
pjavon
-
Posts
883 -
Joined
Content Type
Profiles
Forums
Store
Blogs
Events
Downloads
Supra Articles
Gallery
Everything posted by pjavon
-
I think you should pop up and see me Dunk, one last nice drive. I'll get some nice pics of the old girl before she departs. I'll even get Helen to put the kettle on for you lol.
-
This is the information I followed. But as said the injectors wires only splice into the loom, not through it as in this guide (it's for the Ultimate). Hope this helps a bit mate as I struggled a LOT as well, wiring and electronics is not my best point:D Thanks for clearing that up Ian, I always did wonder how it worked. Is it along the same lines why you need a resistor pack for the mkiii turbo injectors as the emanage blue can't pull it back only add? Dr Nicks Wiring.pdf
-
Do these pic's help, the bottom fitting needs to be a 45degree one though as the bottom pic otherwise it can hit the steering rack bolt
-
Yeah I see what your saying mate, but download emanage(blue) installation (6th one down) from the greddy support page here and go to page 23. I had trouble finding a specific blue install guide so had to use this. I'm no expert though mate:p
-
I used this thread off club na-t mate, the blue has the injectors spliced into the loom though instead of cut and taken through the emanage (hope that makes sense:))
-
Oh I like that, another job on my list:d
-
I've missed this thread somehow as well, good work mate but the reamer bit looks a bit severe to me as well. I used small flap discs and fine dremel bits when I done a zetec a few years ago. I'm no expert though mate, just thought I'd add what I used. Are you going hand grind the valve seats, I found that a killer on a 16 valve never mind a 24, hopefully you've got better forearm muscles than me;)
-
I fitted a stage 2 competition clutch from Whifbitz on my W58, it's handled 2 mapping sessions without any problems up to now (and one of the mappers even commented on how well it held on through out the day). I did make sure it had a fair few miles on the clock BEFORE any power was put through it as is advised in the instructions. The clutch is lovely and light compared to the one that was fitted when I was NA and has no judder at all, this was a must for me hence why I took the chance on a stage 2.
-
That looks great mate, hope the fitting goes well for you:thumbs:
-
 The blue is the same apart from the injector wires are just spliced into the loom rather than cut and going through the emanage, if that makes sense:d
 -
I believe it does for the Blue but not the Ultimate mate. The Ultimate can use a standard usb but the Blue needs the lead supplied by Greddy. Also the blue needs a laptop with a serial port on it (I don't know about the Ultimate) which are getting harder to find now-a-days but then again I guess the blue is getting out dated now. This is the lead I got with mine and it connects straight away to the laptop And this is the 9 pin serial port end of the lead for the laptop connection, the other end (for the emanage) is a standard usb
-
OK guys, I'm still having my missing/stuttering problems so I got my Dad to try and video it tonight. Now I've messed with the map myself a bit and it has improved but it's still there. Watch this video with the sound turned up and at about 5400rpm you can hear the engine noise change to a drdrdrdrdrdrd type noise, thats my problem:( It feels quite a bit worse than it sounds in this clip by the way Anyone got any ideas, it seems messing with the map makes it slightly better but it is STILL there. If I was sure it was just the mapping I'd take to another place (it has been mapped but I don't think the guy was very good to be honest). The AFR's were going off the scale (i.e. below 10) but with some playing about I've got them to about 11 ish on WOT which is when it SEEMED to improve. Obviously I'm no tuner so a decent guy may be able to map it out if that is the problem but I'm not to sure. By the way its had 2 sets of plug leads, 2 sets of plugs, 2 igniters, 3 coils (brand new genuine toyota one fitted now), 2 dizzy caps, 2 stock map sensors etc etc. I've also now fitted a walbro fuel pump and borrowed another emanage blue (with map sensor) and stock ECU which have all made no difference.
-
Oh I've booked our tickets there for the 24th April (flying out on the 18th), what did you think of it mate? We done the feeding/encounter thing at sea world last year as she wasn't old enough to do the swim at discovery cove with the dolphins (got to be 6) but she is now so we're going back:d
-
That looks great now, when lowered it'll look fantastic.
-
Great work. The Custom fabbed brackets look top notch, keep up the good work mate
-
It depends what you mean by performance to be honest. If you mean just outright power then up to about 80mph the kitcar would come out top as there so quick off the mark. At motorway speed roll on's once into 3 figures the kitcar would get slaughtered, mine would anyway:d. Totally different worlds in my opinion and pretty hard to compare as it depends on which way you want to look at it. Round a track it'd be like comparing keira knightley to susan boyle:d, unless it was full of long straights;). Mind you theres a guy on here who I think could well of beat me around Oulton Park in his Supra after watching his video's, he is a very good driver with a well set up supra though. This is what the lad that bought mine ended up doing to it:(, island bend at Oulton park won!!
-
Haha, great minds think a like;) Before After
-
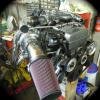
Don't forget me chris;) I'll send you a engine pic later
-
I done a timing belt removal thread on another site, here's the bit with a simple tool I made to get the crank pulley off incase it helps anyone. Once you've cracked the bolt set timing timing again and remove the bolt. Now the pulley needs to be taken off. I think it's an interference fit so some sort of pulley is needed to remove it. I made a flat bar with a M12 tapped hole in the middle (drill it 10.5 and then use an M12 taper tap) and two 8.5mm clearance holes, again at 65mm centres, then fix the bar as picture below Then screw in the 12mm bolt and slowly but surely the pulley comes off.
-
Couldn't agree more. He's a top guy and always helps. Could of done this write up about 12months ago though;)
-
Great looking car mate, black is best;) Keep up the good work and the thread updated with your progress.
-
Yeah that^^^^. Looks fantastic
-
Both great looking cars, enjoyed that
-
I've used them and agree, the quality is fine in my opinion.
-
Hope it helps a bit mate, thats why I've tried to keep it upto date with plenty of pic's:) Thanks Jamie, and thanks for all your help mate. Not long now and hopefully I should be able to boot it at last:d