
paul mac
-
Posts
4269 -
Joined
Content Type
Profiles
Forums
Store
Blogs
Events
Downloads
Supra Articles
Gallery
Everything posted by paul mac
-
if you are going to get it done start regularly hosing down all the adjusters, nuts, bolts etc with WD40 well in advance of taking it, you will then give the garage a fighting chance of being able to do anything with it
-
as i have been awol from the supra scene for a while just caught up on all this Dan, great thread, a car to be proud of mate
-
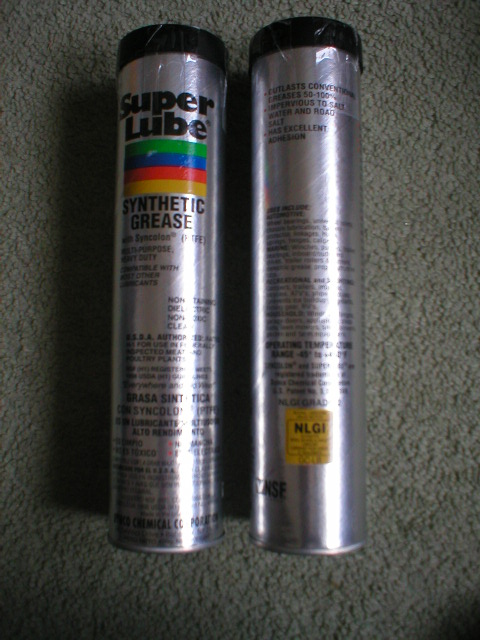
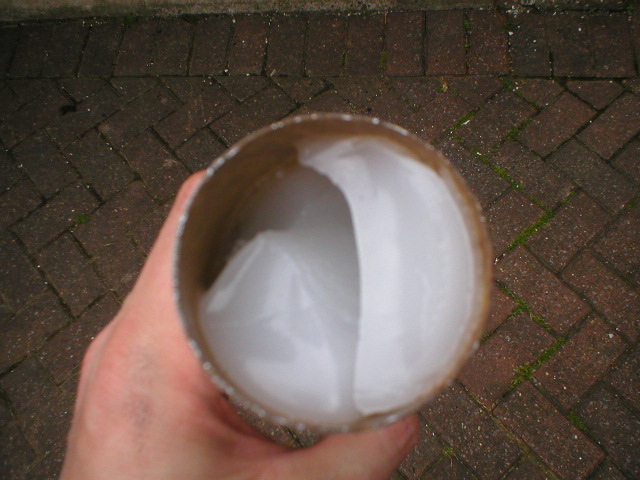
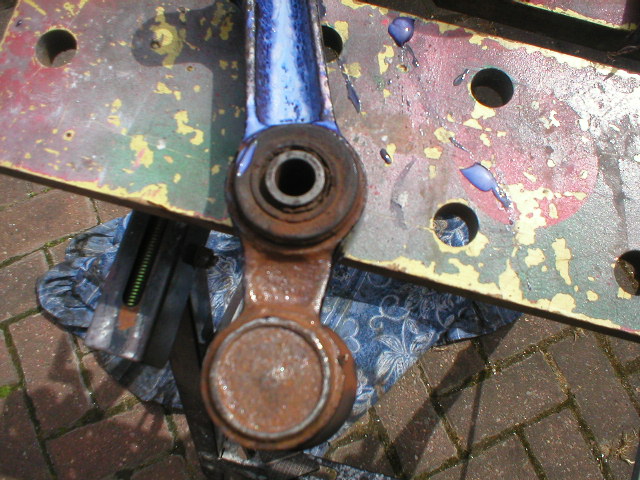
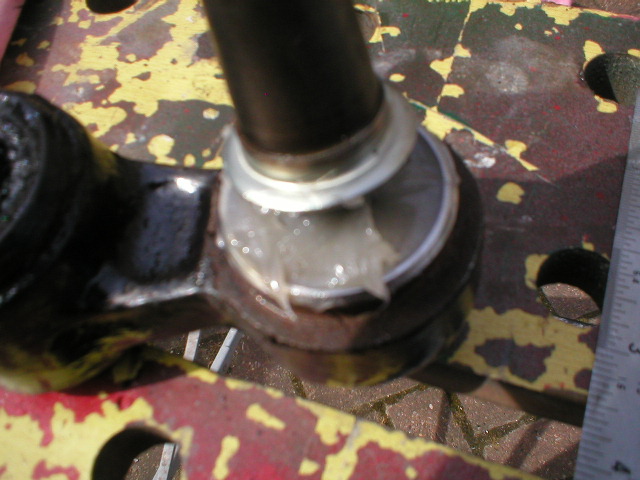
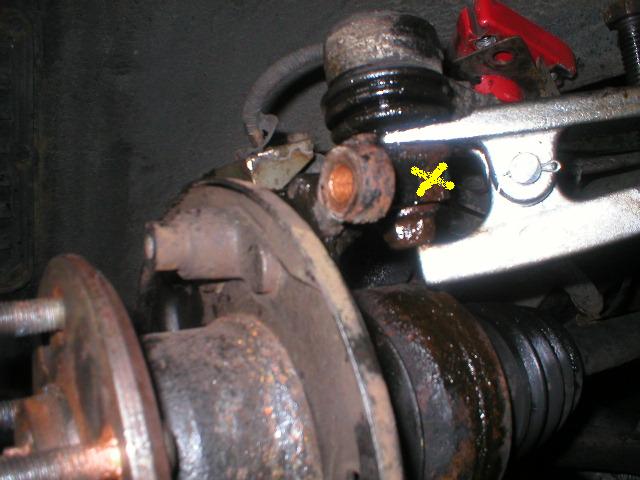
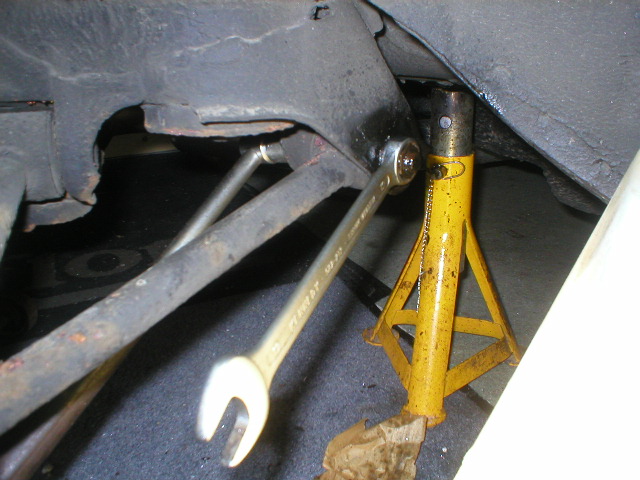
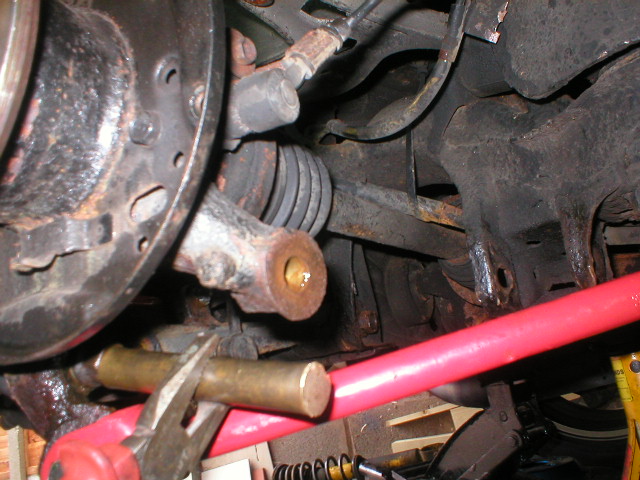
After doing a bit of research i found the the right grease for the job of pumping the bushs full with my new nipples, the last thing you want on anything plastic (urethane included) is anything petroleum based as it will destroy it quite quickly, this is an American product i found and surprise surprise a quick search on ebay came up trumps, any silicone/ sythetic based grease should do the job, if you dont install any nipples R2 supply a shed load of grease so dont worry. Third pic shows number 2 control arm bush which was by far in the worst condition (on both sides) all the other bushs required minimal clean up but this one really took some work, i used a bearing scraper, a sharp flat bladed screwdriver and flaping 3M emery wheels to clean it up, the new bushs need to be a push fit into the housing so keep trying them, if you have to force the new bush in with the vice you haven't cleaned the bush up enough. Forth pic shows rather disapointingly the R2 kit does not include a a new shock absorber bush and if i had known this in advance i would have replaced it as well, the old rubber bush is still servicable though so i left it as is, of other note in this pic is the back of the ball joint had bad corrosion and needed a lot of chiping away to get to good metal, i also drowned everything in rust eater prior to a several coats of zinc rich spray followed by smooth hammerite. Last pic shows the ball getting treated to new grease, pack it in with a steel rule and rotate the ball in all axis to take the grease into the joint and get some in the rubber boot as well, you need to be absolutely spotless doing this as you dont want crud in the bearing

-
do you want me to measure up all the R2 bushs i have, and if yes what are your plans
-
used my modded tool on this one again, lube it up to the absolute excess to avoid nic'ing the boot get some tension on the joint then whack the yellow cross (as per Homers post) and it will come apart easy, a tip for avoiding damaging the boot in pic two, use a scissor jack to lift the whole suspension unit up and this will allow the boot rubber to un-load itself allowing the tool to slide in easier, anyhoo thats it for today as i have a hot date with an 8 year old up at Windermere and Beatrix Potter world
-
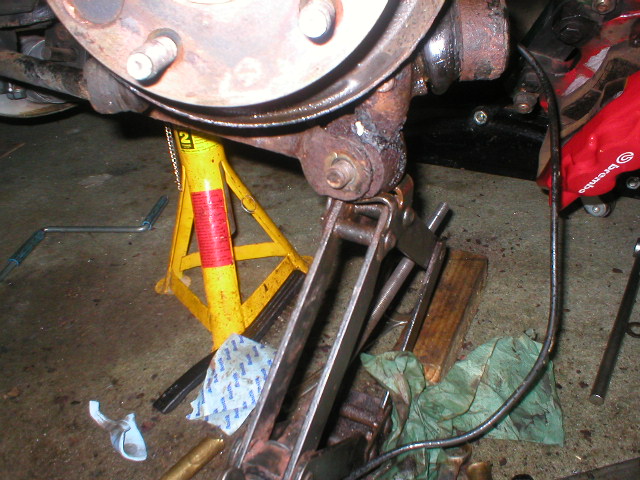
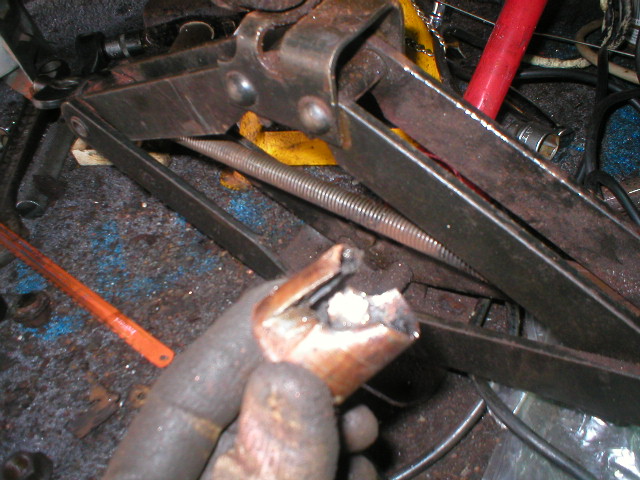
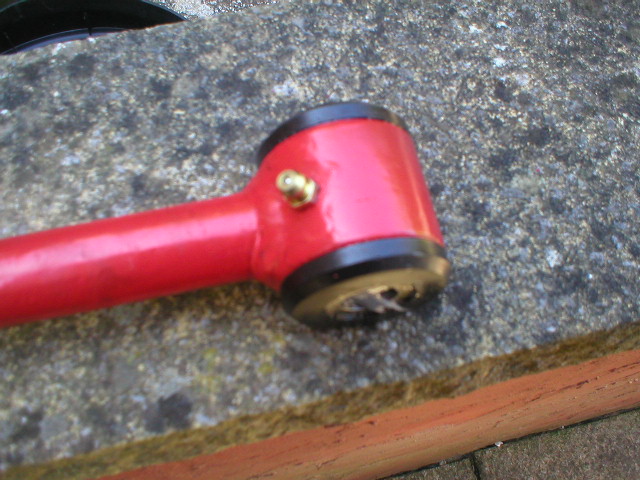
well if i thought the first ball joint was tight it had nothing on the passenger side, despite beating the living c**p out of it with my mate (sorry about the finger Jon ) it refused to budge, i was left contemplating taking the hub off but thought one last effort today, i left it overnight soaking in WD40 which due to the downward angle just kept running out so i made a temporary damm from blu tack as per pic one and left a small gap at the top, pic two shows where i hit the ferker with a punch, i also got some heat into this area being very carefull not to go near the boot, final pic shows weapons of choice, copper bar, dont be a hero trying to hold this by hand use some mole grips and 4lb lump hammer, and if you have girlie arms go to the gym a few weeks before you plan doing this


-
no its defo of use mate, i meant i looked at the title and didn't think it was what i was looking for so skipped past without even looking
-
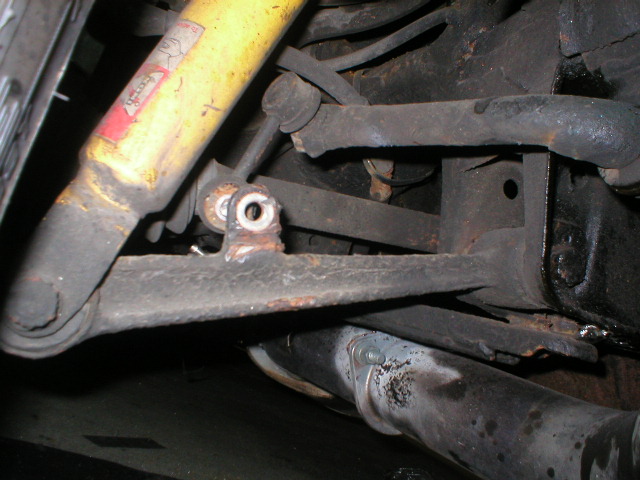
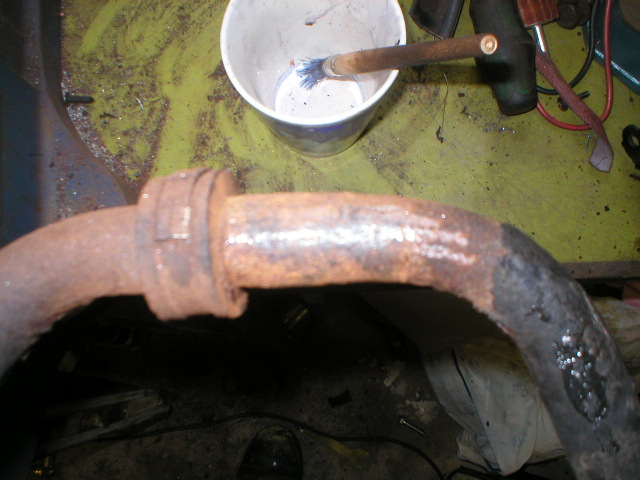
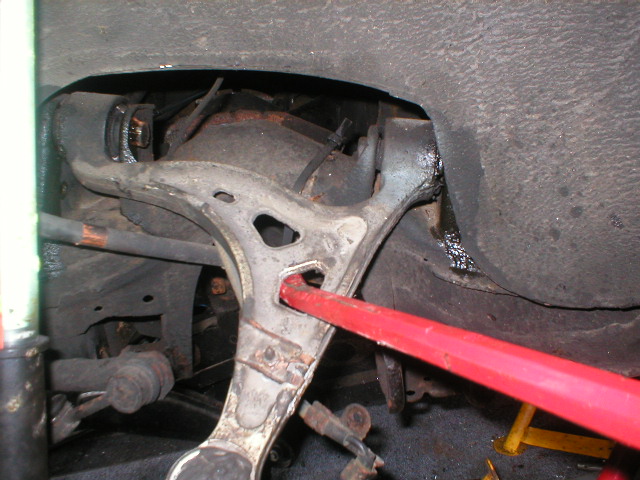
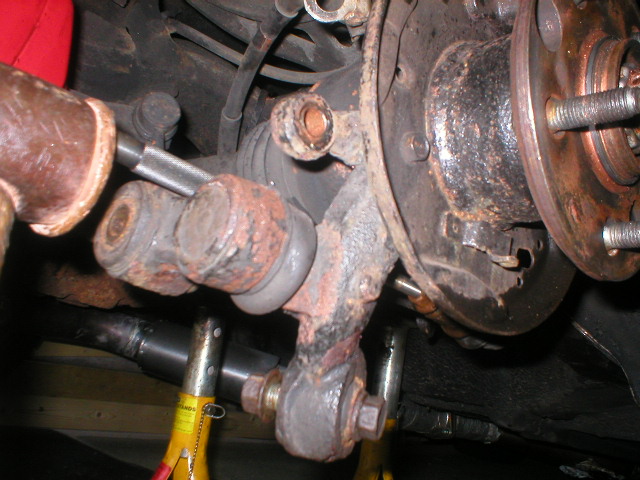
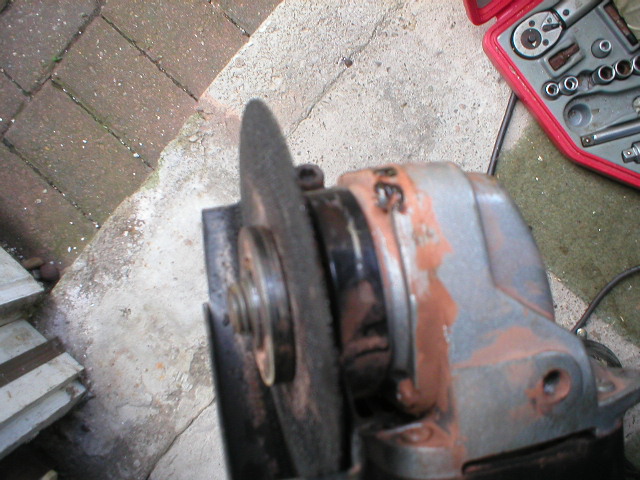
first pic, i didn't even give the passenger side drop links the pleasure of laughing at me and just took the grinder to it, there is no way these things will unbolt, second pic shows a "nice" uncorroded section of the ARB the third pic unfortunately shows what it looked like under the knackered bush, a good section of the ARB measures 21.25mm, the knacked bit measures 20.5mm with a noticable step, fitting the new Powerflex bush on the good section made for a nice tight fit, putting it on the nasty bit had it wobbling around all over the place. I have 2 options a new ARB from Mr T or an aftermarket stiffer one which from reading an excellent desciption from Mr Wilson here has really put me off, anyone know how much a stock one costs and thoughts on aftermarket ARB's for road use
-
fully agree with the subframe out, choosing to leave the top arm as is really meant i didn't have to bother (fingers crossed i hope the other side is ok), good link to your thread (i did see it on a search but skipped past it, doh), as for nipples left, right and centre, can you ever have enough nipples
-
not a chance mate , whatever Miko Supra was charging to do this was not enough , talking of which i found these threads usefull http://www.mkivsupra.net/vbb/showthread.php?t=162252&highlight=miko http://www.mkivsupra.net/vbb/showthread.php?t=110541&highlight=lower+arm&page=2
-
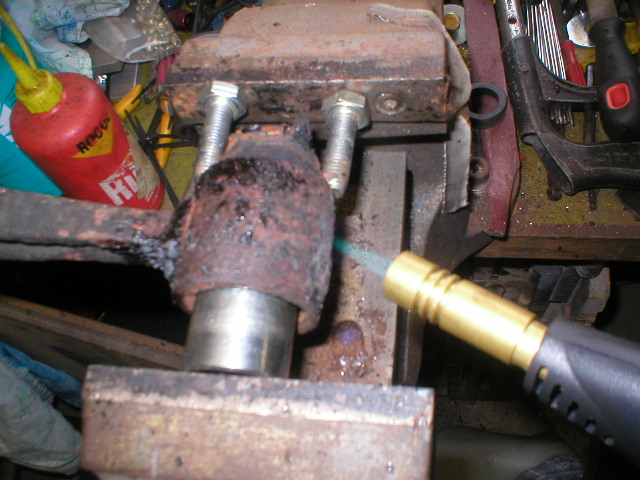
This bush is called "spindle" in the R2 kit. This proved time consuming, without any pulley draws i had to resort to drilling/ burning the rubber out then you need to remove the steel sleeve from the housing, i carefully put a couple of hack saw cuts into it then popped it out with a small chisel, be careful not to go mad or you may damage the internal bore, last pic shows bush in position complete with grease nipple
-
good feedback on the whifbitz bushs dude i have powerflex for the rack and anti roll bars
-
not to tricky, this arm was noticably bent (god knows how) but i managed to straighten it in the vice, first pic shows you need some half decent tools, dont even think about open ended spanners or it'll end in tears you need a good condition ring spanner (19mm and 17mm) which for clouting is better than a socket, second pic shows bush in arm, i have also added a grease nipple to every bush as i suspect any premature wear issues will be due to lack of lube
-
yes all the boots were fine
-
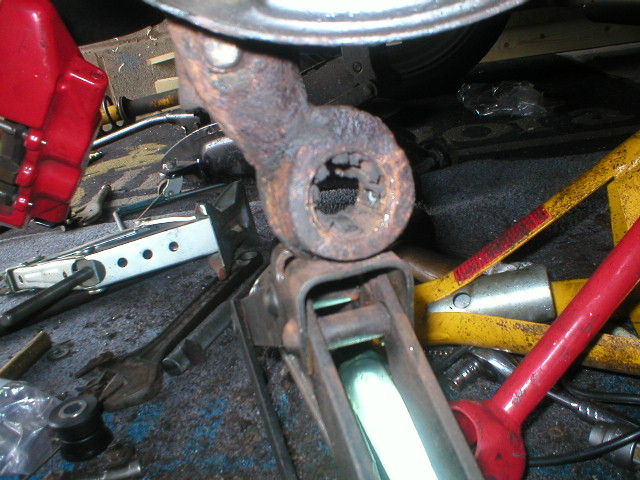
i was really not sure what to do with this arm as i know its a PITA to get to and kept having Chris Wilsons voice in my head "but their spherical bearings" but first things first the ball joint had to come out and this prooved an absolute b****d, initialy i followed this http://www.mkivsupra.net/vbb/showthread.php?t=150232&highlight=suspension+removal but despite beating the living s**t out of it i couldn't get it to budge, i modified a Halfords ball joint splitter as it was to narrow to go round the boot and also thined it down a bit, i took all rough edges of it so as not to nic the boot and it did the trick with quite a bang when the ball joint went, again the ball joint was spot on and i ragged the hell out of the upper arm with a crow bar to check the spherical bearings and they were spot on with no play so i now have a set of R2 upper arm bushs spare
-
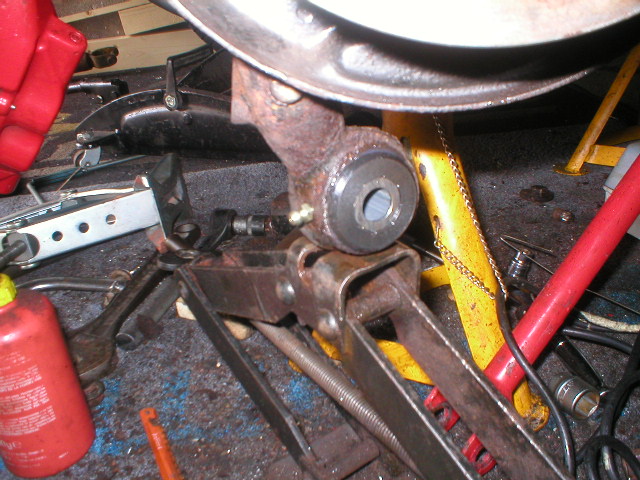
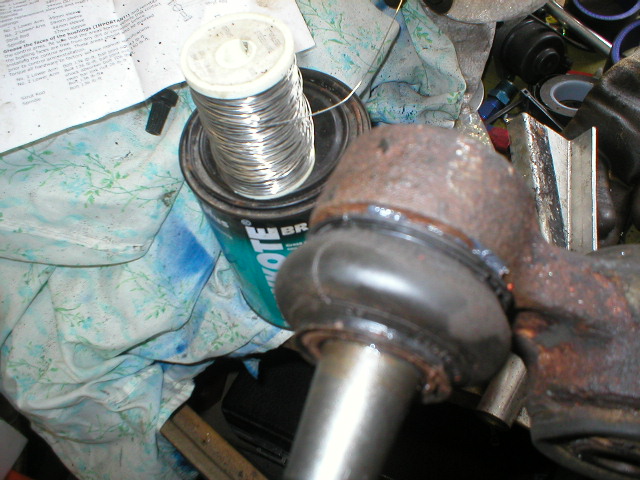
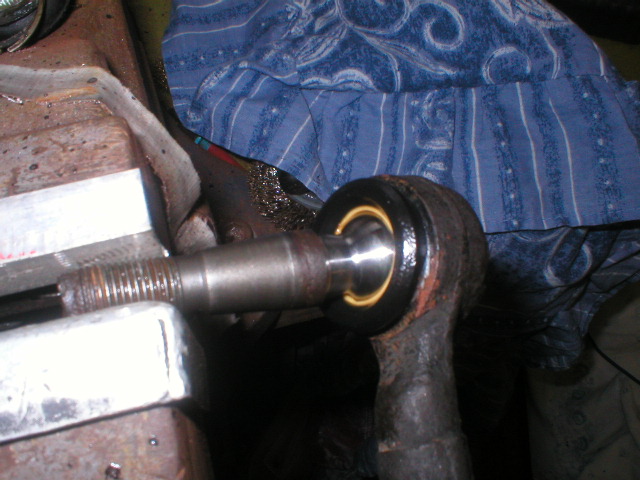
this proved a real pain in the arse with again the cam adjuster siezed so out with the grinder again and unfortunately running short of new disks i couldn't quite get in fully with the disk so the hammer and chisel had to be deployed, first pic shows brass drift on ball joint, if you haven't got a big hammer for this go and buy one you really need some big blows, next pic shows bush in vise with a bit of heat to help it along (this was the only bush i needed heat on) be carefull with this as the packing bits can fly out of the vice at a rate of knots if your not carefull, last pic, again ball joint perfect and repacked with grease, i used some stainless lock wire on the boot (mig welding wire would do as well)
-
i have read a lot of good things about them Jamie and the bottom line is i really cant justify the cost of a complete set of new arms
-
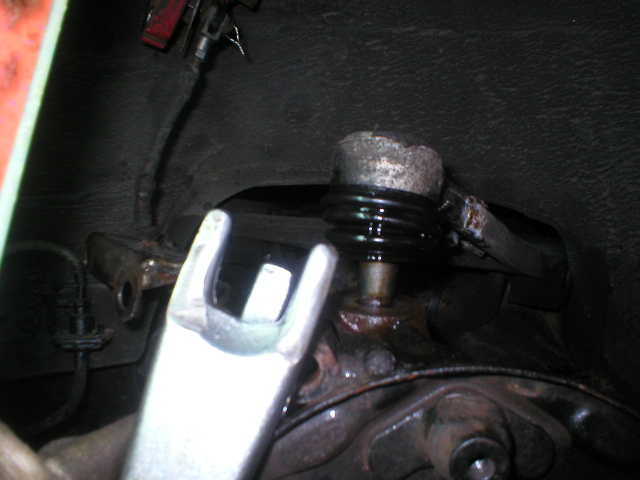
first pic shows punch to knock the ball joint out then unfortunately the angle grinder had to come out despite drowning the cam adjuster in WD40 and leaving it overnight, the fecker was siezed solid (this was a sign of things to come ) i used 1mm slitting disks in the grinder which got in the gap nicely to chop the cam bolt off, if you have never used slitting disks before they are delicate and take absolutely no lateral load, they can shatter as well so make sure you at least wear goggles or better still a full face mask, the ball joint came out pretty easy and i was amazed at its condition at 17 years old and 130 k + miles, i repacked it with molycote grease and cleaned it up and drowned it in hammerite
-
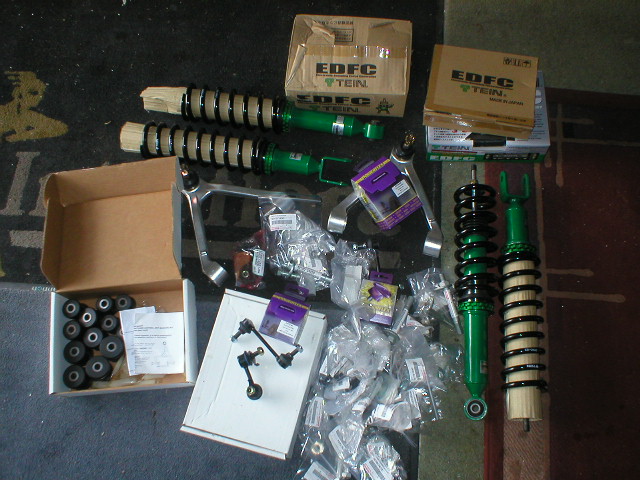
right then, i have been collecting suspension bits for quite a while and the purchase of 2 new back tyres has accelerated my rebuild plans as i dont want to wreck the new tyres, both my backs always had a lot of negative camber with the drivers side having noticably more than the passenger side this maybe down to the strut rod being bent, i tried to get the geo set a while back but all the cam adjusters were seized, so i decided to go with the R2 polyurethane kits, new cam adjusters and associated nuts and bolts and suck it and see as to whether any of the ball joints were shot, i'm not really bothering with shocks as theres quite a bit on here already but thought we were a bit short on the rest of the suspension components, i will post each arm /component in its own post to keep things in order as i cant be bothered with all that photobucket malarky please feel free to add anything
-
sorry boys without going into to much detail i have been going through a rather sticky patch in my life, i didn't honestly know whether i was keeping the car or not and completely lost interest, however things look back on track so the car is staying, i need to sought all the suspension before i finish the throttle bodies as i dont want to wreck my new tyres with naff alignment, so watch this space, i haven't spent all this time and money on the throttles to just abandon them
-
Transmission cooling, right then, heres my 2p worth from running a Boostlogic built auto at 500hp for the last 4 years, firstly fit a temperature gauge, you have no idea whats going on temp wise until you do this, running at around 50 c is optimum and personally i peak at an absolute max of 90 c, the fluid will take higher temps but whats the point if you can keep it under control, my trans cooler fan kicks in at 80 c and as i have no rad connection is absolutely vital stuck in traffic, if you are connecting to the rad as previously mentioned this puts heat into the transmission when its needed so it doesn't matter a jot which way the cooler is connected. Thermostats, i went along with David2009's thoughts initialy some years back but after a thermostat malfunction nearly cooked my rather expensive transmission i kept it simple and adopted Dudes aproach of coolers everywhere (do a search) the transmission has now run fine for the last 3 years with no stat (and no radiator connection) and two coolers. Ducting, without total seal duct work on your cooler it is next to useless, have a look at the time and trouble Mr T spent on ducting the stock rad, lastly... Fluid, if you want the trans to last stick to the service intervals and change a percentage of the fluid regularly
-

K&N 4" air filters ??? used on single turb set ups
paul mac replied to lui's topic in mkiv Technical
the dishwasher is a great place to clean a K & N, when the wifes not looking of course , new K & N oil can be purchased from Halfords, comes with instructions -
spot on, after 4 years as well i still find a 1.4 bar pull a buzz with my paltry 500hp, i will add to this figure this year but for me there is one key word in Ians post "drivability", maybe its the fact that i am probably a bit older than most on here but i dont have the desire to rag the arse off the car everytime i get in it, so when i do hit the loud pedal i still enjoy it, perhaps you need to go "cold turkey" and limit yourself to one rag a week
-
glad it helped someone, dare i ask what size you have gone for
-
oh god this is the end, anyone want to buy a Supra


