SPG
-
Posts
4223 -
Joined
-
Days Won
14
Content Type
Profiles
Forums
Store
Blogs
Events
Downloads
Supra Articles
Gallery
Everything posted by SPG
-
.jpg.01331768d8bc363816822a7709d9b204.jpg) Thanks for sharing Mark, that’s certainly factory enough to be classed as a yellow UK Spec. Love it
Thanks for sharing Mark, that’s certainly factory enough to be classed as a yellow UK Spec. Love it -
-
See I thought this might be the case, but then I remember reading about a DJG one that was a 1996 also, special order. If it’s factory then it’s got to be a unicorn.
-
-
Lovely looking car you have here . Was this yellow from the factory?
-
-
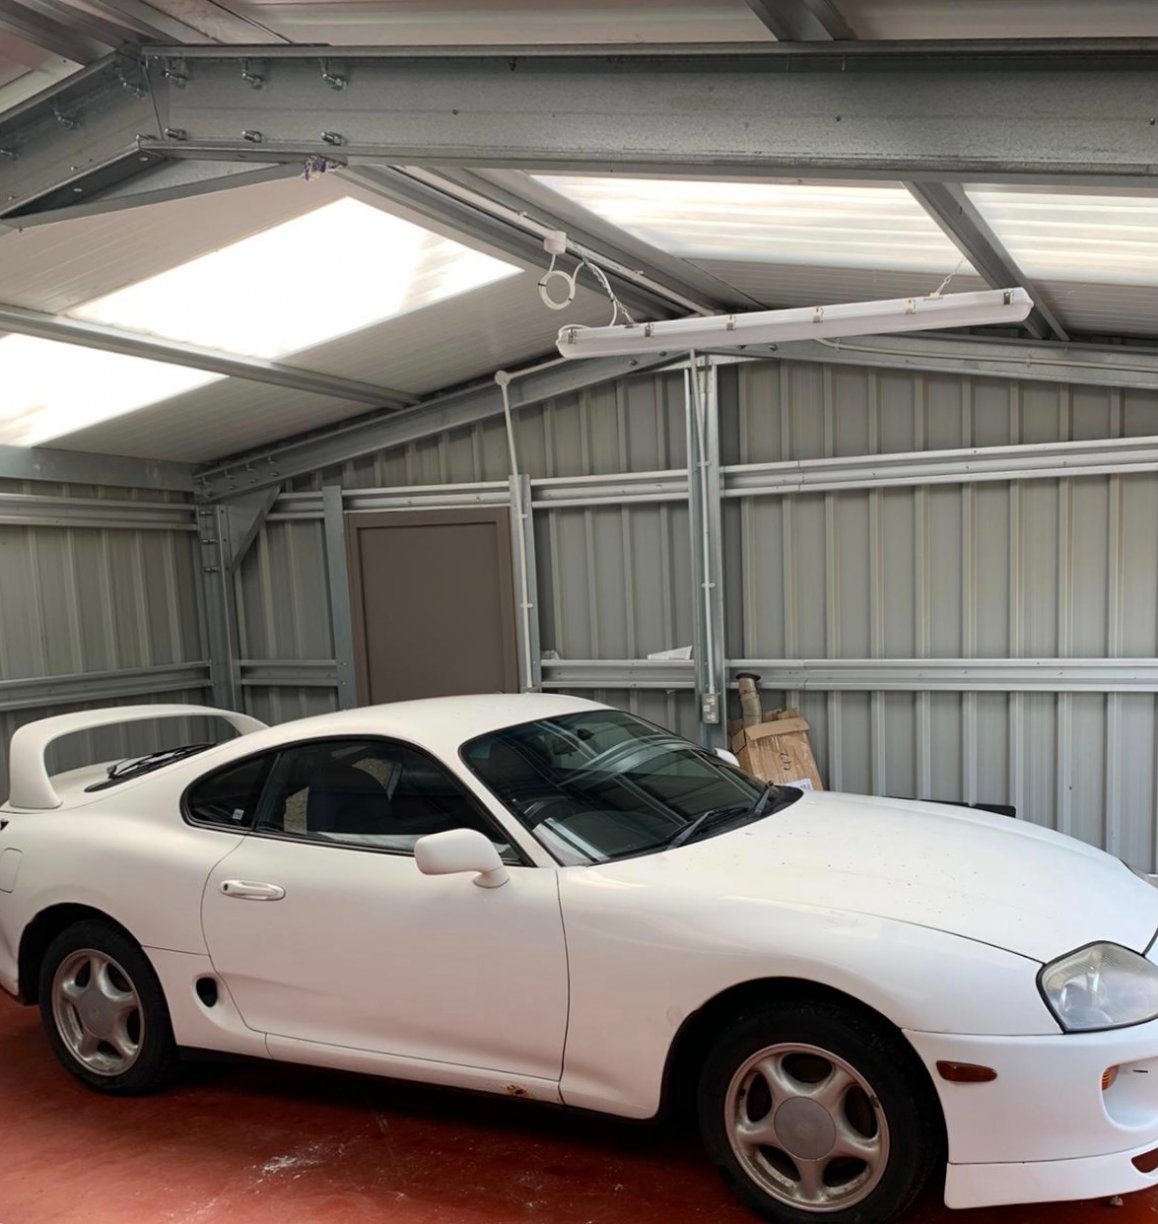
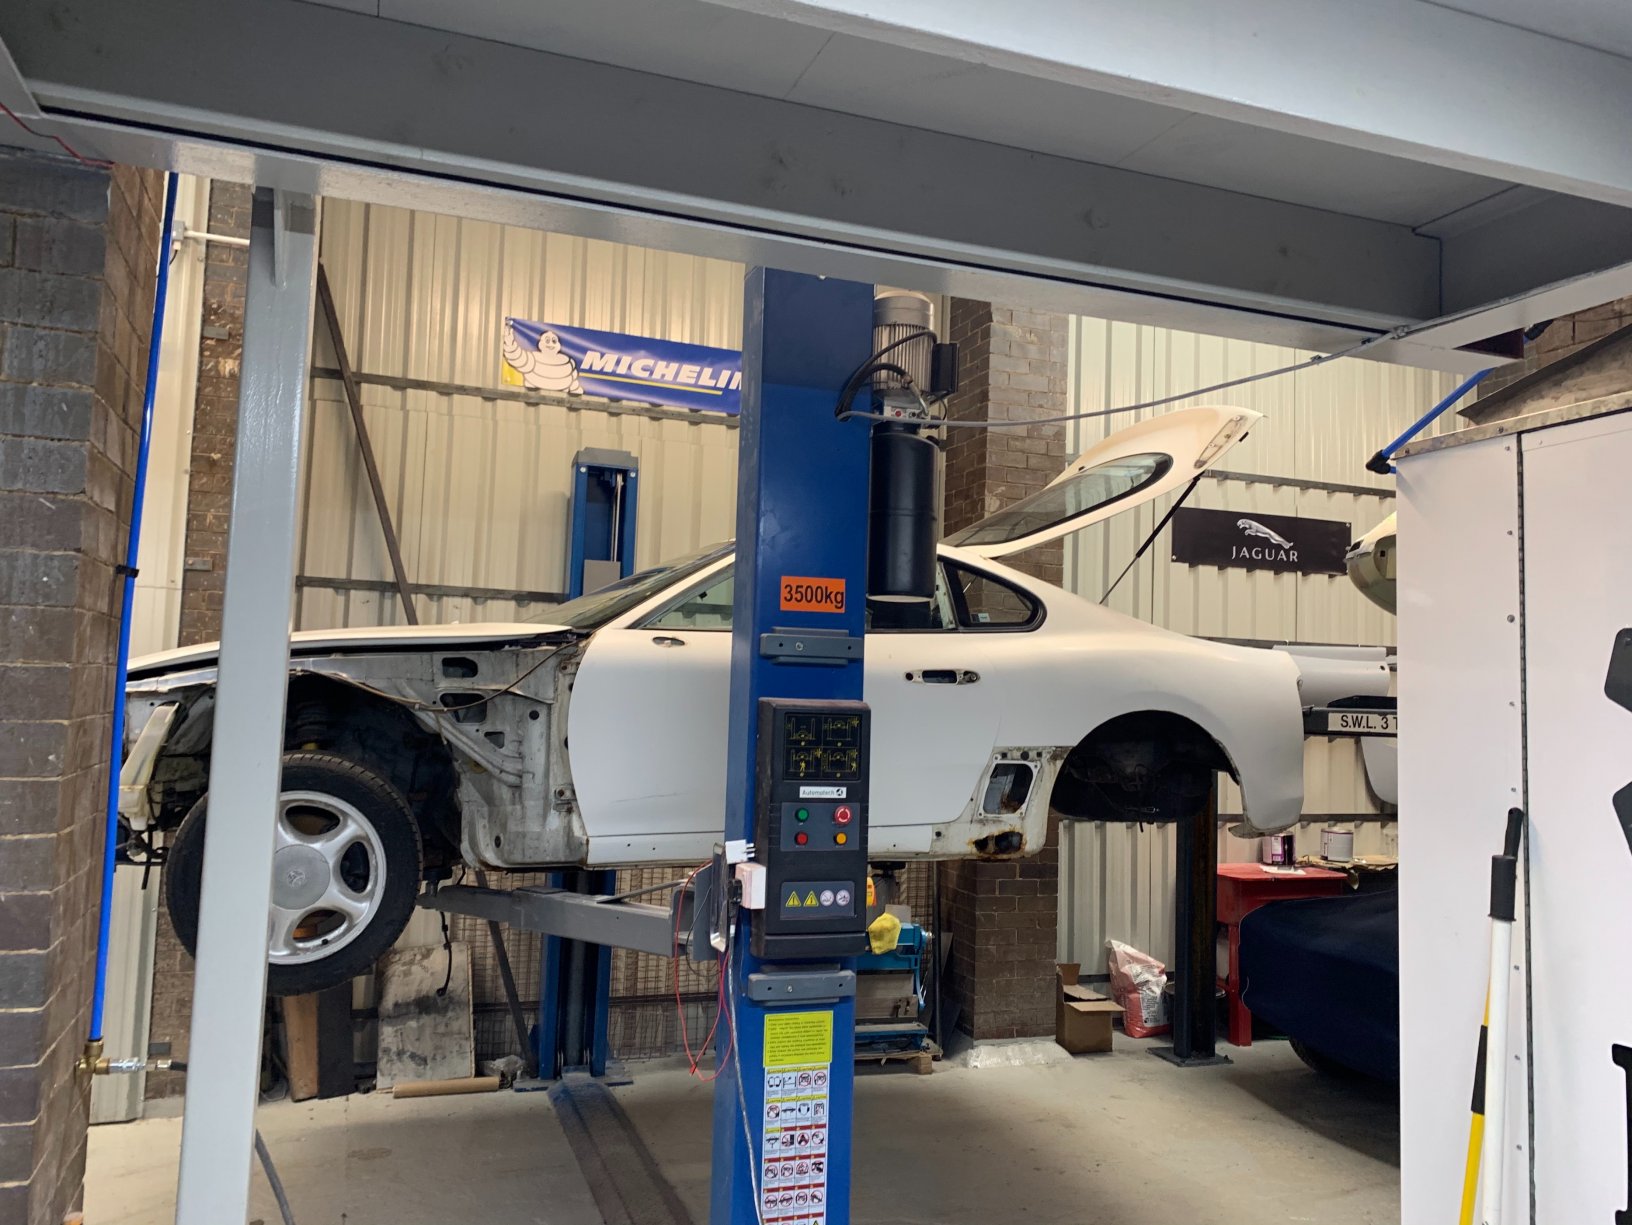
Thanks Guys, one last scary fix to go, and then I can start posting the prep and spray booth pics. Im building a track car from an accident damaged TT6 shell which I’ll start a new thread on once work progresses, here’s a teaser of what that looks like, and yes I do like a challenge .

-
Absolutely amazing Keron, that’s such a massive saving over buying the whole thing from Toyota. Looking forward to seeing the other parts you have been working on. it’s this sort of stuff that will keep our cars going for years to come, thank you .
-
Welcome firstly , As Raven mentioned above, club membership is required to post in the classifieds sections. You can find the subscription page on the link below if you wish to sign up, also 1 years membership is £10. https://www.mkivsupra.net/subscriptions/ Thanks
-
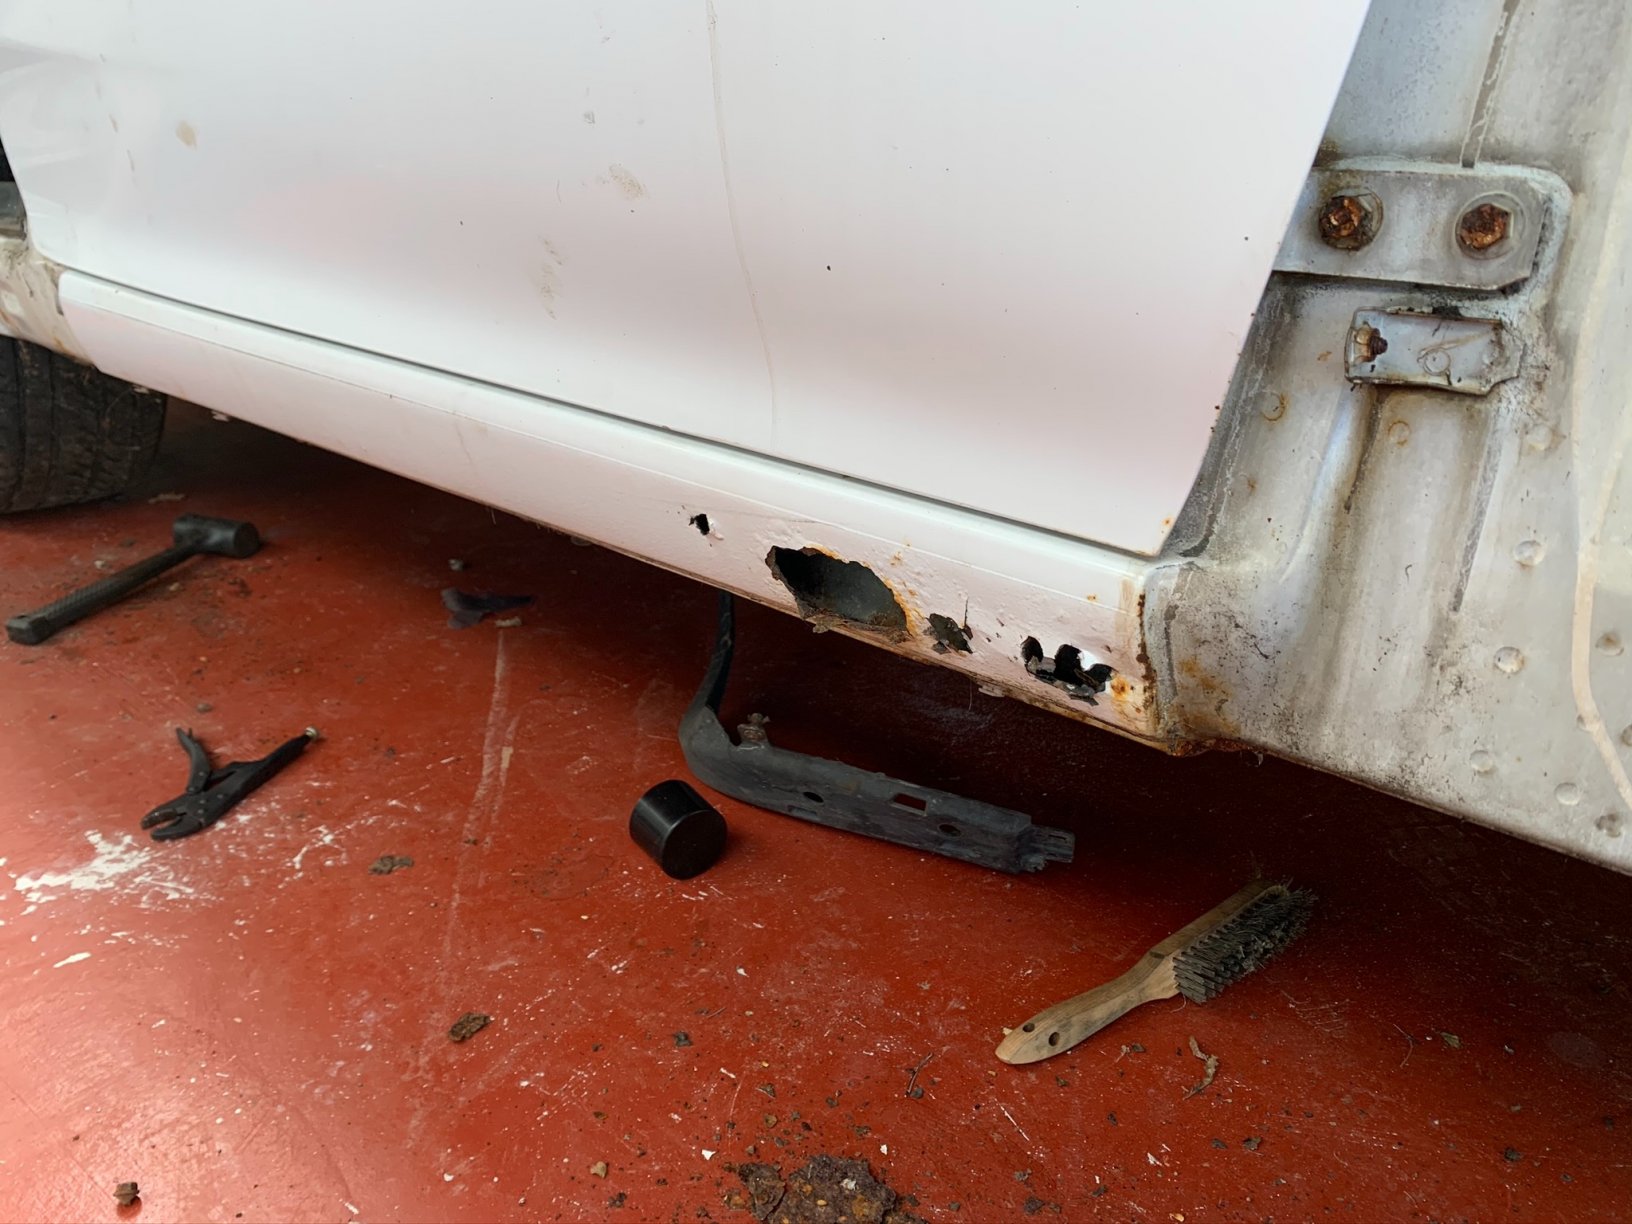
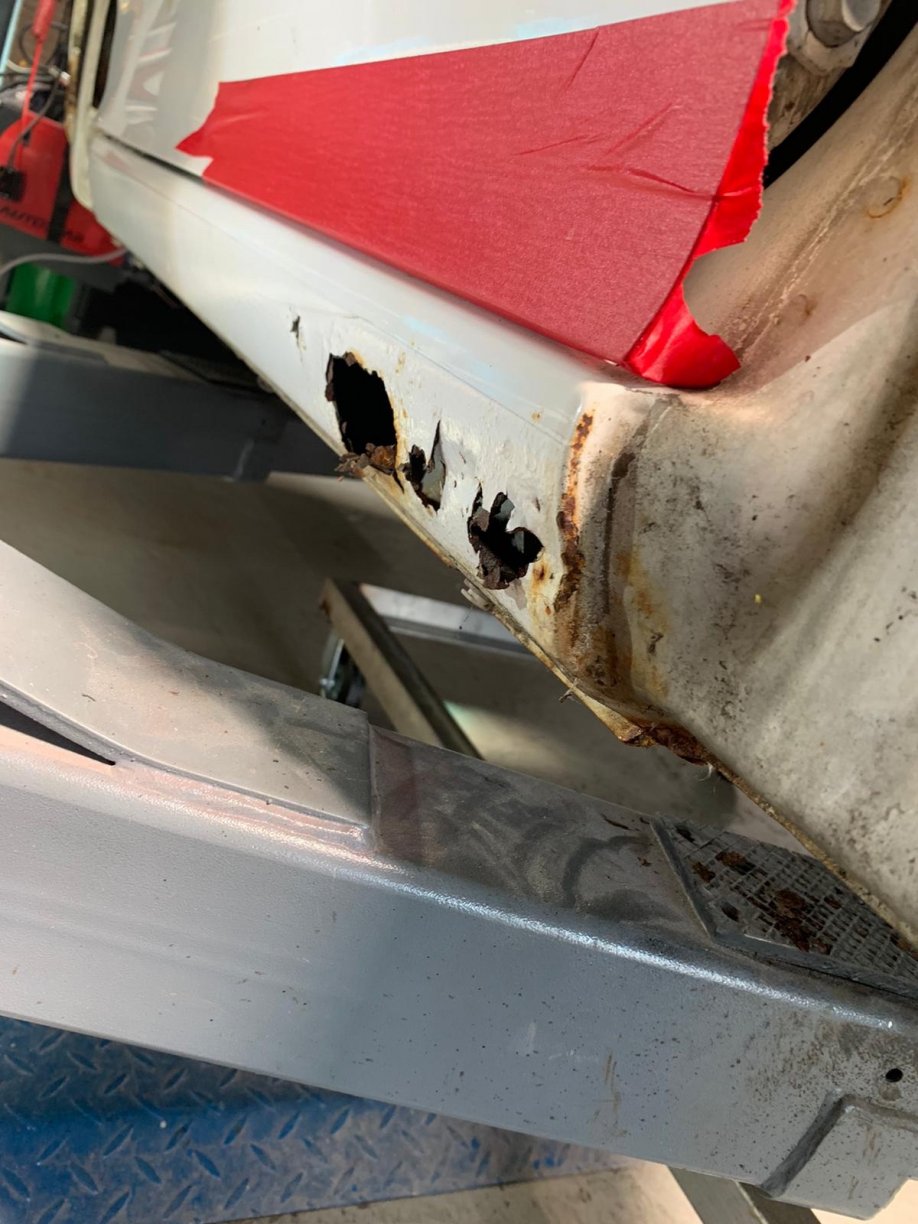
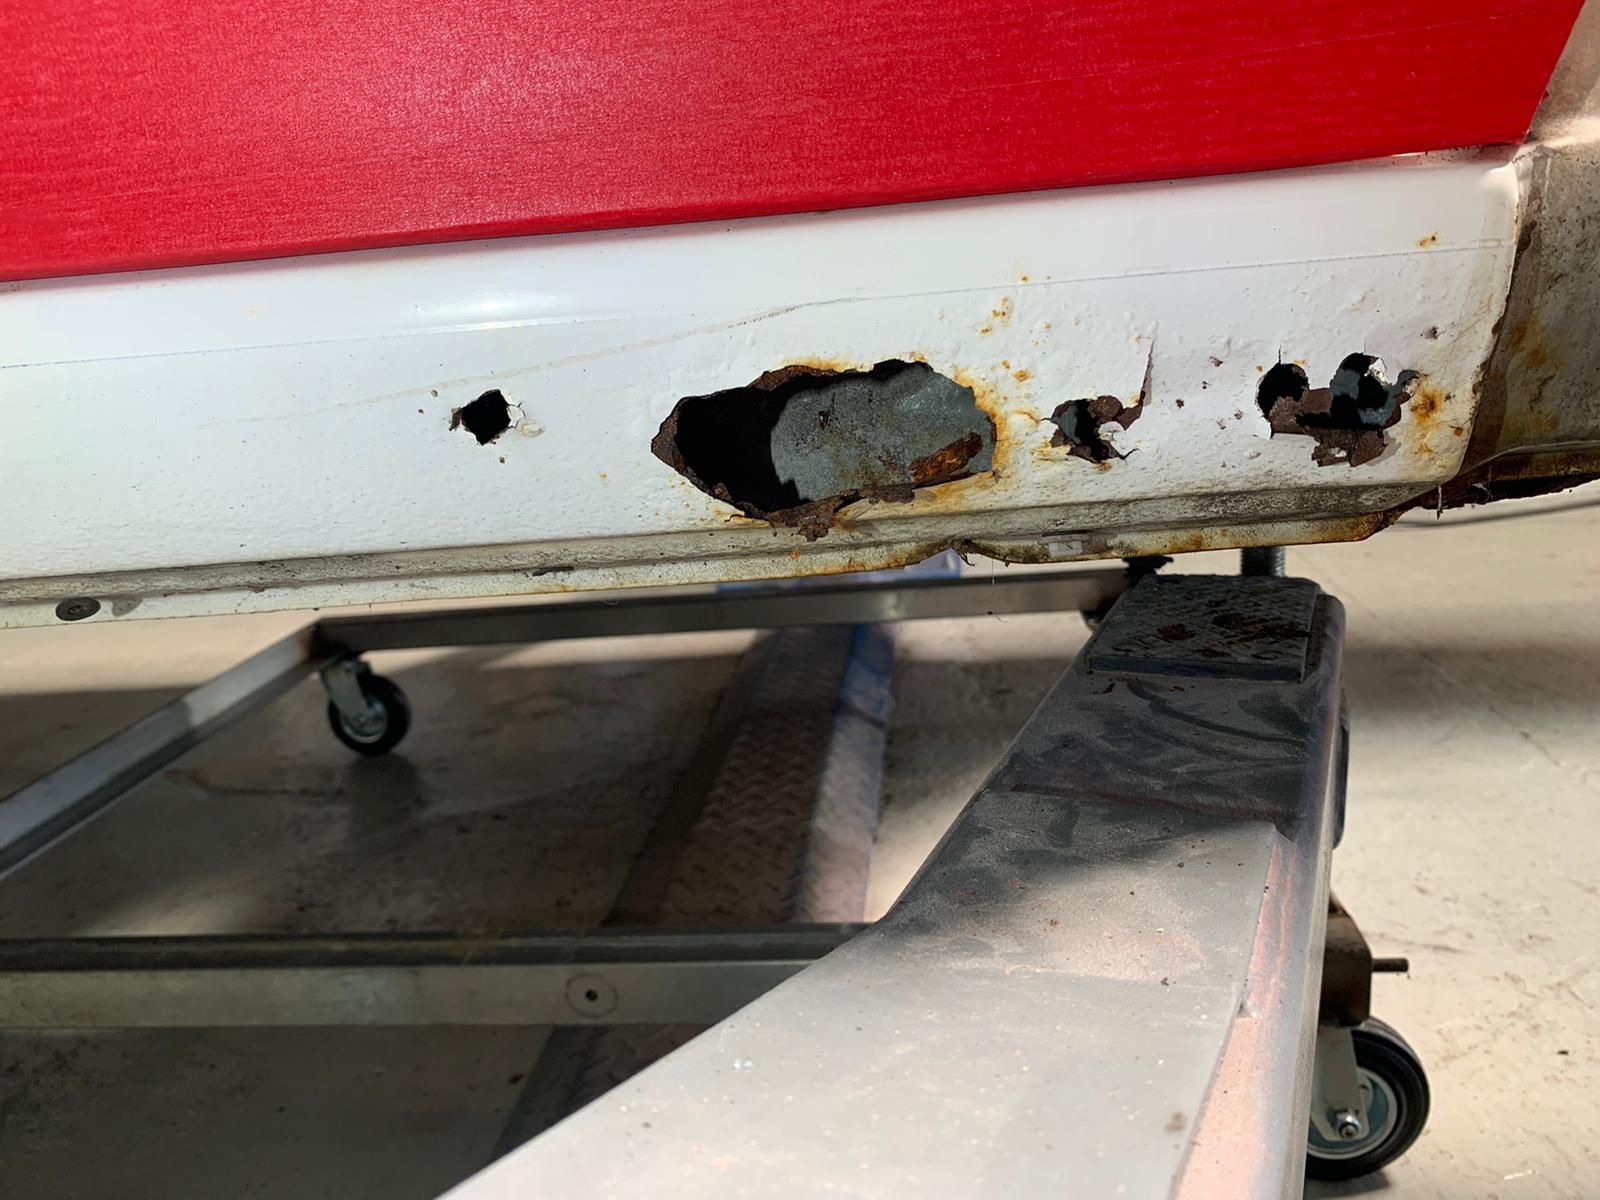
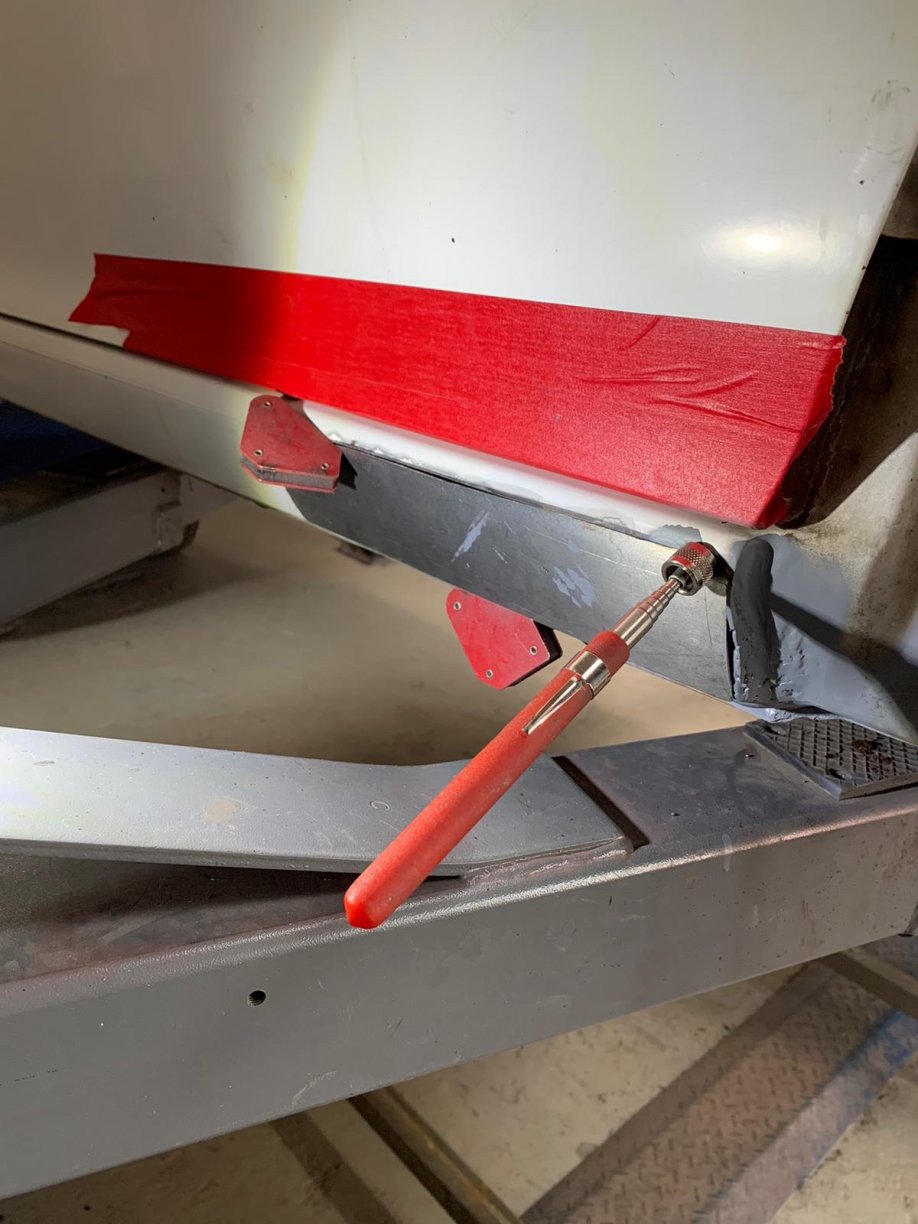
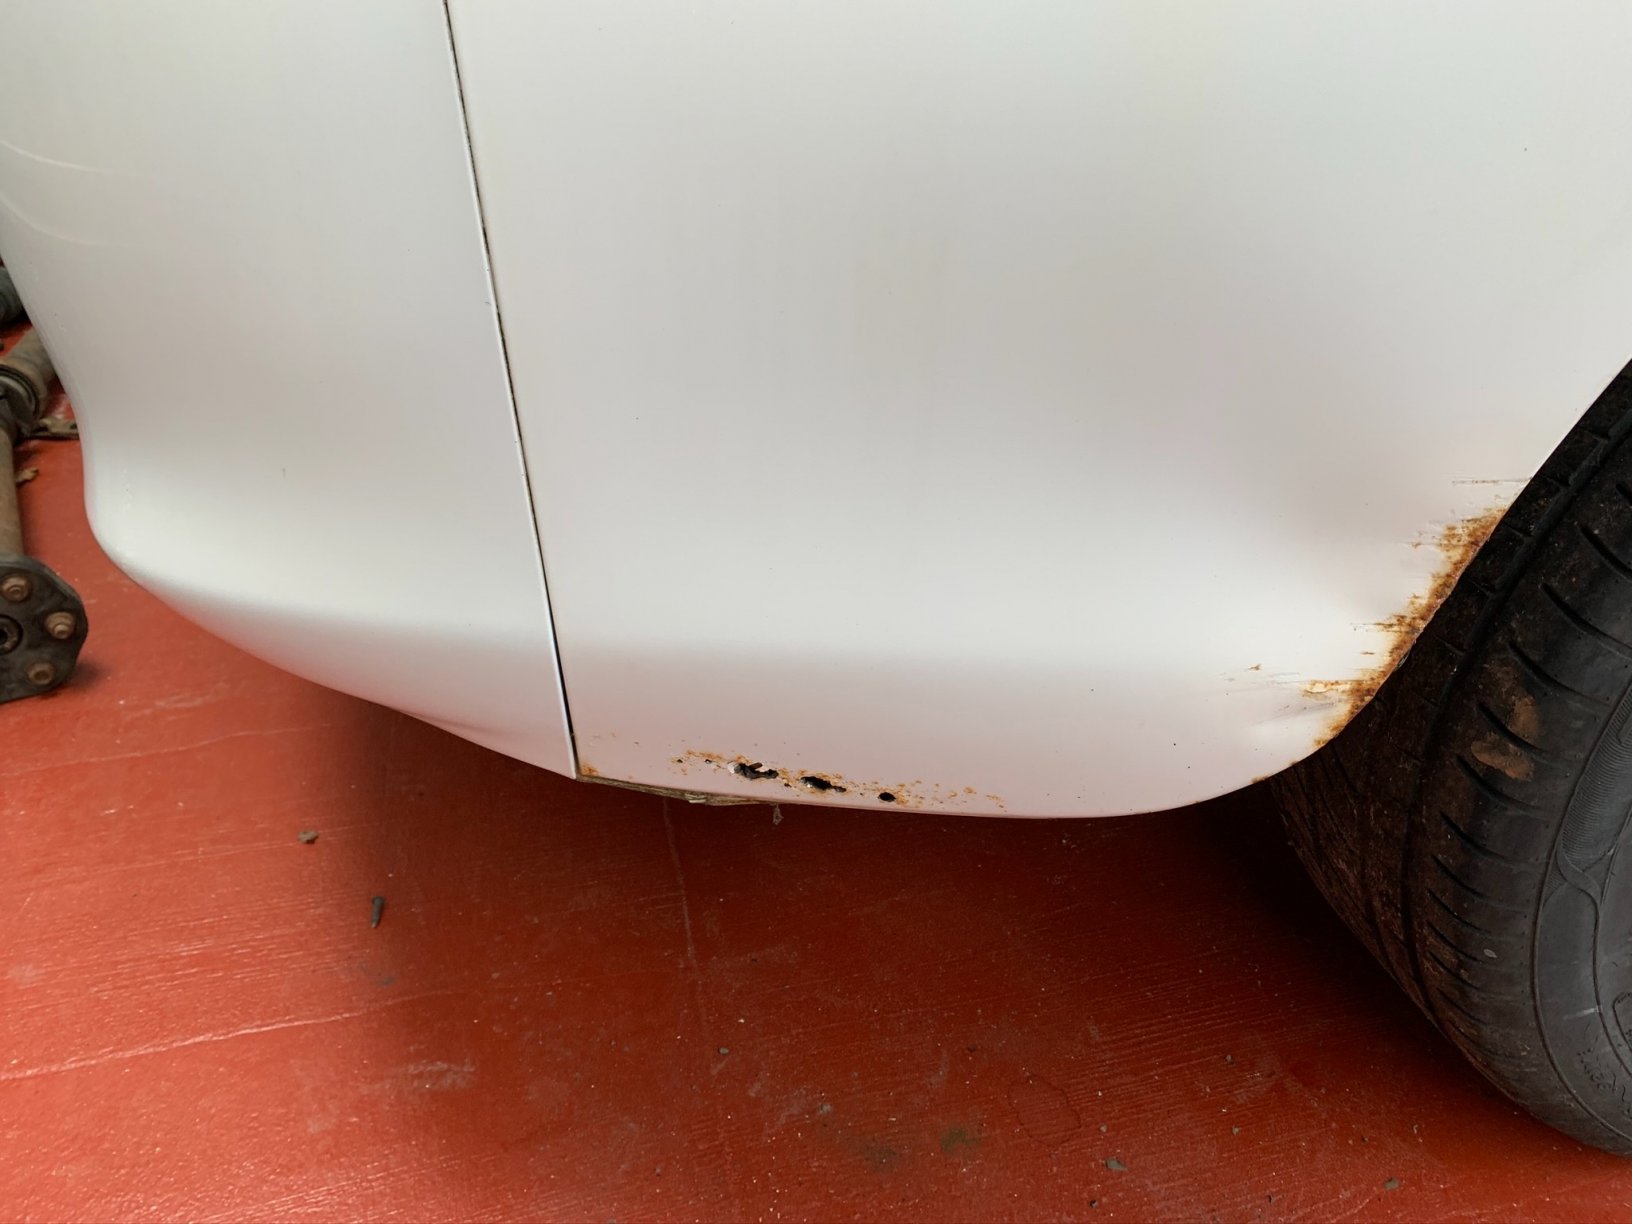
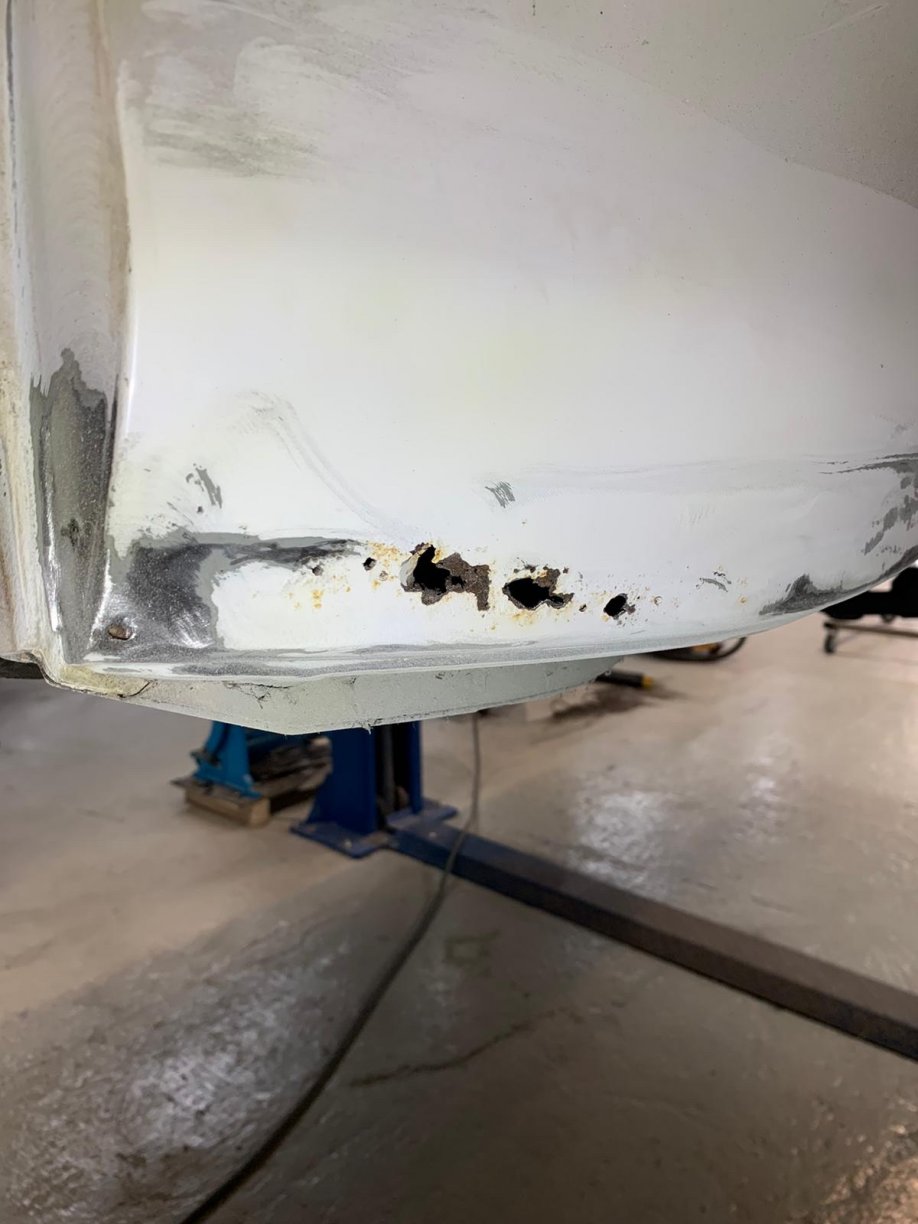
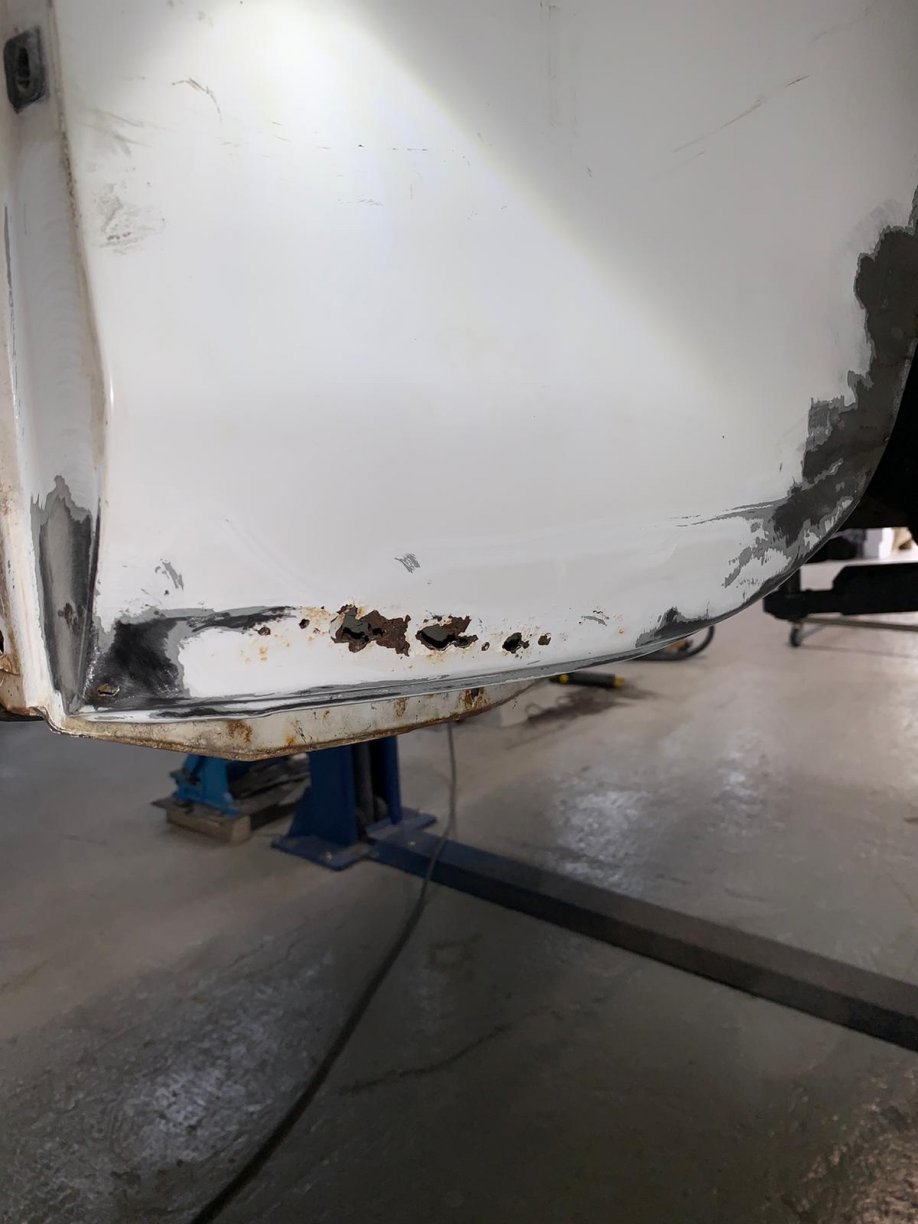
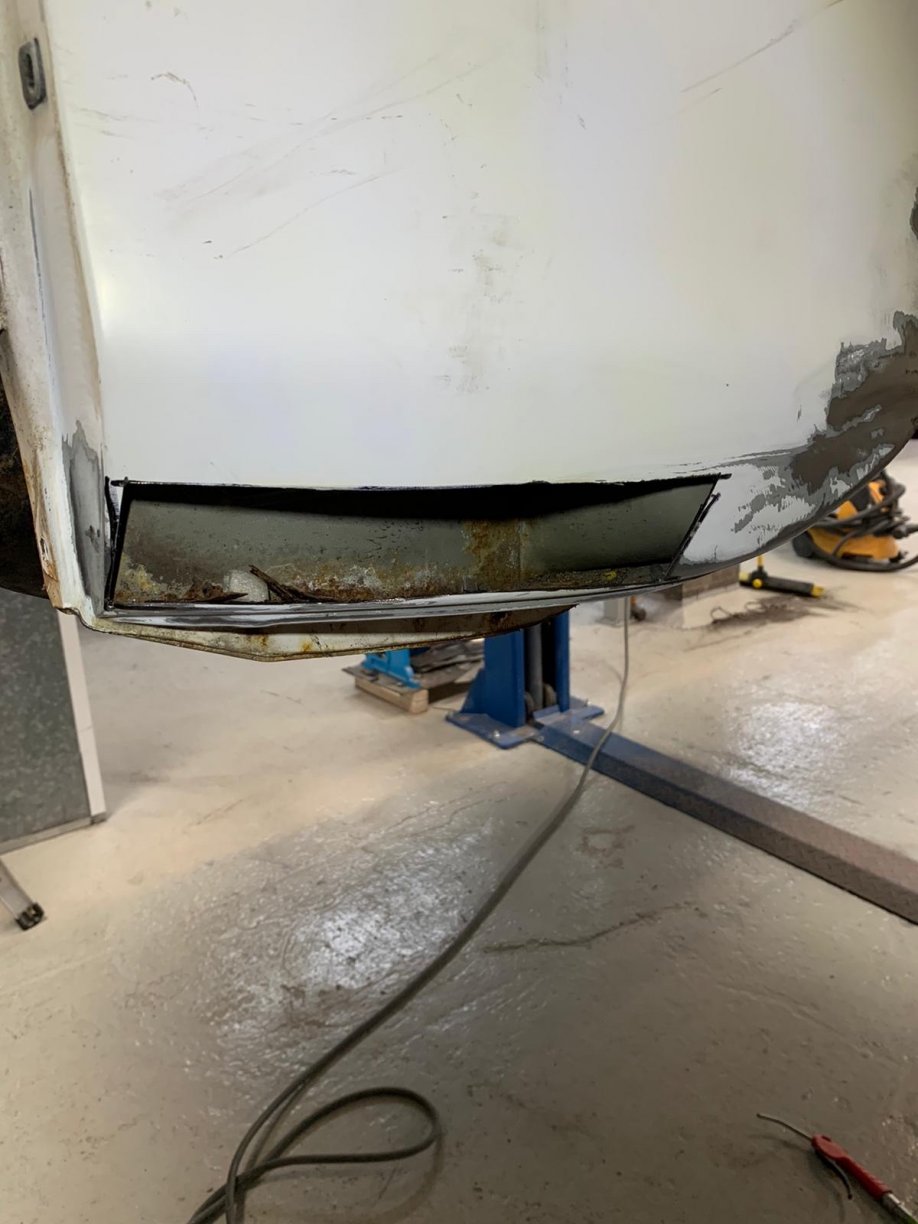
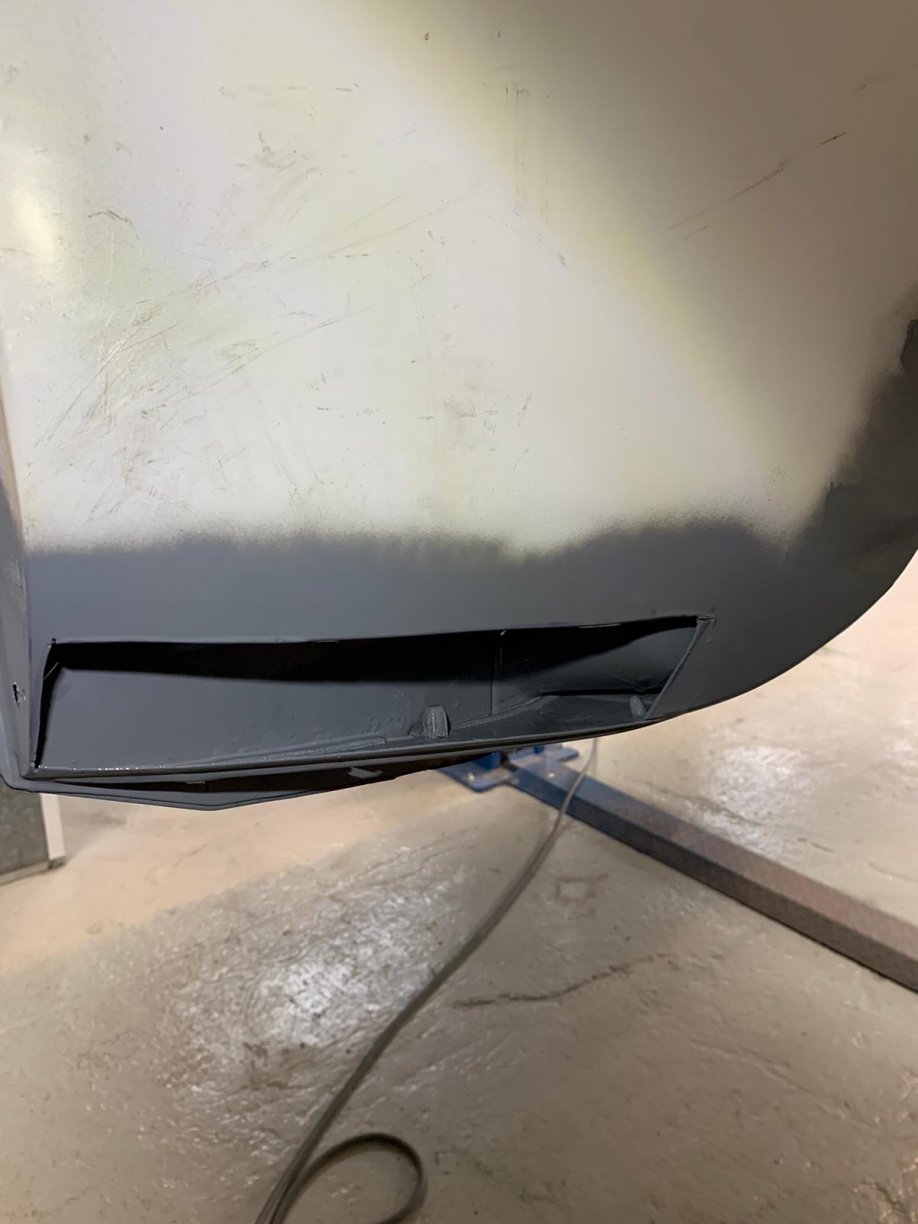
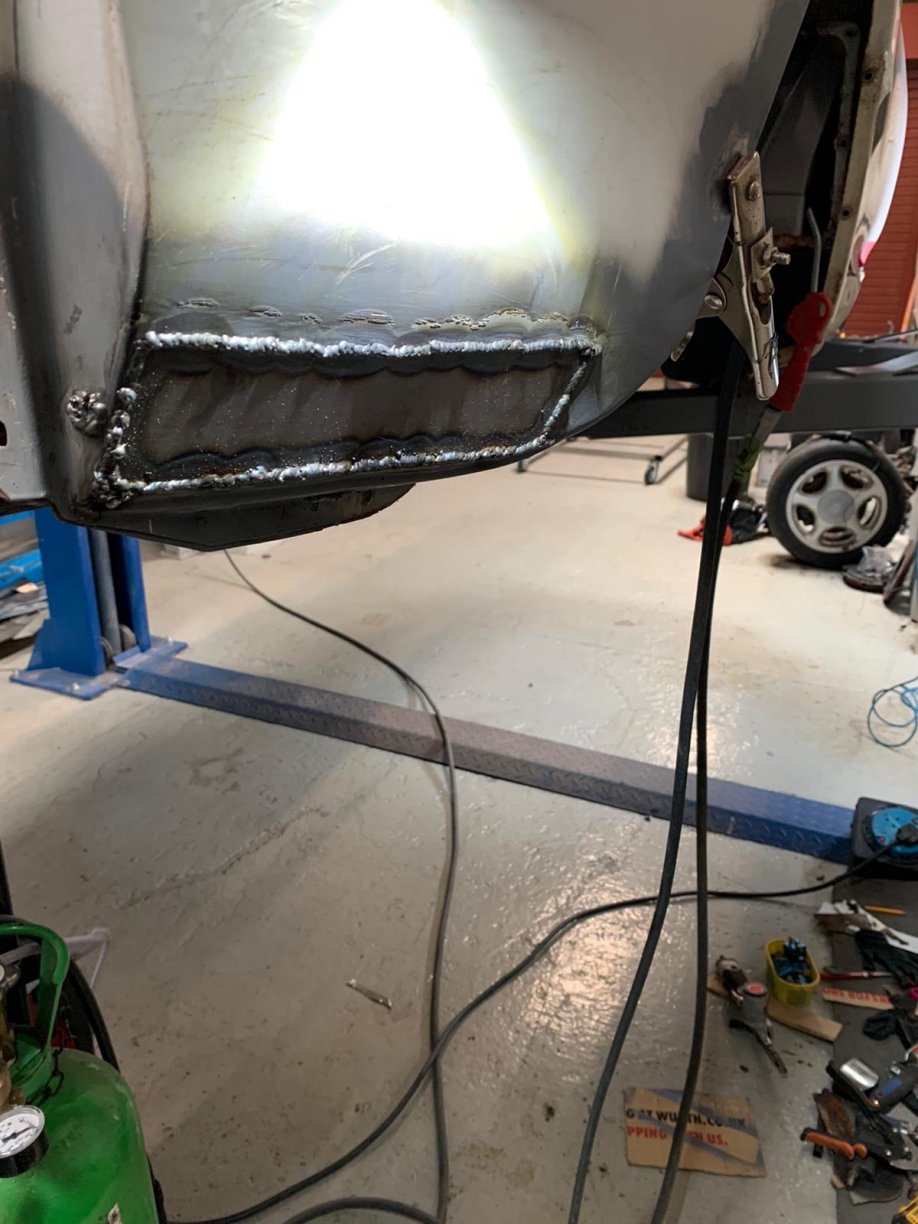
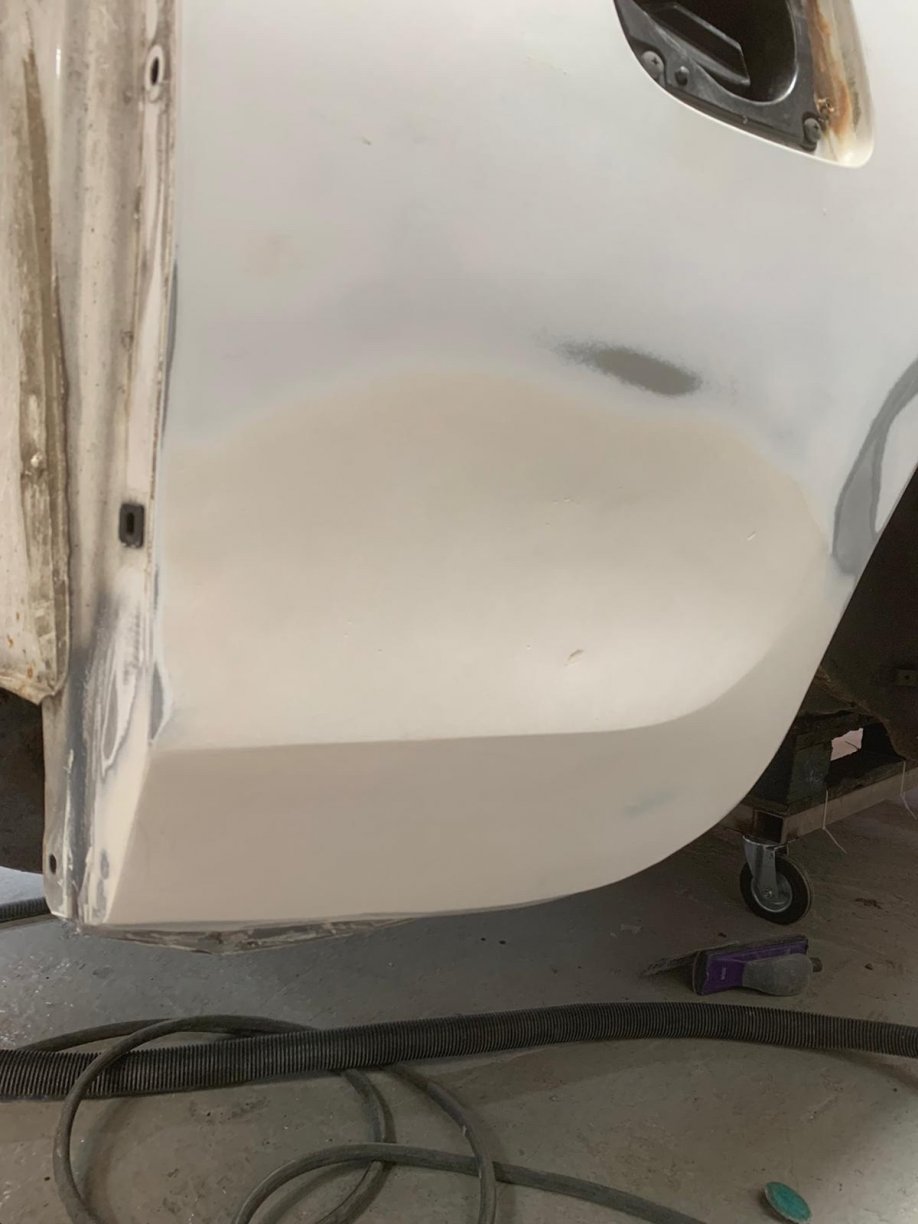
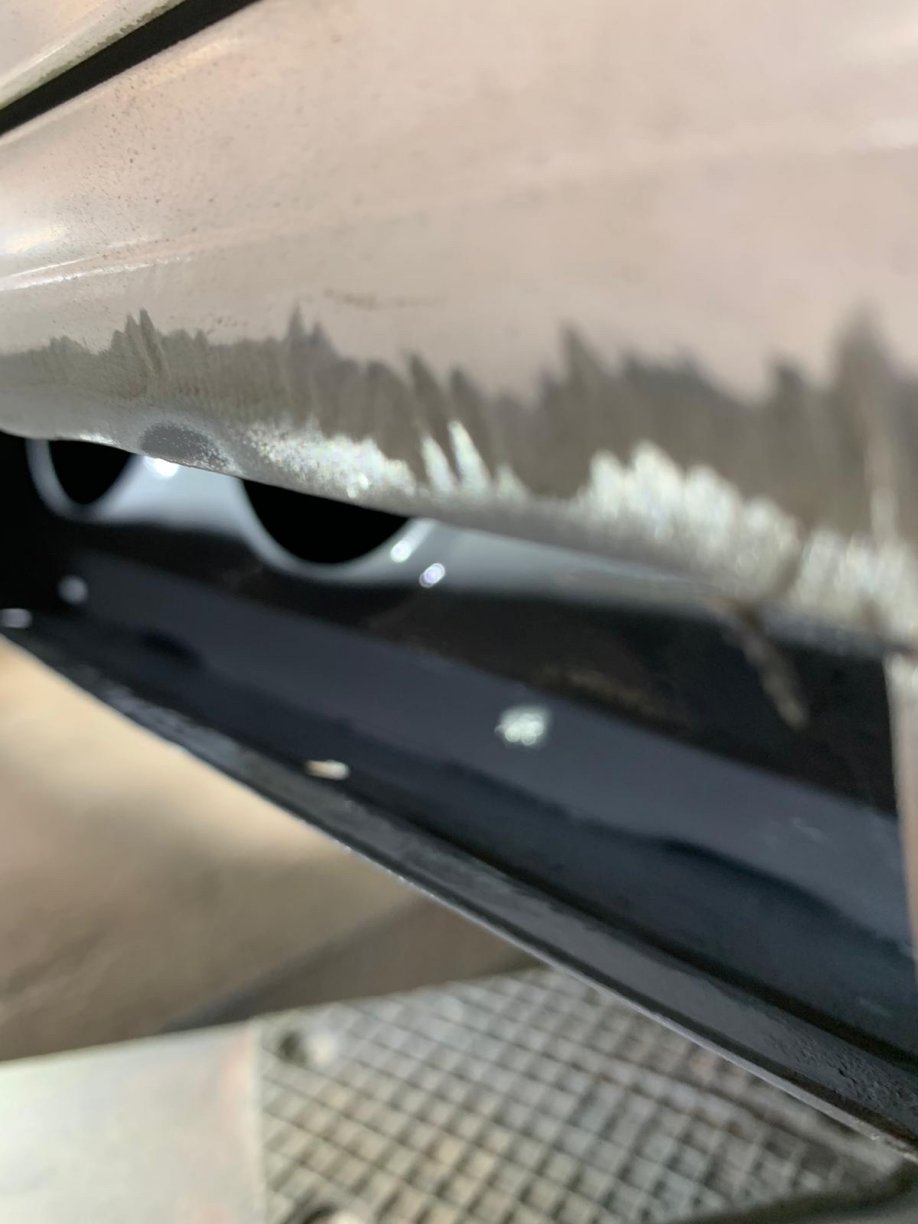
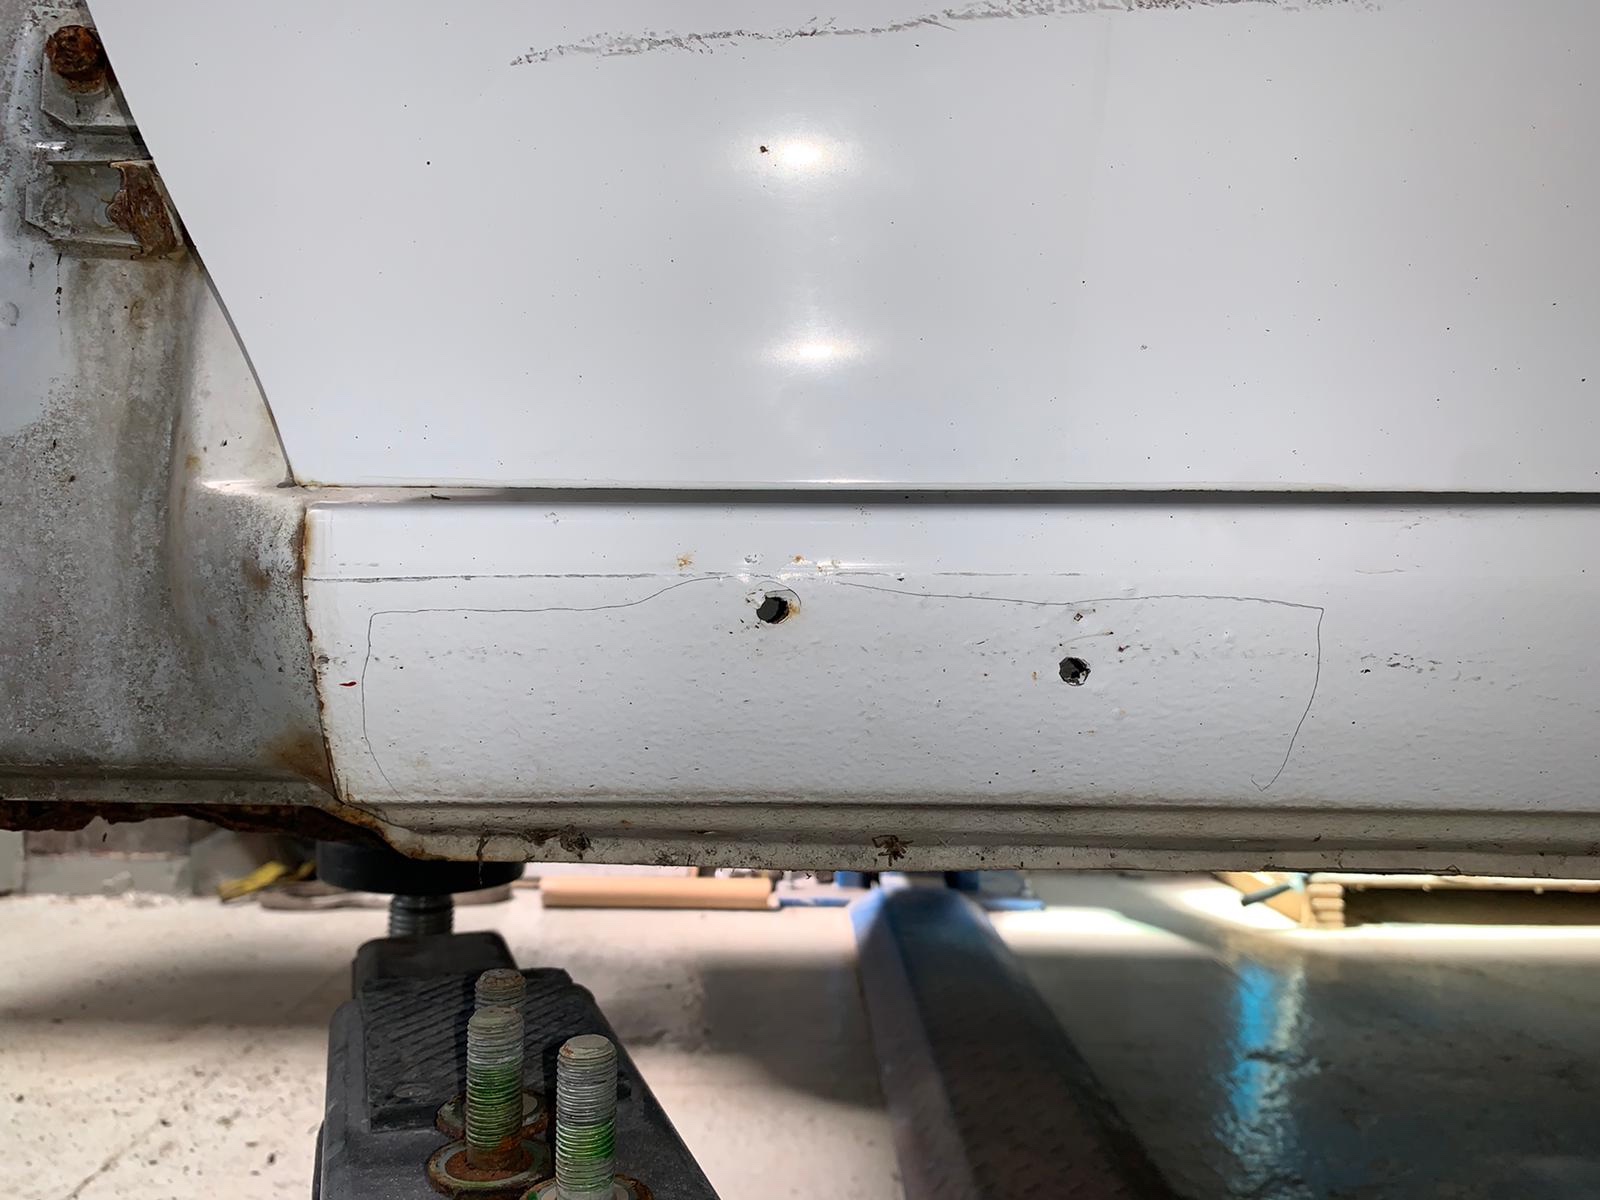
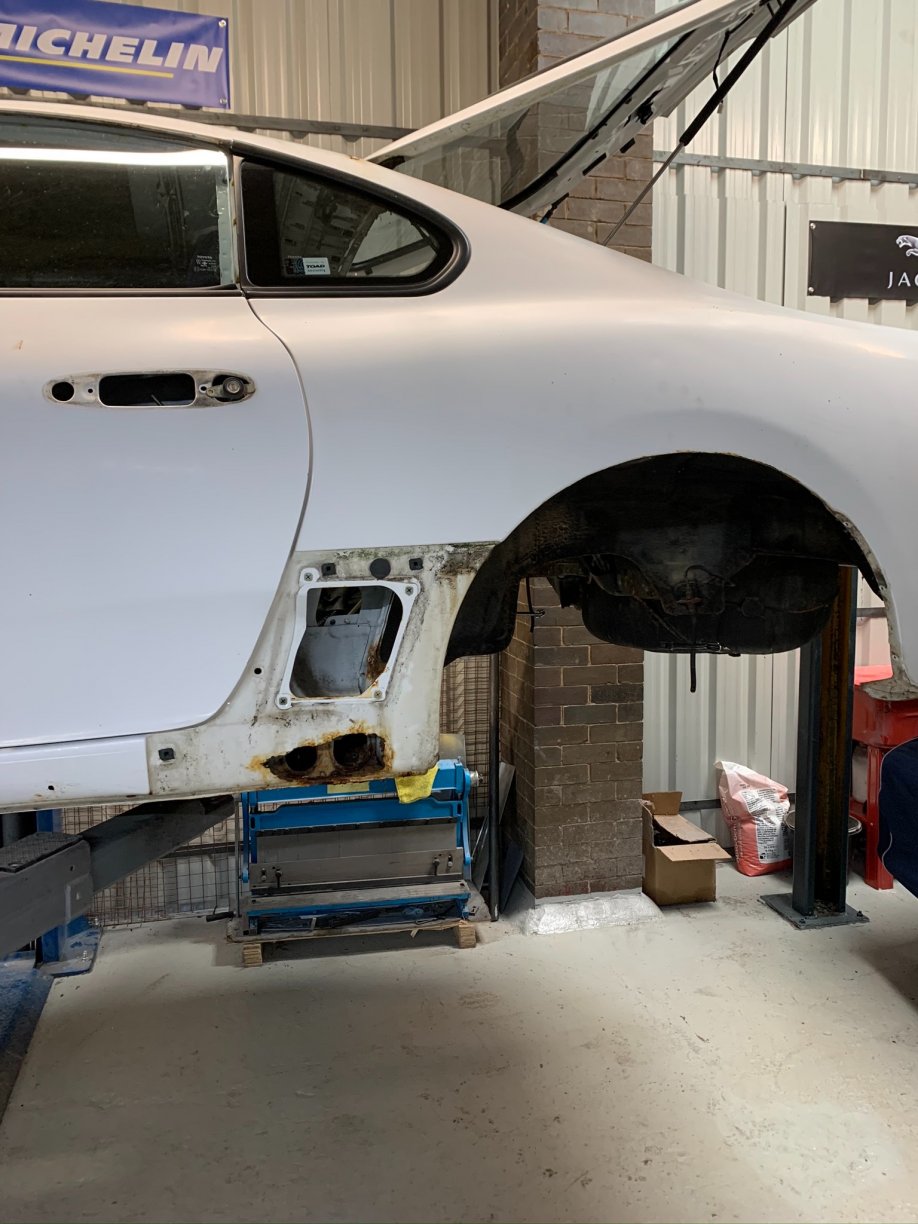
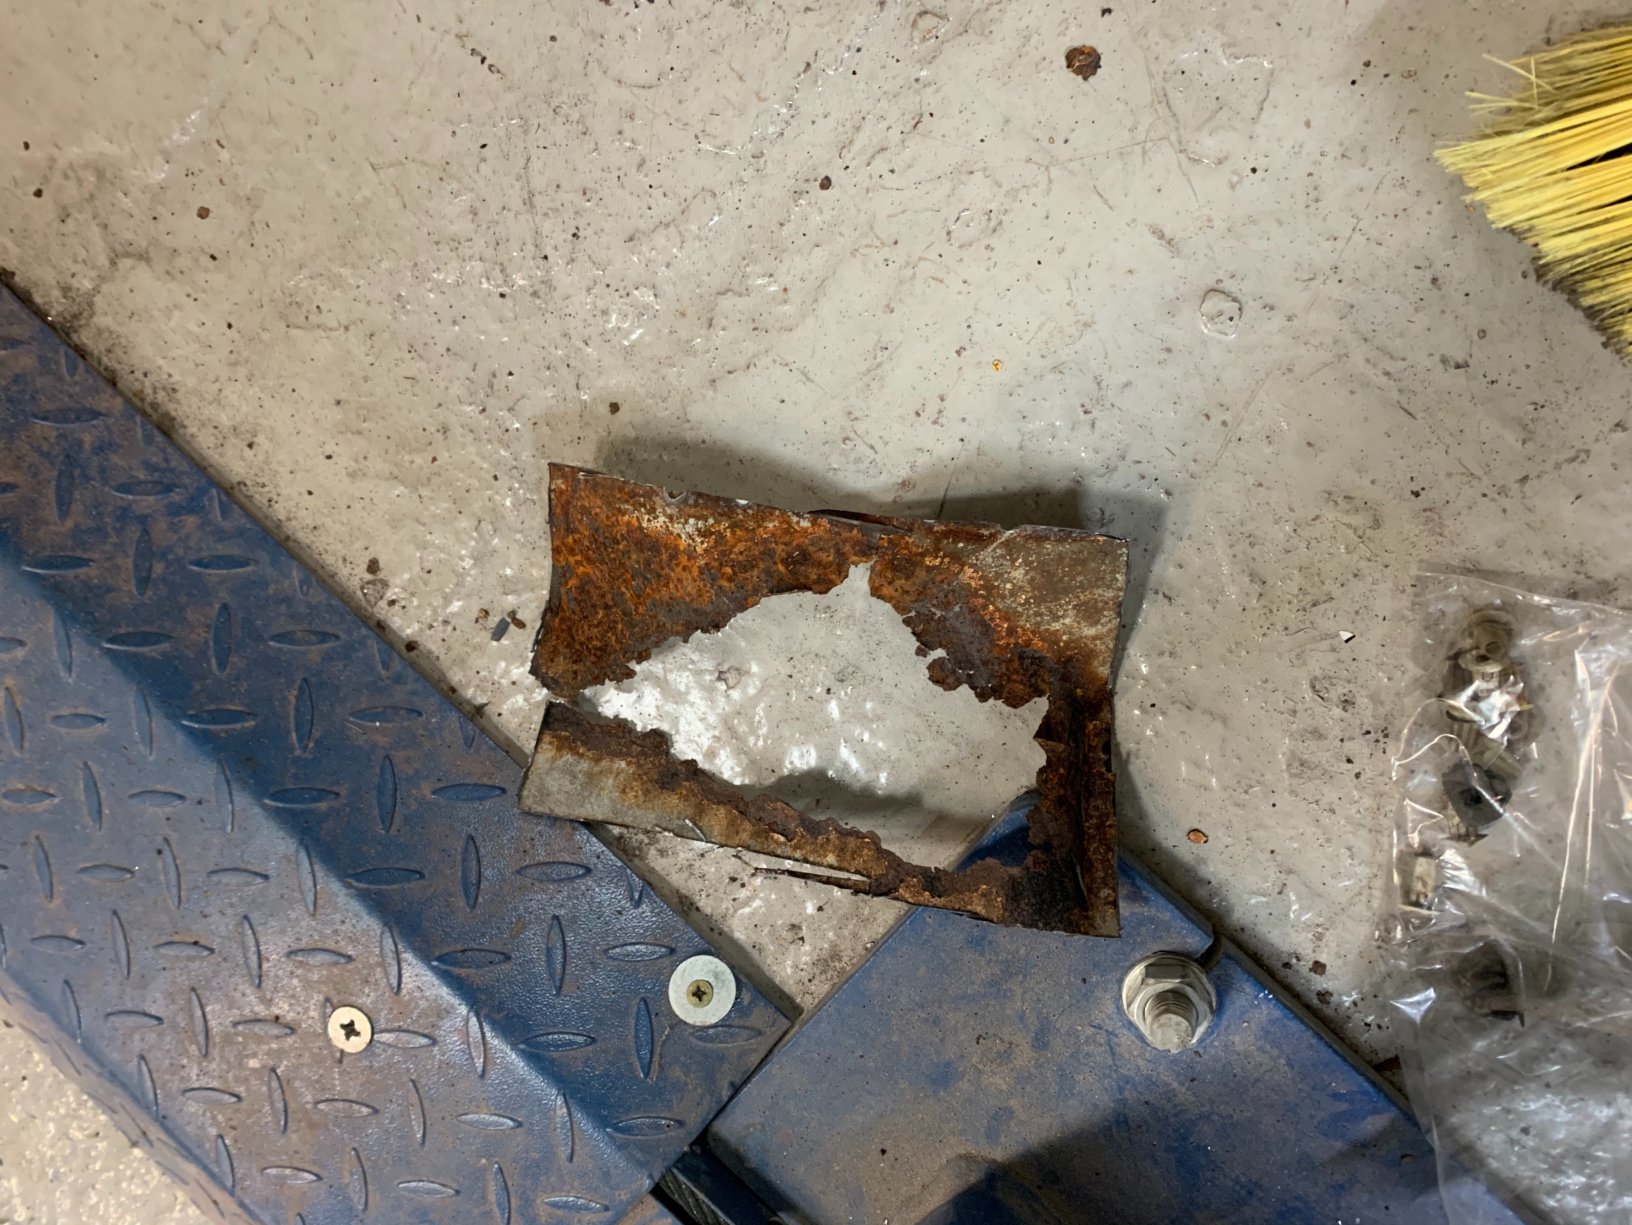
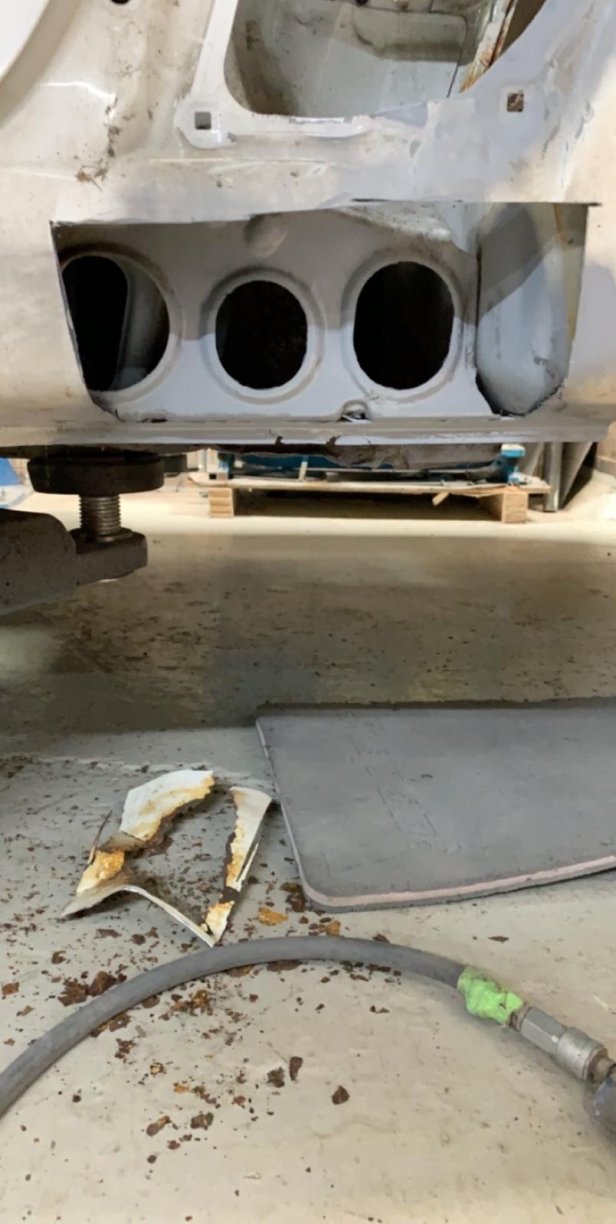
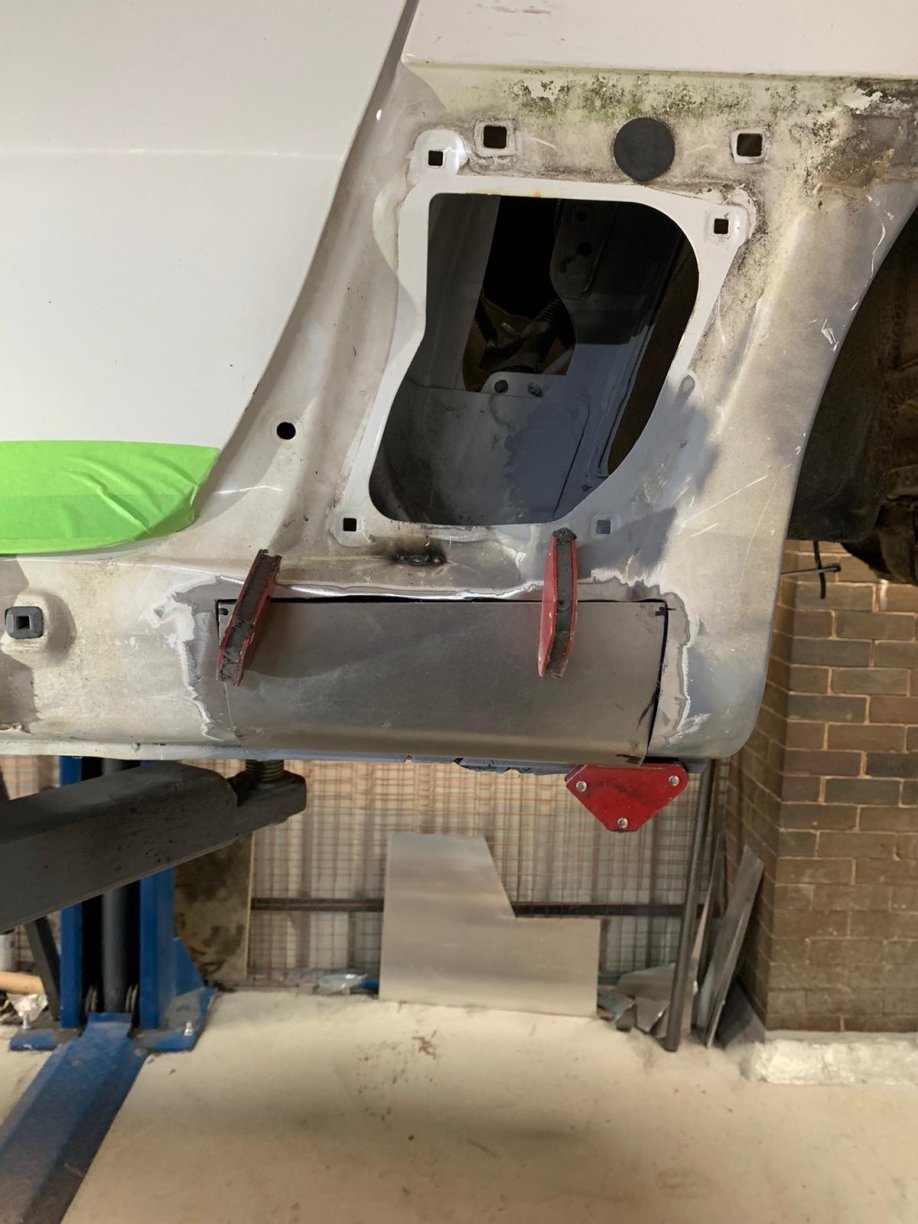
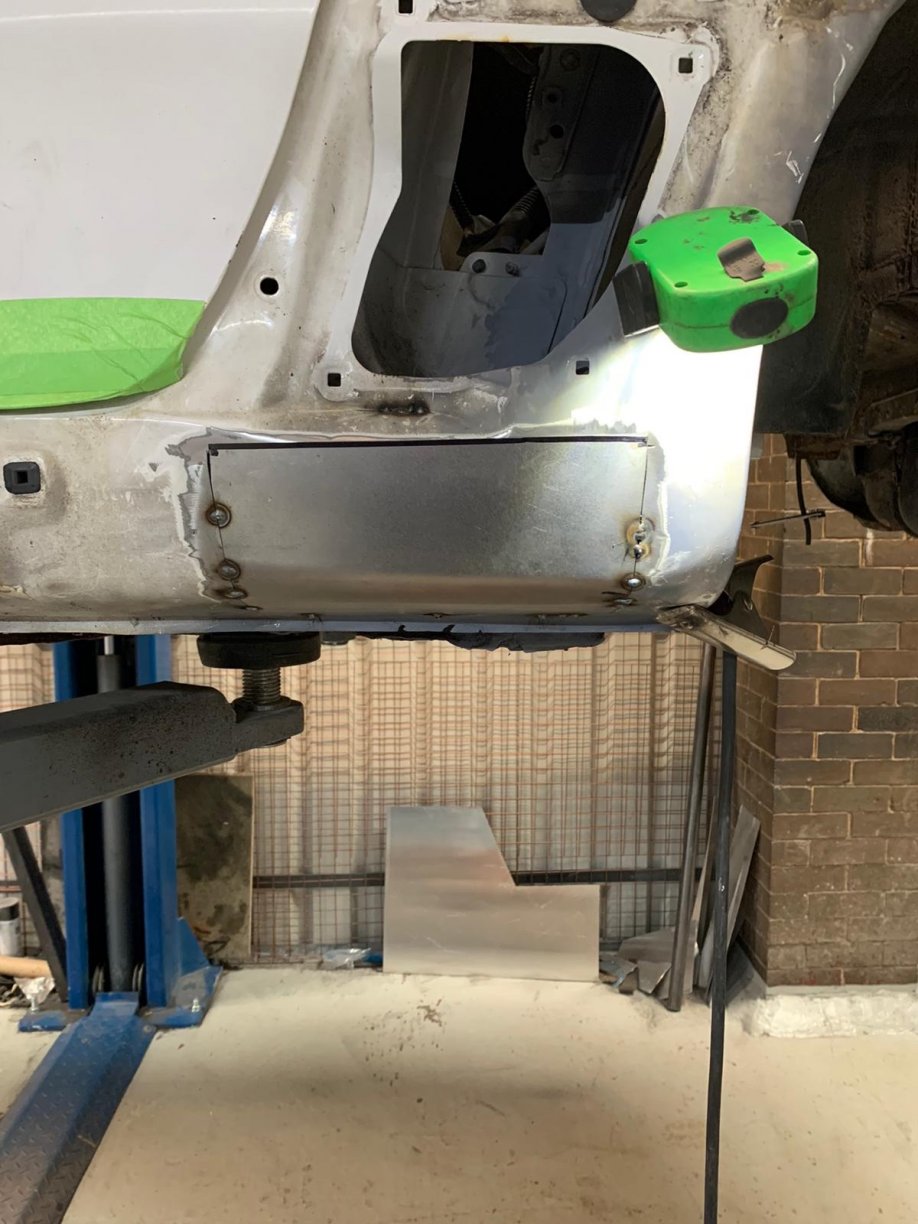
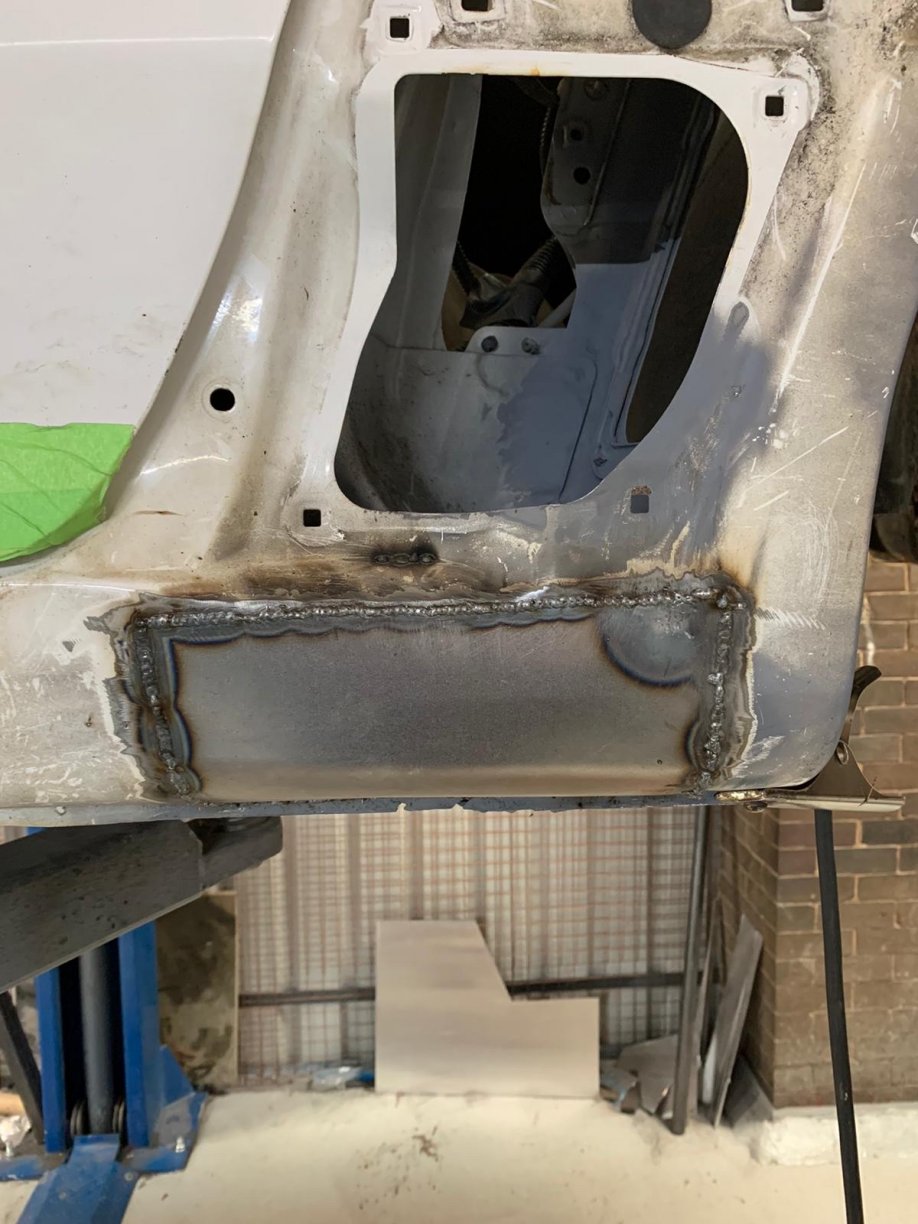
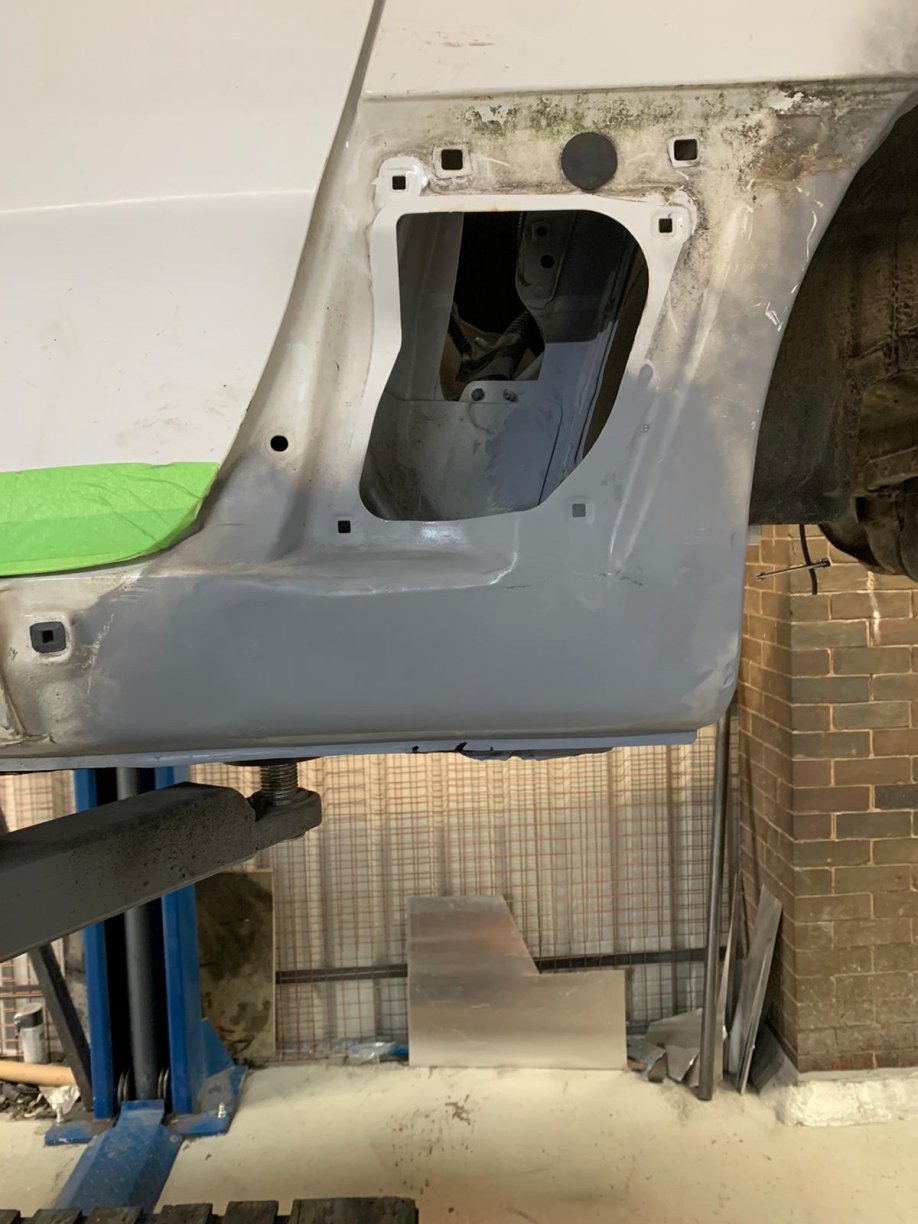
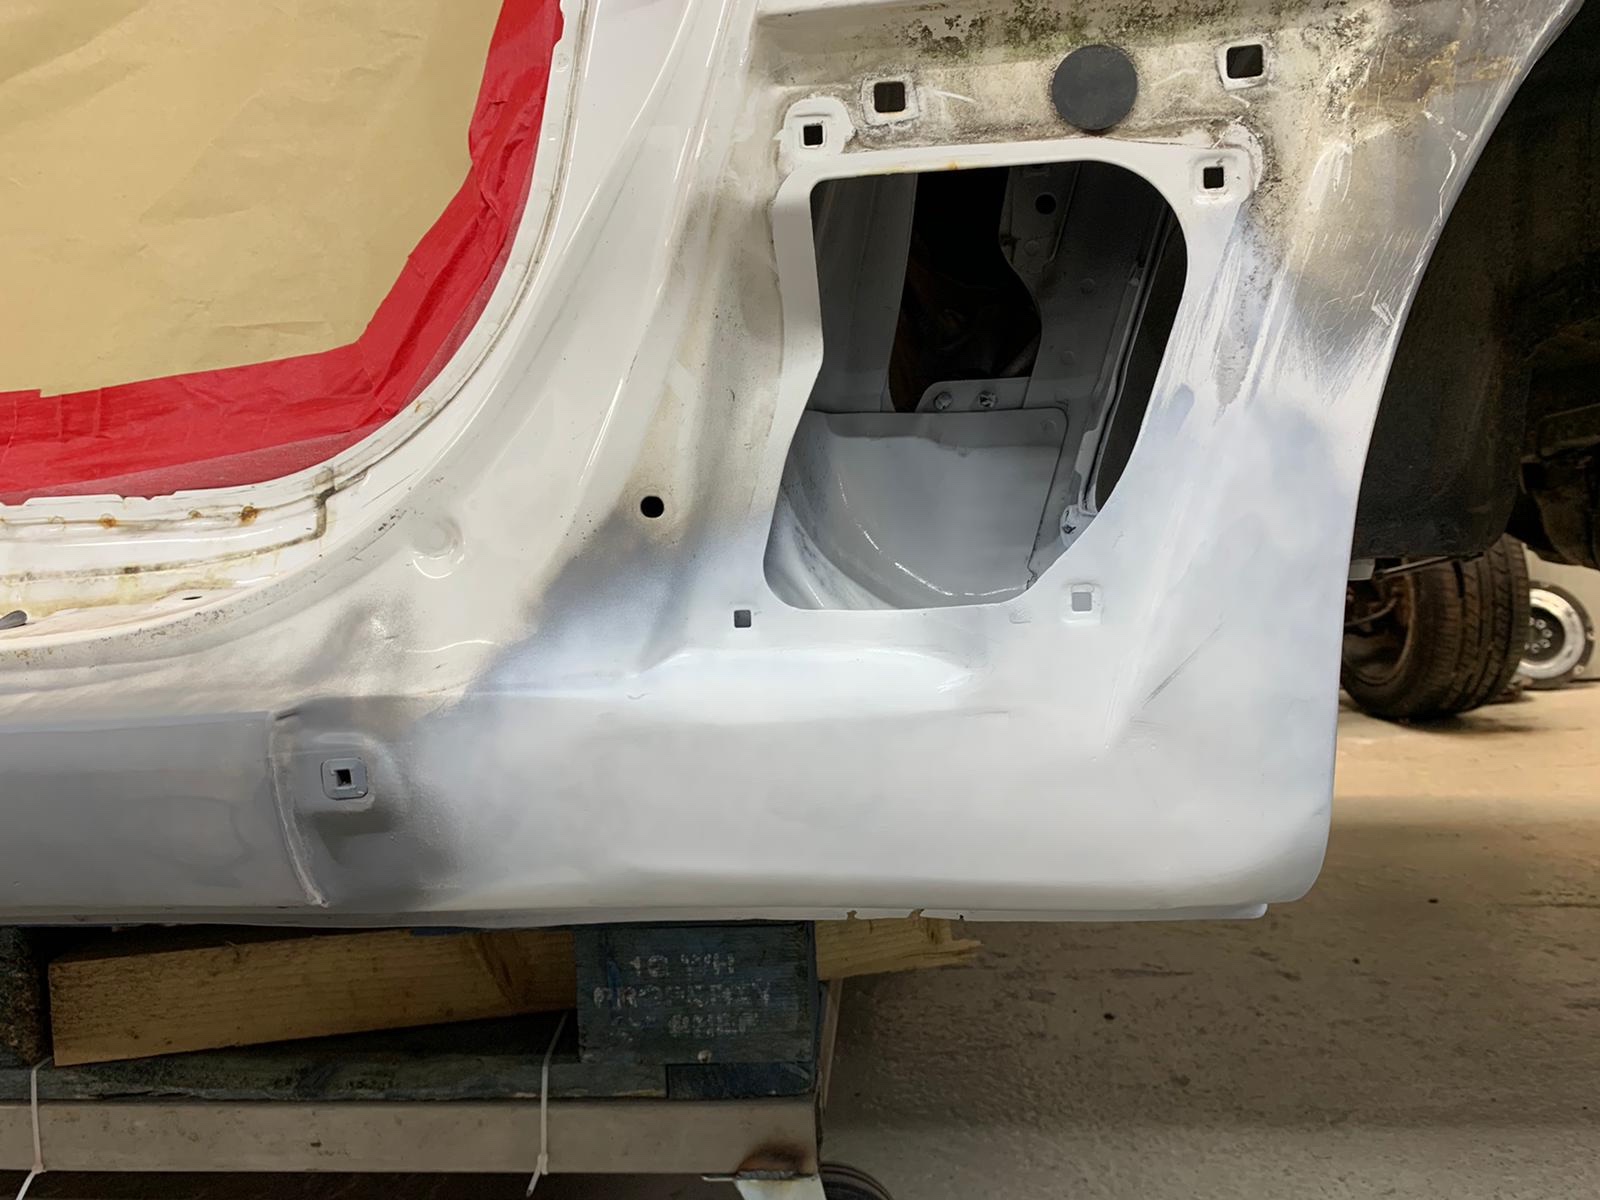
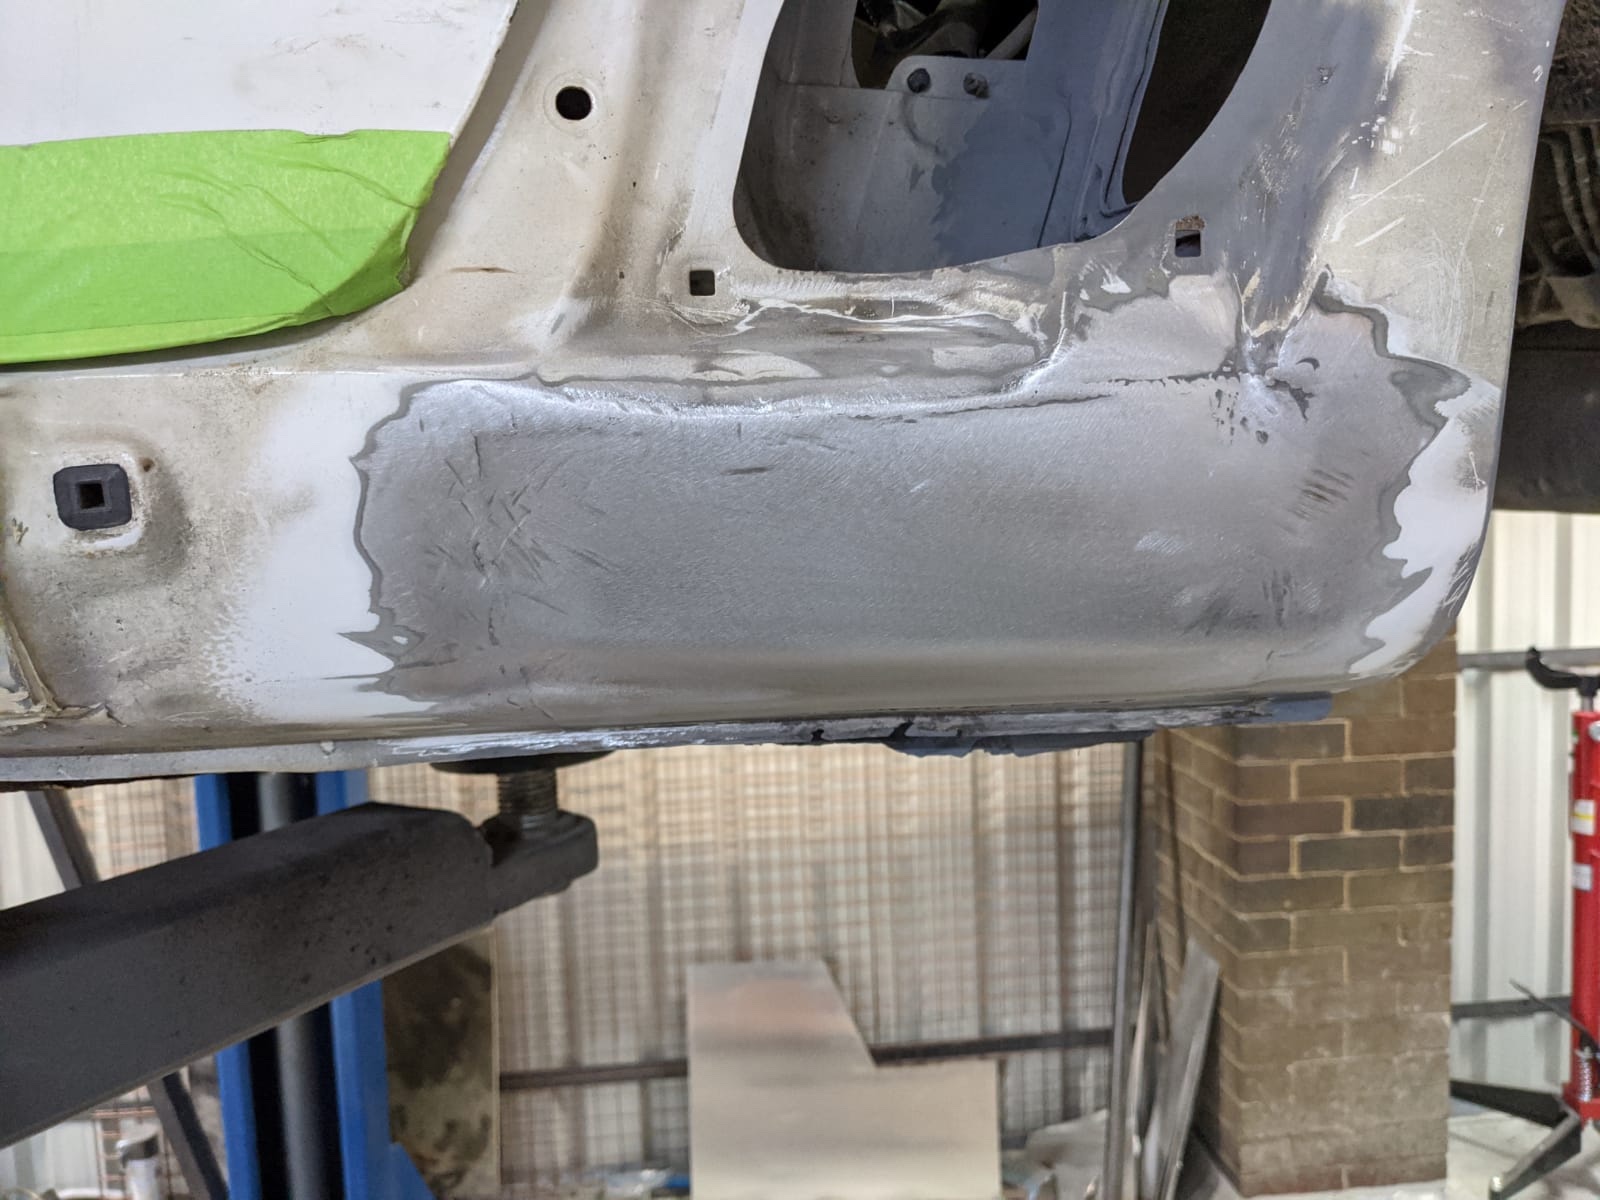
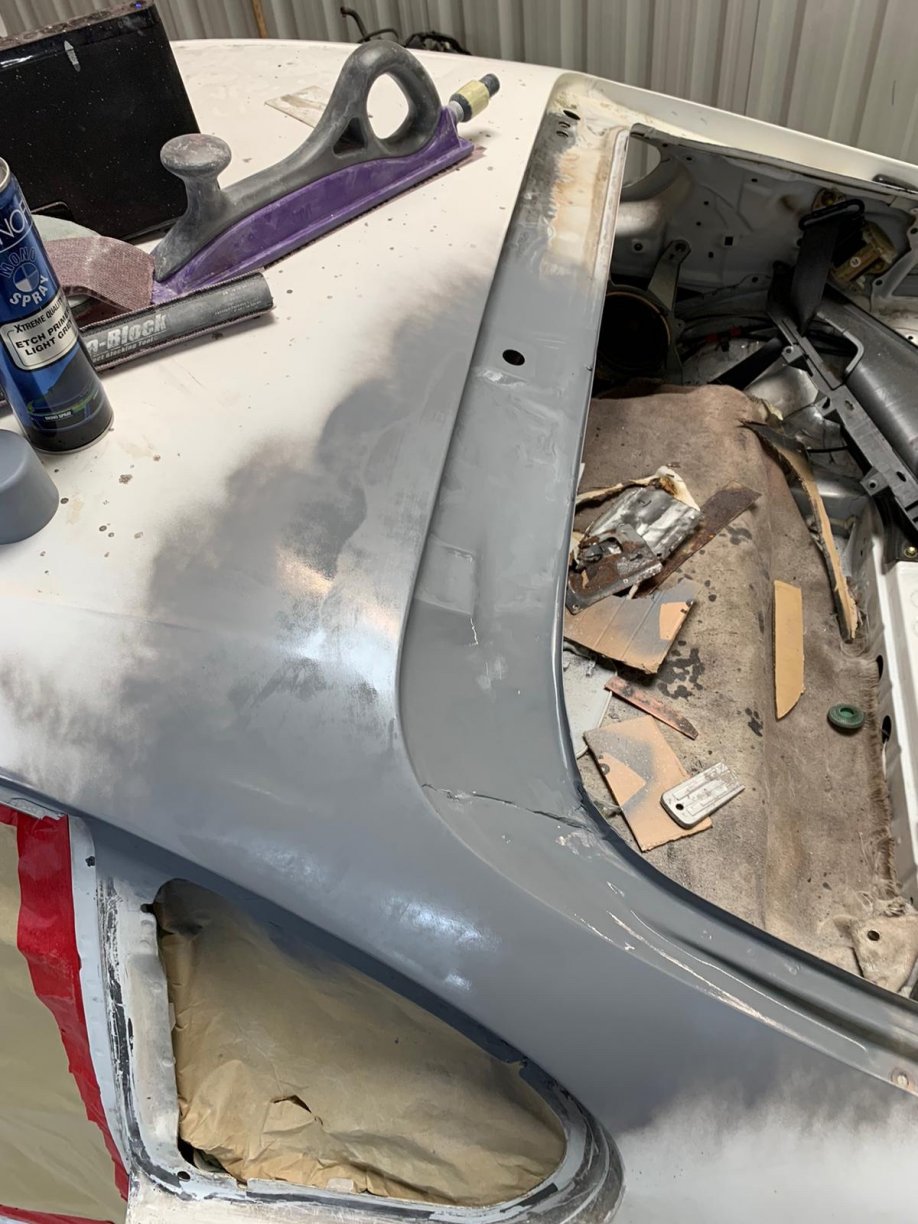
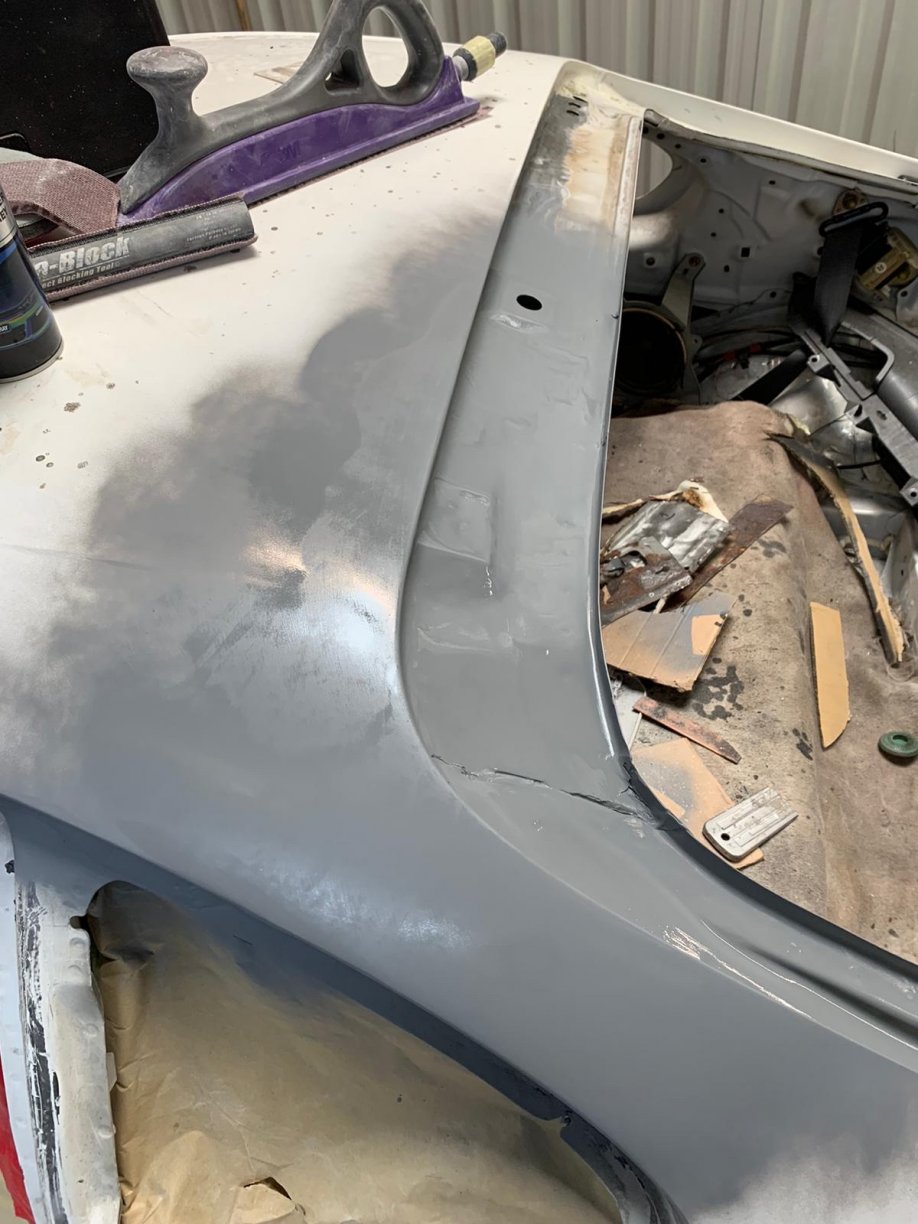
With the N/S sill now fixed, it was time to sort the O/S which had only the one troubled area on the sill but also a very nasty bit of corrosion on the front arch to sill curve. Firstly the sill was tended to, this was more like a bubble or two showing on the paint, no more than the size of a 5 pence piece, until I agitated it with my screwdriver. This is what the car looked like after the initial wash on page one of this thread. You can see the rust bumbles near the front of the sill. This is what it looked like after the agitation. As you can see, the end result of me poking at it with a my screwdriver was a lot more worse than it seemed from the pre agitation picture. Worth considering if you go to see a car and it’s bubbling a little, obviously the owner might be a little less enthusiastic about you poking holes in the sill . Yup you guessed it, more metal added. I also don’t seem to have the picture of this metal welded in so will check with ML to see if they have a pic. Staying on the O/S but moving to the rear, I’ve noticed this on a number of Supra’s I’ve seen over the years. Basically the rear spat section, where the rear hockey stick meets the body, that area has often seems to corrode and this was the car for the old girl. This was the car after the first wash as mentioned earlier. You can also see a scrape on the arch section. Stripped back to see what we were dealing with. We caught this is a the right time as that corrosion behind was just surface rust and buffed off, but given more time, that would have developed into a much bigger problem. Fully ground back to the metal and the corrosion treatment steps added and finished with etched primer. You might be wondering why is the welding so rough on this section, well that’s because I wanted to give it a shot so that I could say that I had added one section. I was fully supervised and to be honest for a complete novice it was a good attempt. The excess material was given the grinder treatment and then a skim of filling was used to smooth it over. skimmed and shaped to match the origin lines.
-
I’d certainly encourage and one with the carpets already up to pop a dope into the box sections, fairly easy thing to do if you have access to the tool. It’s been a massive learning exercise and I’ve been lucky enough to be able to watch at the repairs were being done and more importantly to check the condition of the inner sills and box sections myself before dealing back up. Should give the old girl a longer life hopefully.
-
Thanks Brad, a few more repair to come but the fact that another is saved makes me feel better about the outlay .
-
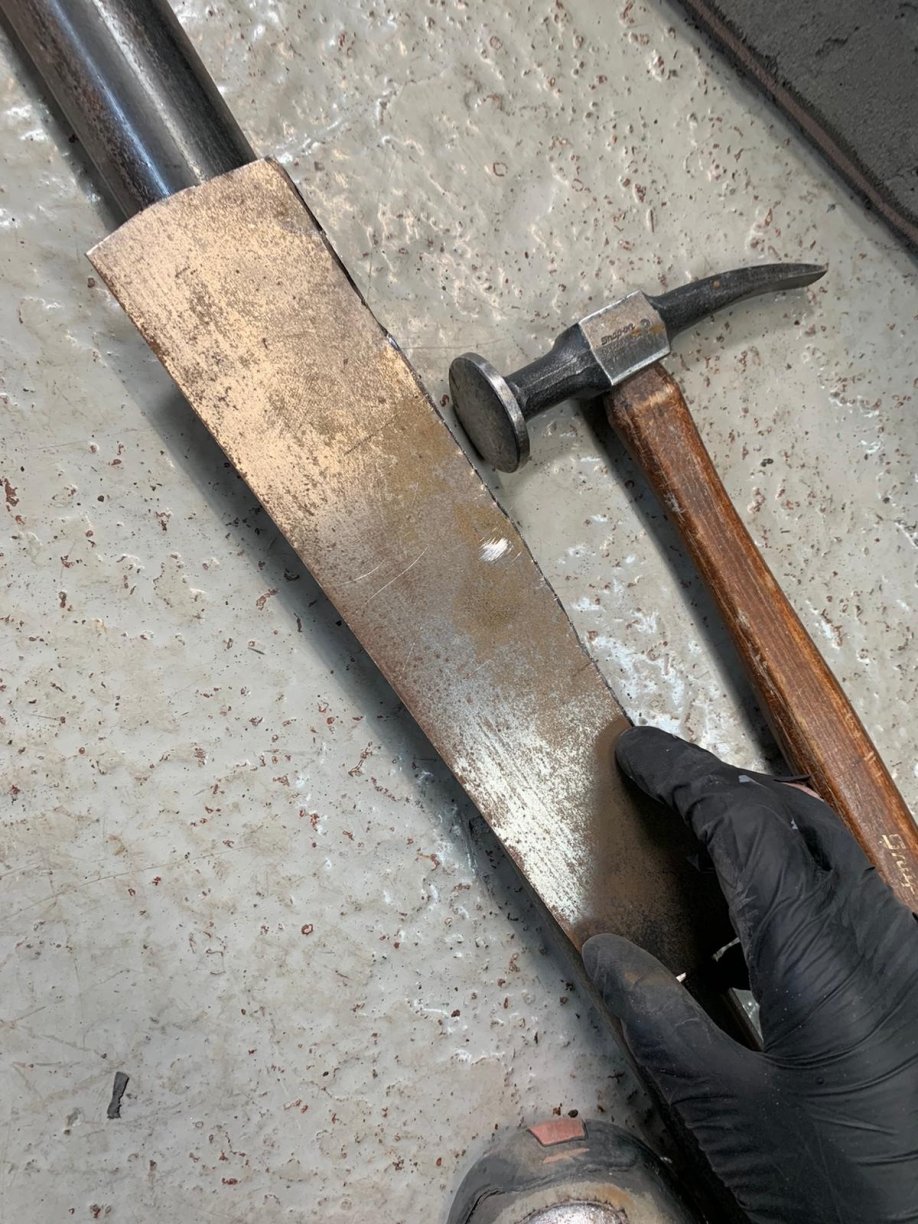
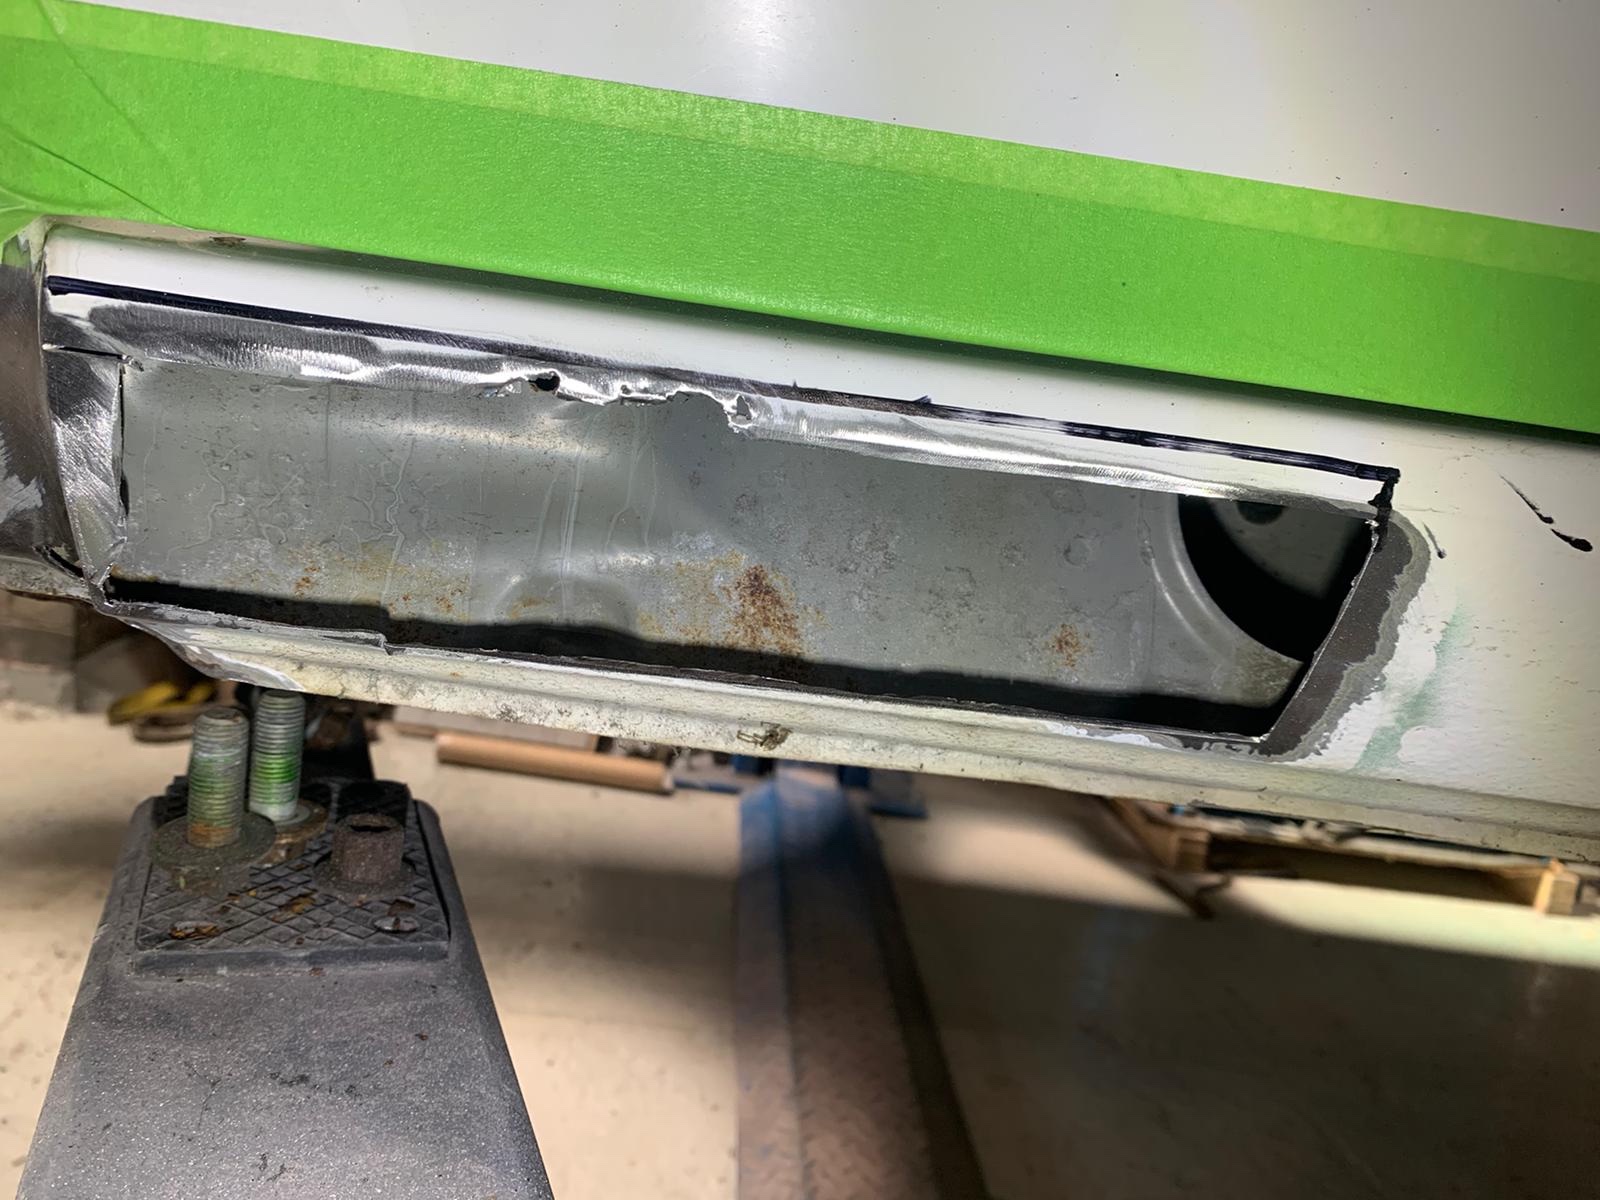
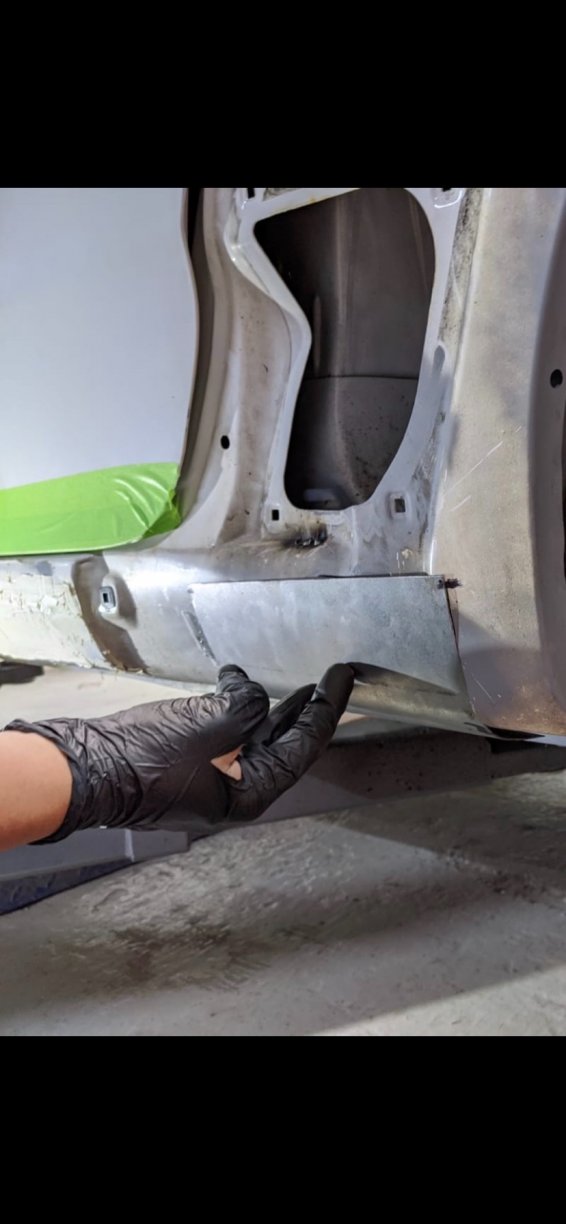
More metal work on the sills, from the earlier testing of the sills integrity. We also used a scope to look behind the solid sections to make sure we didn’t have anything lurking. Okay so what you see here is the Nearside outer sill, there were 2 sections that needed removing from this section, although they were smaller than what we replaced due to the closeness in proximity of each weakened area. This picture shows the back and the front section of the sill. Offending areas were cut out and again the new metal was cut shaped and prepared for entry. As I mentioned the sections behind, inner sill were not bad at all thankfully but to be safe Martin and the team prepped, rust proofed and prime red over each section. Working in the curvature to suite the replacement section. This is the back side of the new metal, same process for preventative barrier. Section buffed back to great the contact area for the welds. New rear sill metal section held in place again with magnets ready to weld into place. Front nearside repair section, same process really as the rear section, just a slurpy larger area. Again the inner sill was in good shape, a little light surface rust was forming so a great time to catch it. Area ground back treated and protected as per the previously mentions process. Etched primer applied, ready I offer up the new metal. New shaped metal inserted and welded into place. I don’t have a picture but it was welded in, and ground back and treated before it was smoothed over with a light skim of filler. Last look at the inner sections before being sealed up. The Offside sill was next on the agenda, but that had only one section to repair, again checked with the scope and when the corroded section was cut open. Pics to follow shortly.


-
I’ve thoroughly enjoyed catching up with this thread Matt, really appreciate your attention to detail on this build. Nothing wrong with hoarding a few parts if you know your going to use them at some point . The diff looked super satisfying to do!
-
Hey Bender, it does sound a little strange that he’s not responded, please keep this thread updated with the outcome. We have a dispute resolution section but it looks a little early for that.
-
I think the shock factor wore off after the hinge was fixed, after that it was a case of “hit me with it” . glad you’re enjoying it, it’s great being able to share it with the club. I know I keep saying it, but there are loads of updates still to come, so keep an eye out for updates. I've loved the whole process, it’s been unnerving at times but a lot of fun.
-
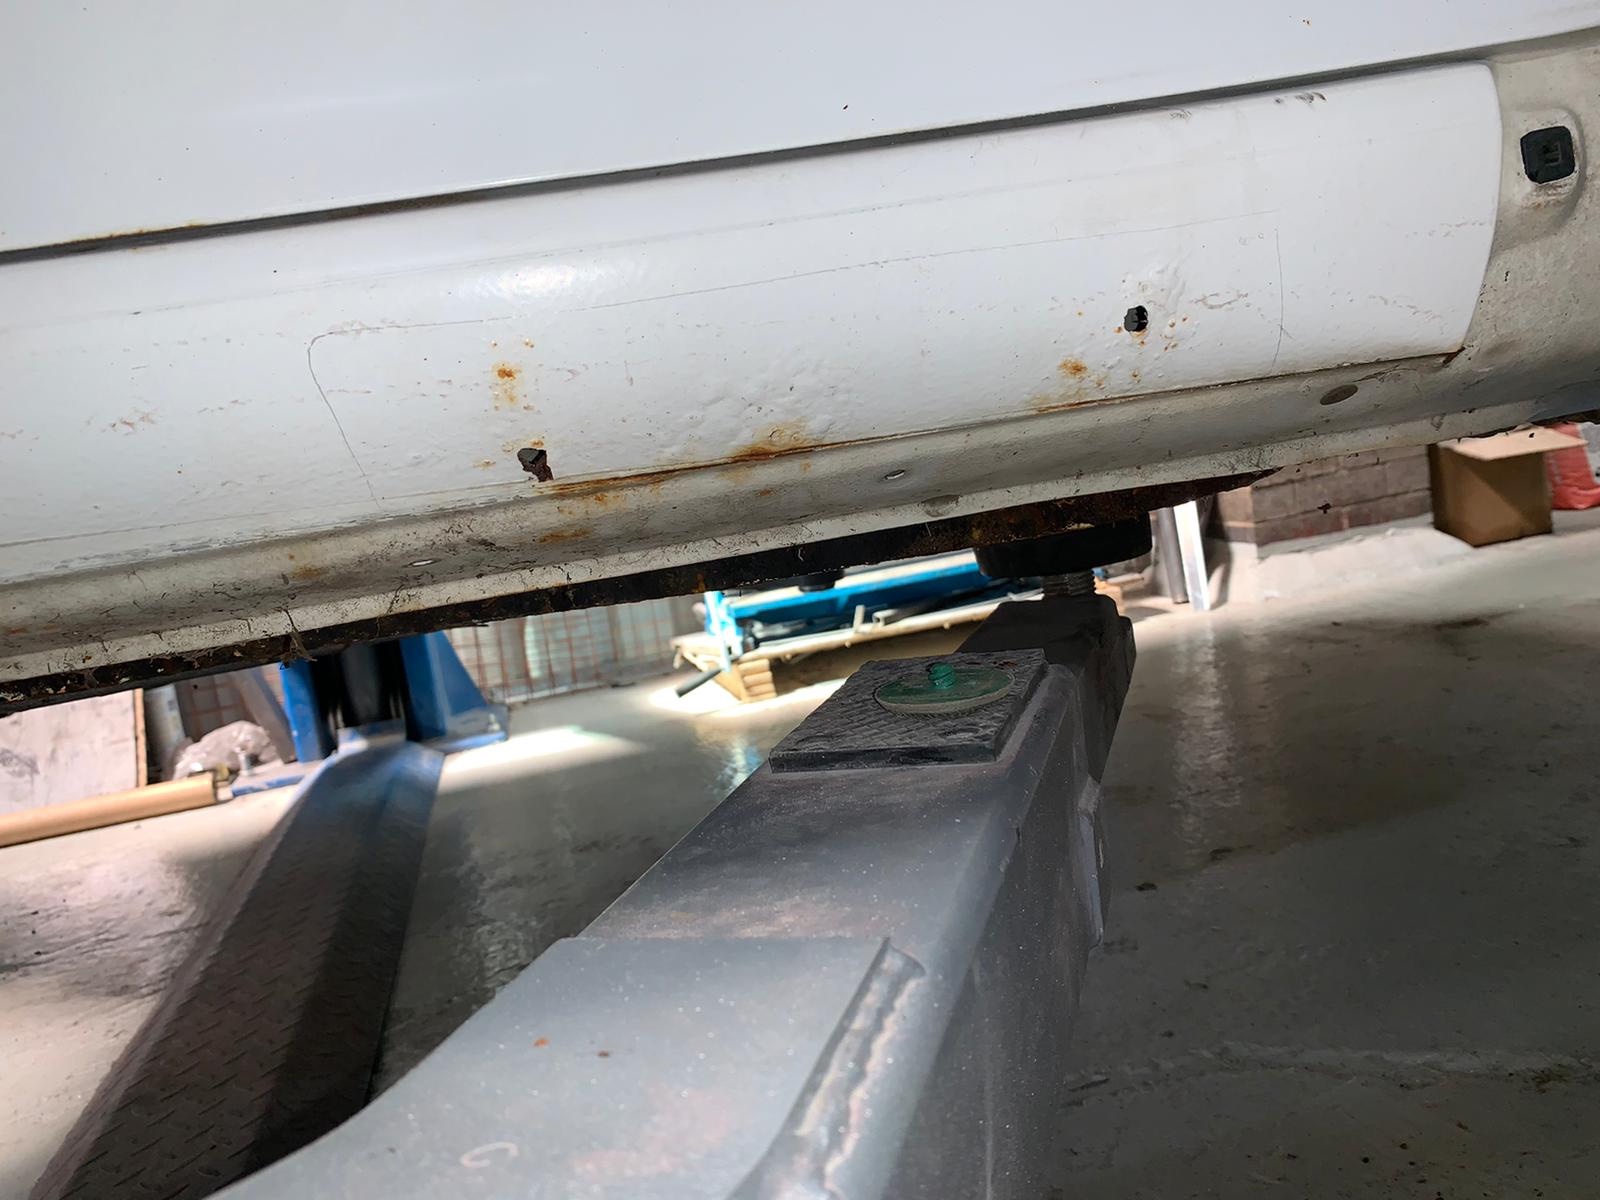
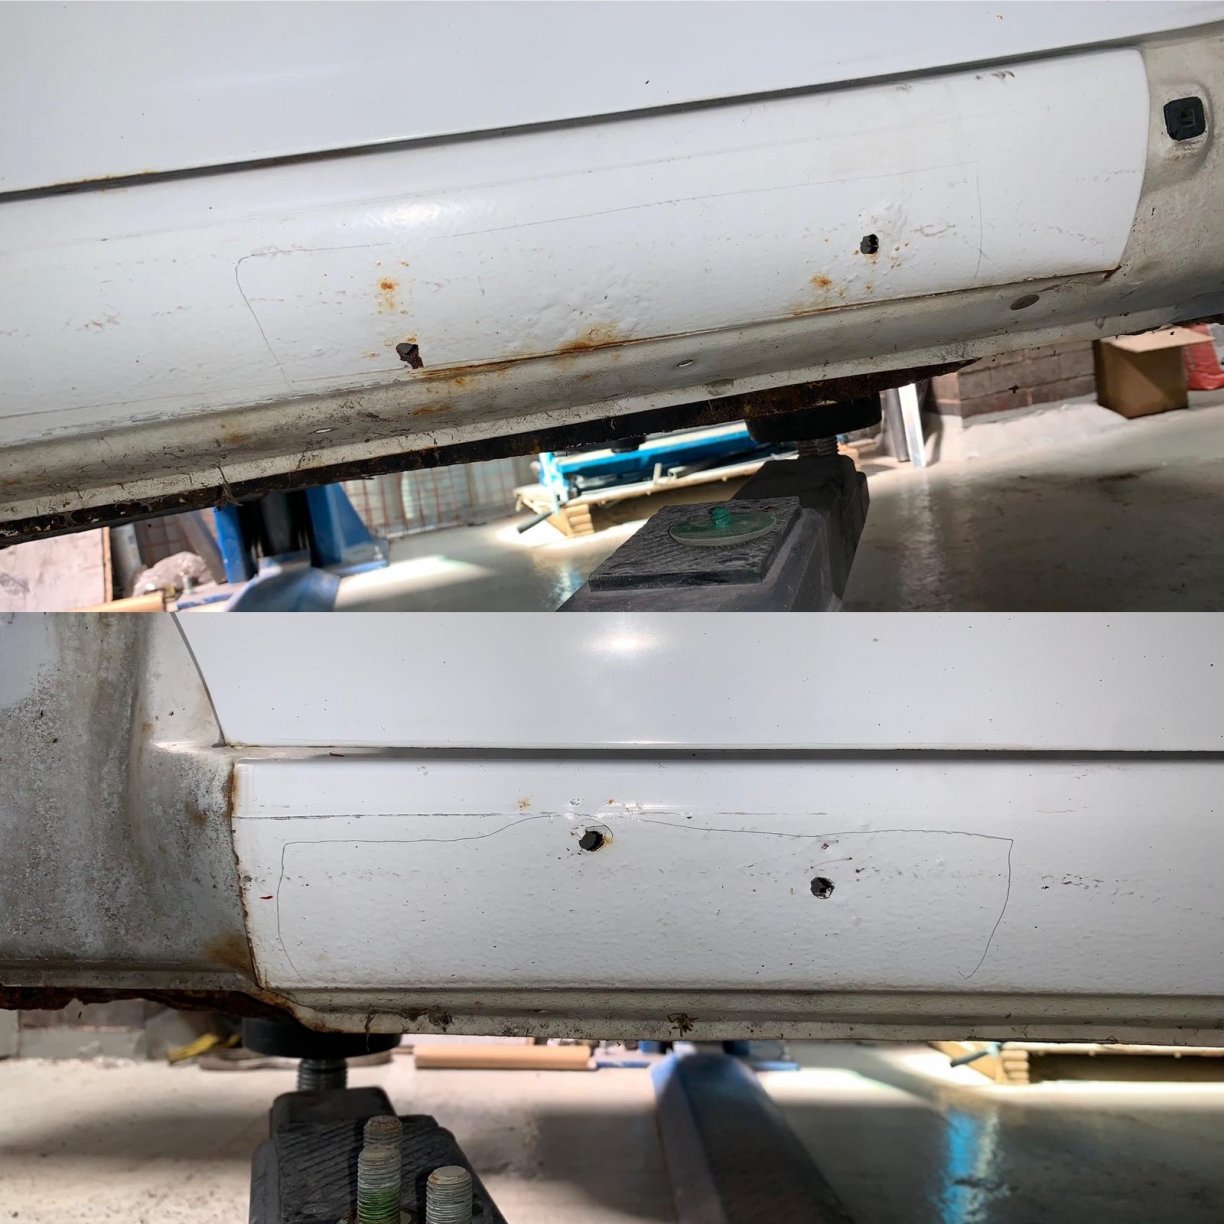
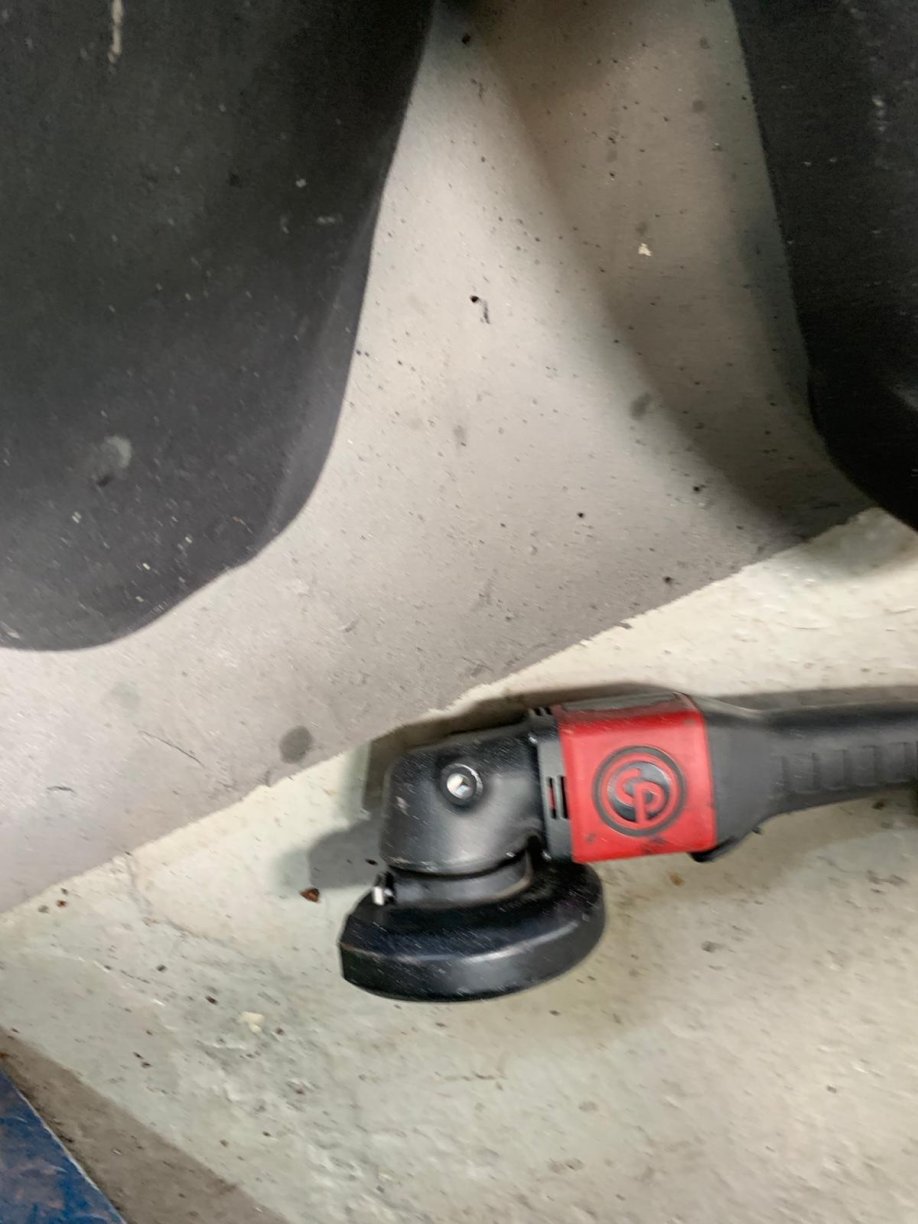
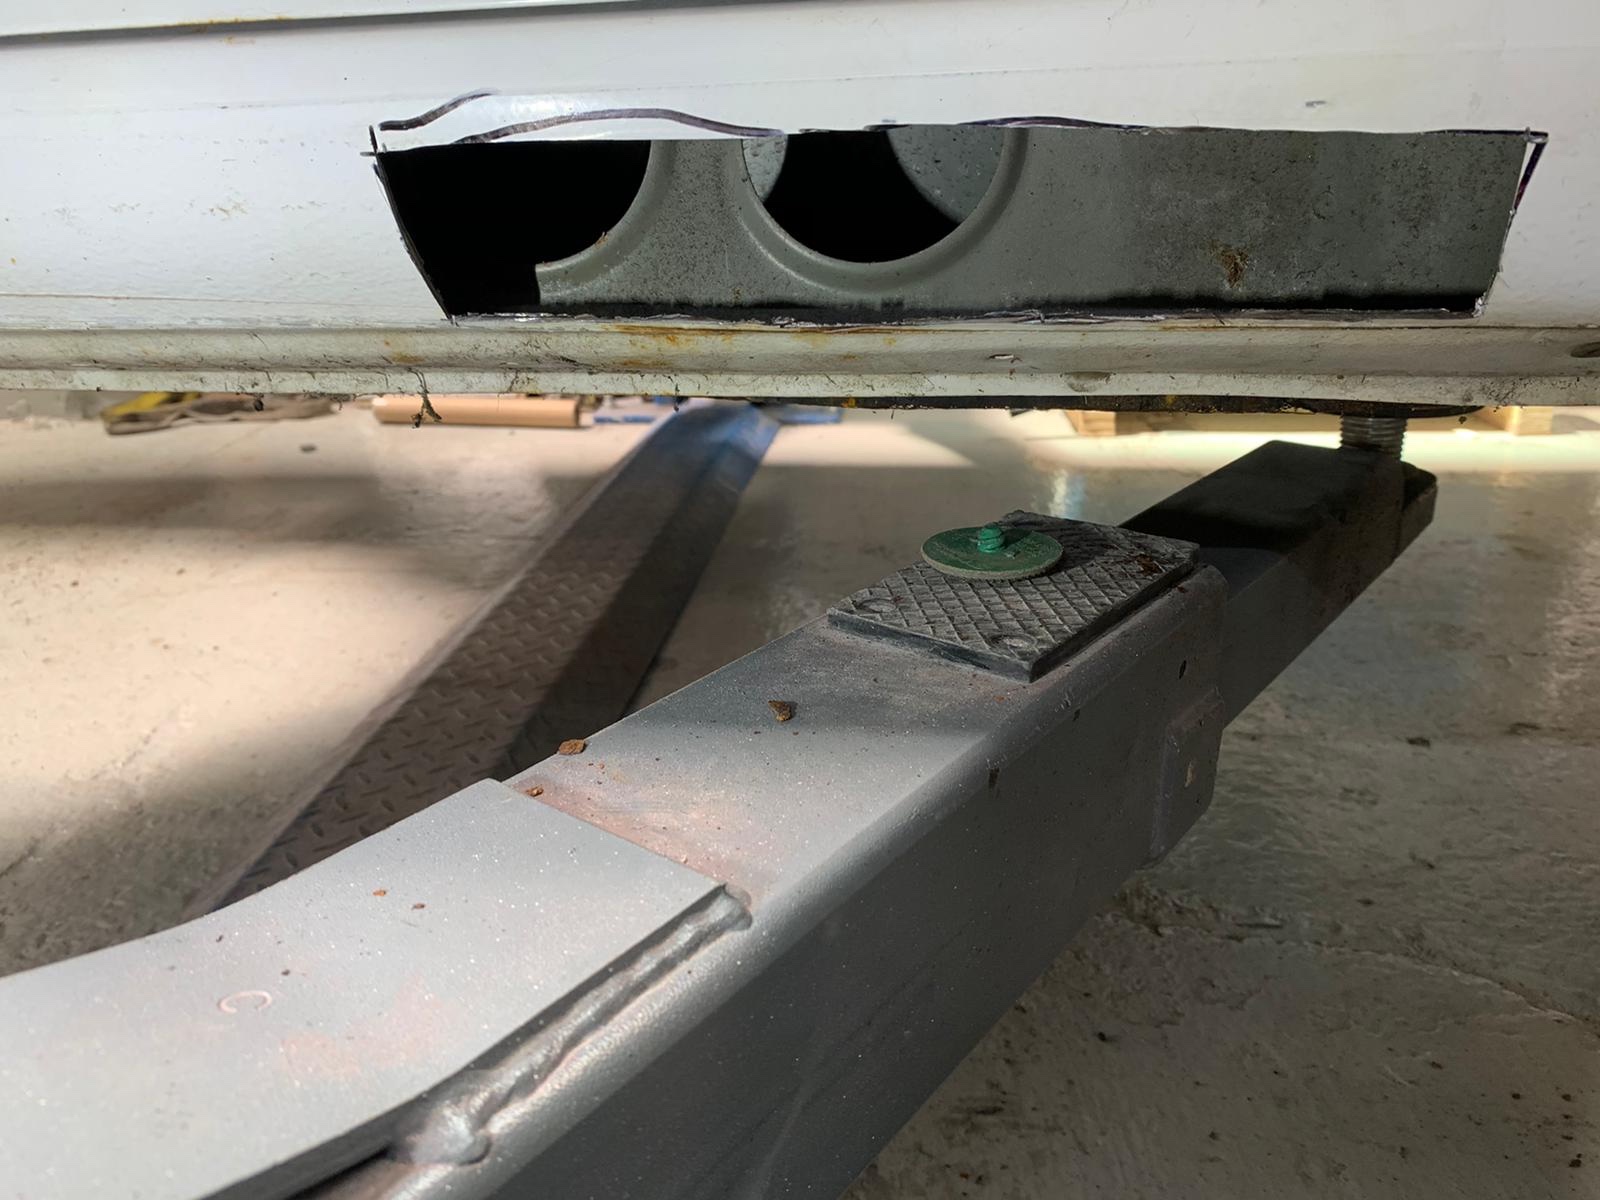
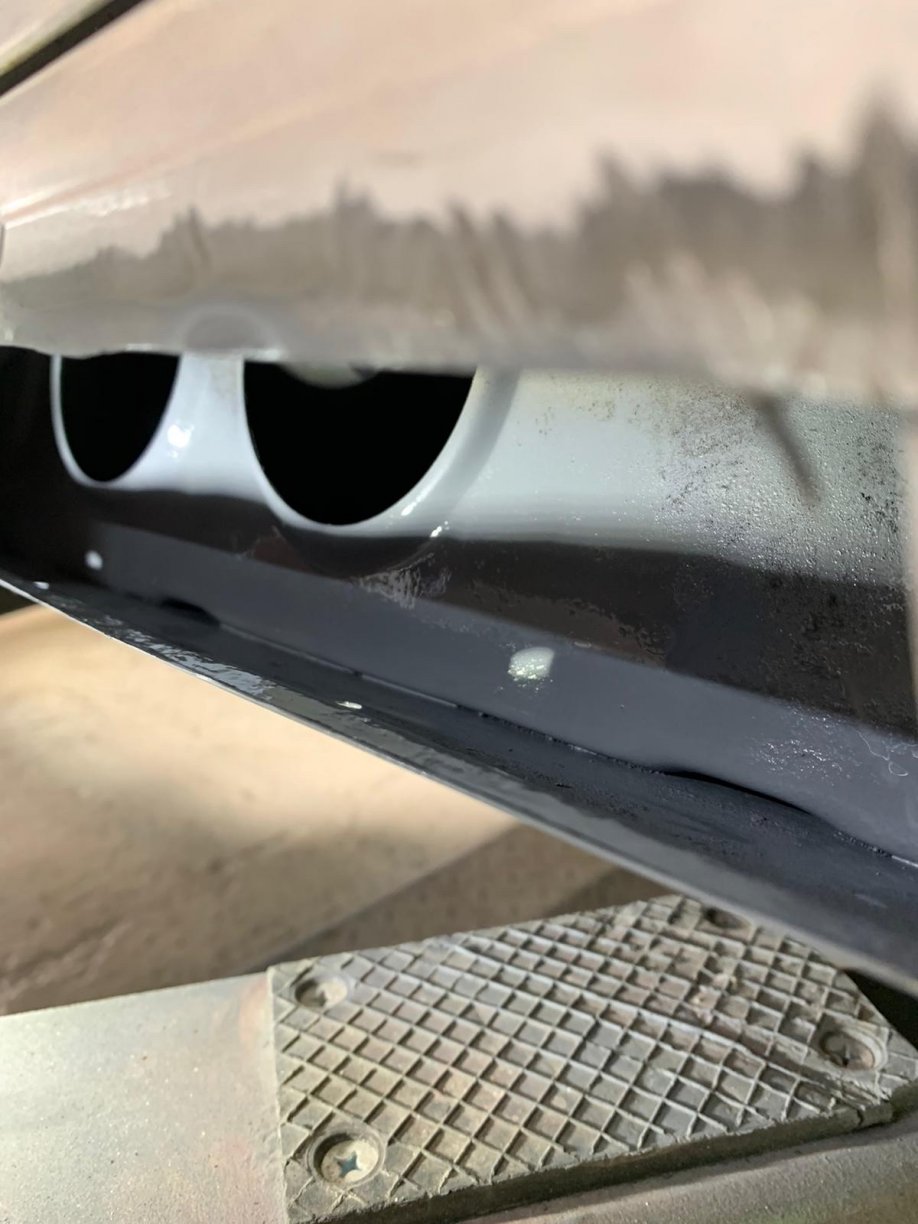
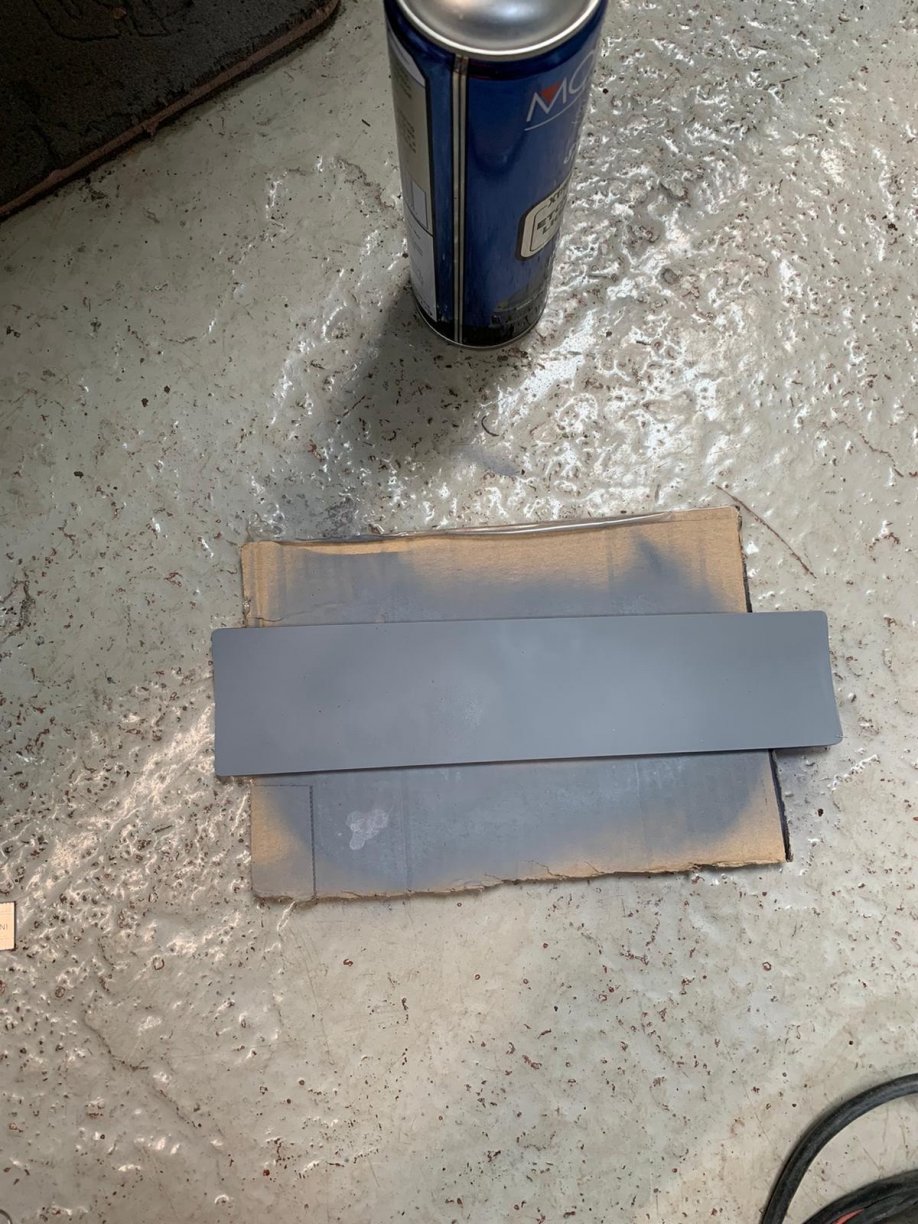
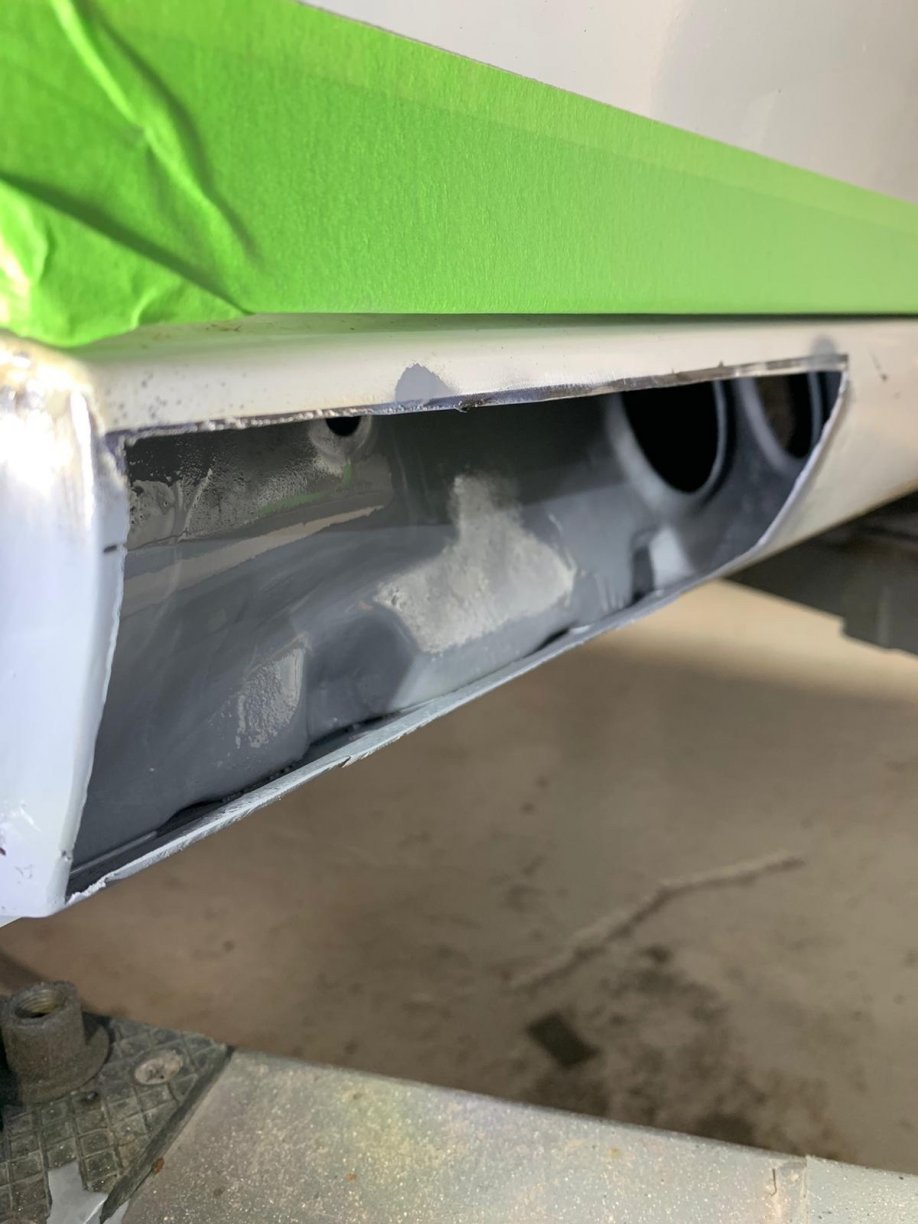
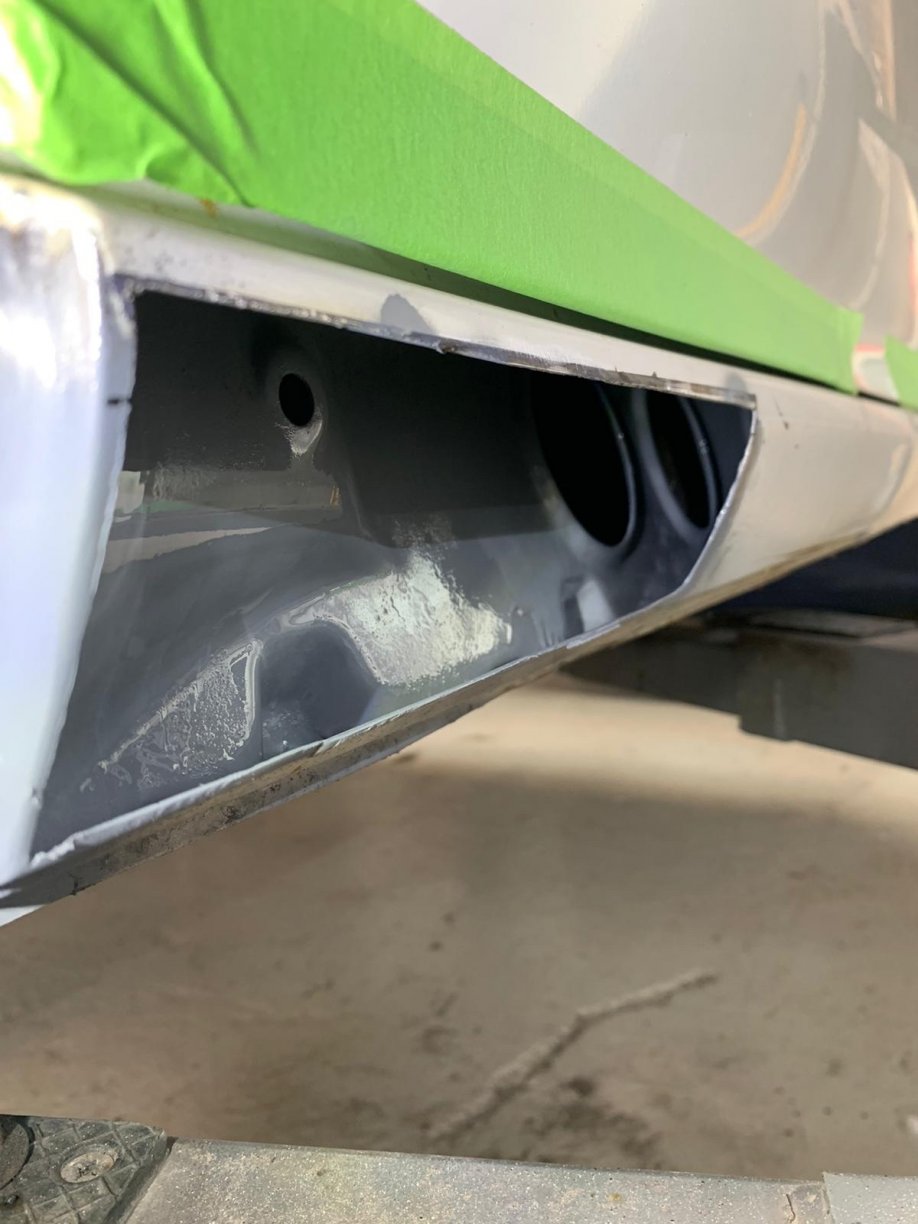
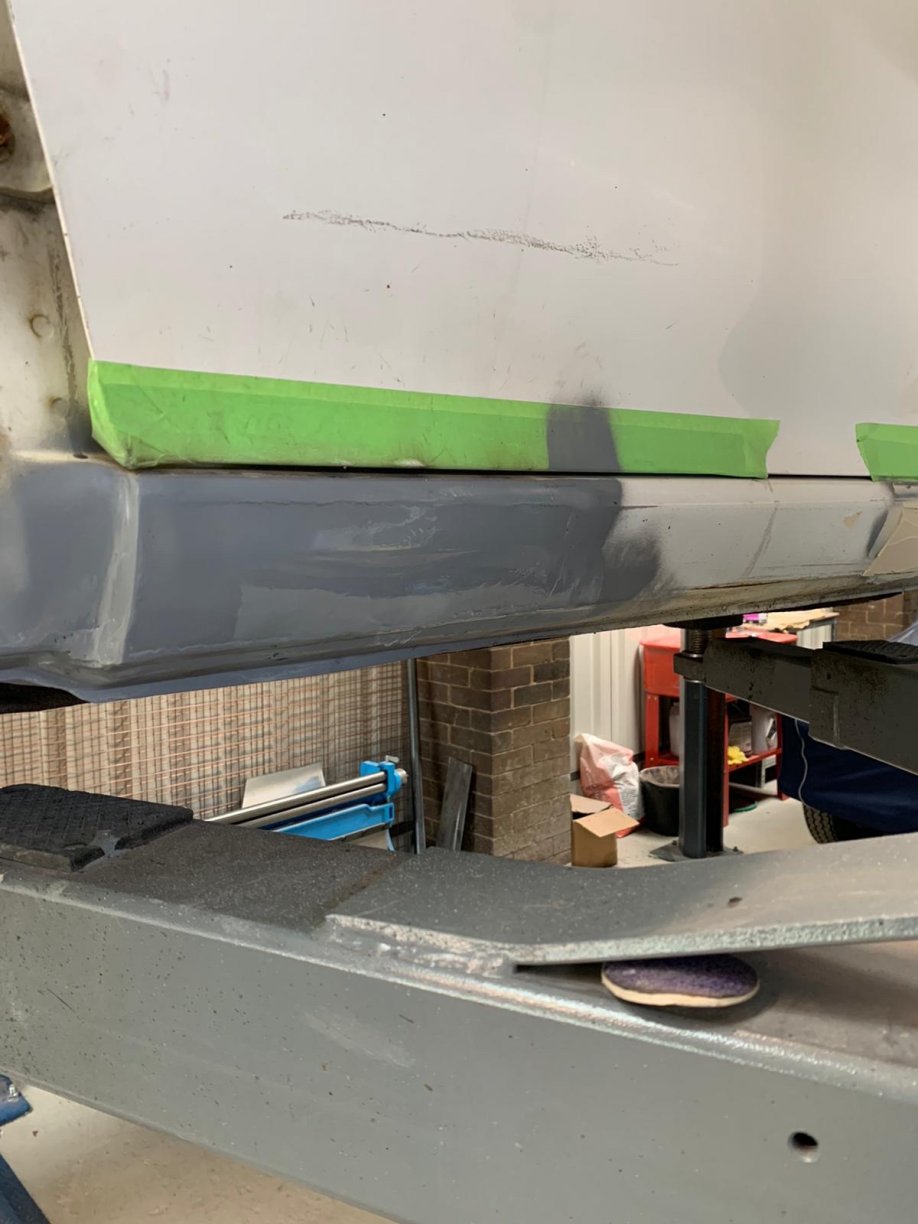
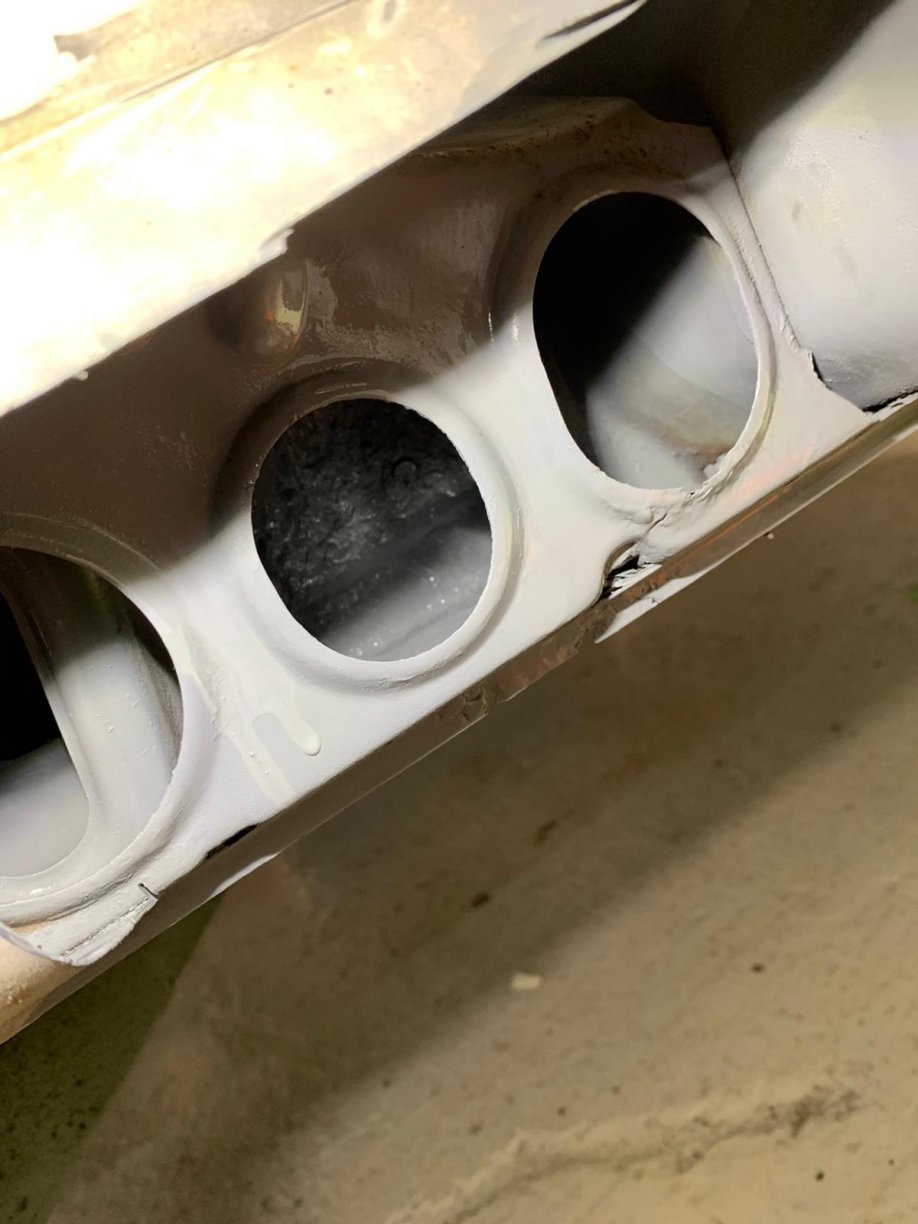
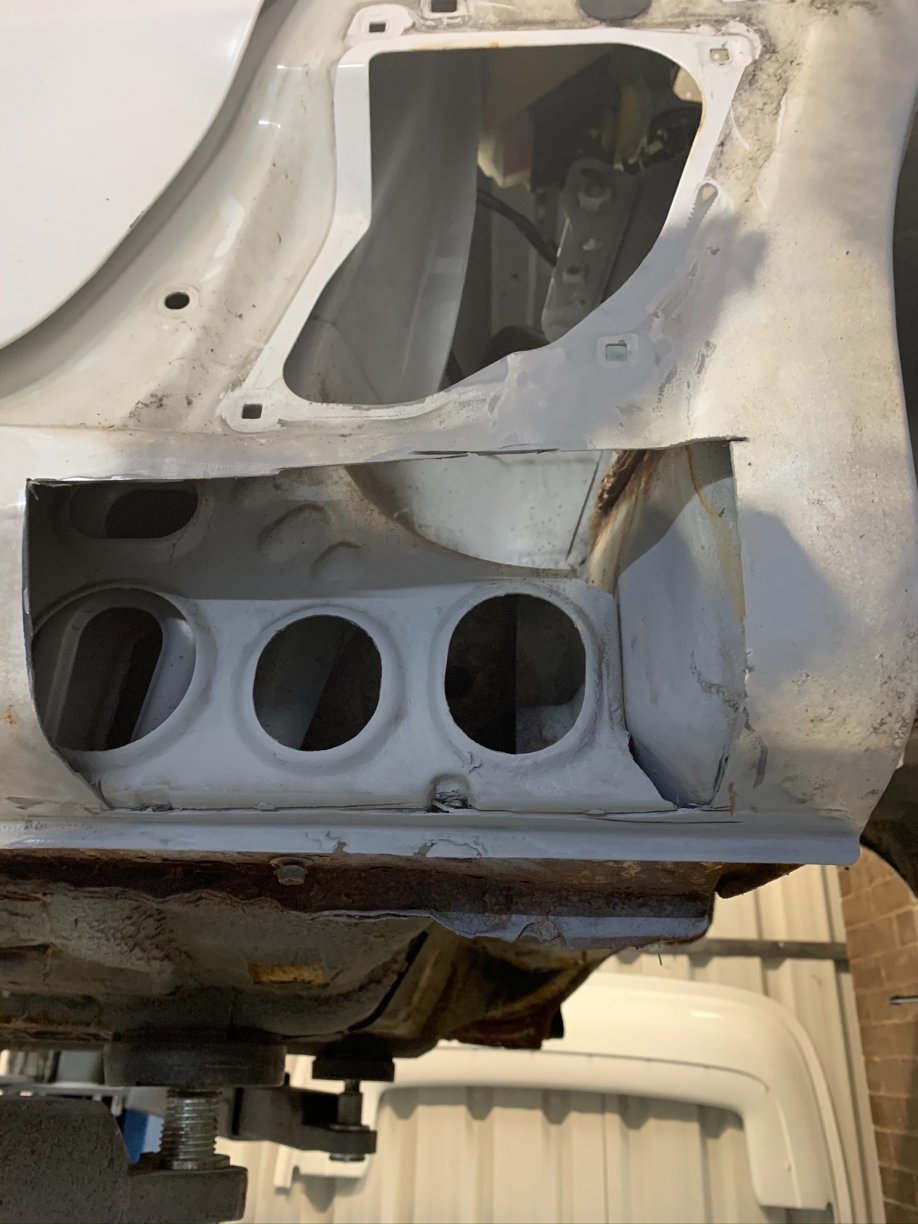
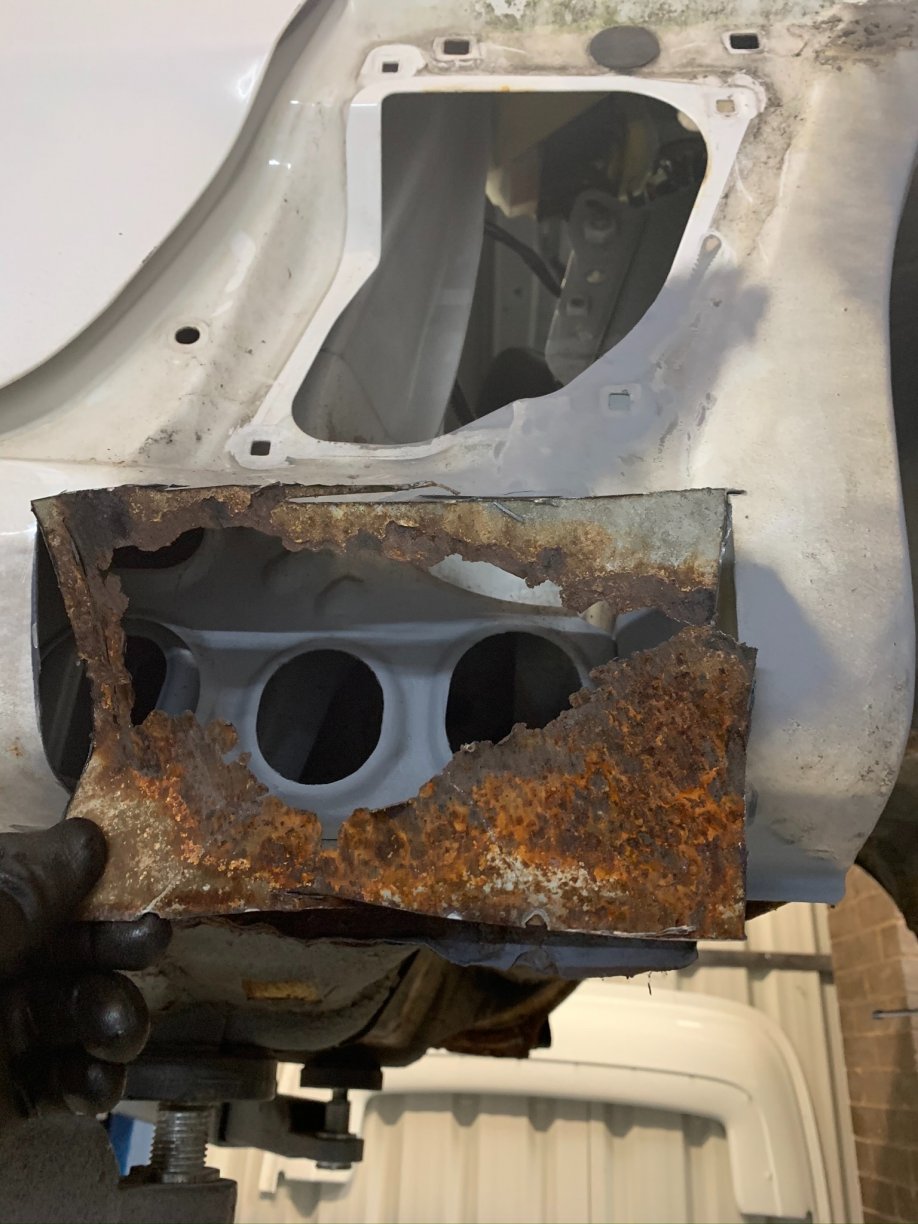
Okay so sticking with the metal work theme, next up were the Sills and a naught surprise hiding behind the OEM side pod that left me thinking “Strewth” can you guess why . I’ll update this post with more pics, that’s lunch over... Here’s a closer look at the problem section behind the side pod. Perhaps a rare factory double air duct option . All the surface rust on the inside was taken back to the metal and treated before the rust proof primer went back on. Martin invited me up to check the box sections and the inner structure to be sure that I was happy with the rescue work he and the team performed. There was also some surface rust on the rear arch vent section, you can see a run from the top right side of the cut, this was also taken back to see if anything was requiring a fix, at this point I was happy to sign off on most repairs as I was confident it was not being over looked. The rusted outer sill cut out, looks a little Australia , almost as big also . Where it belongs. Just after the cut out was performed, offending scrap on the floor. The new metal cut and shaped to follow the original lines, this pics shows it being held in place with magnets. Once happy, Martin tacked the new metal into place. Fully welded now, and ready to be smoothed in with a grinder Rust proofing on top, and then a light skim over in the last pic.
-
I’m sure this one is probably a little more crusty than the general supra population, but there will be a few horror stories hiding behind things like OEM skirts in the years ahead etc. He is really busy all of the time, understandably so, very talented and down to earth.
-
Certainly agree, never seen anything like it on any of my Supra’s. I really don’t like breaking a good car if it can be saved. I have broken a TT6 around 6years back, but I was always buying that as a parts car and bought it already crashed. This on the other hand was in need of some love . funnily enough I’ve kept the stripped shell and will be recommissioning it at some point in the future for racing, so it’s not a total loss. Honestly once I saw what light work Martin made of that section, I knew anything was possible and it really got me fired back up and interested in the push to make it right. I’m also amazed at the way Martin managed to repair this, and how relaxed he was about tackling it. I’m sure he’s seen a few challenging jobs over the years whilst working on E-Types and other various classics. It was great to see he had the love for the Supra, as when compared to some of the metal he works on, the price and rarity factor of the other cars far outweighs that of the Sup.
-
Martin reckon it was the split grommet that let in the water, this water he believes collected or was absorbed into the headliner and over the years it’s caused the issue. I had this particular car parked on my parents drive as I didn’t have space at my house. Their drive is sloped and the car was reversed onto the drive. My theory is that the water has collected in the at water channel due to the passenger side nose being angled down and to the left with the gradient of the drive. That coupled with the split grommet, and that square patch we had cut out, all kinda made for a good recipe for corrosion. This car lived in Aberdeen with the last owner, and my parents also live not too far from the sea, so that’s air can get to the best of cars. Thats my 2p’s worth anyway .
-
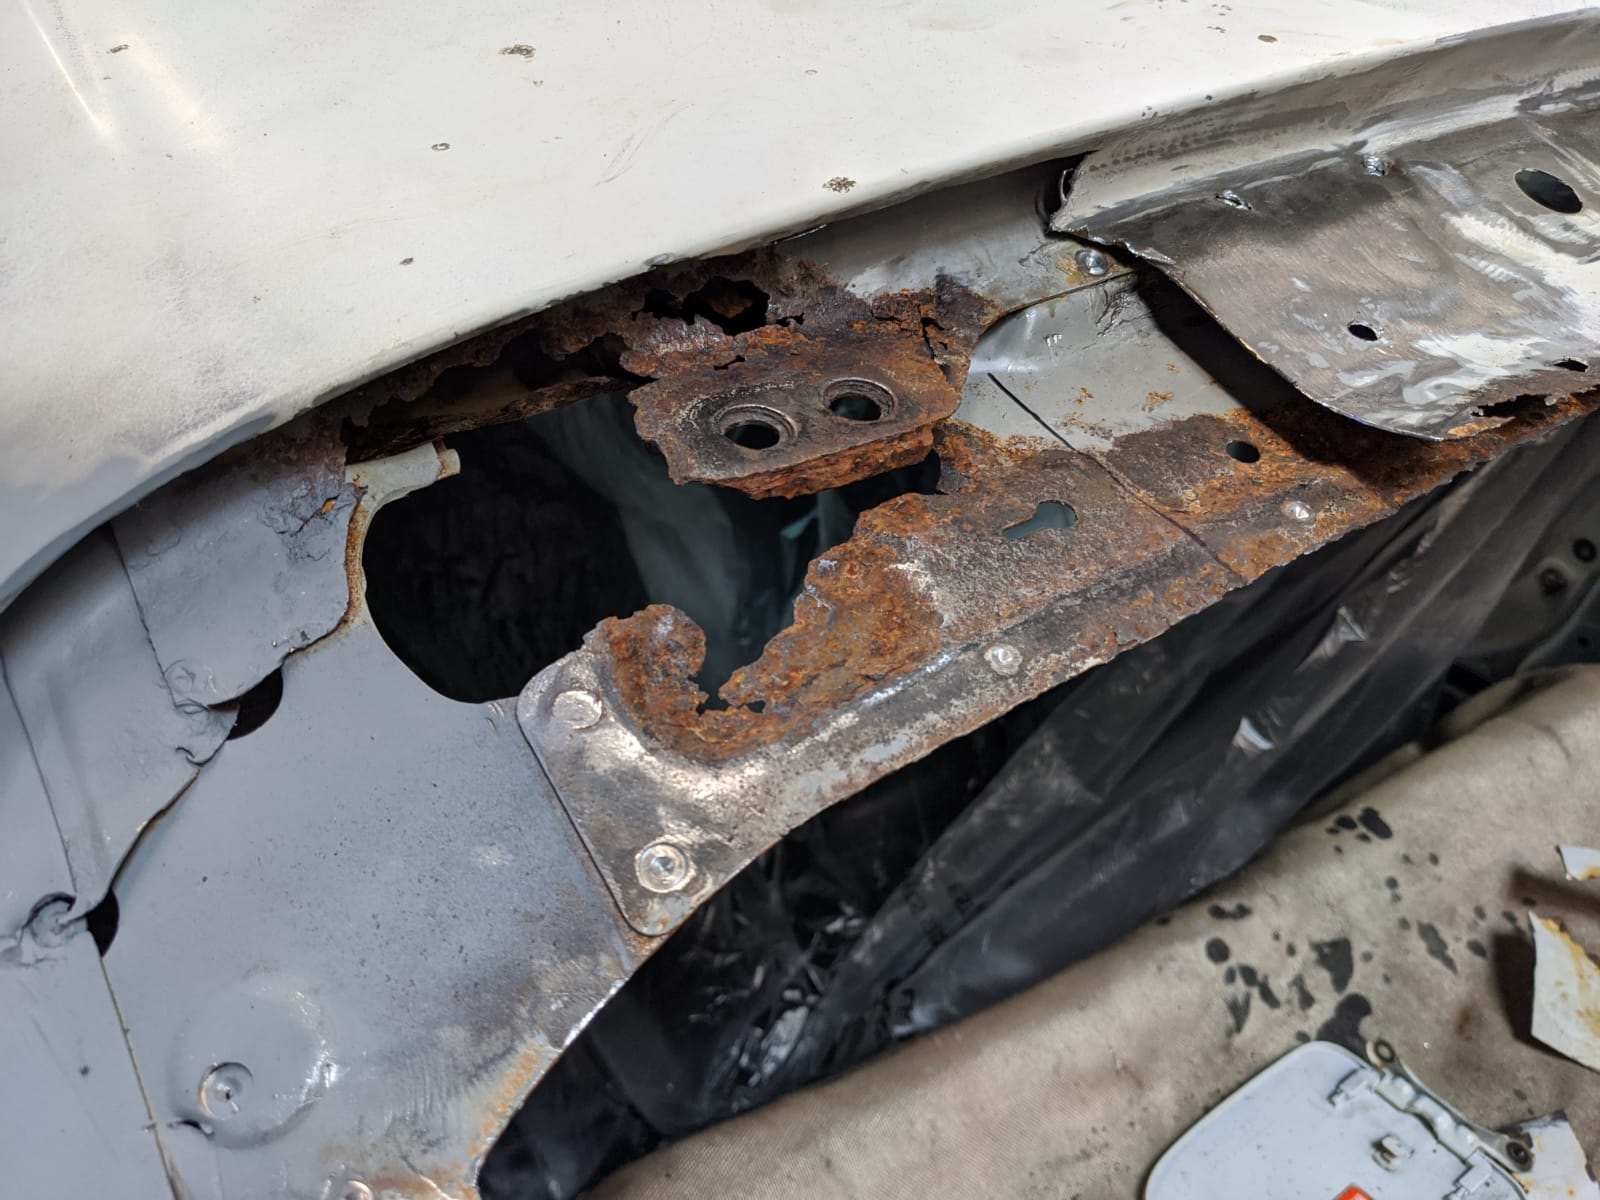
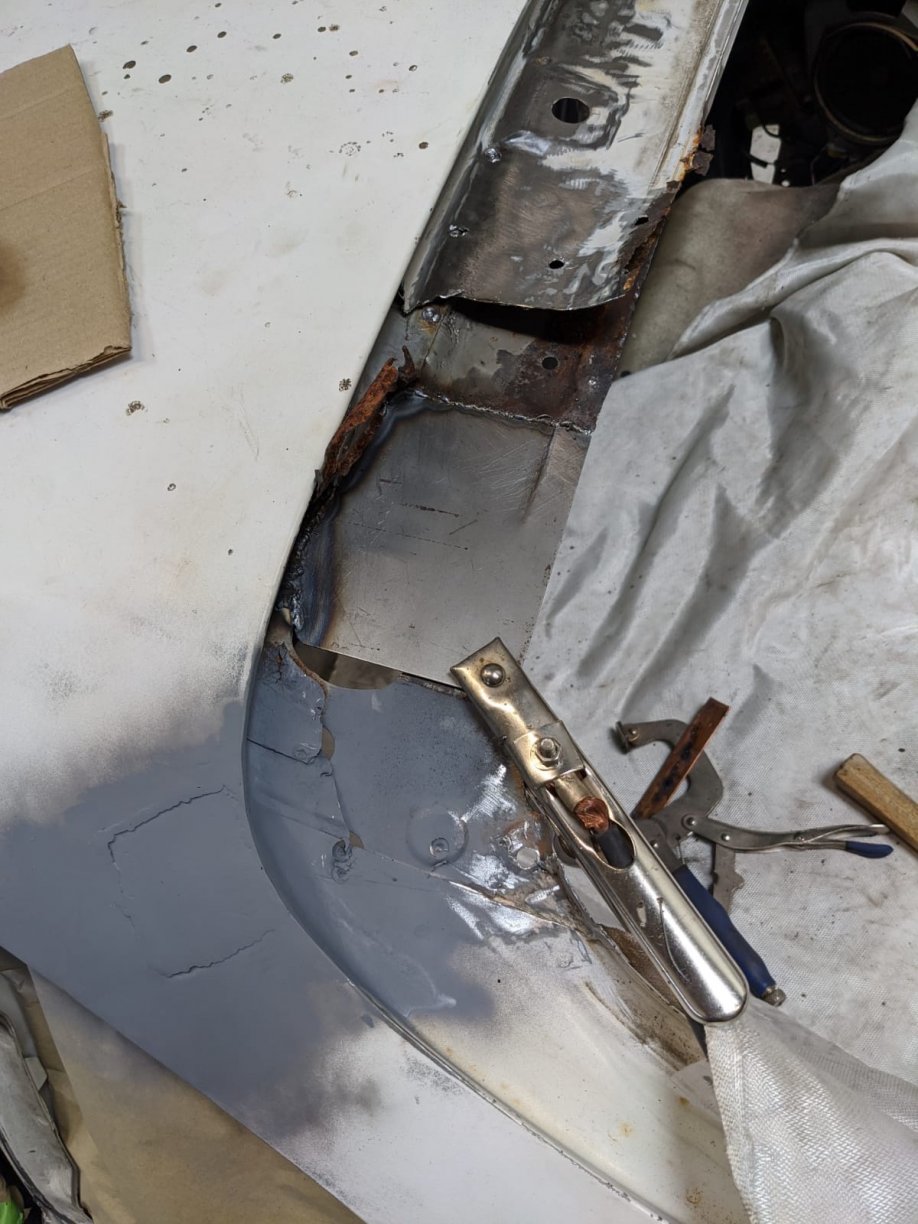
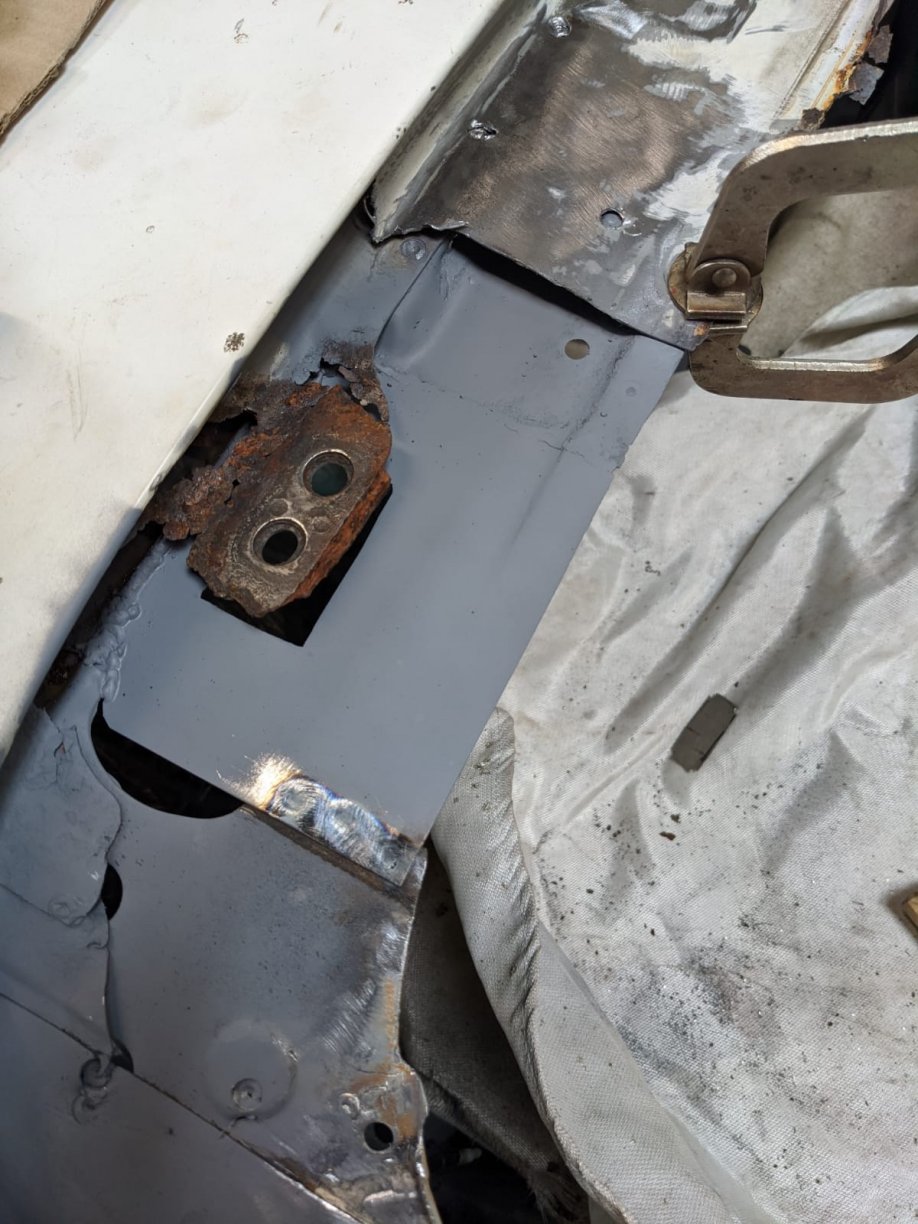
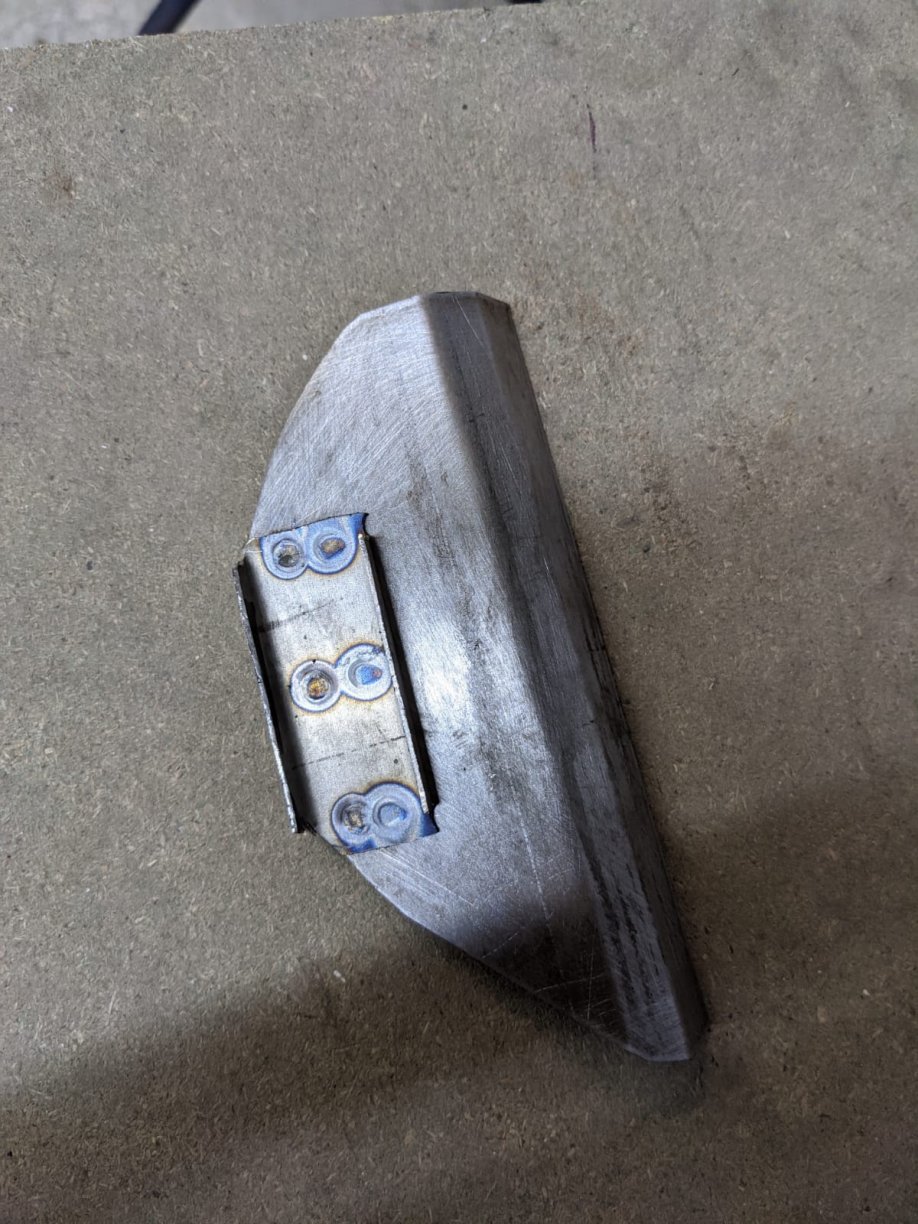
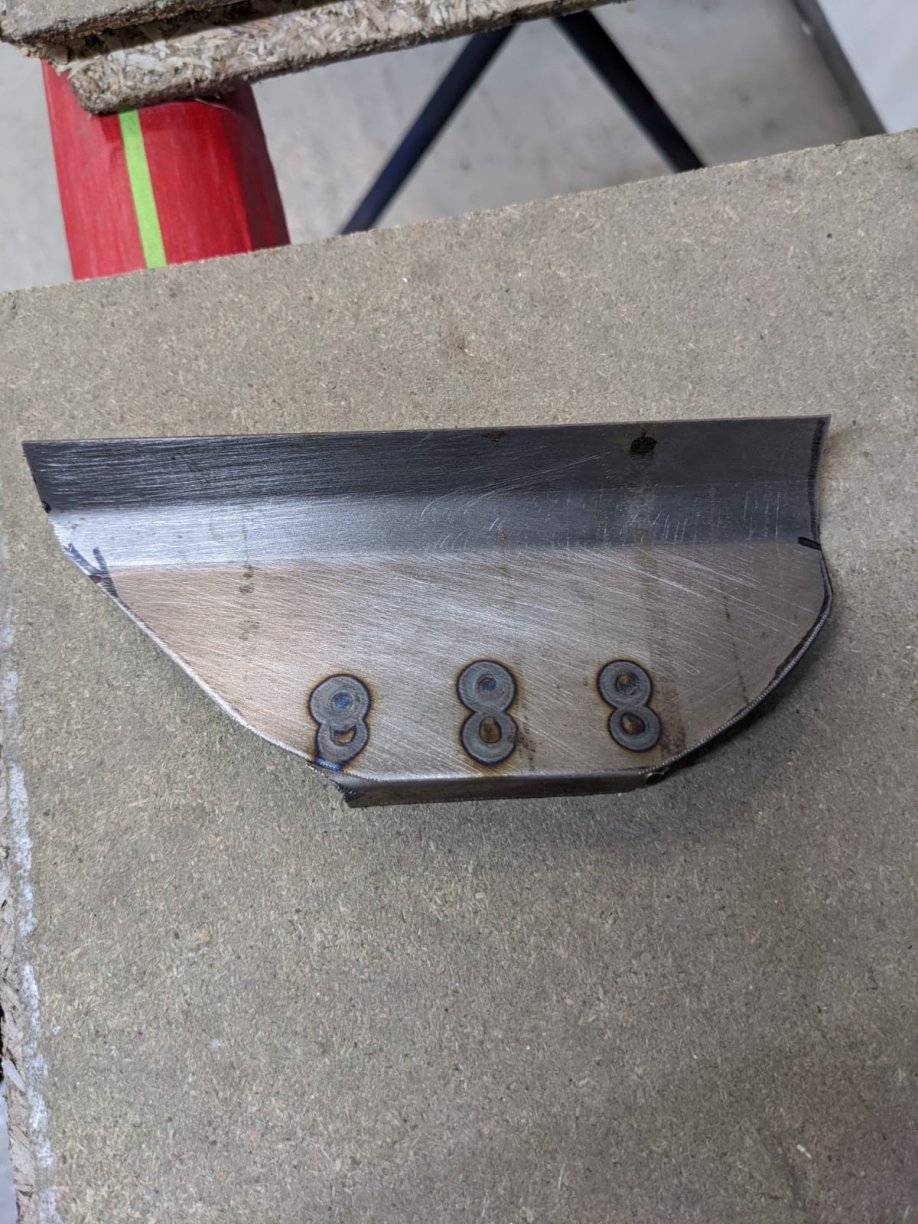
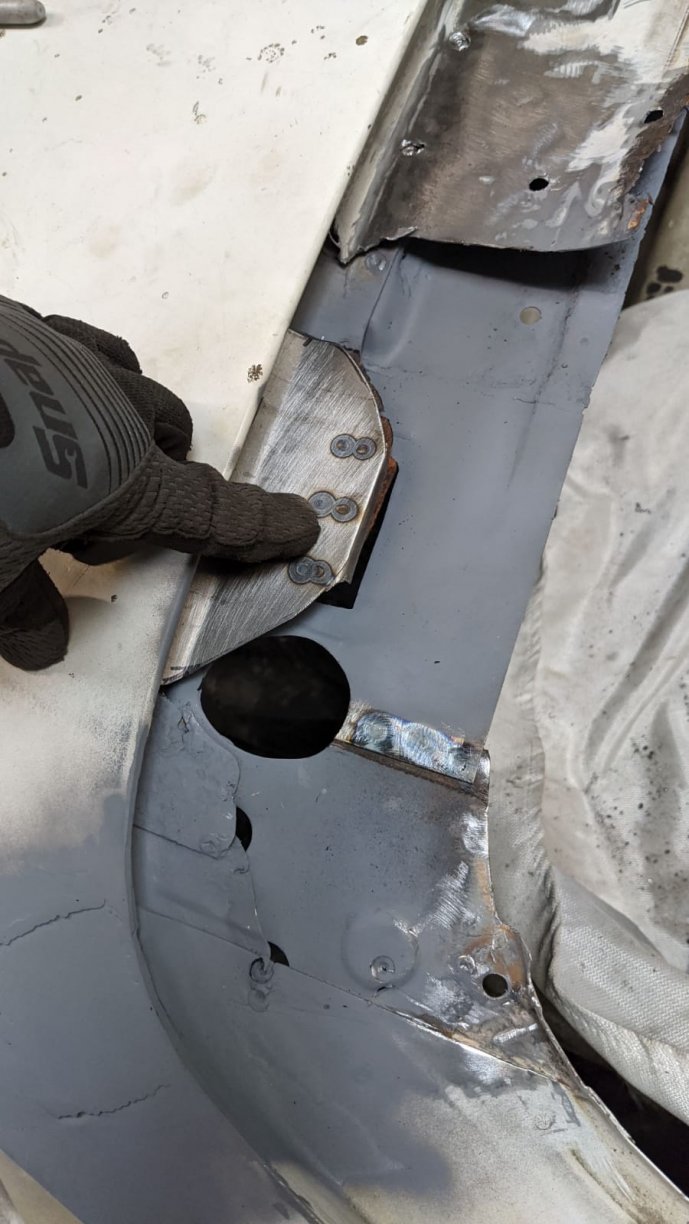
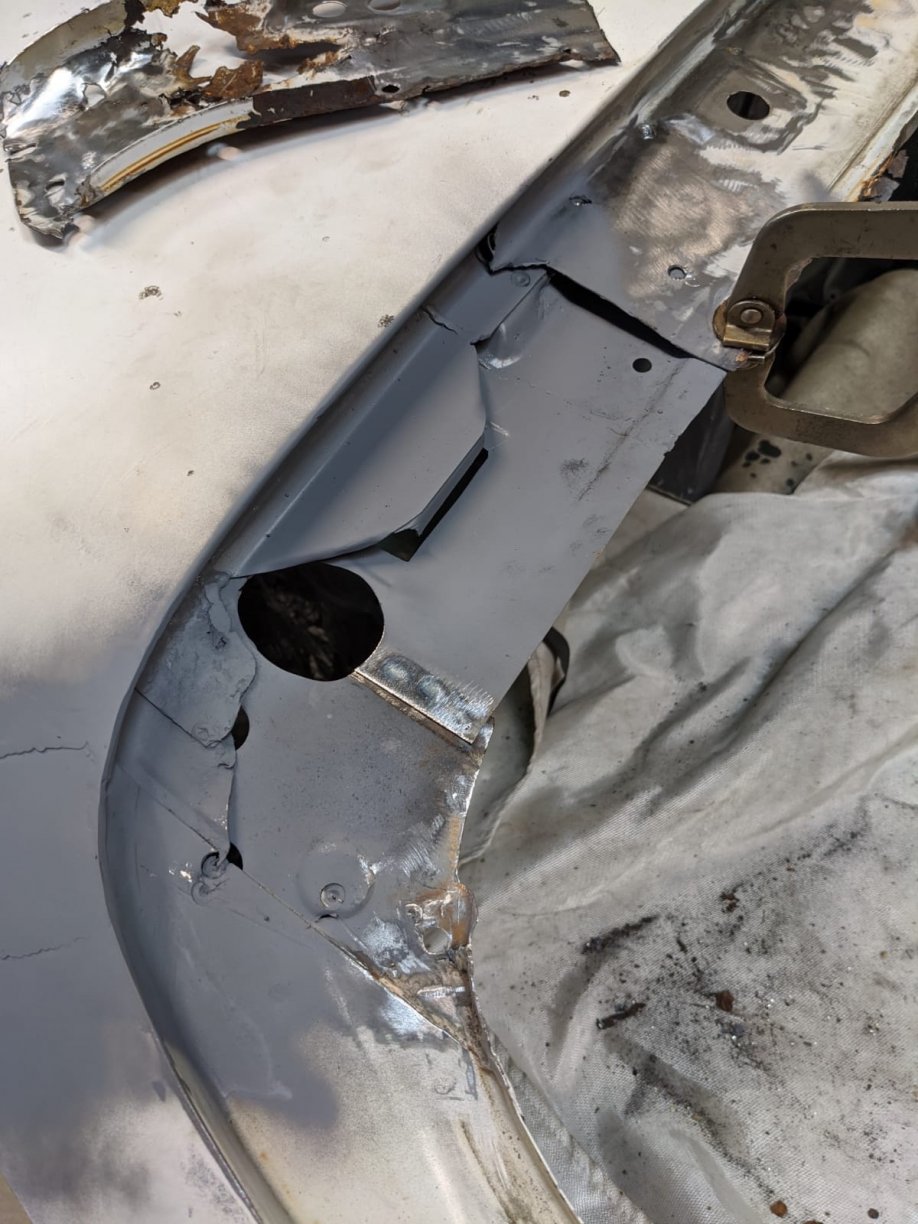
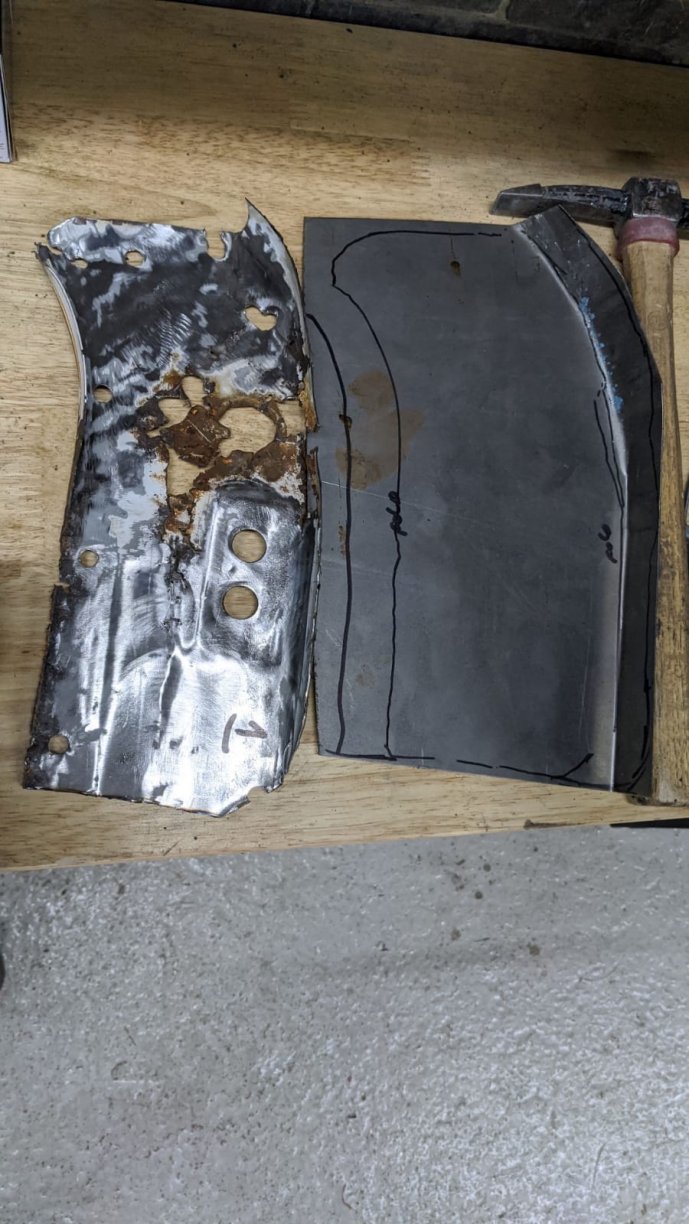
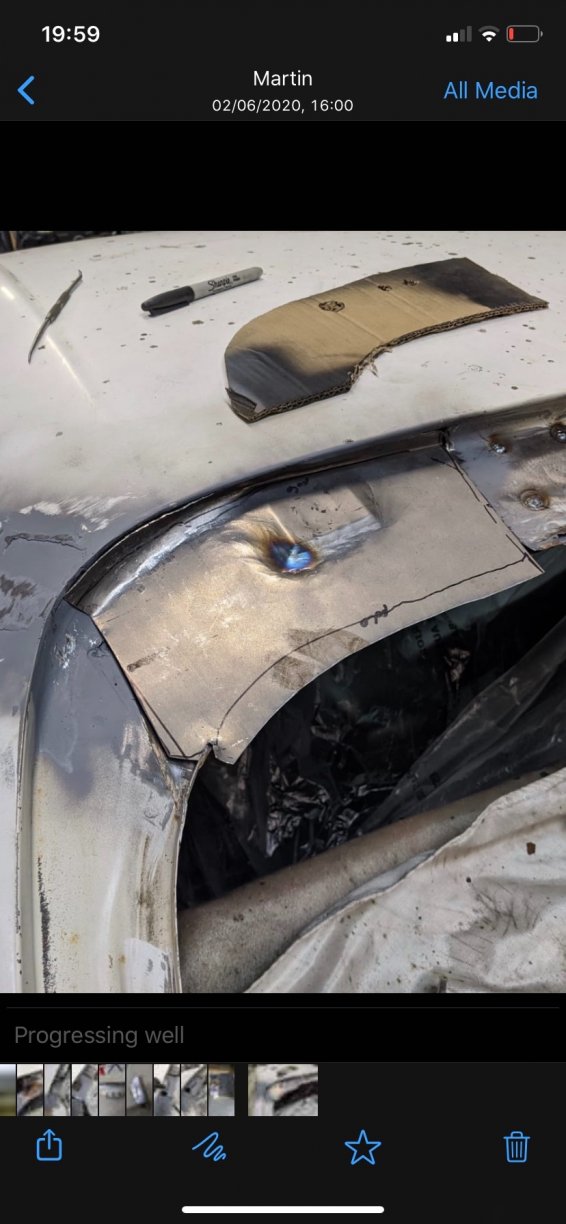
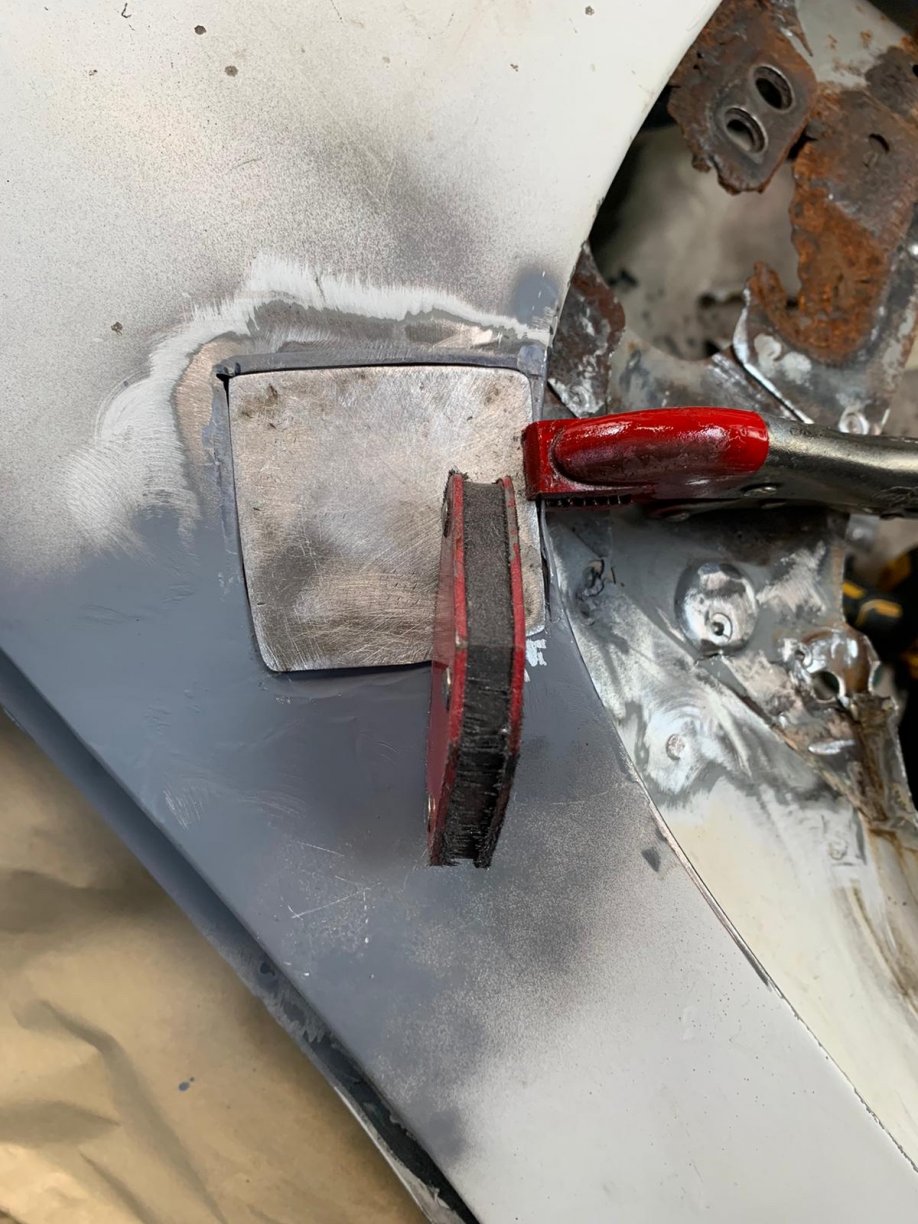
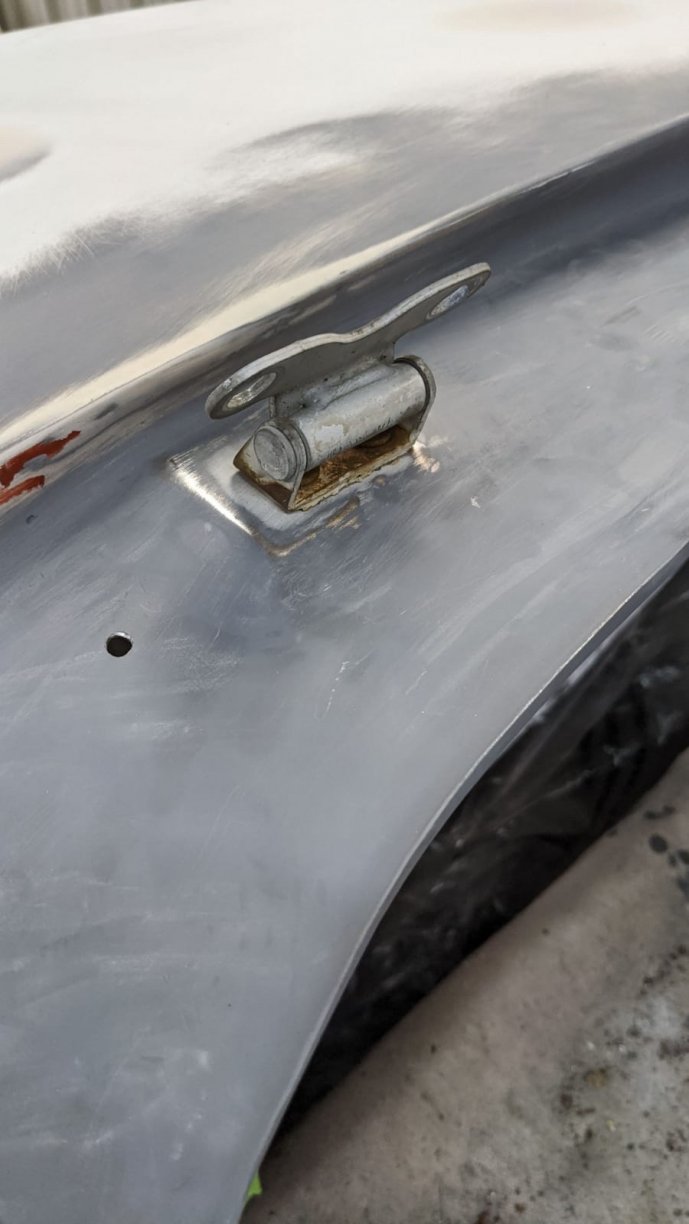
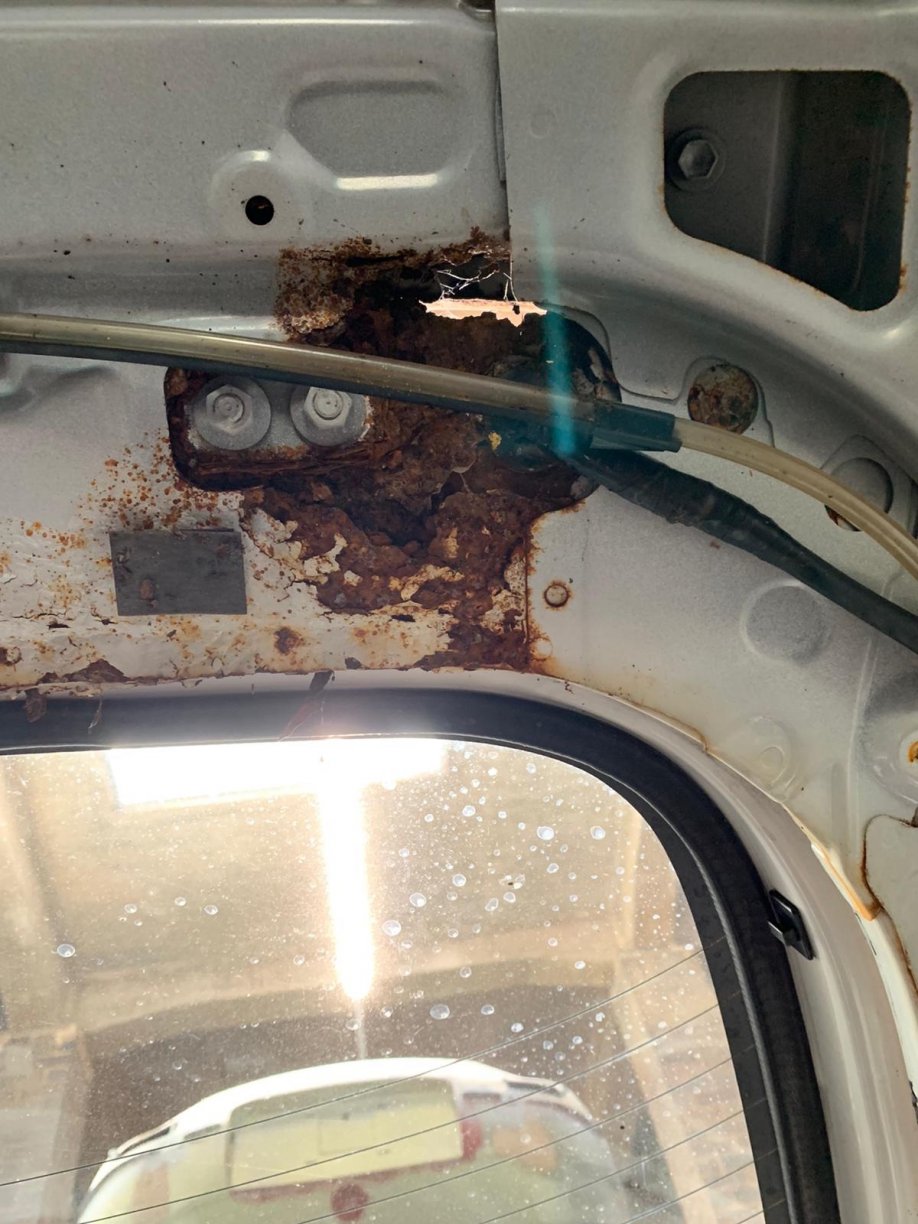
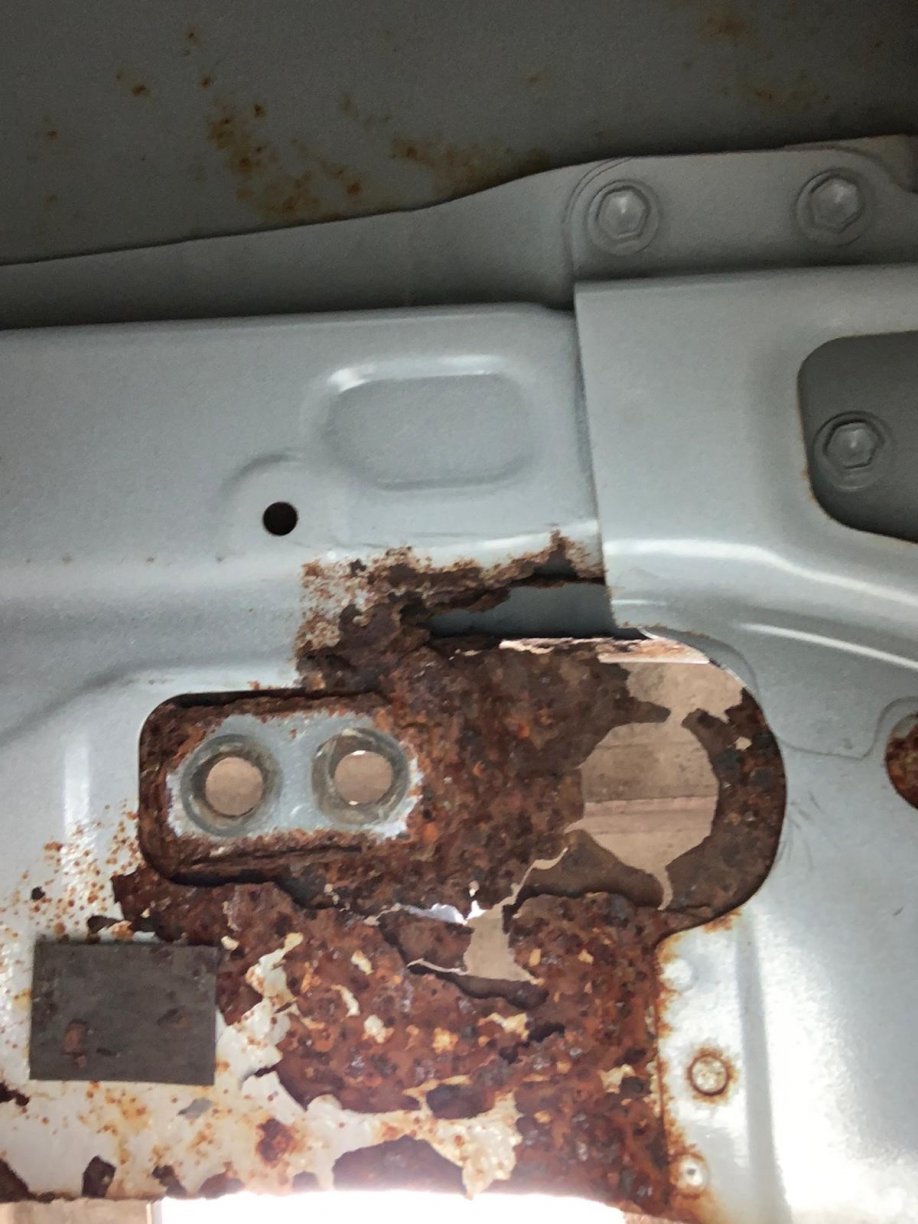
Okay so the hinge was left to team ML to work out, I can’t profess to being involved with anything this skilled. Once the hinge section was stripped back, Martin marked up the section to be cut, and made a template of the original position. This would obviously have to be very accurate as otherwise the boot would bot align correctly. With the old metal cut out, the lower section plate was offered up and tacked in place. There are other pictures of the process that I’ve missed out but this give you a good idea of the layers. Next up the mounting point was positioned to check that the correct position was created. Martin did a fair bit of this in his head and I came up to watch him at work, and the guy was as cool as a cucumber. Me on the other hand, I was ready to call Keron for an uplift . Next up was the new mounting point, this had to be strong and the metal used was a lot thicker that the section below it. Martin luckily has just taken delivery of a much more industrial scale guillotine which helped with the thicker material. New mounting point ready to weld in, Shapes and welded in place. Etched primer applied on each section. Metal cutout from pic one used to make up the third and final piece with is the overlay section/water channel. New section offered up and shaped before being welded in place. Nice little shot of the cardboard template above and the new panel below. This was the patch that had rusted on the roof section, it was cut out etched, and a new piece of metal was welded in. Old hinge used for the last time before being retired. Replaced with a good used spare.


-
Thanks Dunk I’ve got loads of updates just finding the time to upload them is proving difficult .
-
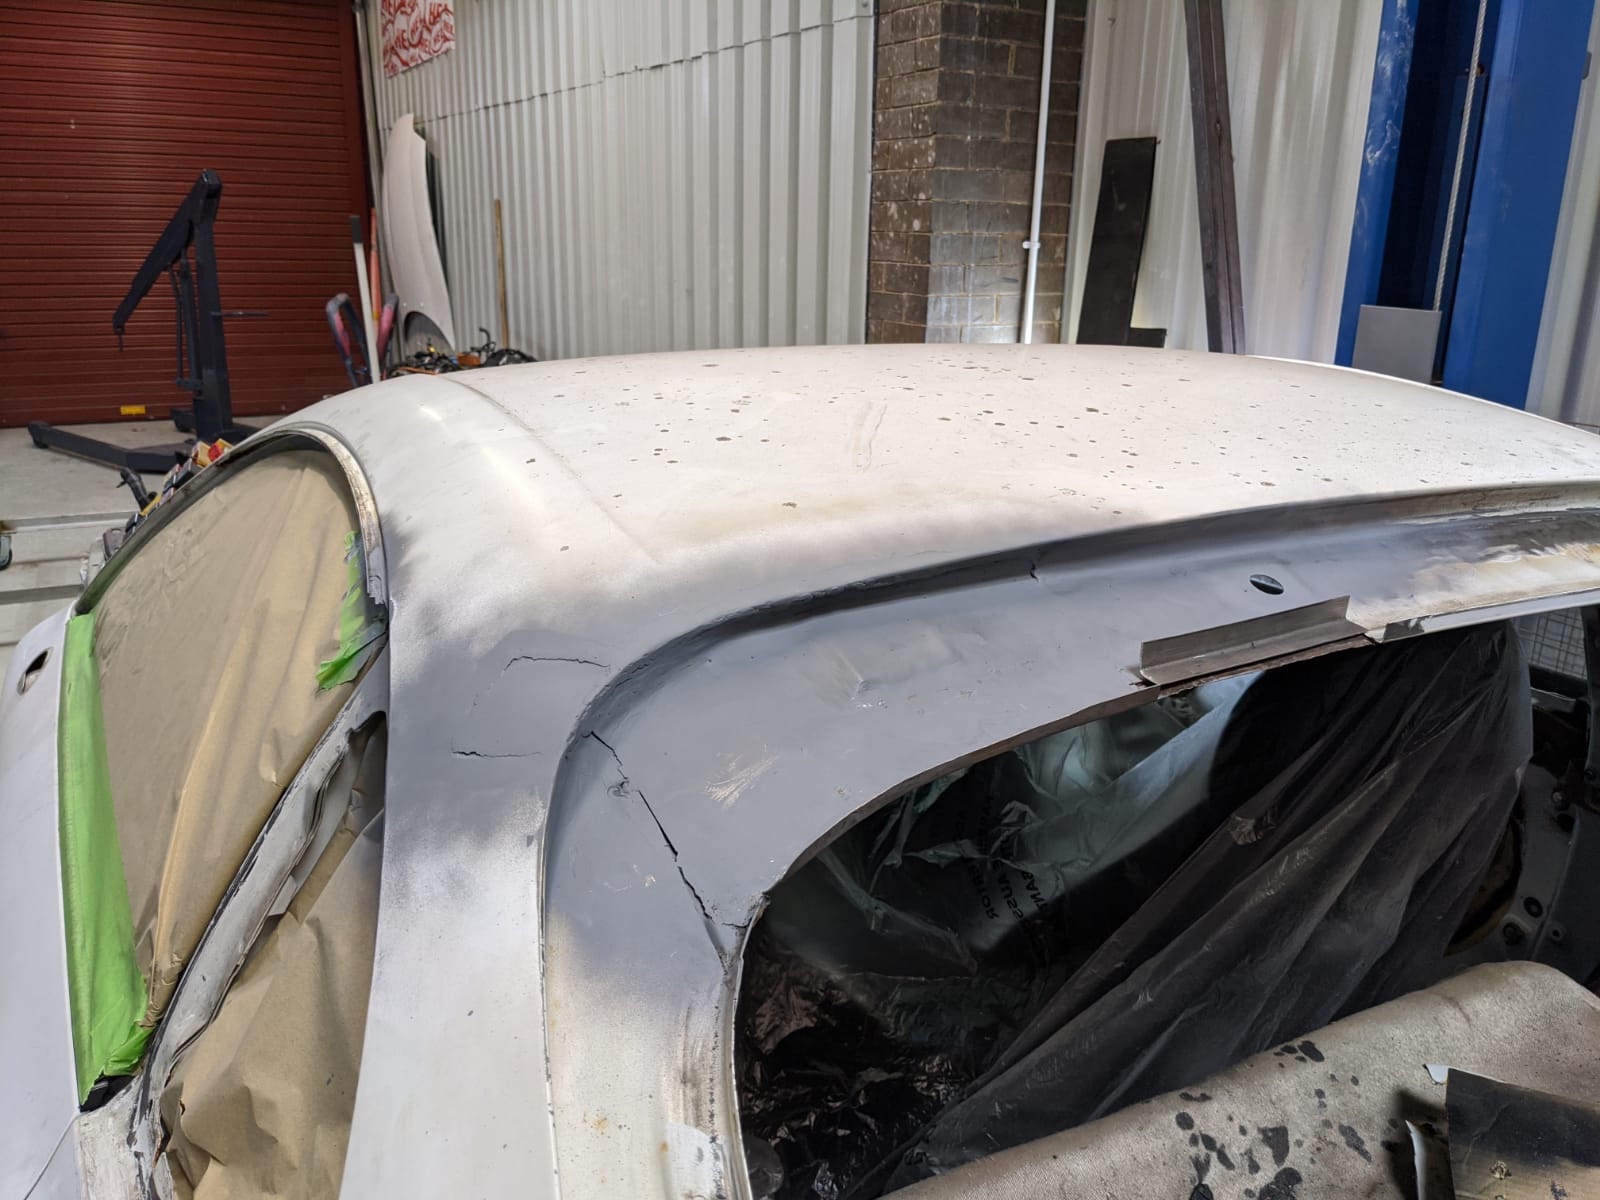
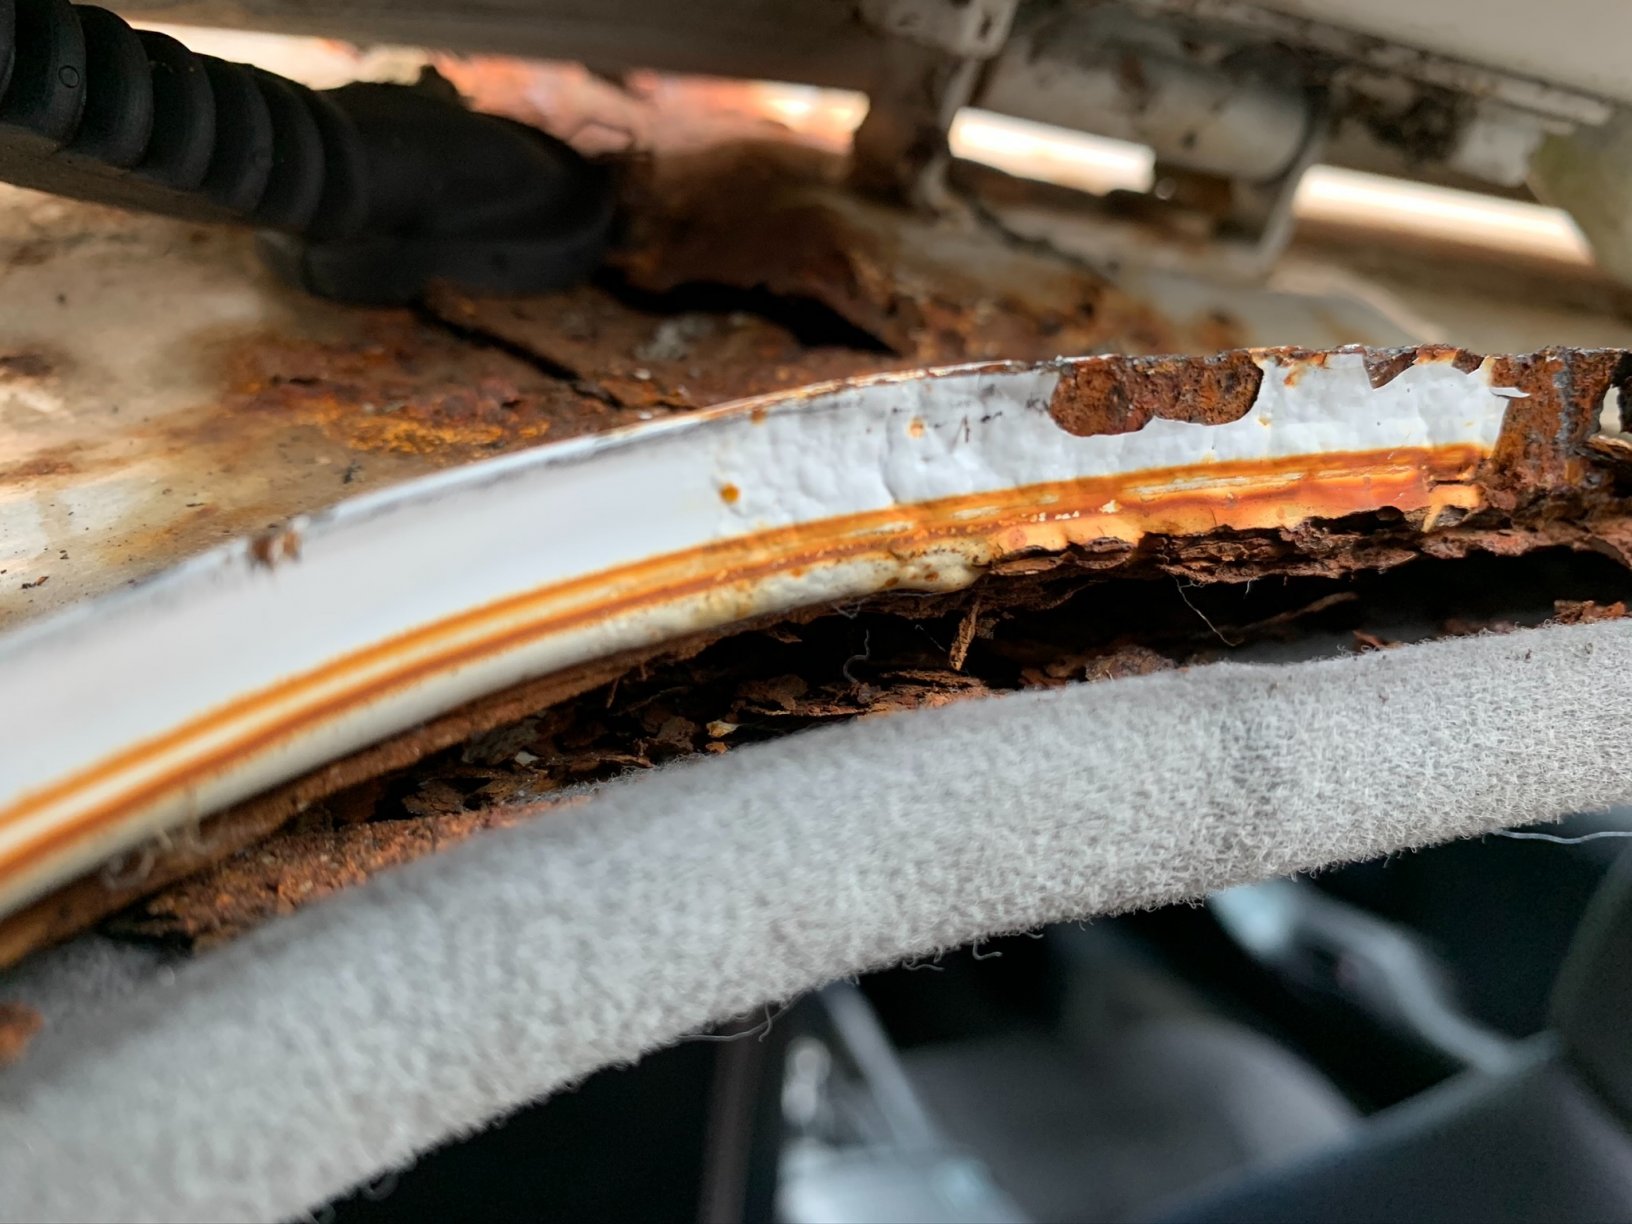
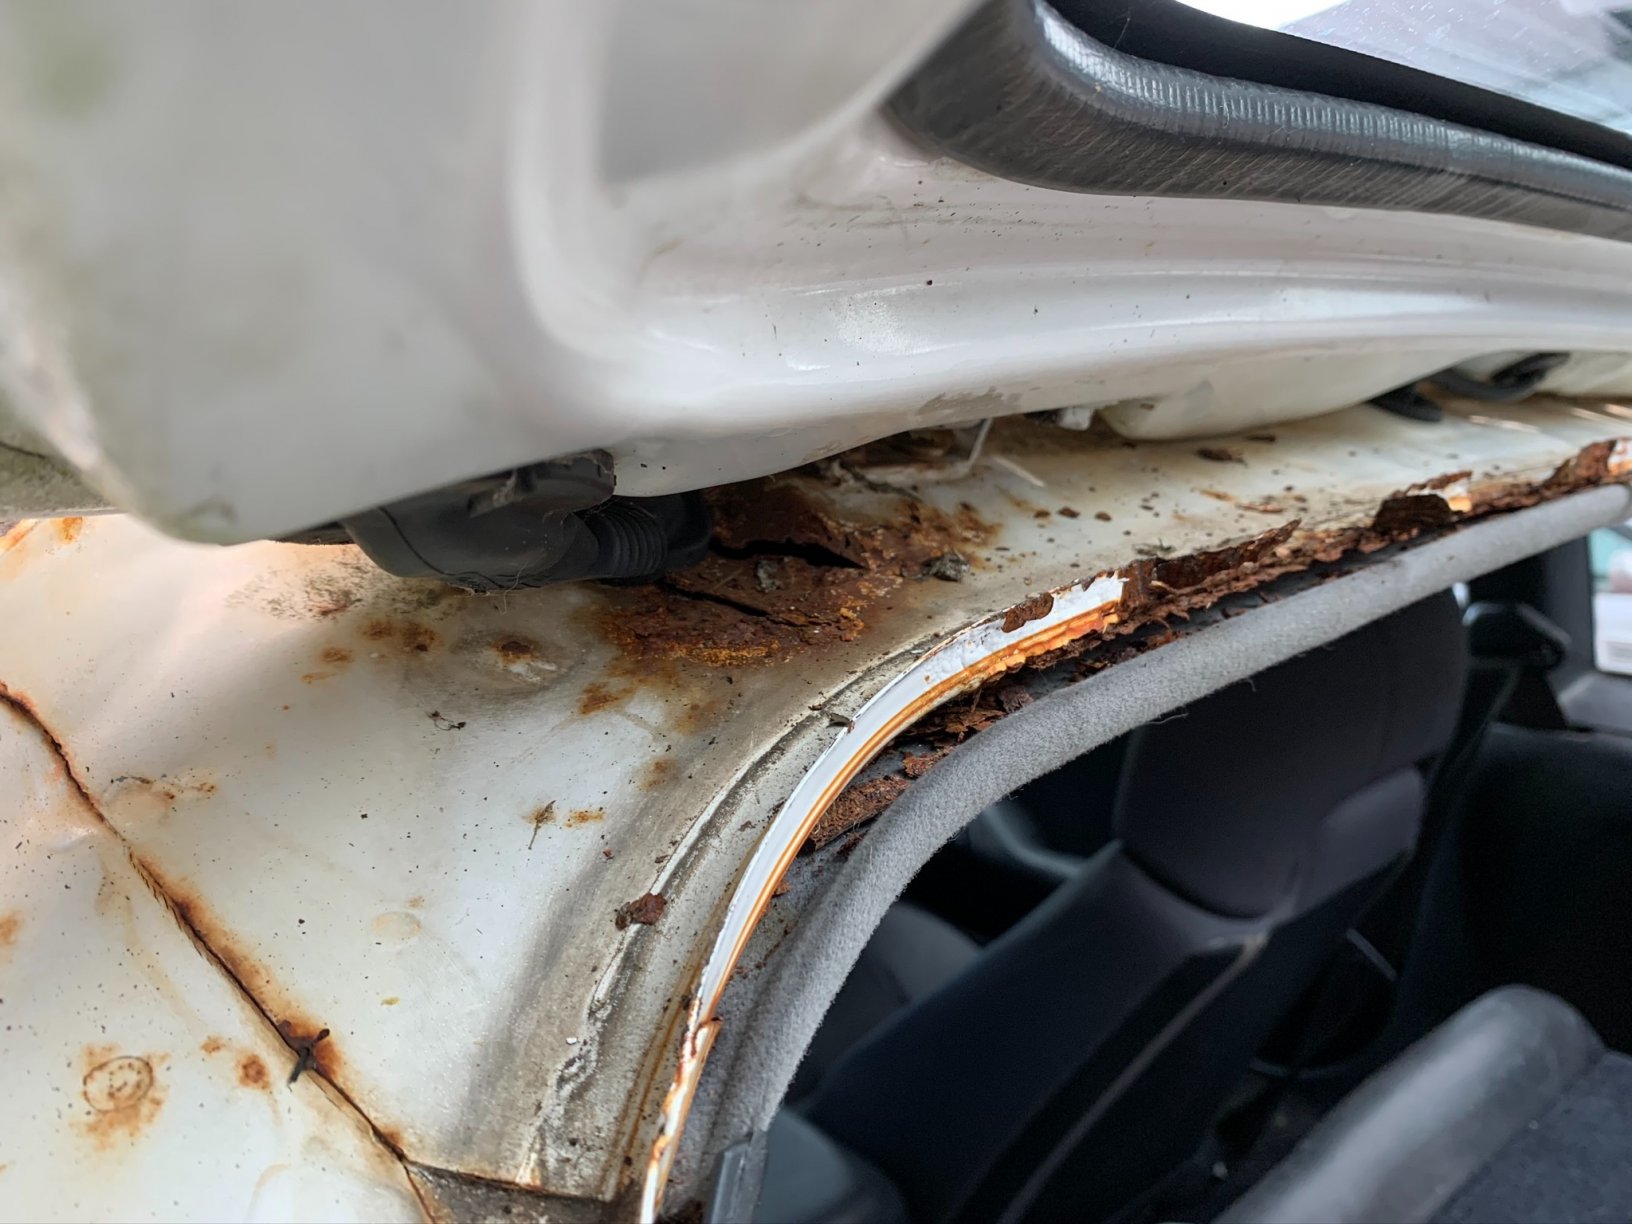
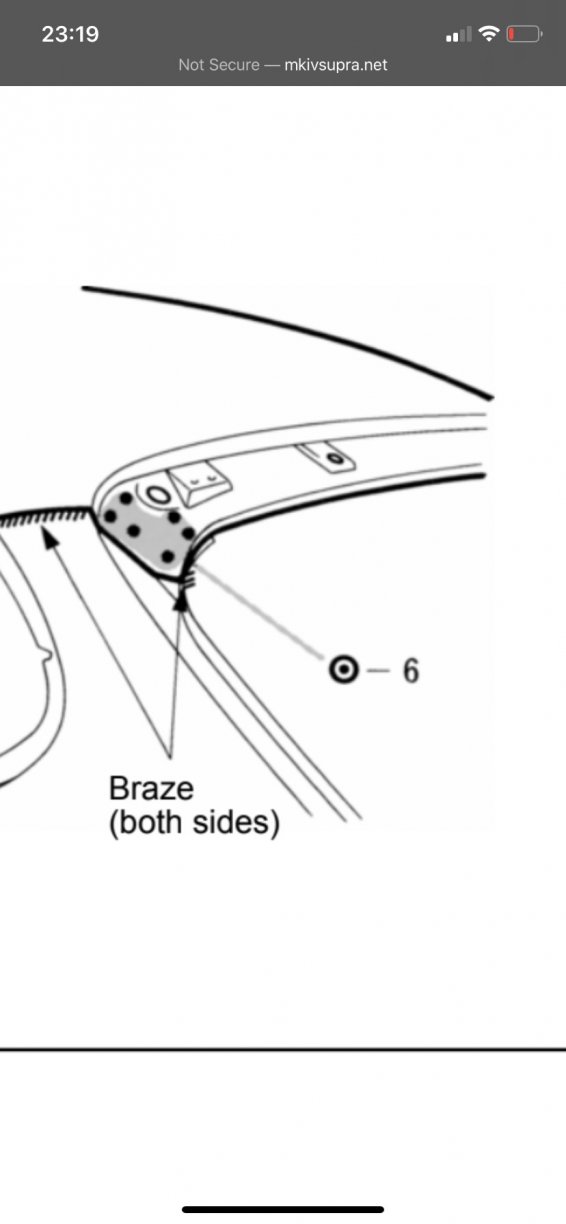
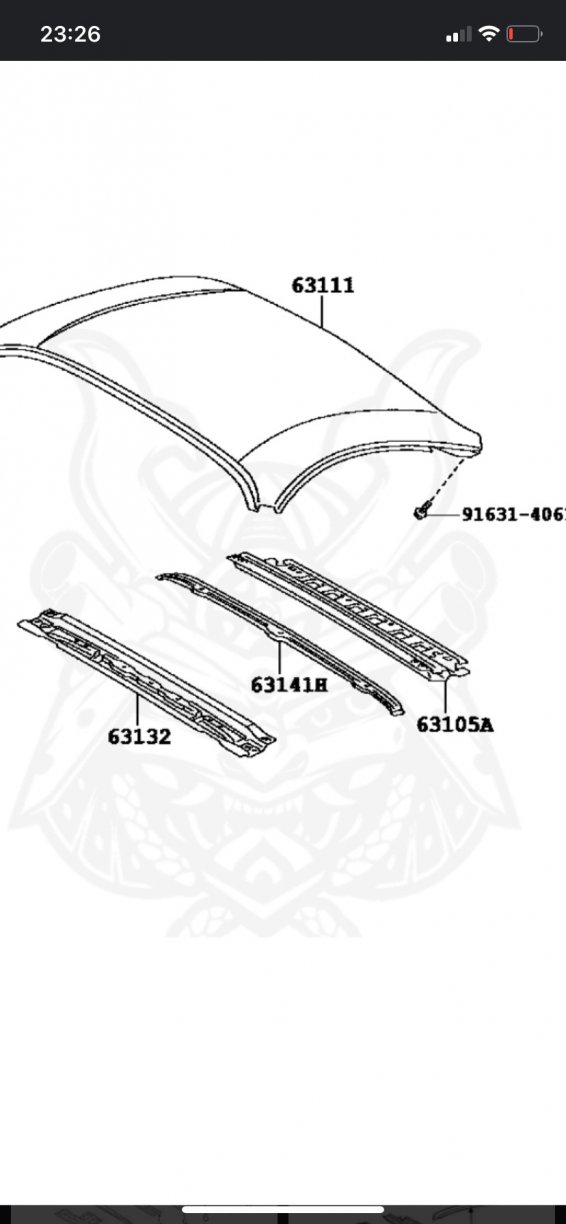
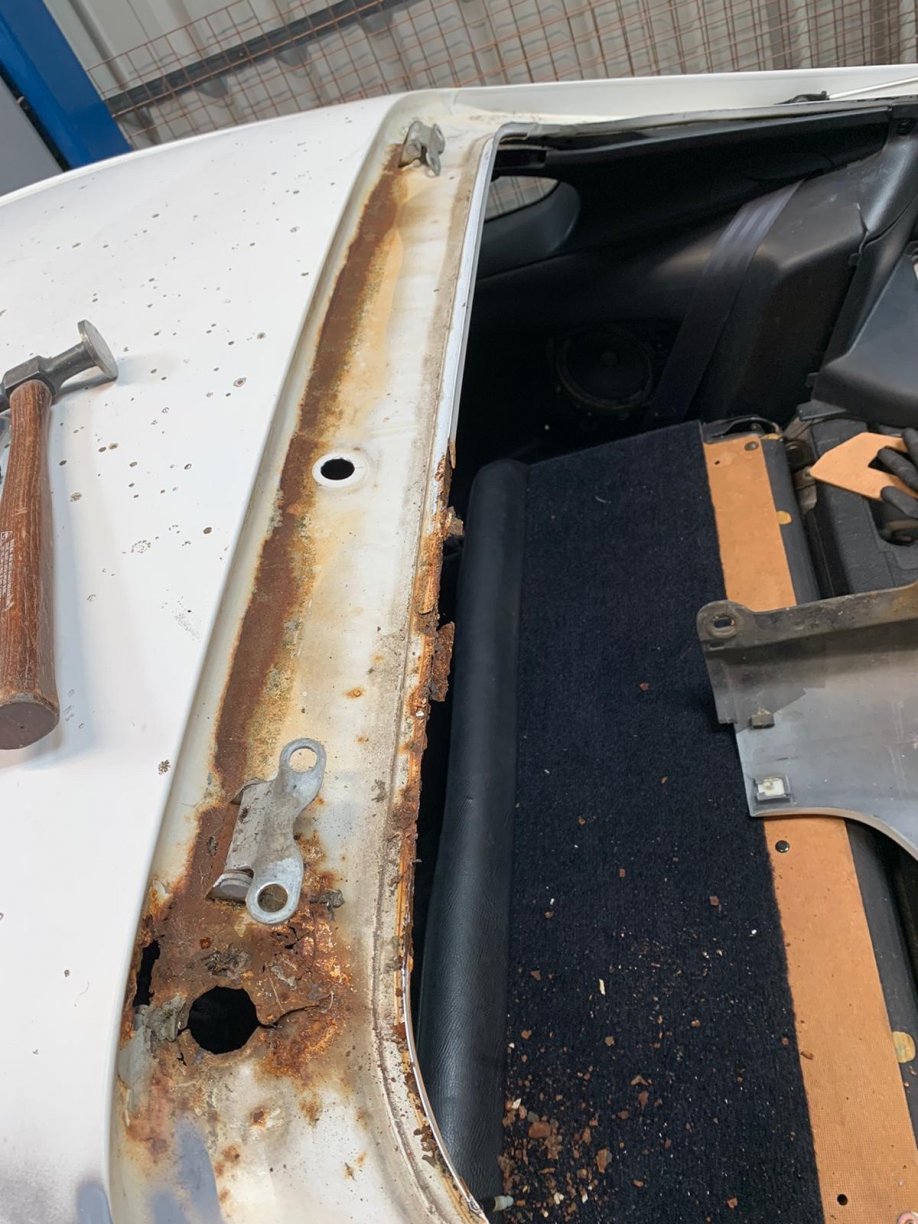
Okay so moving along to the repairs to the bodywork, and the most challenging section of the refresh. lots get right in to that problematic roof section, as you’ll recollect the passenger side hinge section looked very dubious. quick reminder of what we were working with: next up was understanding the standard frame/structure configuration, luckily the EPC is handy for explodes diagrams of the sections. After some digging I located the following to supply to ML. Then the stripping back was performed, to reveal the true extent of the damage. Fair warn it’s not pretty Rear hatch removed and rubber split grommet removed also, this is what it looked like. We can see from the picture above, there was also light surface rust on the rest of the hinge plinth, so the rest was taken back to the metal to be sure it wasn’t anything other than surface rust. Now fans of Terminator 2 will remember fondly that the T1000 took a grenade to the torso in the closing scene, this was clearly the Supra’s take on it Searching for inspiration and finding the light. As you can see, rear screen washer hose is holding it all together. This was after the top layer was inspected and lifted to reveal the bottom layer or underside of the hinge plinth.


-
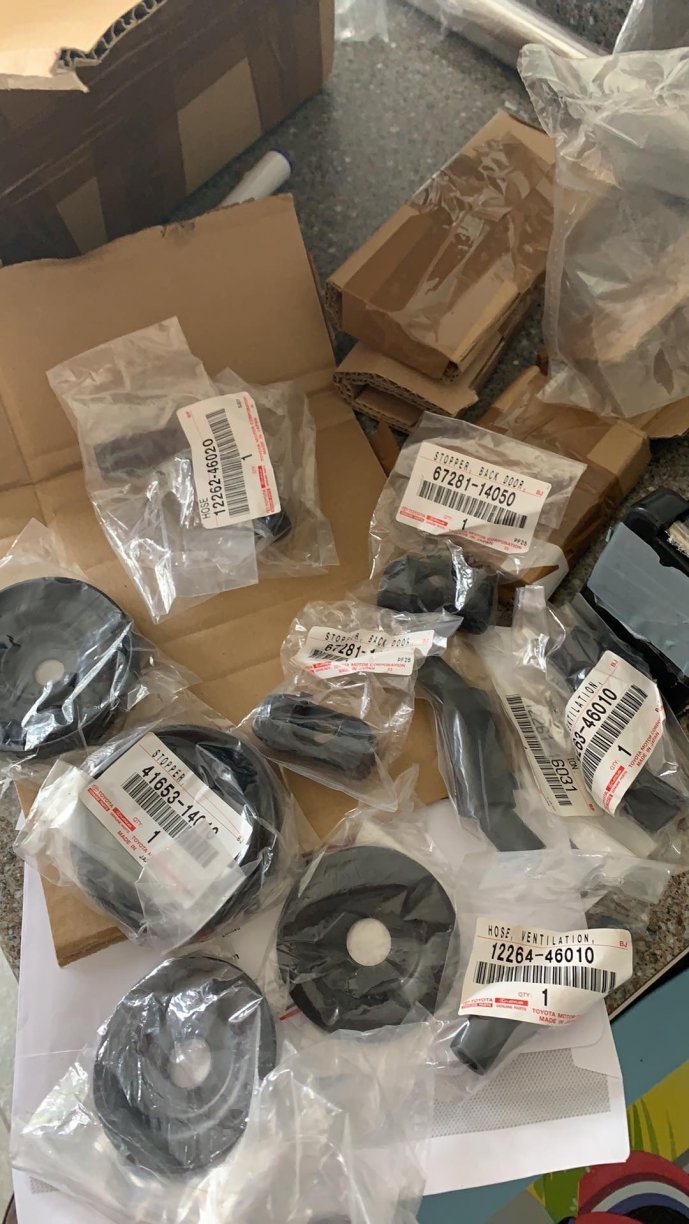
Quick shout out to Paul Pridham @TCB Performance for supplying all the OEM parts for the car. Paul has very reasonable prices and is very knowledgable, I’ve often called him with an elaborate description of what part I need and he usually manages to work out what that means in plain English . I ordered all the windscreen seal, rear screen seal, boot rubbers, various clips, bolts, bonnet catches etc etc from TCB and have always been happy with the prices and delivery.
-
Thanks buddy, I’ll keep an eye out for your thread, hopefully you don’t have as much bother with your car as I’ve had with this one . I agree Herb, really unsure why they also had black centres previously, as it was an unnecessary eyesore. Hopefully we see more threads being posted soon, the new site makes uploading pictures a doddle and I can imagine it might have deterred previous thread starters from posting. Mawbs certainly delivered . Metal work is up shortly, as well as the underside clean up so stay tuned.
-
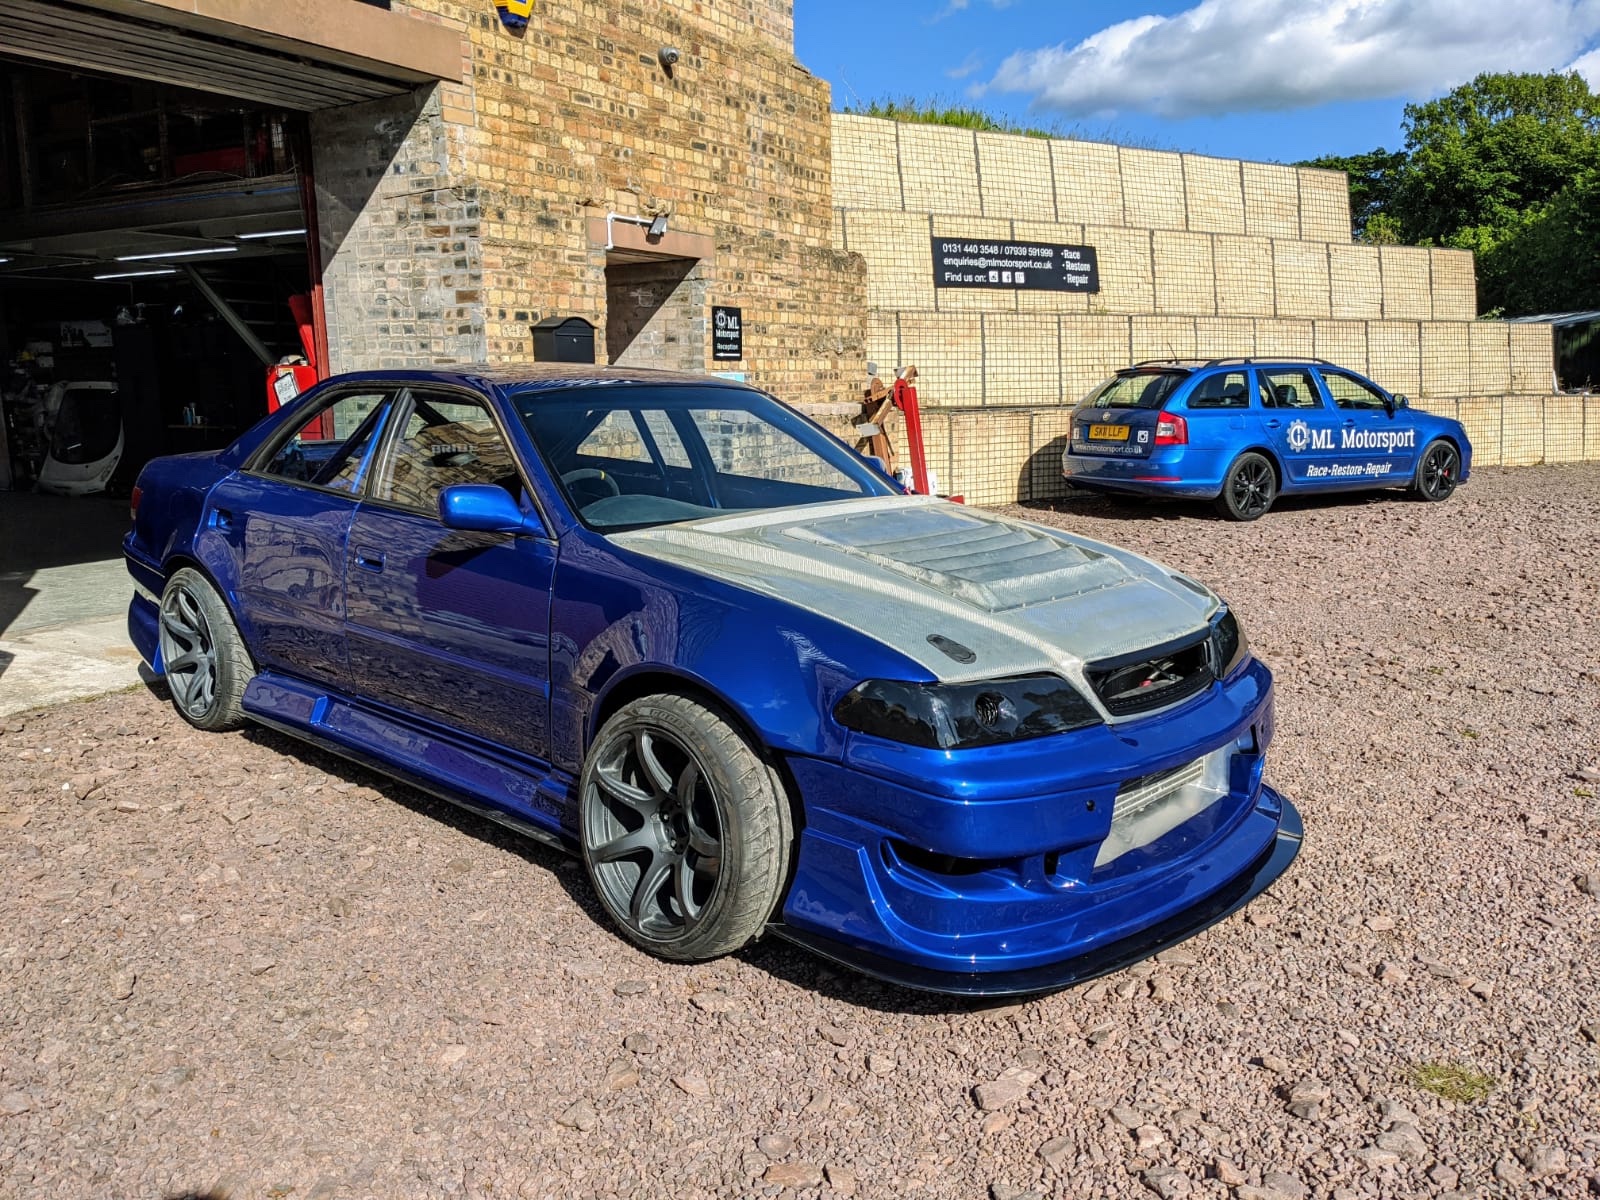
Thanks chaps, I agree that more threads like this might pop up over the next half decade abs beyond for sure. I am doing a full Resto on a RSP TT6 which should be a fun thread, but that’s not due to commence till Spring 2021 as I literally have no space at the moment. I’ve already sent the subframes for that one off and all new components for the suspension, boots, nuts etc etc are all gathered for the re-build. So keep your eyes peeled. I currently have my friends Drift car that’s going to be competing in the BDC next year stored at my place at the mo. ML Motorsport did the build on that also and I lent a hand where I could . Toyota Mark II resprayed in VW Lapis Blue from the Golf R colour range :

.jpg.01331768d8bc363816822a7709d9b204.jpg)