
suprasurrey
-
Posts
485 -
Joined
Content Type
Profiles
Forums
Store
Blogs
Events
Downloads
Supra Articles
Gallery
Everything posted by suprasurrey
-

for sale Polished S/S Top intercooler pipe replacements
suprasurrey replied to Dragonball's topic in Parts for Sale
I`ll have a set in Blue if you still have one. Shall I transfer funds to the same address you gave for the decat pipe?? -
for sale First cat replacement pipe (jap spec)
suprasurrey replied to Dragonball's topic in Parts for Sale
That sounds fair to me. Just transfered funds to you, so consider it sold and many thanks. -
Thanks mate, if I`d looked at the bonnet I would have twigged that it was Henk:rolleyes:
-
for sale First cat replacement pipe (jap spec)
suprasurrey replied to Dragonball's topic in Parts for Sale
Do you have a pic? If it`s in good condition and fits the j spec tt I`ll have it:) -
First was a lovely blue one (M***VRB) along the seafront, next was a silver one with body kit (K***UJR) one level below me in the multi storey car park and last of all, another silver one (K***WOW) outside the multi storey car park at about 4pm.
-
A very funny read. It`s a shame that they missed out the all time classic Haynes instruction...............First, disconnect the battery:)
-
No, I don`t have a GTR. Just keep seeing a purple one regularly
-
Removed heatwrap from manifold, now melting stuff
suprasurrey replied to jevansio's topic in mkiv Technical
I think the reasoning is that keeping the engine bay as cool as possible increases the air density, and therefore increases the amount of fuel that can be added to it. Cold air will also expand more than hot air, thus applying more force to drive each piston down. This is why turbo charged engines seem more powerful on cold winters mornings. -
I hate that level crossing, I don`t mind stopping for one train, but they seem to let half of Network Southeast through at a time! You must keep up the good work on your workmates until they are all converted to the Supra way of life:eyebrows: Is the R33 GTR you see dark purple by any chance??
-
Glad to be of service, which offices are you in? You`re not in charge of the level crossing are you?
-
Have a look at the thread for likwidart badges in group buys, there should be plenty of original badges available soon!! Maybe pm a member near you and see if they can help out;)
-
Hi mate, I`m guessing that this circuit completely bypasses the standard active control? If this is the case you will need both relays and a suitable switch. The relays are drawn with a diode across the coils which I`m sure is not correct. Just for your information the pin numbers mean the following - 85 - coil 86 - coil 30 - common contact 87 - normally open contact 87a - normally closed contact Good luck:)
-
Are you selling de-cat pipes or catalytic converters? If they are de-cat pipes and they fit the j spec I`m interested in the 1st mate.
-
If the release lever feels weaker than usual your release cable may be very dry, or a strand of the inner cable may have broken and got caught in the outer sleeve. If the cable still moves freely, try some 3 in1 oil on the cable ends where the inner meets the outer. Also, oil the moving parts of each lock assembly.
-
Yes mate, twice every weekday. Why do you ask?
-
Thanks for the compliment, not so clean now, covered in splattered insects!!
-
The L on the shift stands for LOW, but LAUNCH could also be appropriate!!
-
Hello mate, I can`t help with the electrical connector but the pipes both run to the charcoal cannister. The pipe in the first photo runs to a solid pipe which is attached to the bulkhead then goes via a rubber pipe to the rear cannister connection. The pipe in the second photo goes directly to the front cannister connection. If you have no charcoal cannister try a search as to how to plumb these pipes. Hope this helps:d
-
You passed me on the A3 South bound just after 12am.
-
There are two small slots at the front of the clear lens, insert a screwdriver into these slots and prise the lens out. you will now find two Philips screws at either end of the light assembly, undo these and ease the light out of the head lining. To uncouple the electrical connector, push a small screwdriver down the side where the clip is and pull apart. I hope this helps you, if you get stuck at any stage please ask as I`m happy to help;)
-
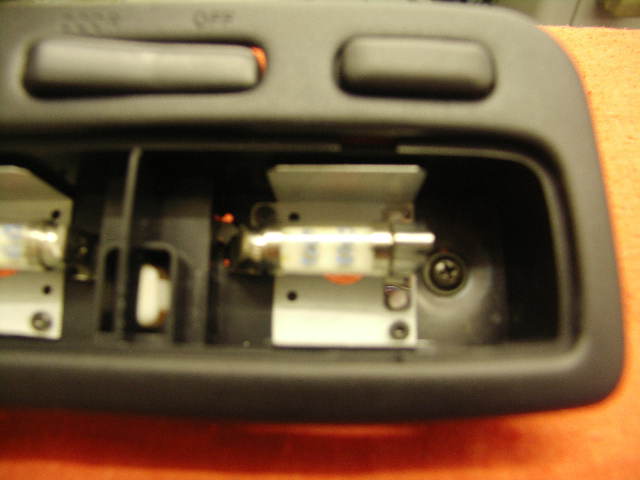
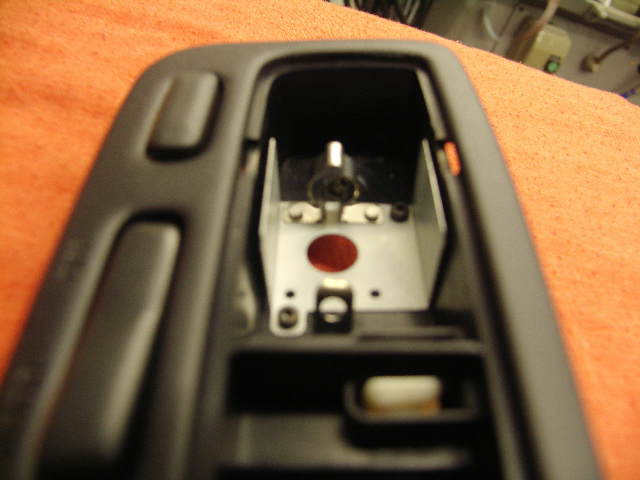
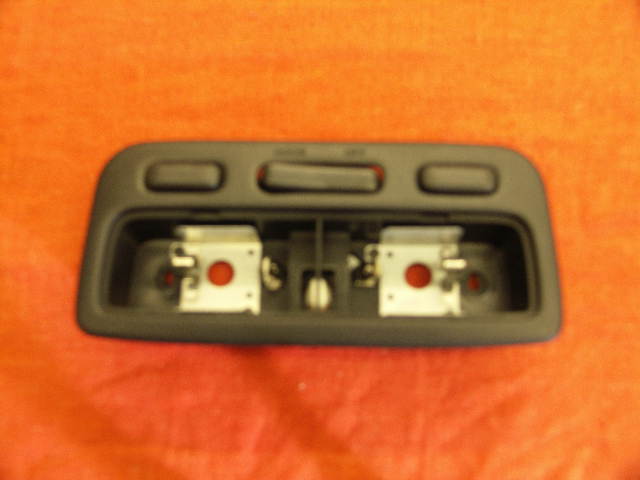
I`ve just completed this modification to my interior light so that it accepts 11mm x 38mm LED Festoon bulbs. You need to drill out all of the rivets that hold the reflectors and the spring contact. Swap the reflectors from one side to the other and fix with M2.5 x 6mm screws and nuts (Model shops should stock these). Drill out the dimple in the spring contact and cut off the two projections (the metal is quite tough, so use a sharp drill!!). Open out the mounting hole in the spring contact to accept an M2.5 screw. Fix the spring contact in position and bend it to 45 degrees. Pop the LED bulbs in and check that they are secure. Reconnect the light and check that the bulbs work, if not, turn them round to change the polarity. Refit the light and admire your handy work:d The whole job took less than 1 hour and cost me £6.99.
-
Well I guess it`s the first one that comes to hand if you lose your favourite one:D
-
just been out to look at mine, one connects underneath the throttle butterfly and the other connects to the main plenum body on the outside (wing side)
-
I did my fronts recently and it was a doddle. There are a few do`s and don`ts though. Do use axle stands as well as a trolley jack, don`t use anything hard or sharp to push the pistons back, as you could slip and damage the dust seals (wood or plastic is ideal), do check that after pushing the pistons back your fluid reservoir hasn`t been sick on your paintwork, do start the engine and pump the brake pedal until you get good resistance and lastly don`t expect your braking to be 100% instantly, drive carefully until the pads have had a chance to bed in to the contours of the discs;)
-
for sale polybushes/rear hubs/front decat
suprasurrey replied to brettjones's topic in Parts for Sale
You have pm.


