
Crossy
-
Posts
299 -
Joined
Content Type
Profiles
Forums
Store
Blogs
Events
Downloads
Supra Articles
Gallery
Everything posted by Crossy
-
I completely understand this angle, I have other mates with cars they attend Show and Shines etc with as I do, but some are now trailering their cars to and from these events. I'm a little more cautious where I leave the car at times, so parking has become even harder, as even when left in the quiet side of a carpark, even if its only left 10 minutes some ass will park right next to it, sods law! I don't think I could get to the point where I'm considering not driving it, even after I get around to doing all of the subframe sandblasting and coating. After all I bought the Supra to enjoy first and foremost, and I do enjoy the fact that it's cleaner than 90% of the cars on the road even though it's a 22 year old car that's driven most weekends and sometime weekdays. I really hope the fear doesn't get hold of me and stop me enjoying the car one day. I suppose its a bonus i don't own a trailer, trailer license, or car to pull a trailer!
-
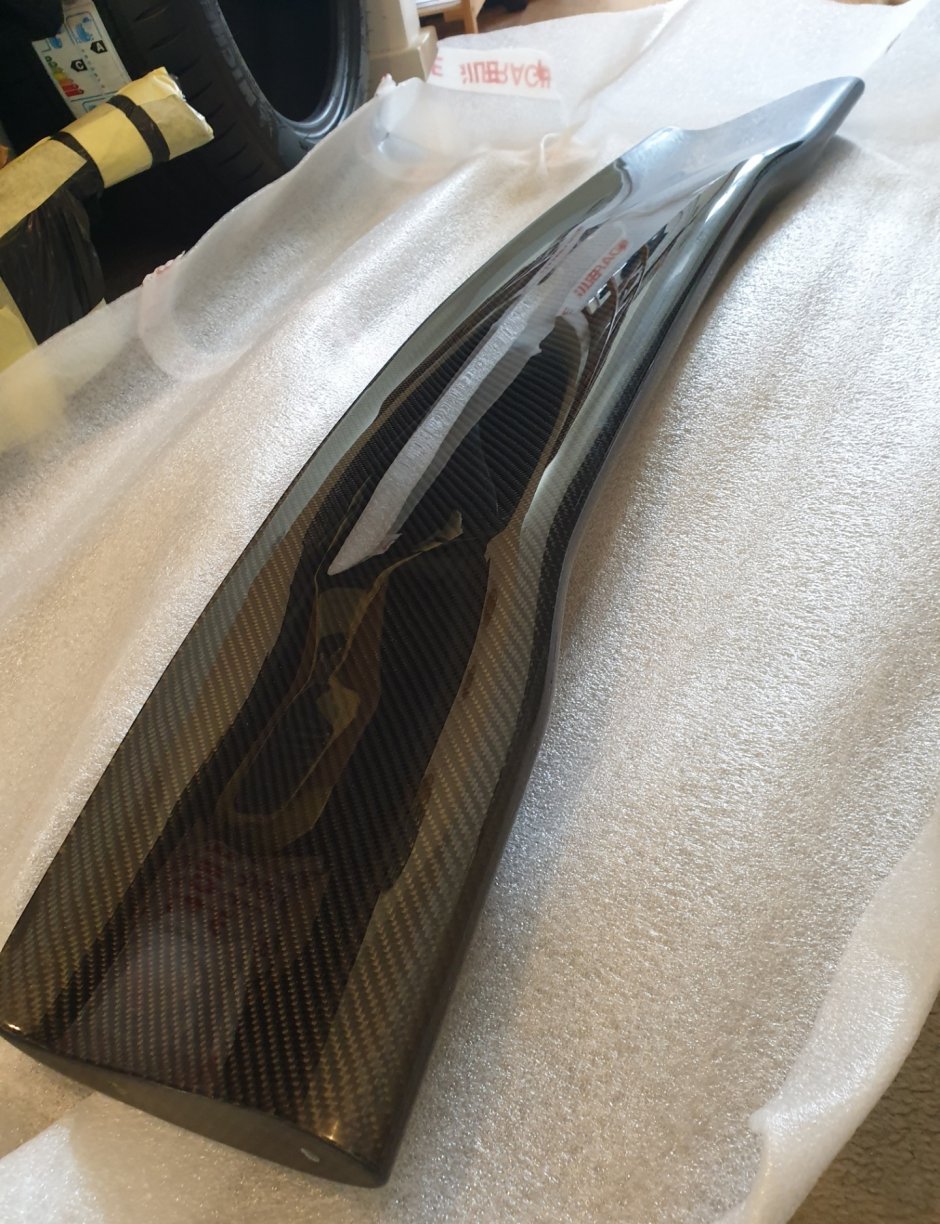
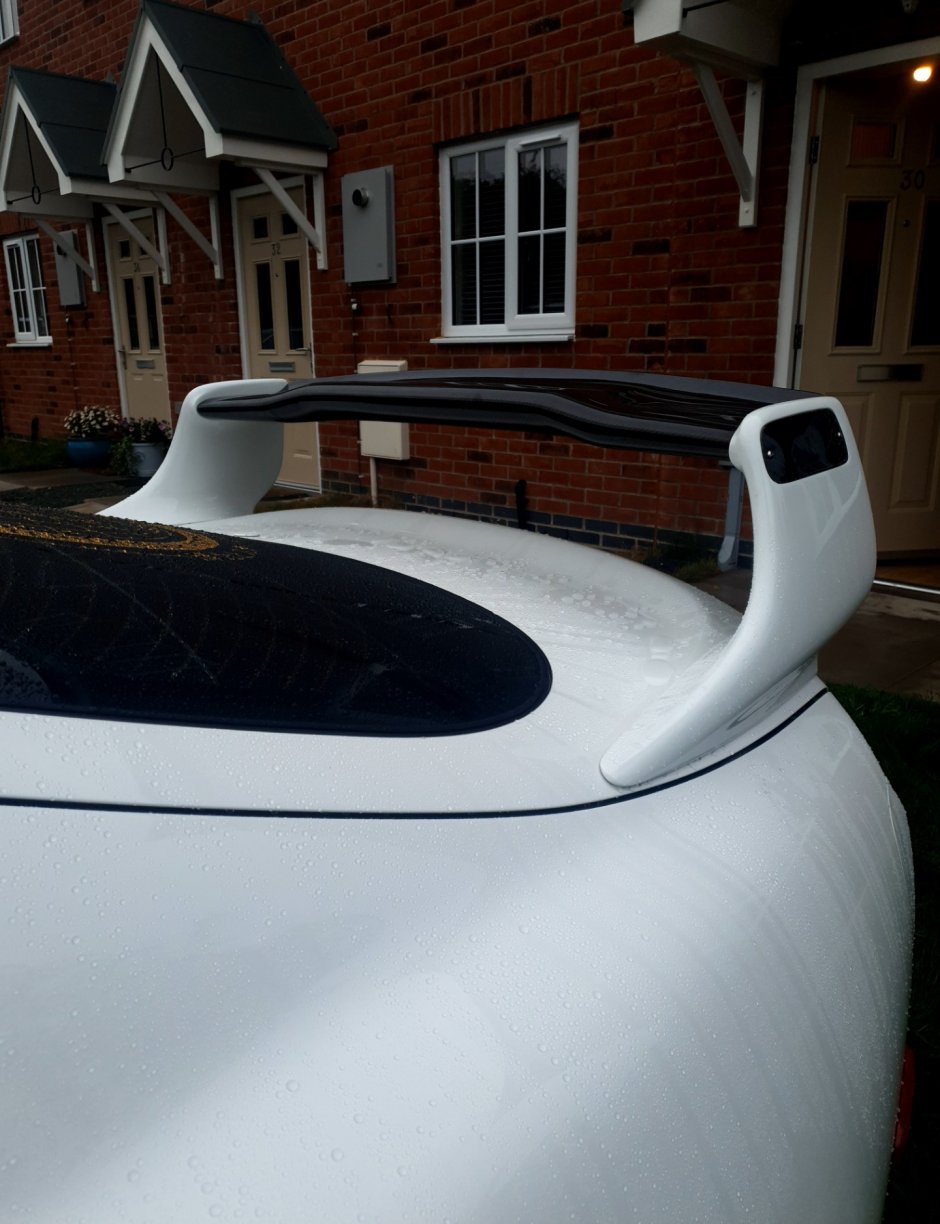
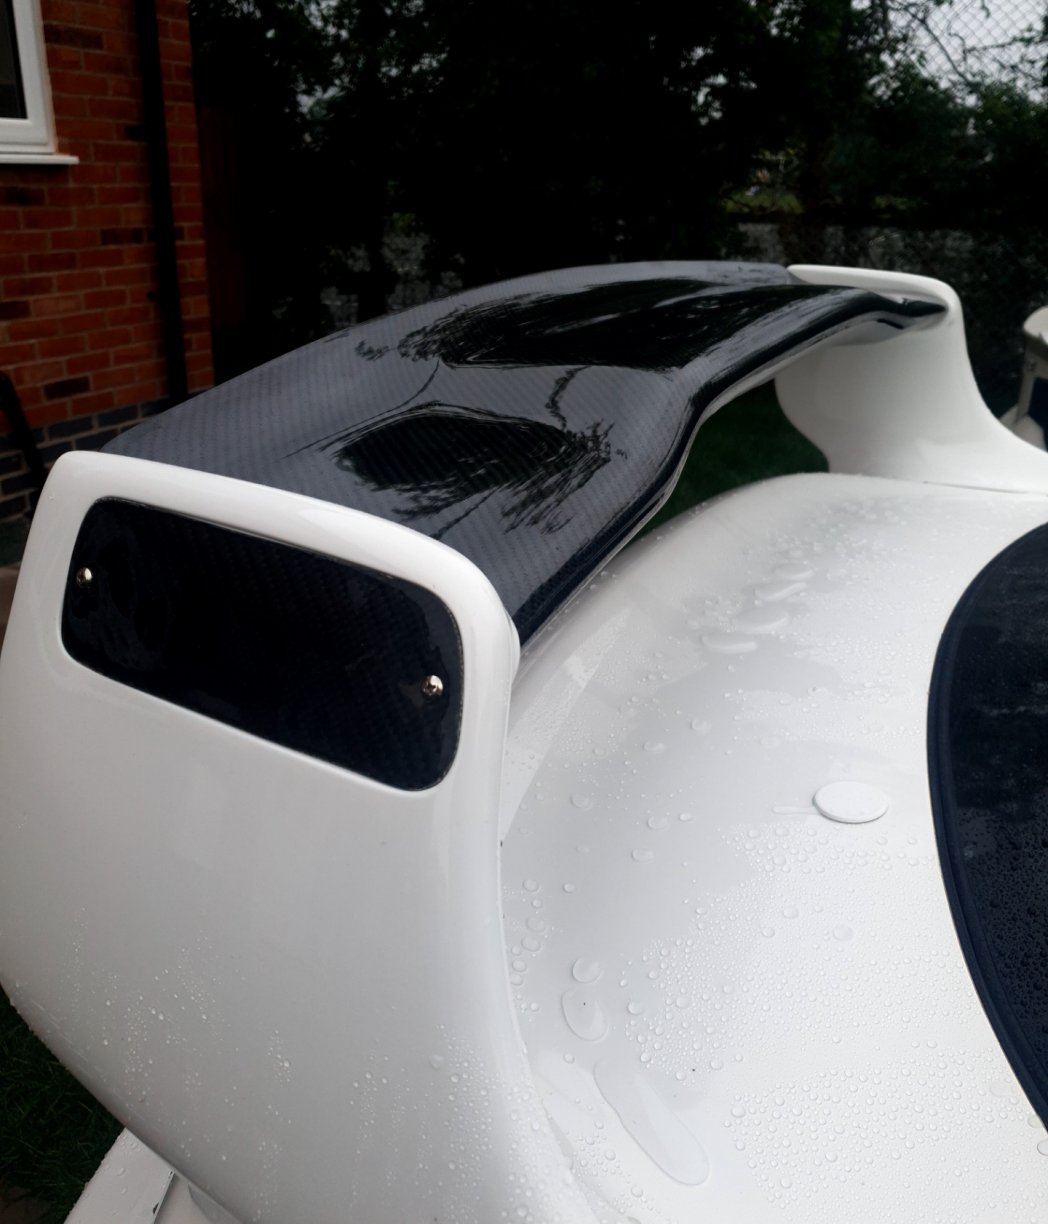
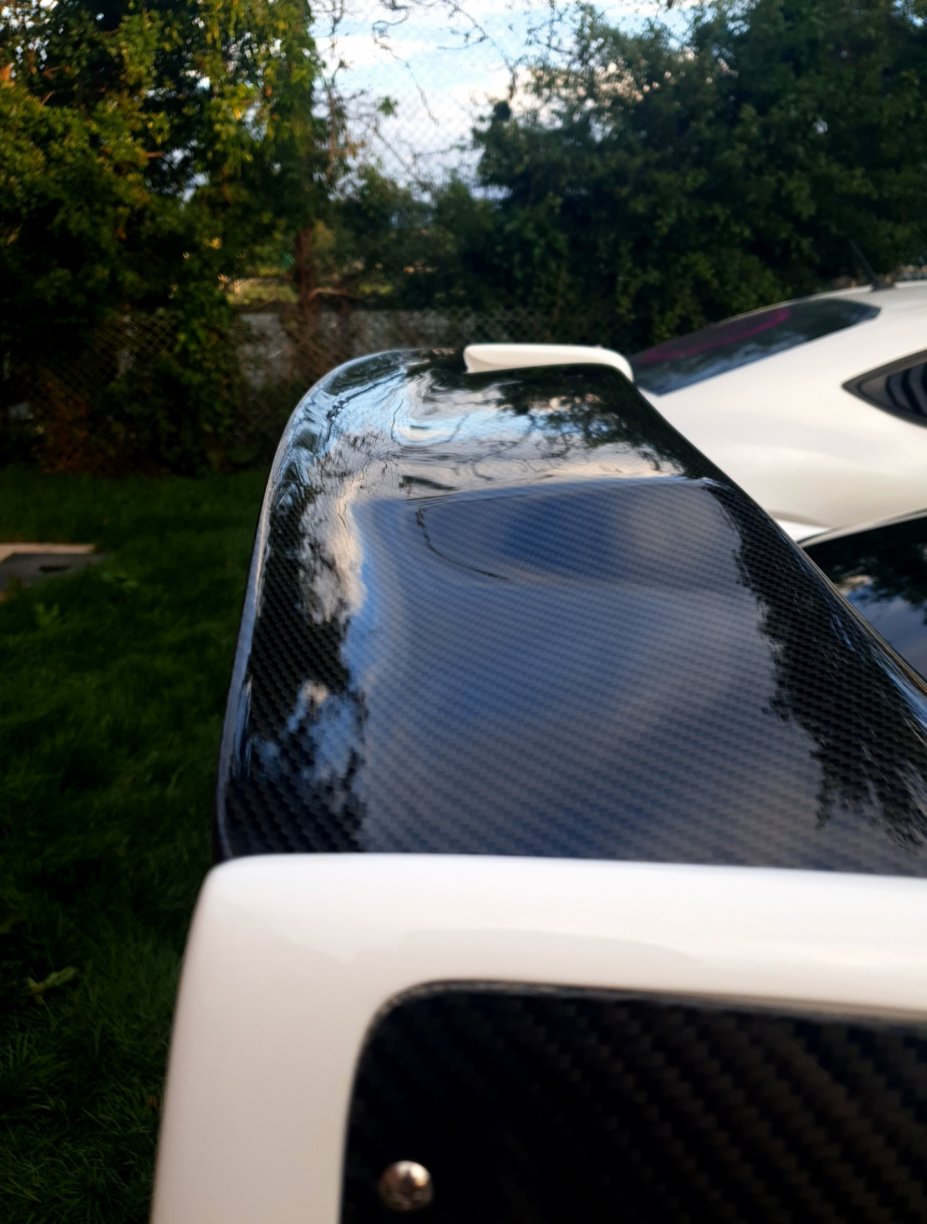
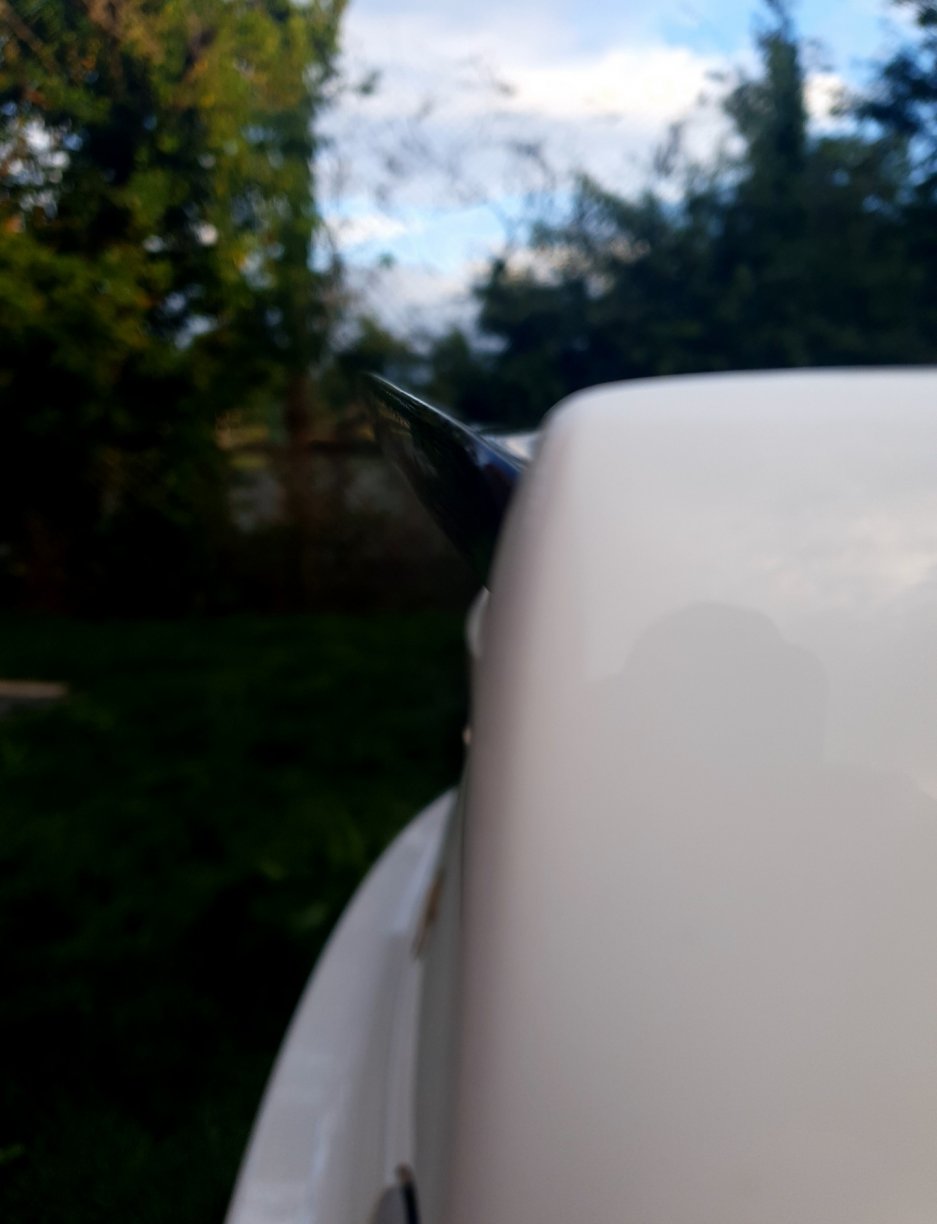
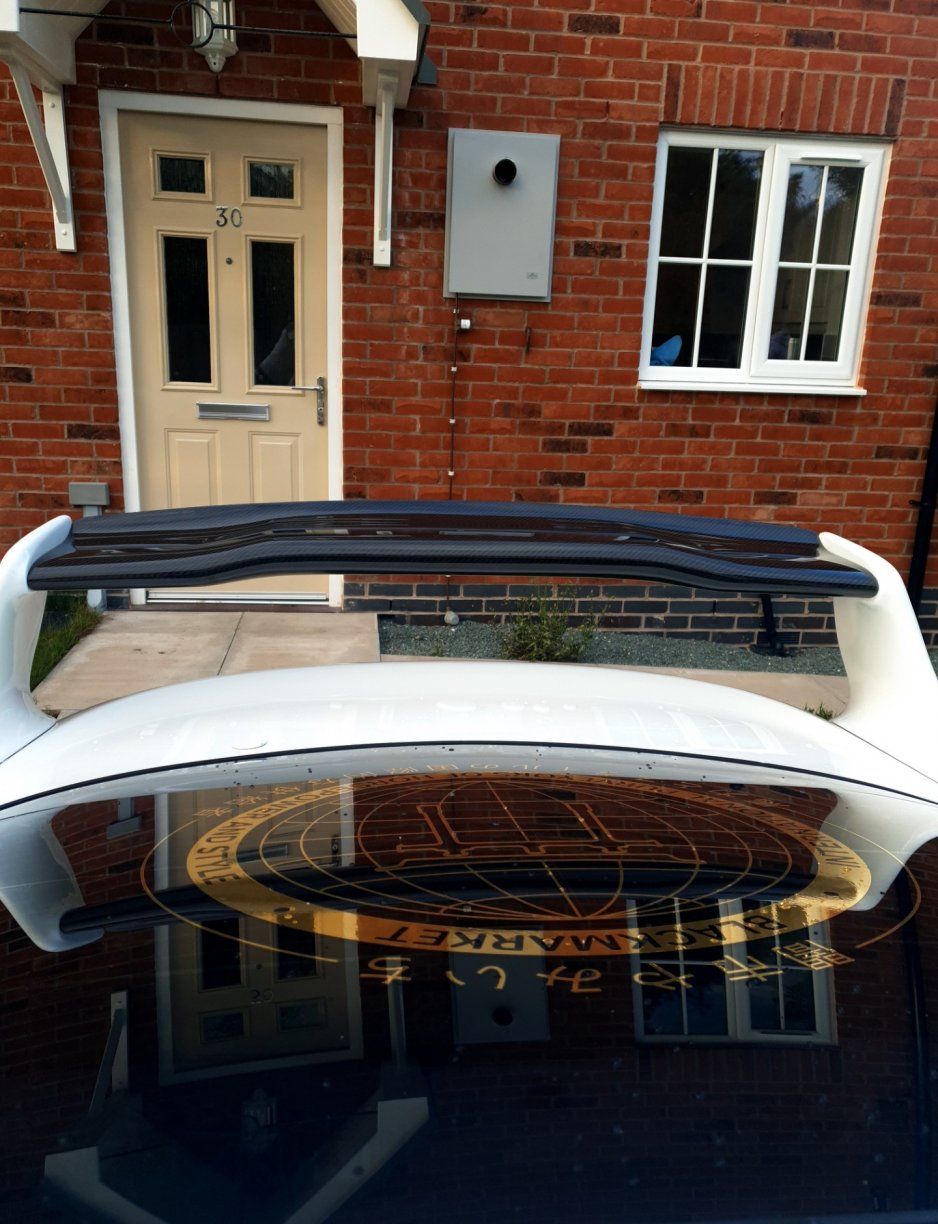
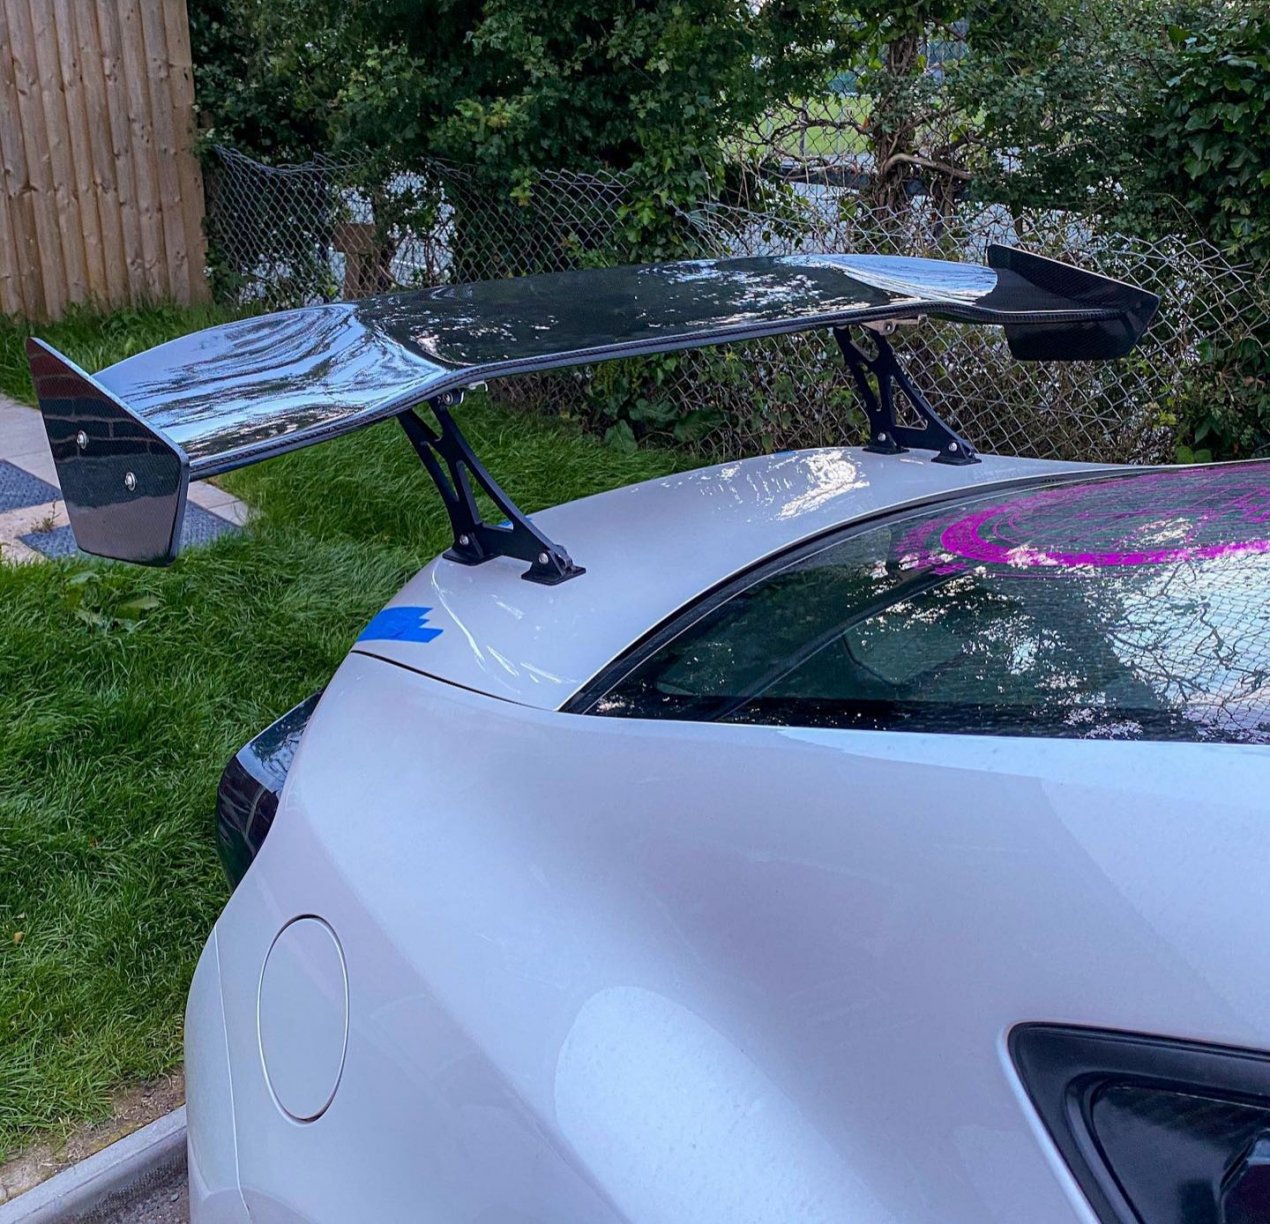
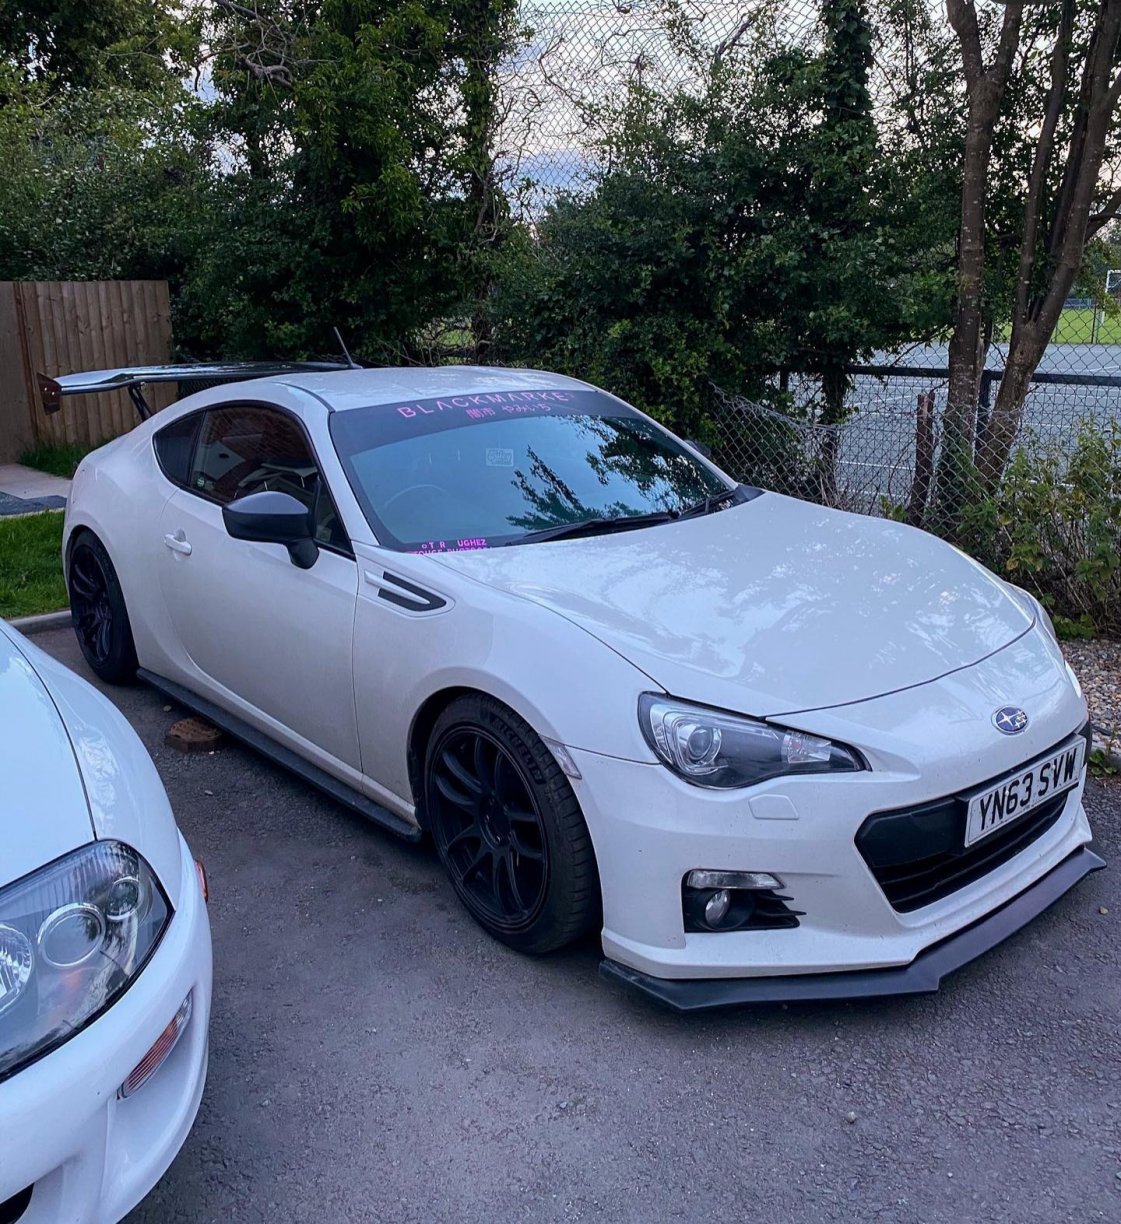
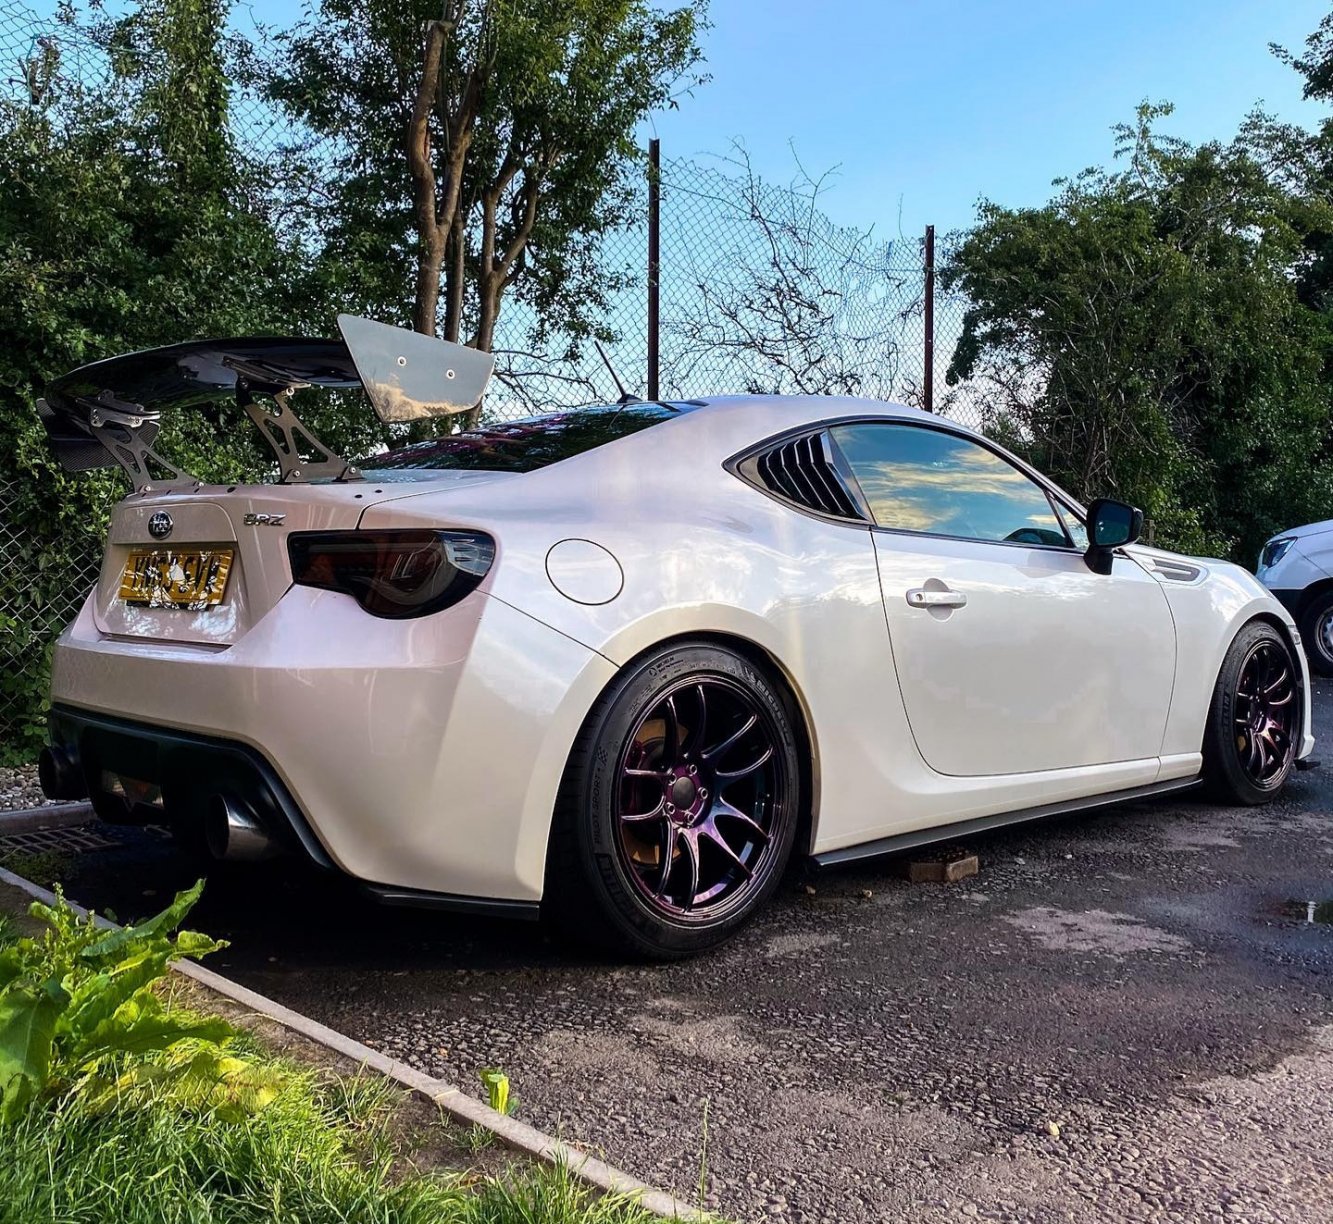
Furthering on from having the bodywork done and sealed, I decided it was about time I got around to getting a front splitter on. I ordered one from a company called Aero D Autos, polyurethane finish as I actually have a few carbon parts ordered already coming from the US around the end of August, and a splitter is one of them so I figured the polyurethane lip would see me through until that arrived. I ordered it back in June, and it got sent back in June. It was awful, edges were all untidy, there were loads of deep ridges and marks, and it actually sat at about a 40° angle on the one side when I lined it up with the bumper so it would have looked on the piss as well and pulled the bumper about. They told me all it would need to rectify it was heat and prep. Do yourselves a favour and dont even contemplate using them. I then decided to tide me over I would get a GRAMS Carbon lip, it arrived about 3 weeks ago and has sat in my unit since, juat haven't got around to giving it a lacquer finish before it goes on. I'm actually contemplating selling this now and just waiting for the stuff I have ordered from the US to turn up, as it should be here in 3 weeks tops. It cost me £220 I believe with waiting 3 weeks for it, would probably take a sensible offer if anyone wants it. An opportunity also came up to get my hands on a little upgrade from Gary at Charge Auto Styling and I jumped on it immediately. How nice is this! It is currently in a gel coat, so I will need to wet sand it and cover it with a good 2K lacquer at some point soon as well, but I decided to immediately test fit it The fit was absolutely perfect, really shows his attention to detail. I've already got my eyes on a few other products of his I want, but when we last spoke he said he was inundated with work to be done, which really doesn't surprise me as the stuff he makes is pretty unique. Anyone that can point out where he got the inspiration for this blade from gets extra Jap Scene points All to do now is wait on the Carbon, fit it all, and get it all Graphene Coated so that the whole car is once again done. In the meantime I think I'll probably try and get around to doing this battery and fuse box relocation to the boot! Have been putting a lot of work into the other halfs BRZ lately, even though she is now really happy with it so it has been completely worth it, need to finally get back to getting through the jobs list on mine!

-
Bump
-
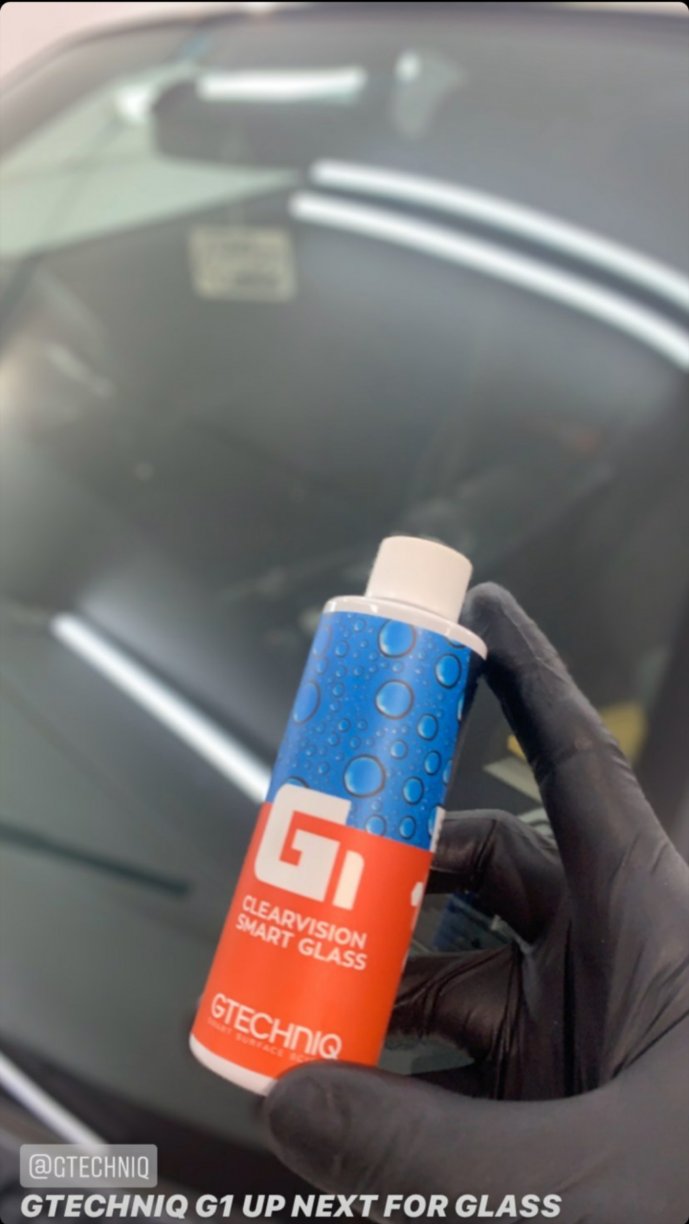
I had been and seen the finish on about 5 different coatings, 4 were differing variations of Ceramic and the last was the Seof Healing Graphene. After seeing it heat up and take all sorts of damage out of the top layer, I immediately just went for it. I know you can get ceramics the same grade in self healing; but Graphene is the harder coating, slightly more hydrophobic and also deals better with water spots left to dry on the coating. More than welcome for you to come and have a look around the xar if you're ever passing Shrewsbury! Failing that we often see each other at shows so maybe Japanese Performance Show may just abiut hold out and stay scheduled! I believe that the films are called PPF. I was very tempted to get some of this done on the front bumper, bonnet and carbon splitter when it comes, but that's for future haha. Depending on what film you go for they're supposed to be the best avenue for protecting, and you can actually top them with the ceramic and graphene coatings I believe
-
Cheers mate! Yeah got what I felt was a good deal from him, and he was loads happier knowing I'd done a bulk of the work already as he could get straight into the coatings on the 3rd day giving it an extra day in the unit to cure. It's definitely worthwhile to protect the paintwork longterm, I'd recommend the place that did my bodywork and then the person who did the coatings but I know this area is quite a way away from you!
-
Luckily enough I missed that time period by 20 years haha. I don't even think my other half would want me to have a sunstrip like that and she's into cars herself. She also has a bigger "wang" than me now after our efforts a few weeks ago haha. Coincidentally, from a Supra.
-
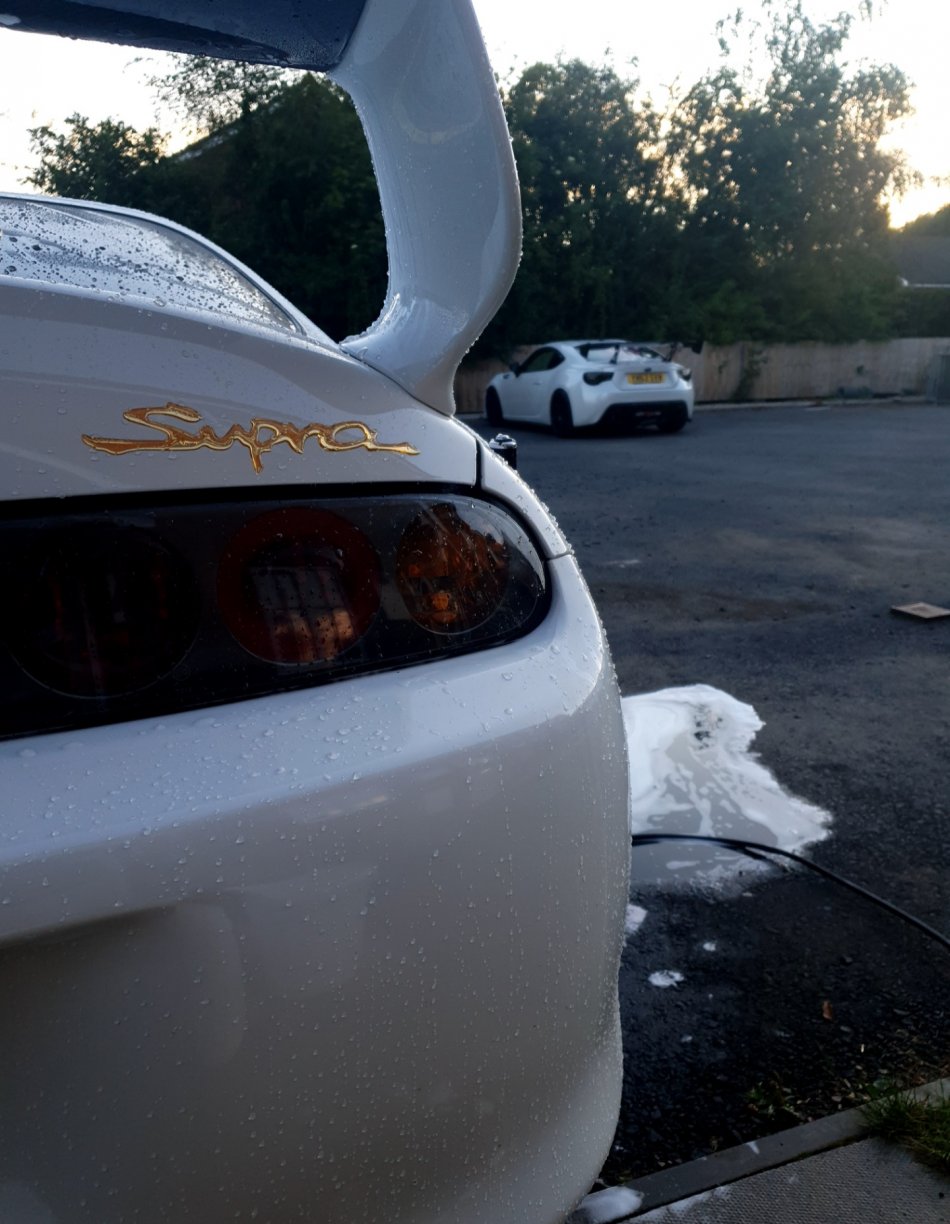
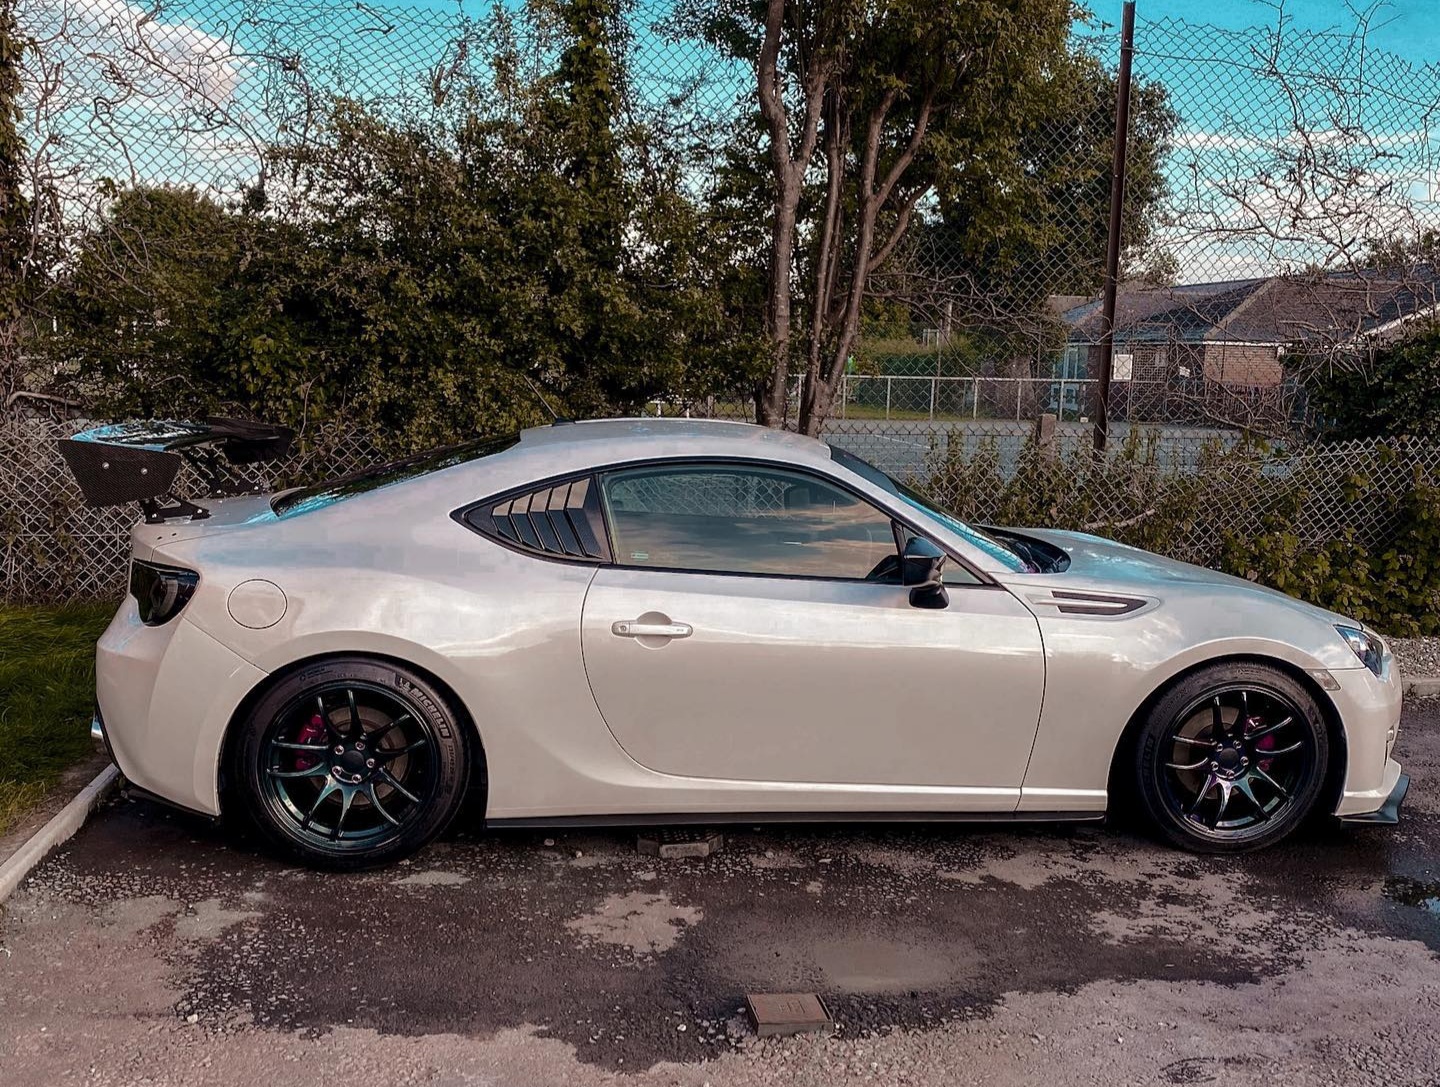
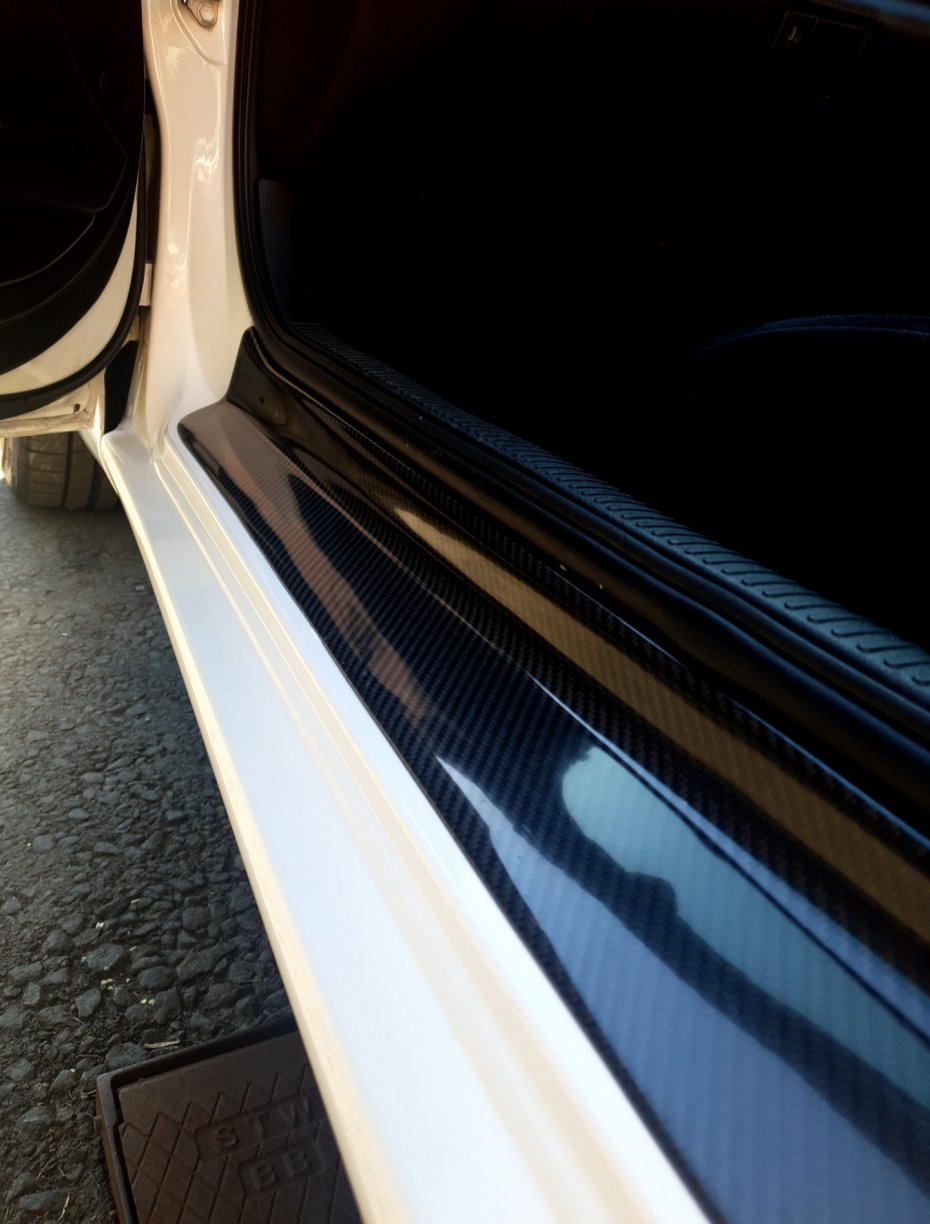
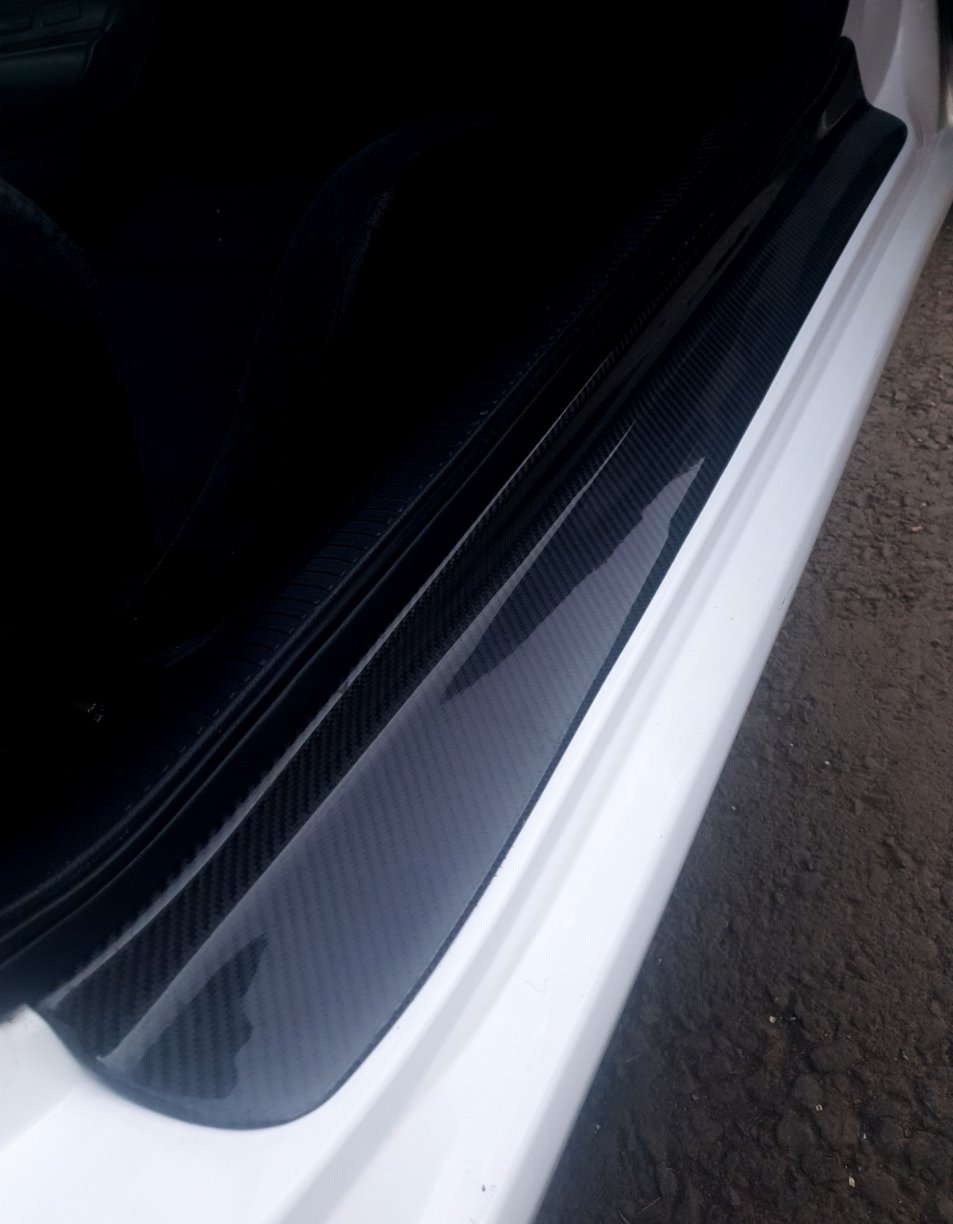
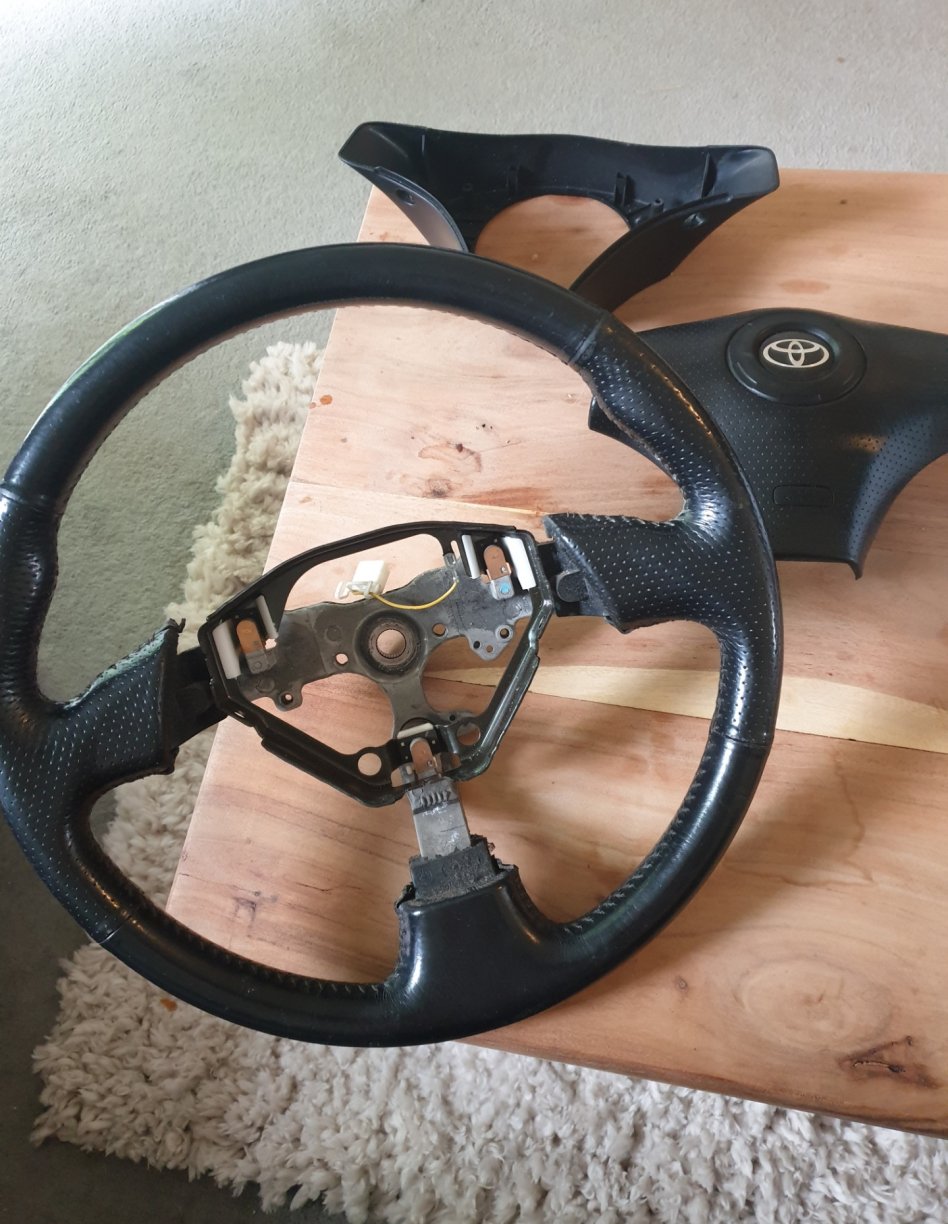
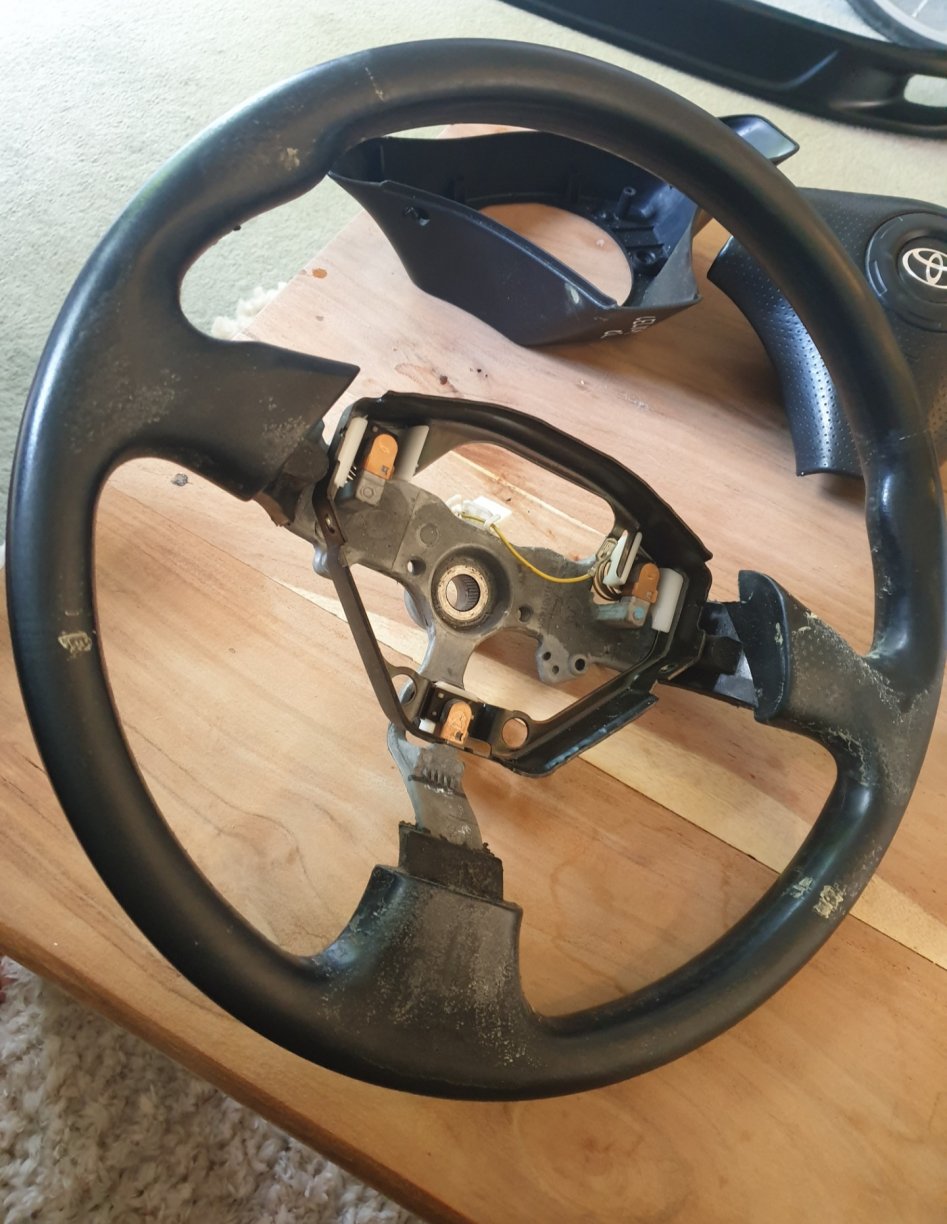
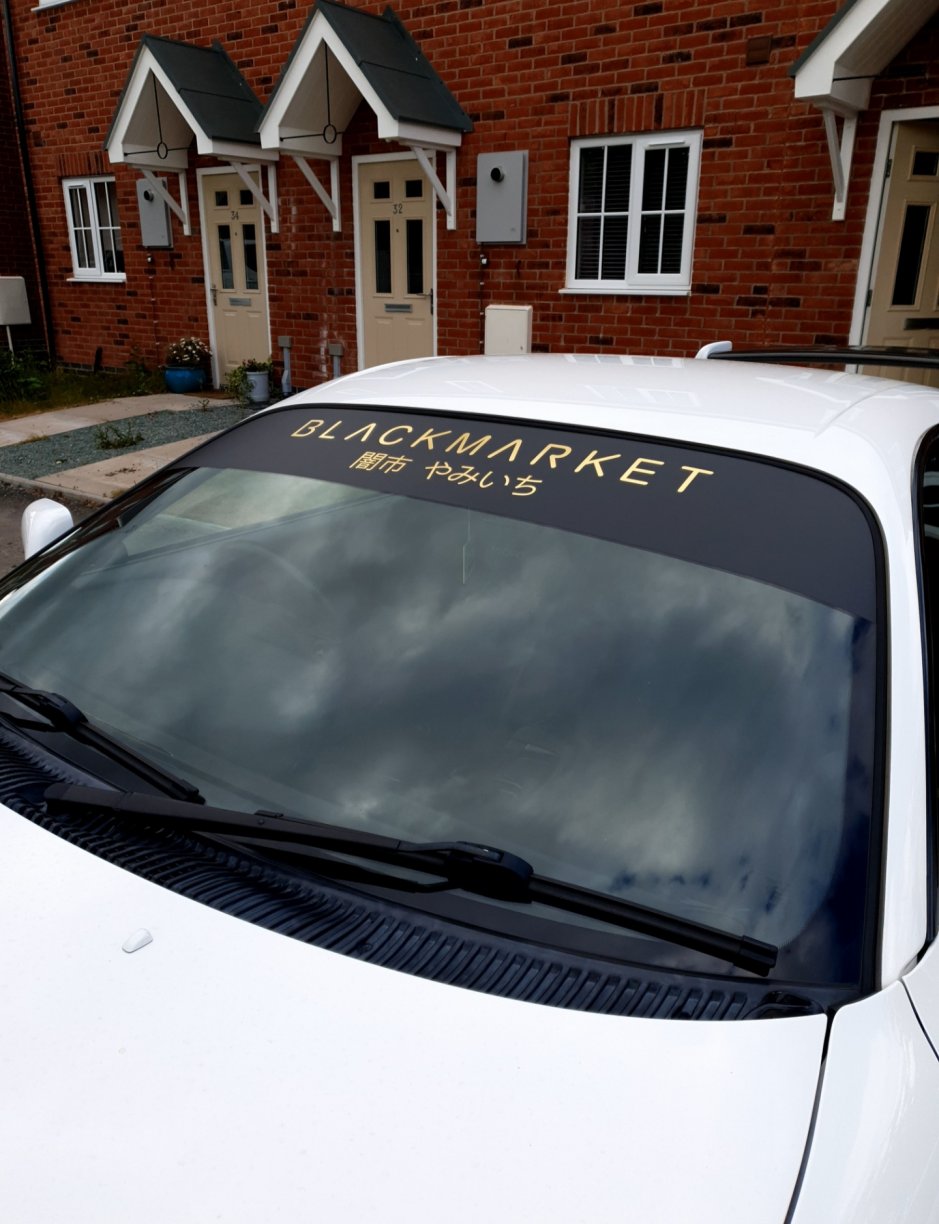
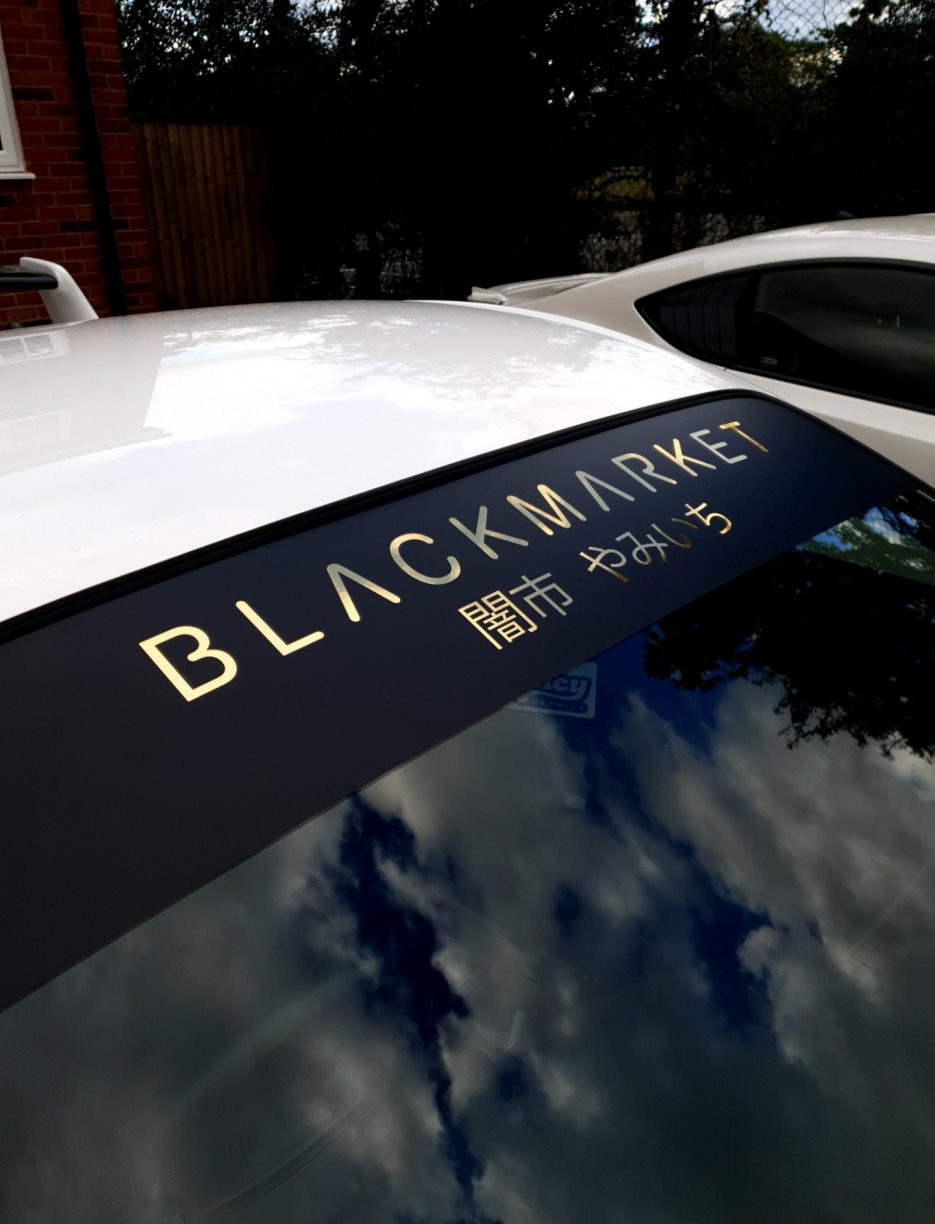
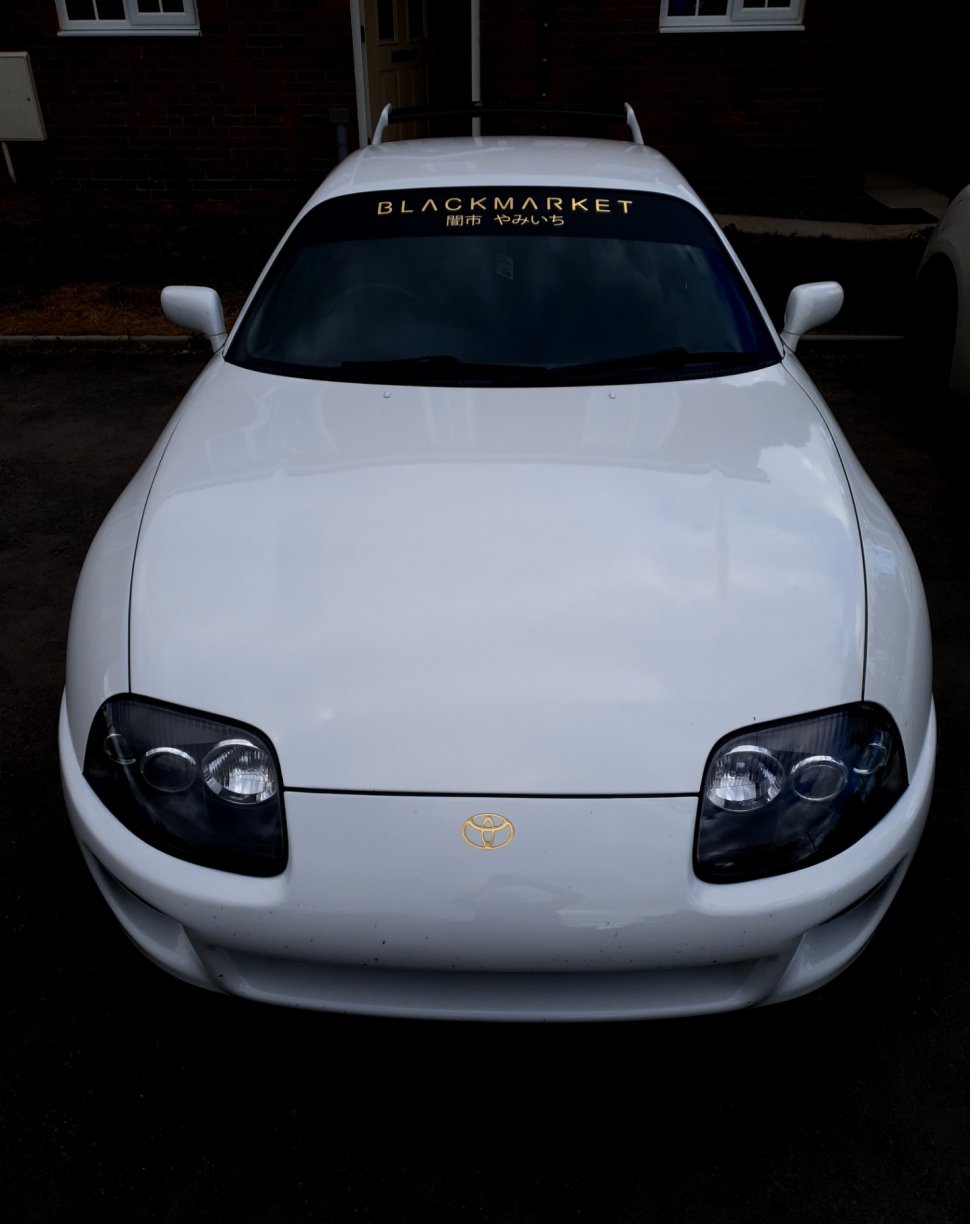
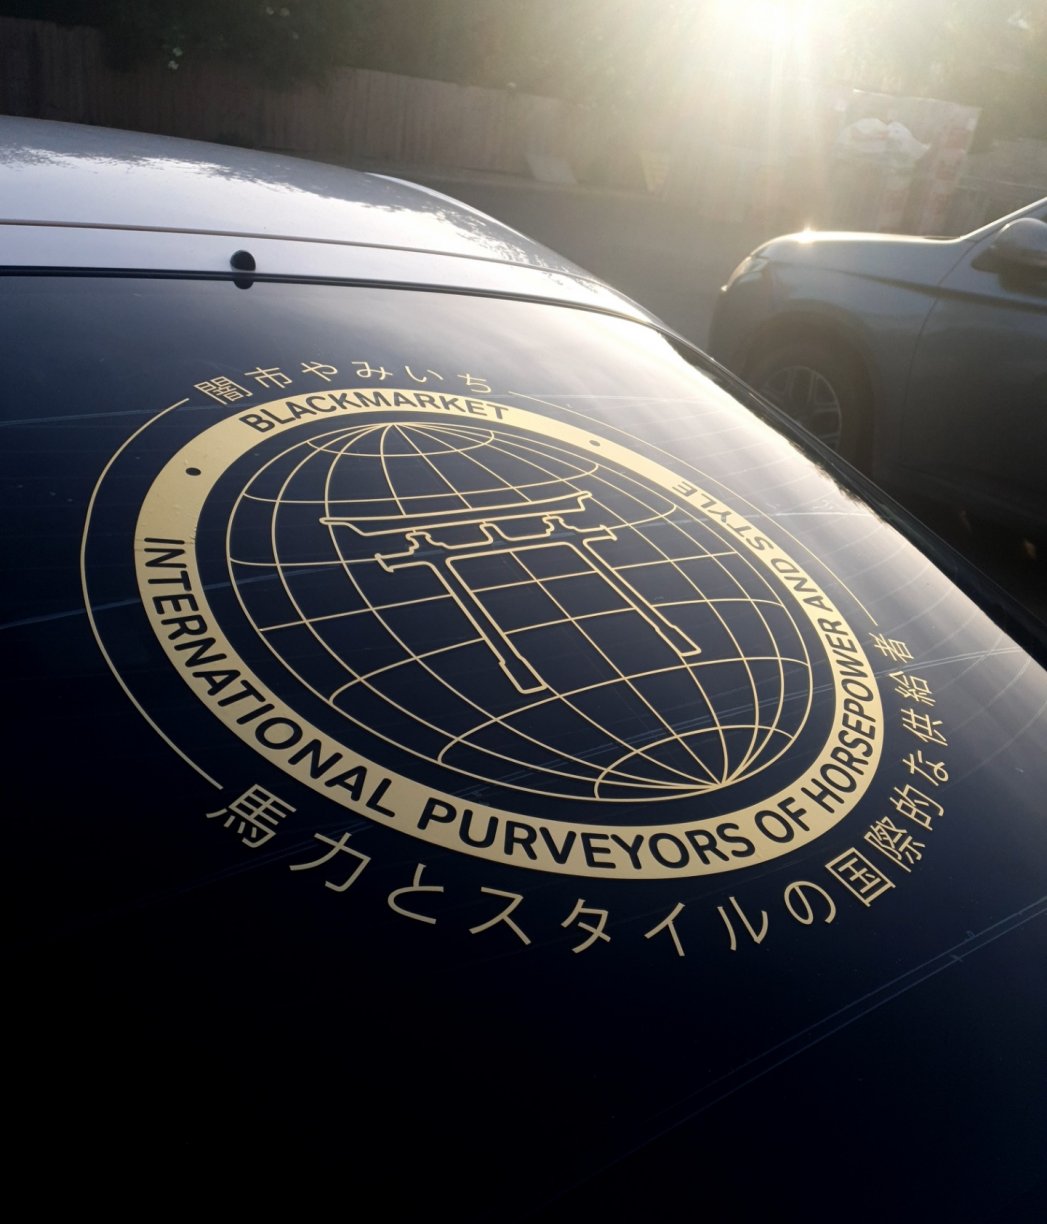
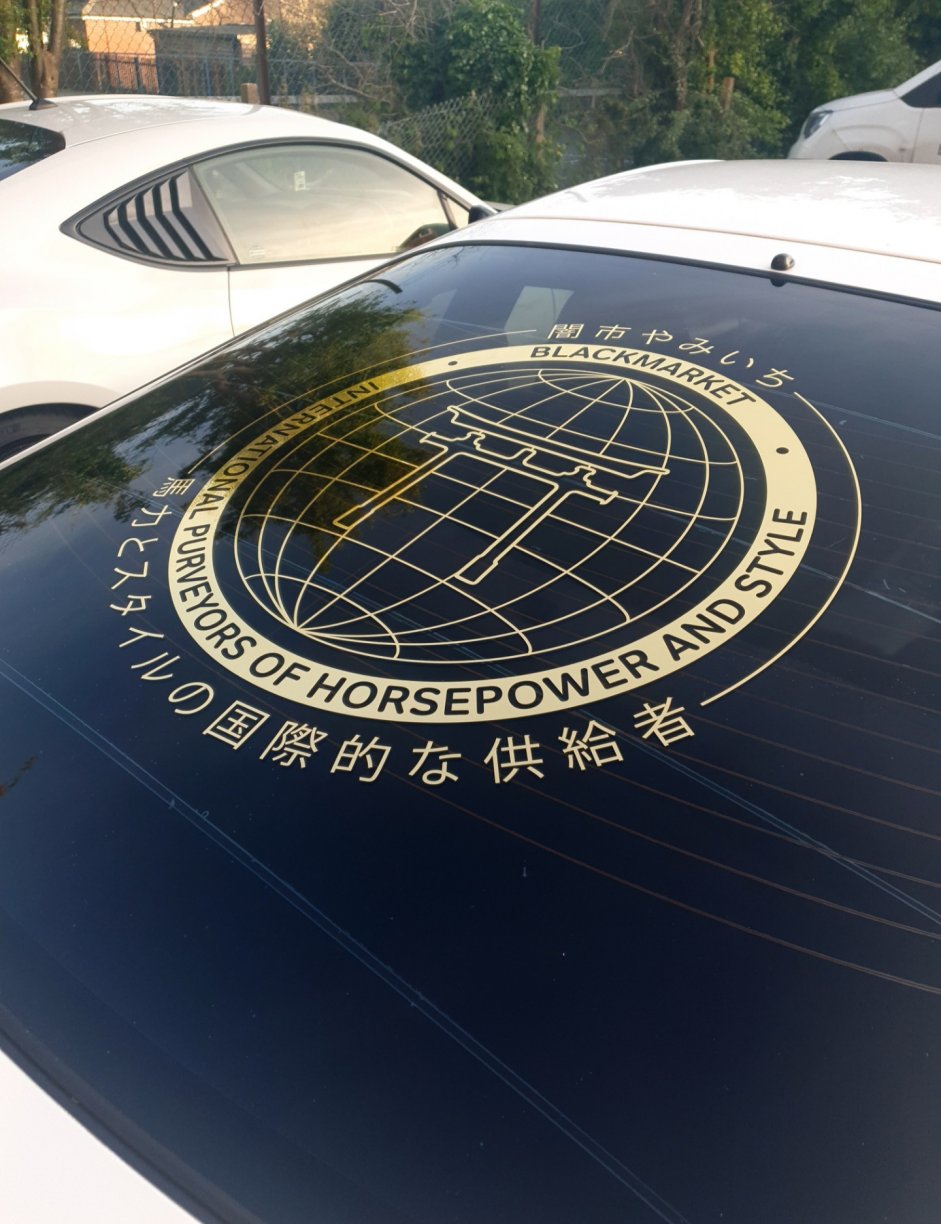
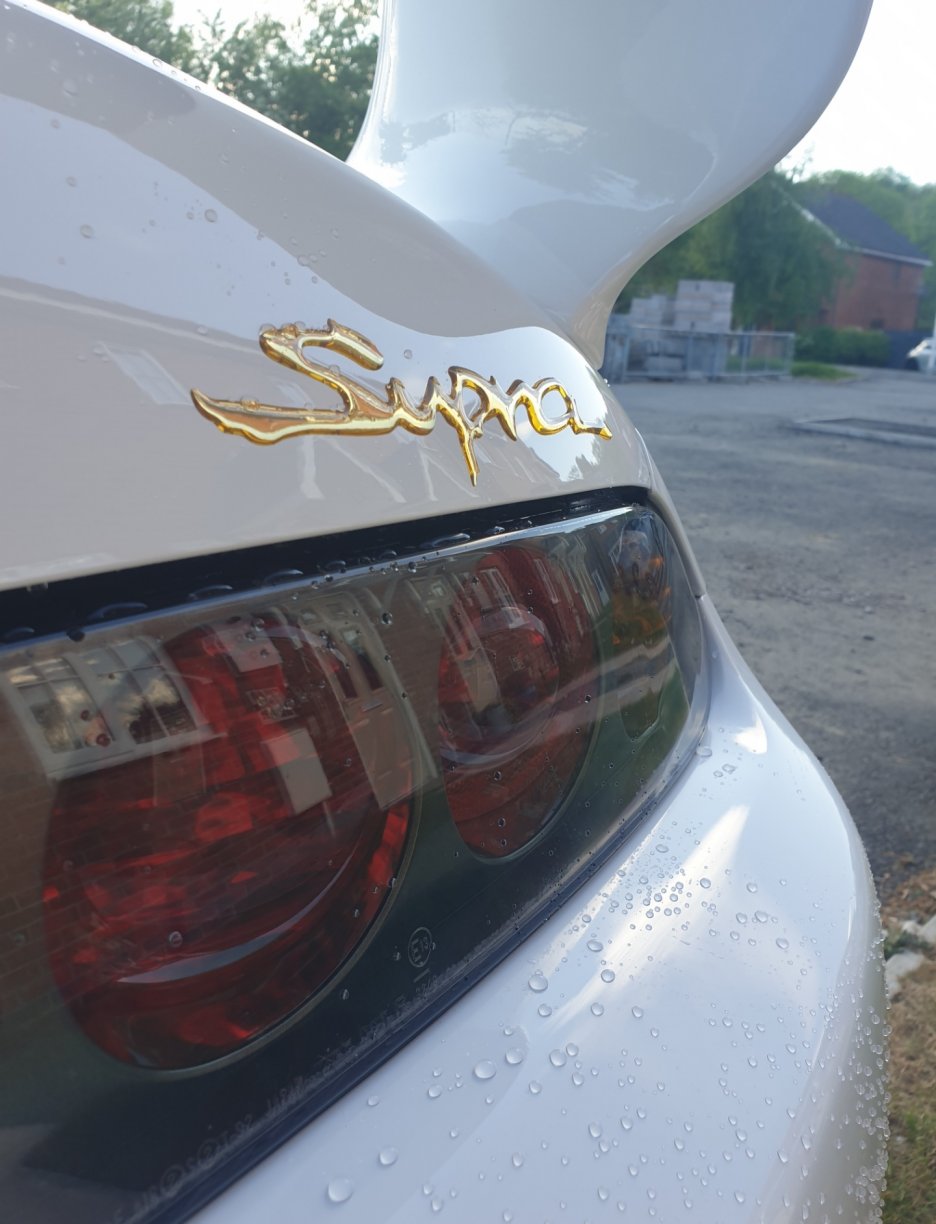
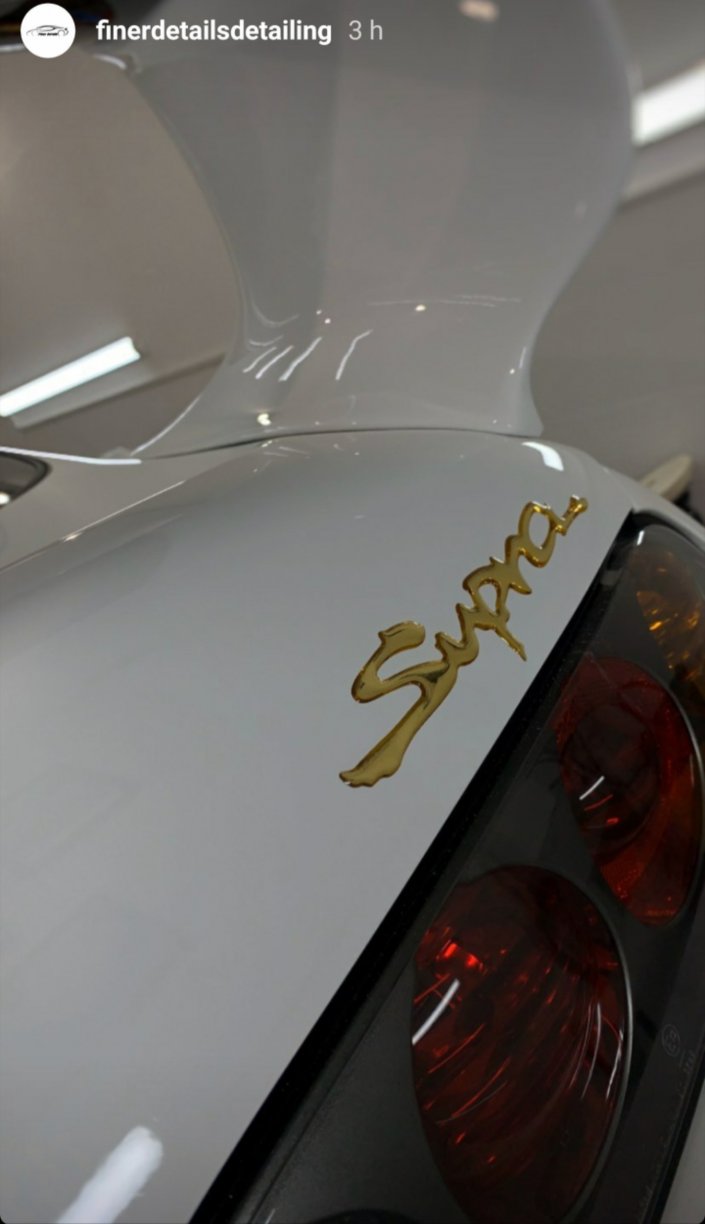
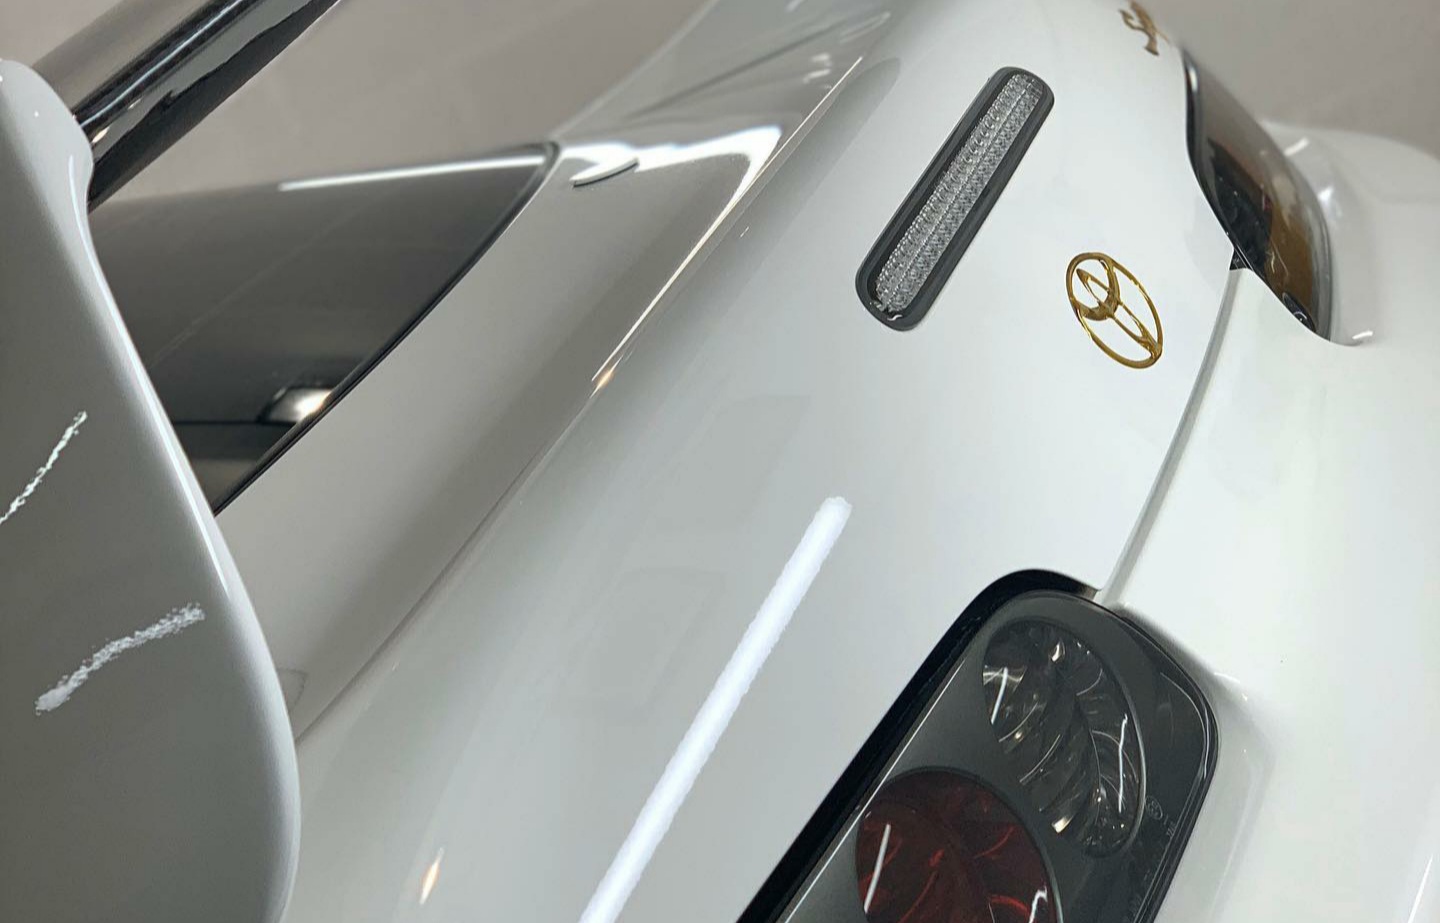
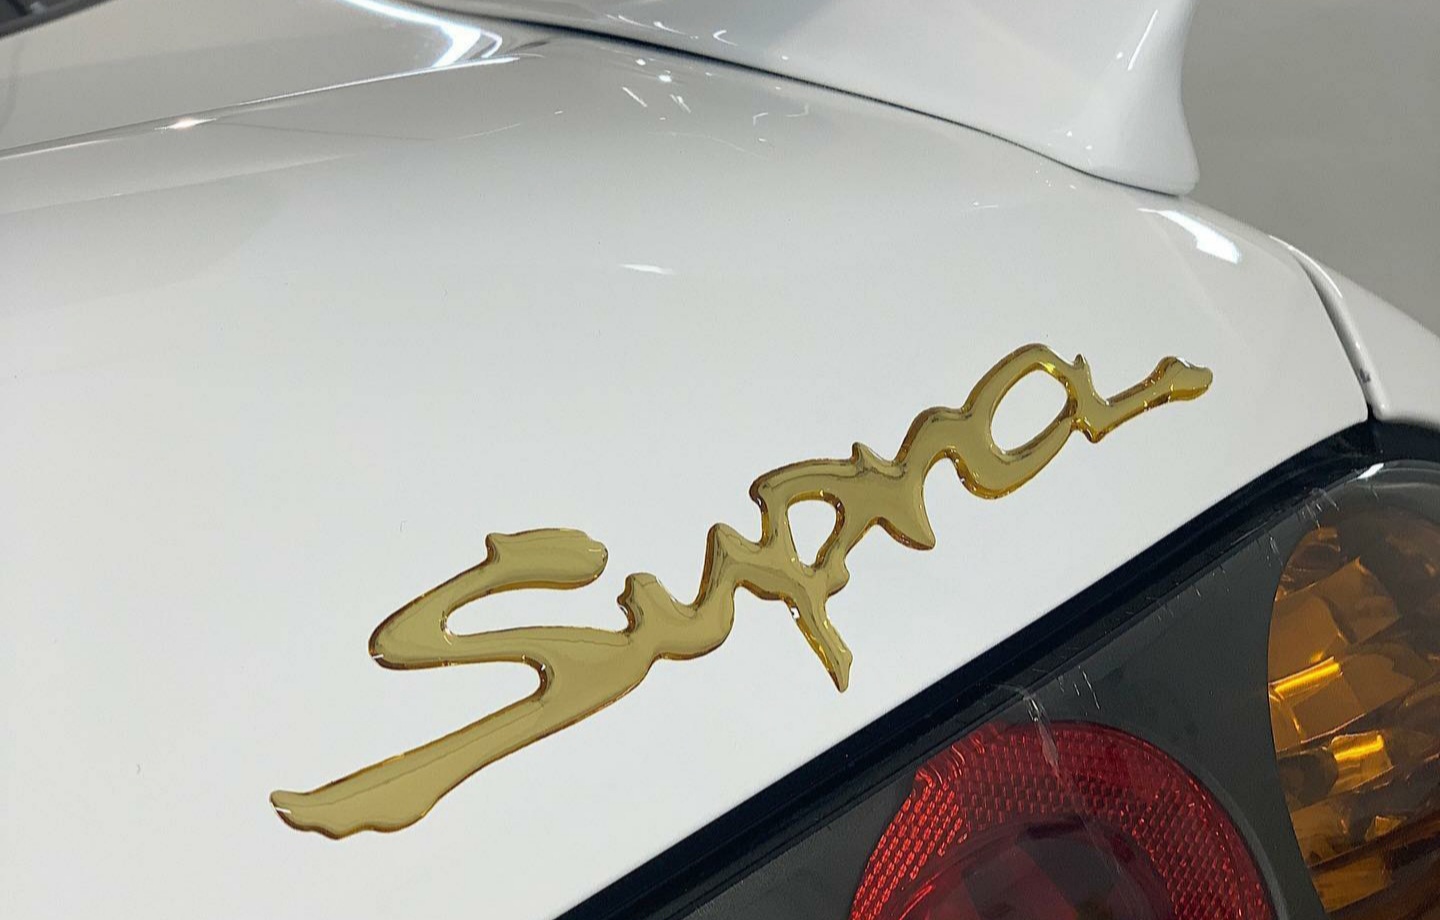
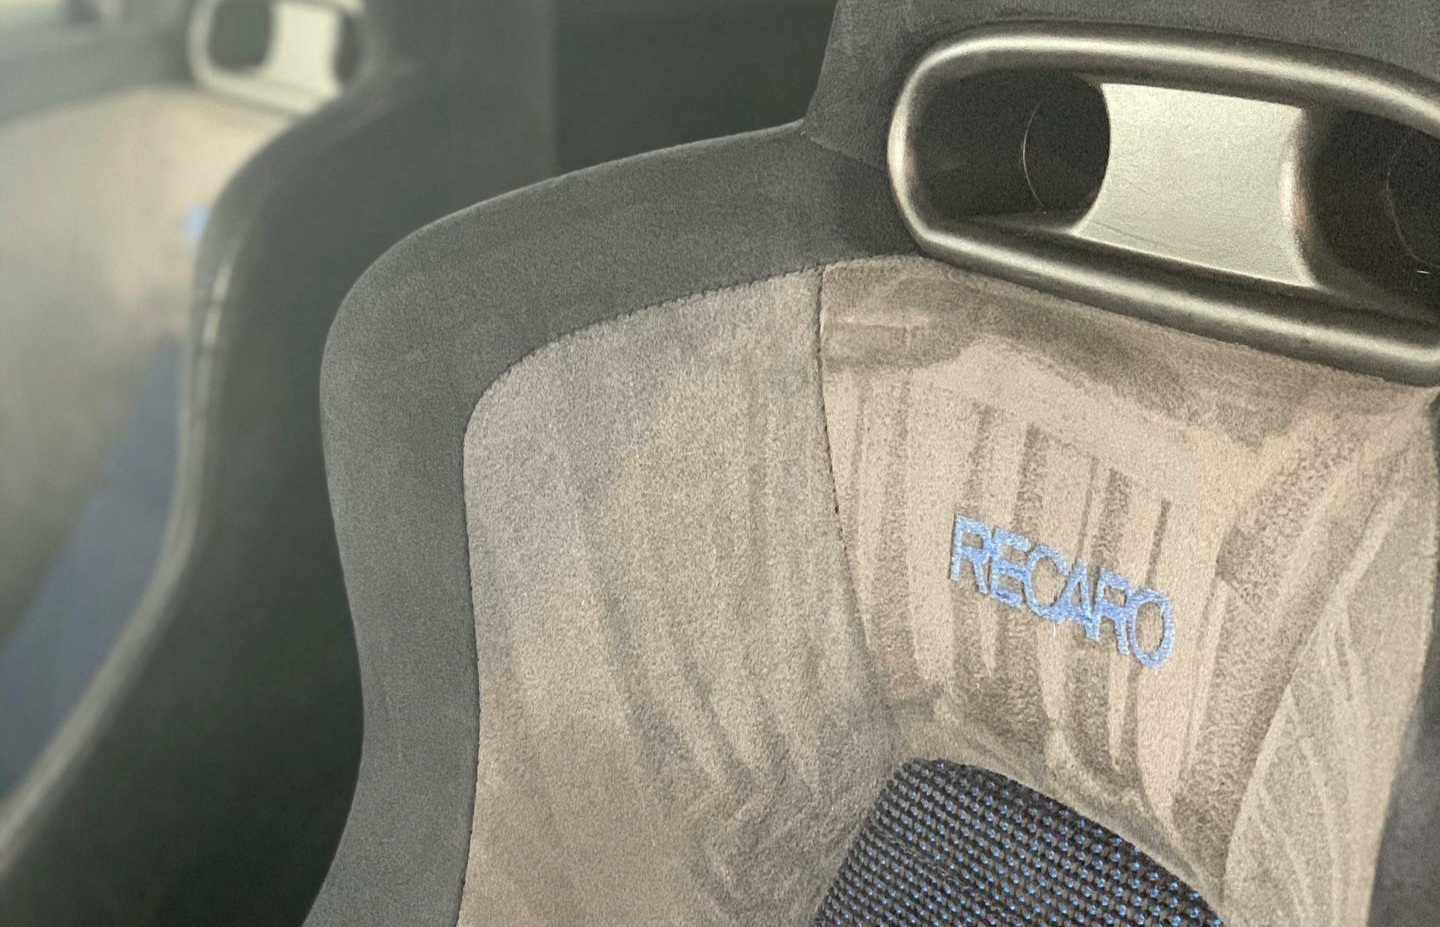
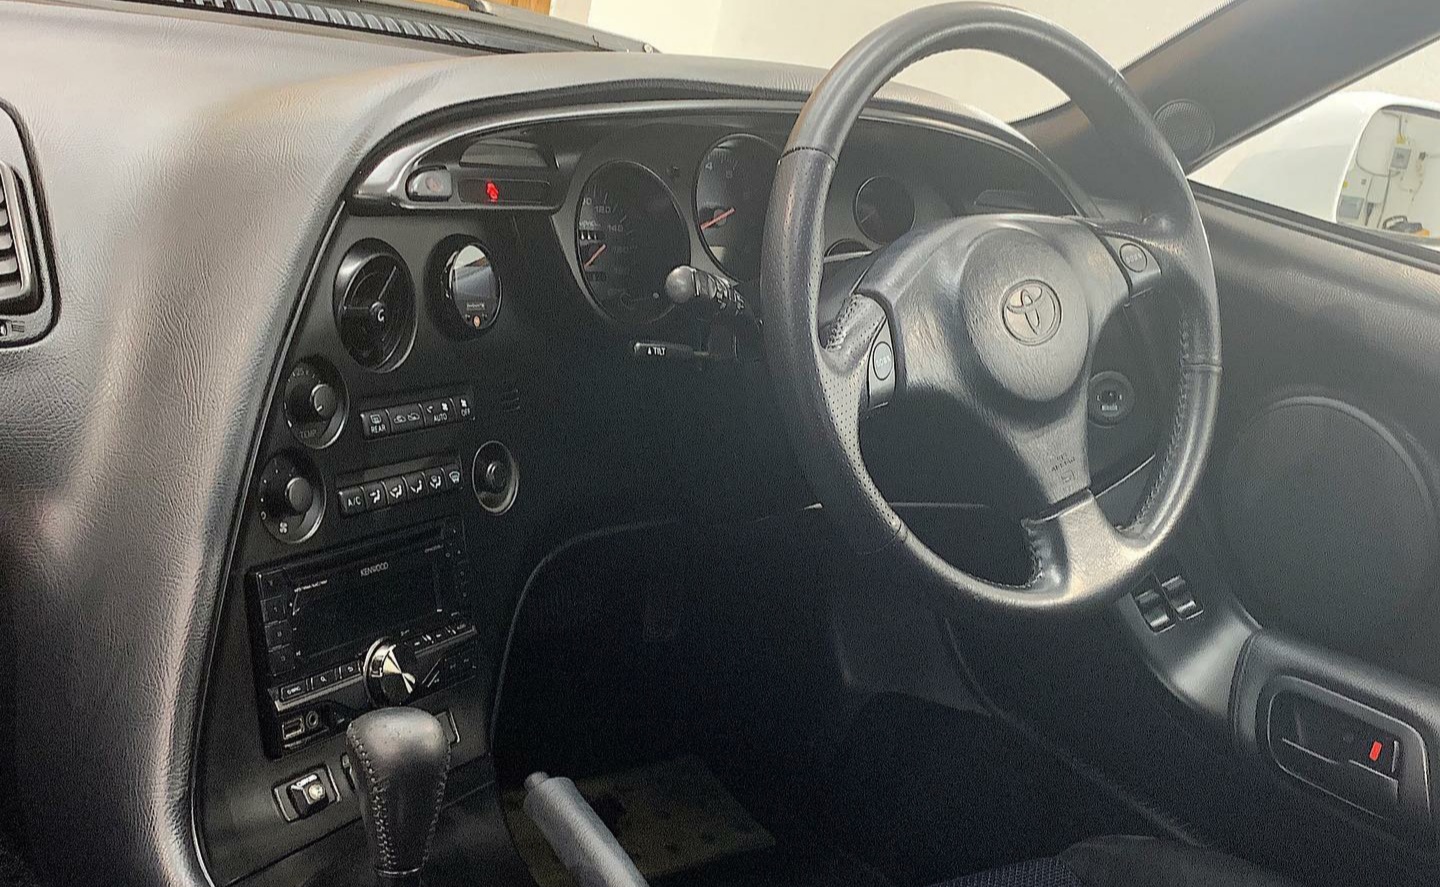
Made a couple of small additions cosmetically to the car, finally got around to fitting the carbon side sill covers. Found the best way to do them was to fit them in place with a small bead of sealant, and then trap them with pressure by shutting a small drying towel in the door Finished outcome of both sides Bought a MR2 MK3 Roadster steering wheel that I've been playing around with, stripped the leather down to create a template for a retrim, bought some Leather and Alcantara to do it but this is going to be at a later date. Actually wanted perforated leather if anyone can suggest a good place to buy it from? Seems harder to find good quality when perforated. Once I've actually found the time to do this I'll be working some paddles to the back of the steering wheel and wiring them to the tiptronic system as well, as done previously by other members here. Loved my old sunstrip before I had the car professionally coated, but the sunstrip had to come off to polish the glass before the coating, so I replaced it like for like with Blackmarket products. They also sent me one of their rear International style stickers which I've placed on the rear window, this seems really hit and miss as to whether people like it or not, and i seem to flick between liking it and wanting to take it off, so that's likely staying there until all my carbon bits arrive in a few weeks for the bodywork as it shouldn't take so much attention when those parts are on
-
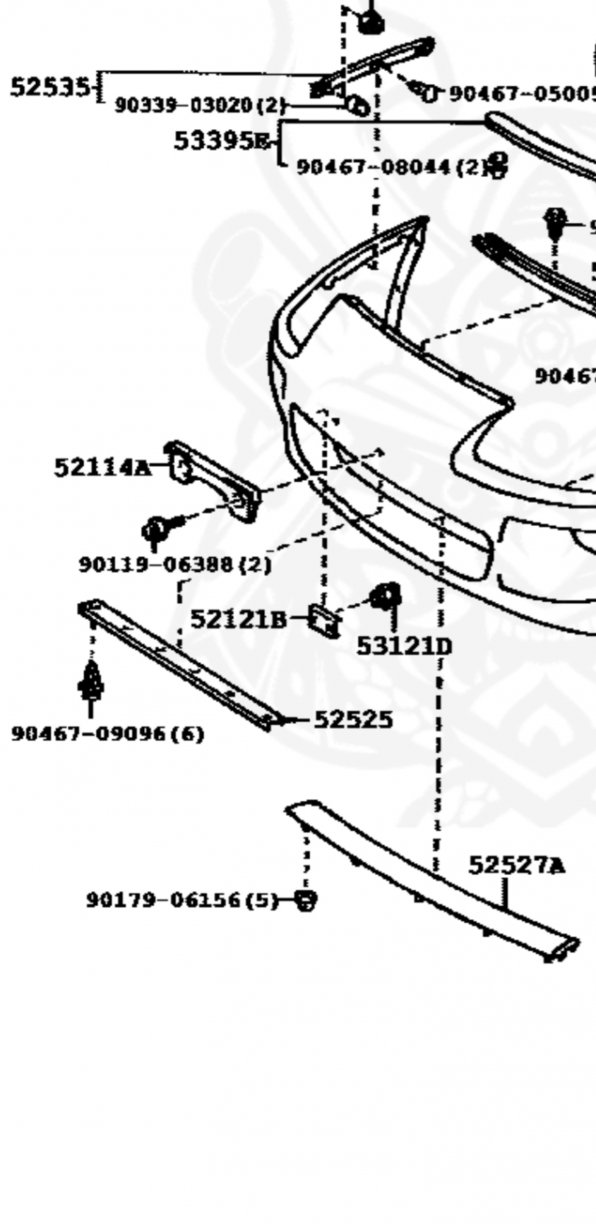
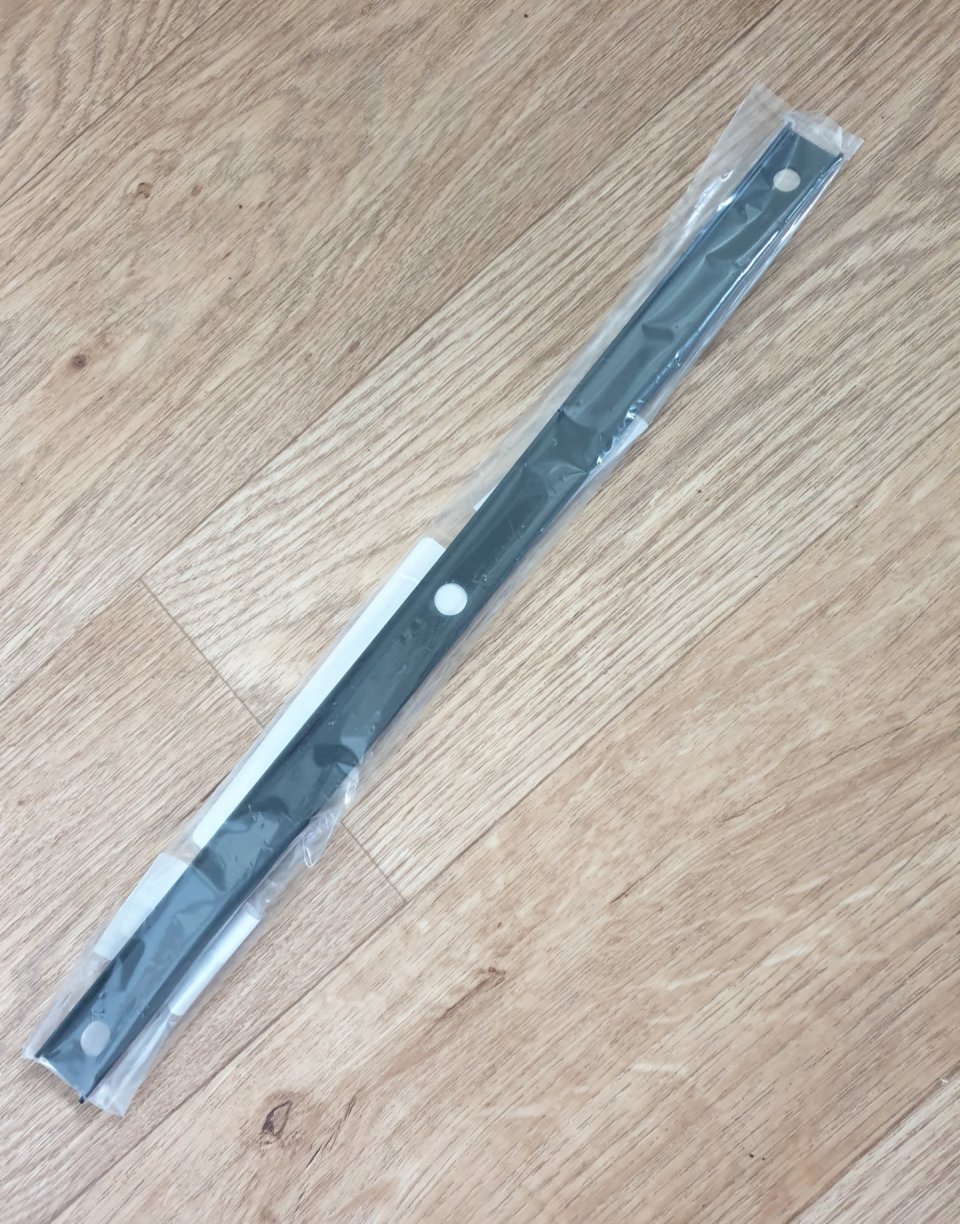
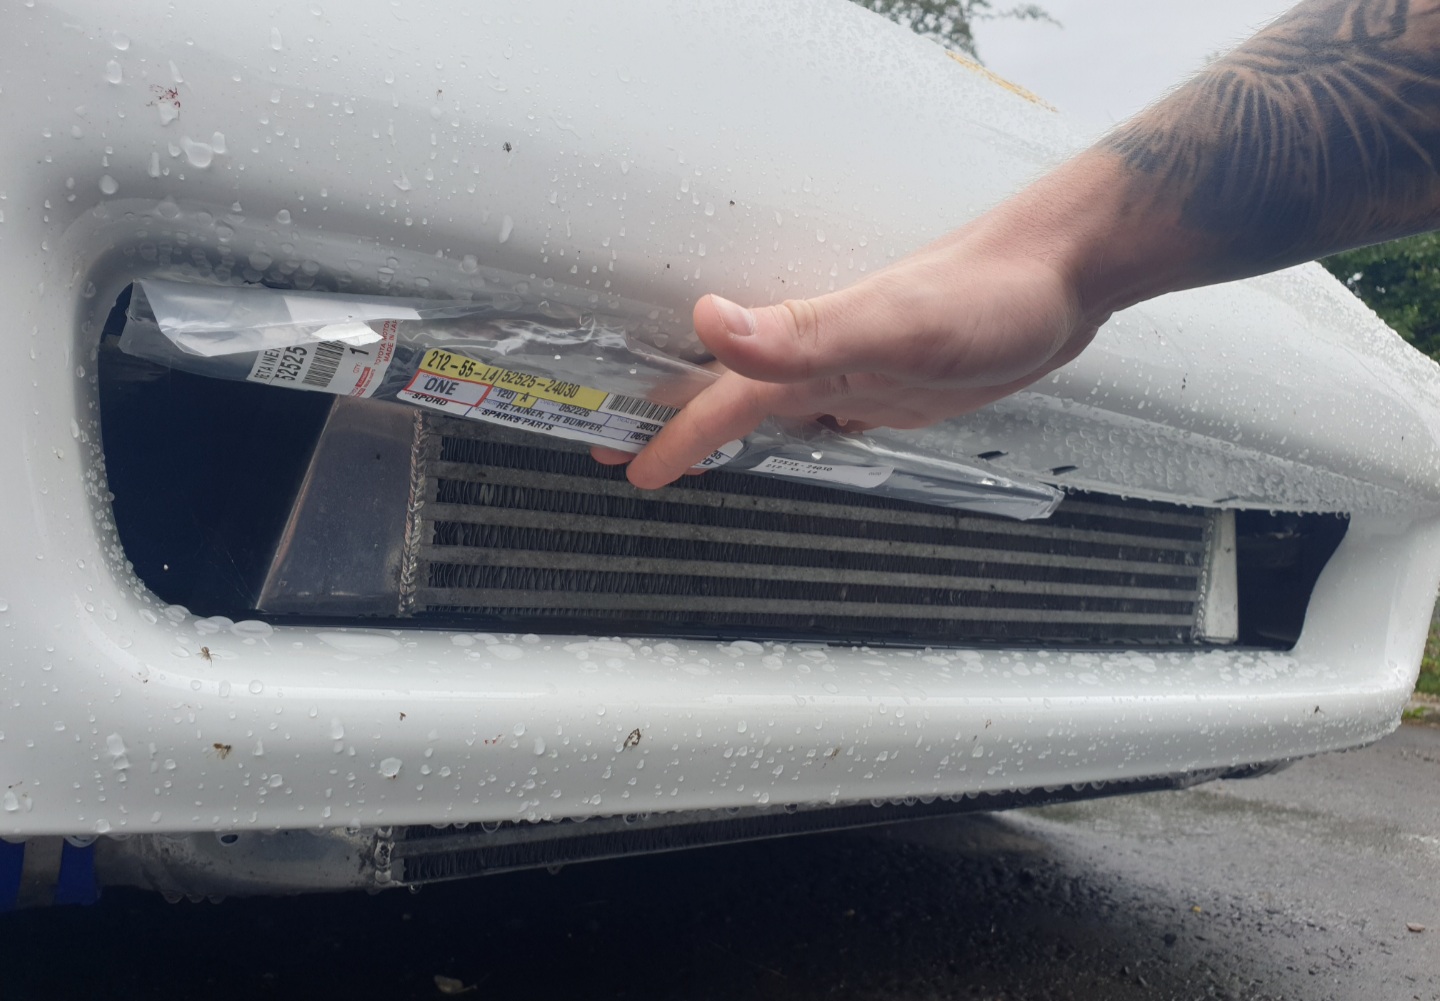
Wanted the part described above, ordered from Toyota Sparks in the US only to receive the part and its not the same as the image in the breakdown of part numbers, nor is it the right size... Part No 52525 - 24030 They've been useless with information and help. Anyone got one of these by any chance? Pictures for reference...
-
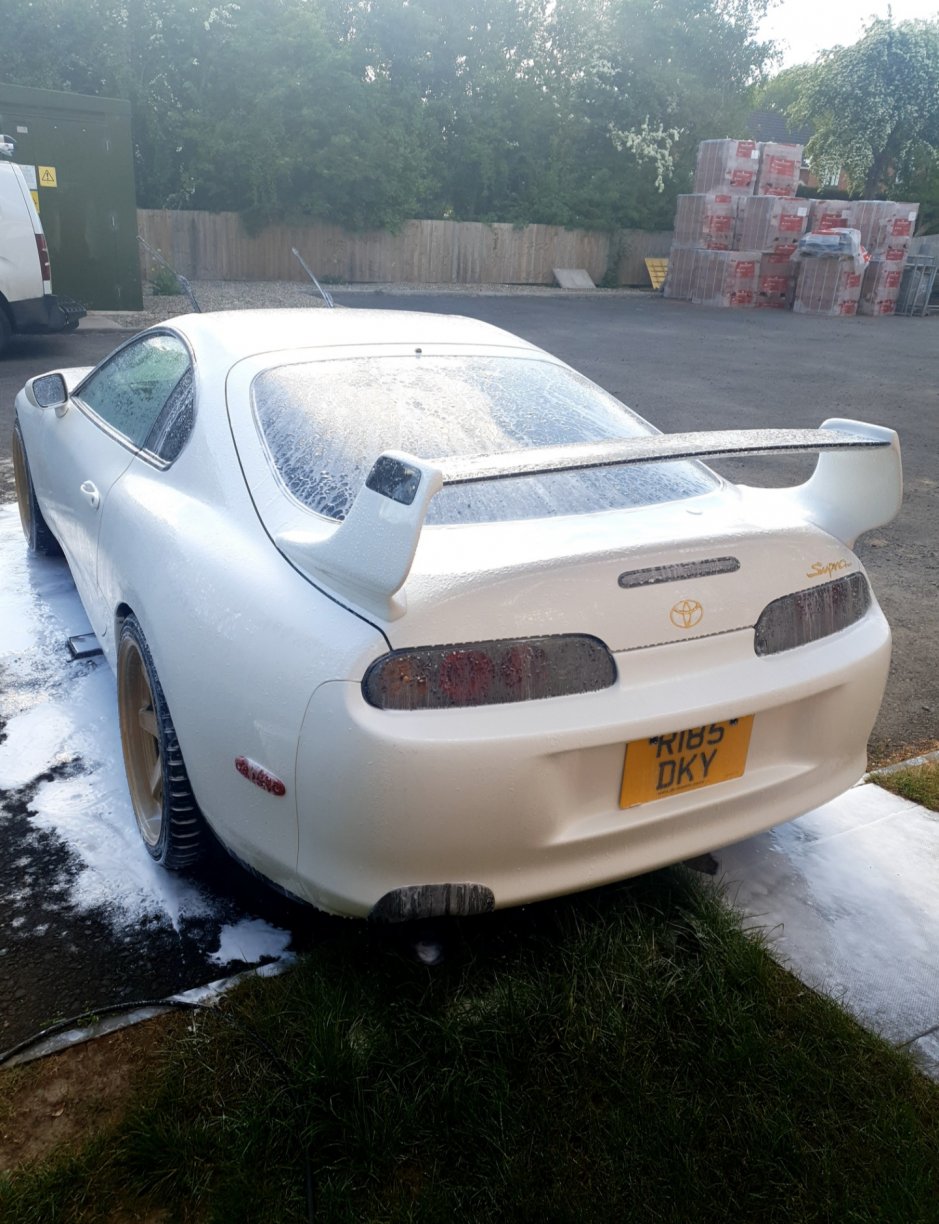
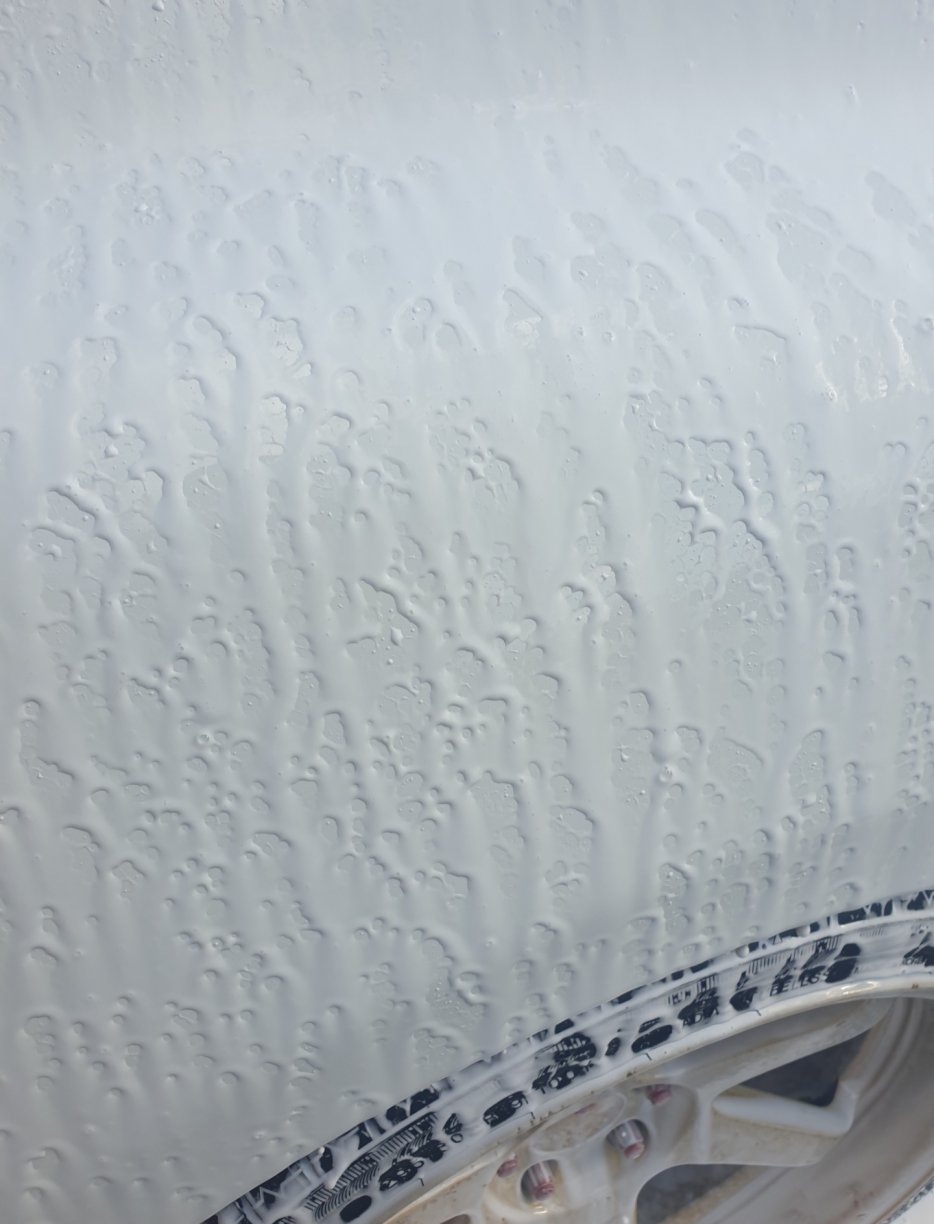
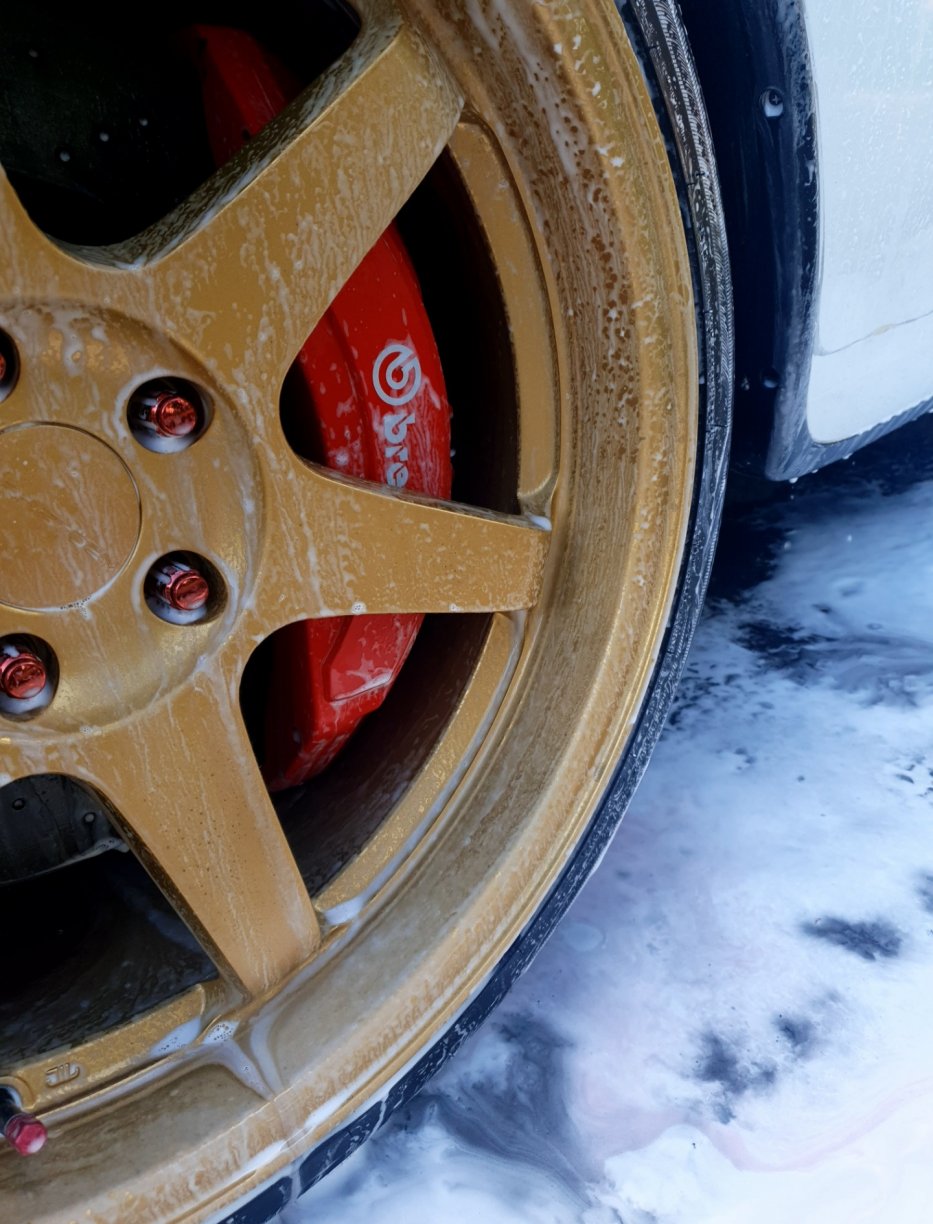
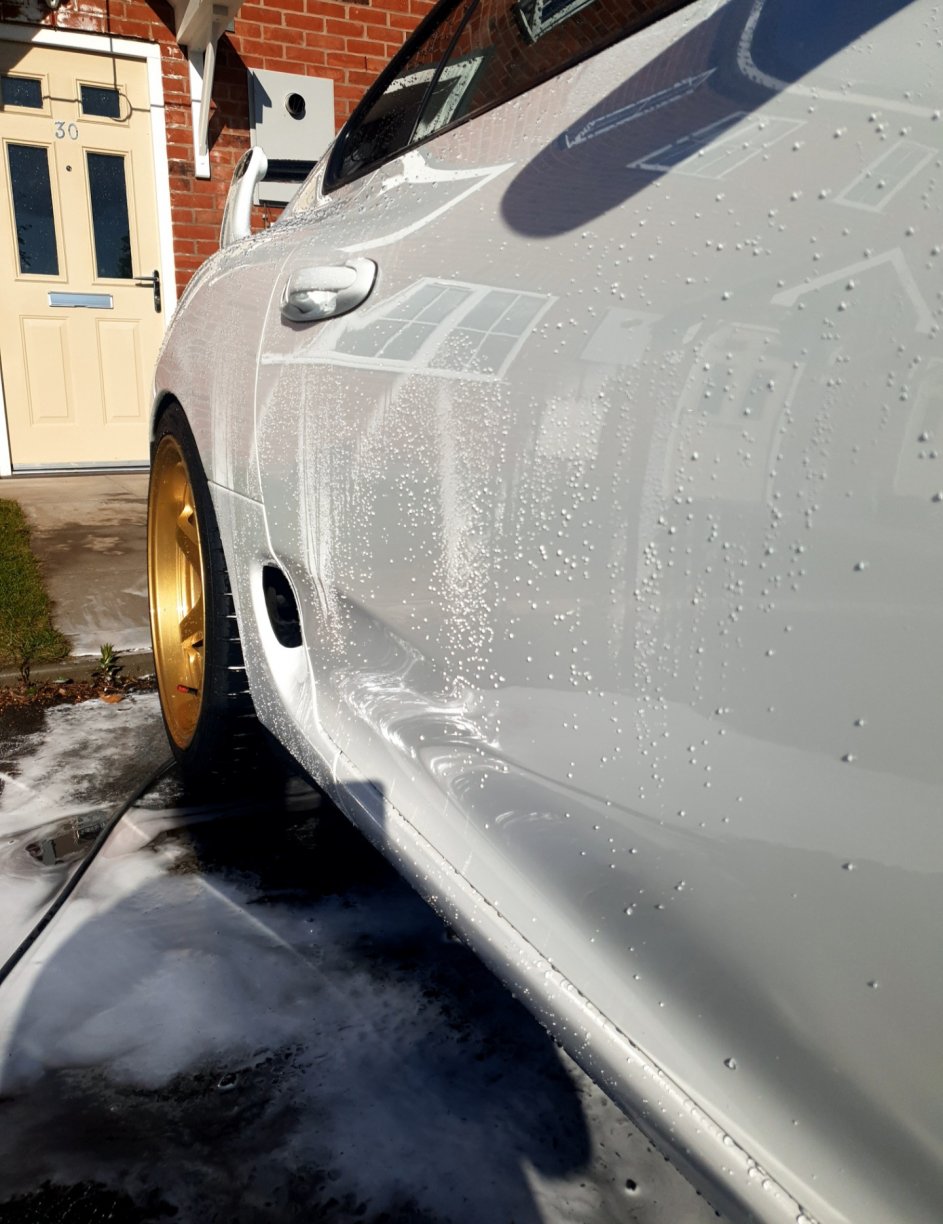
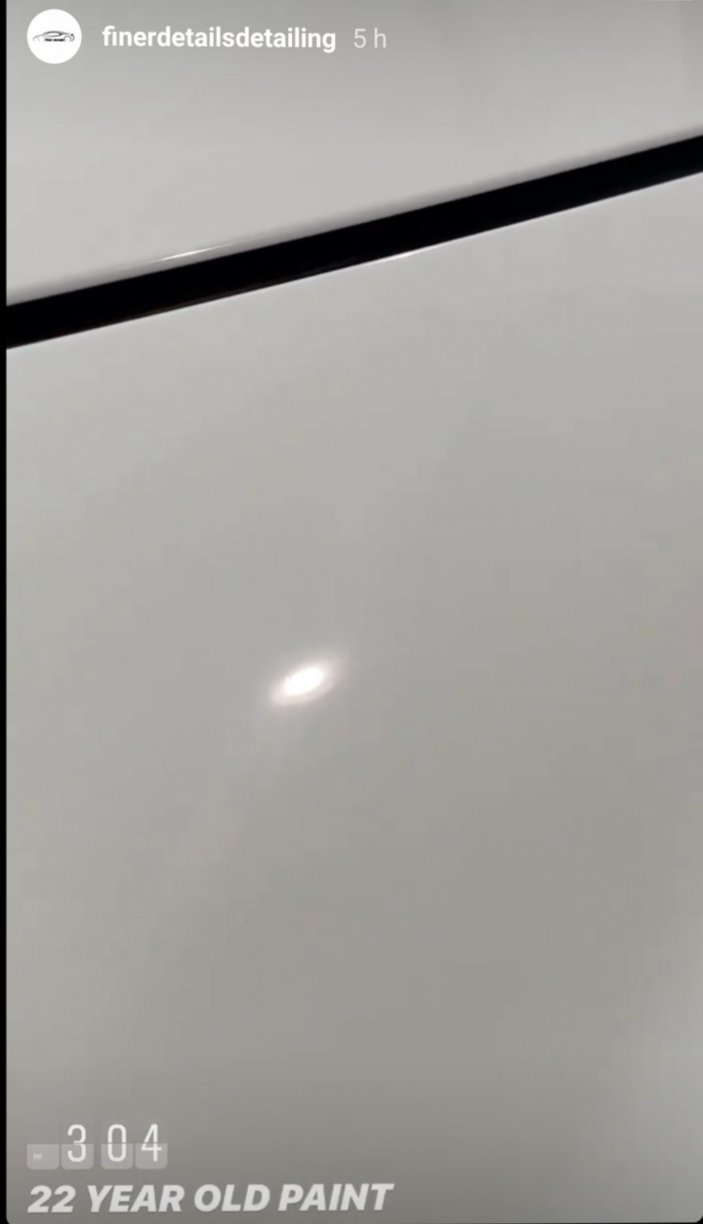
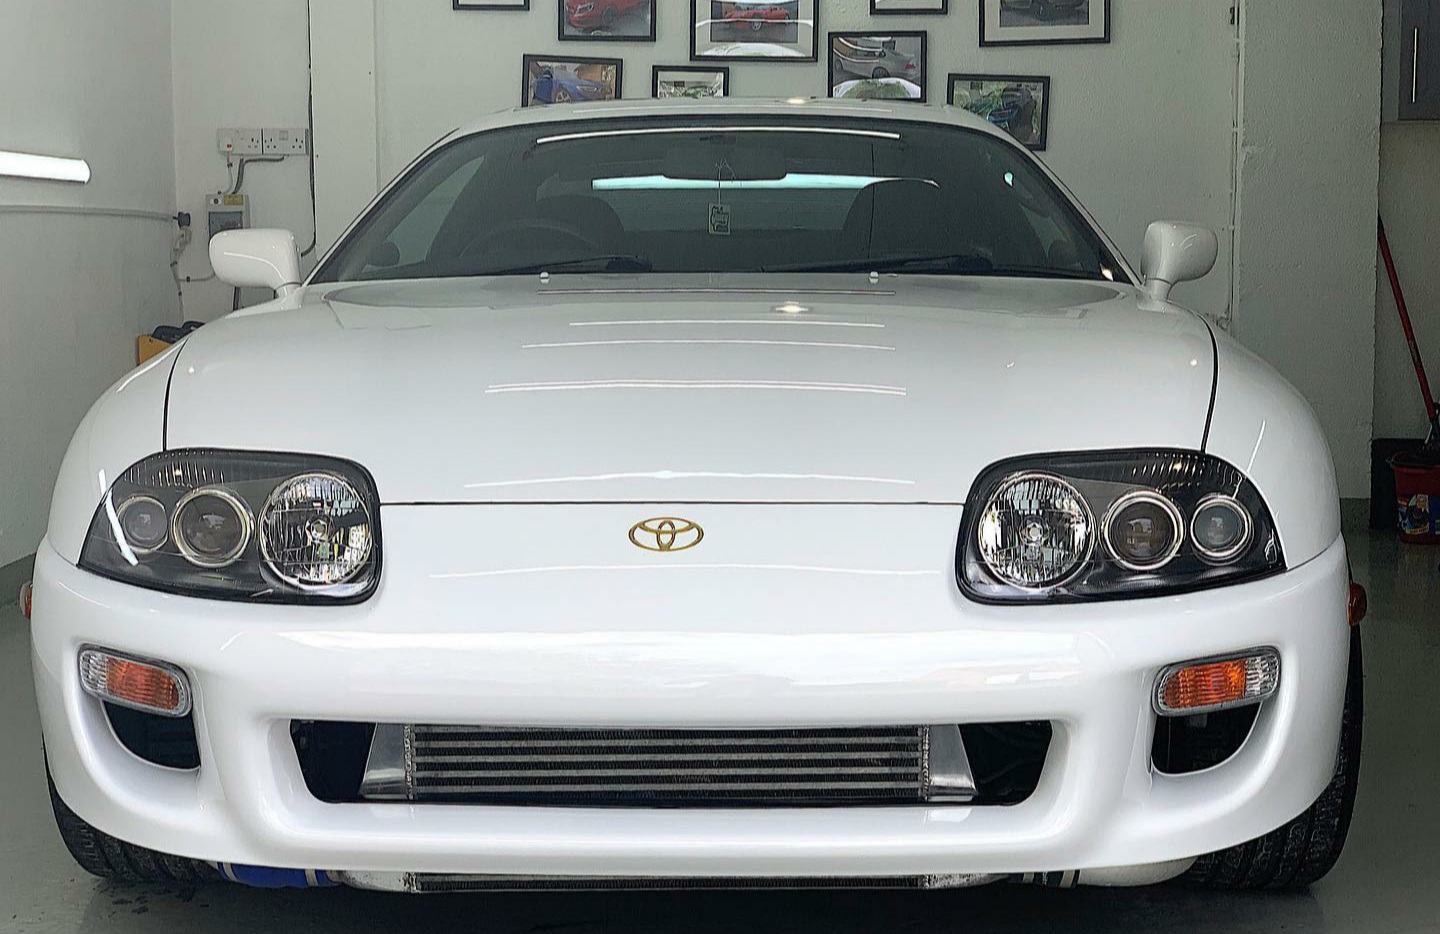
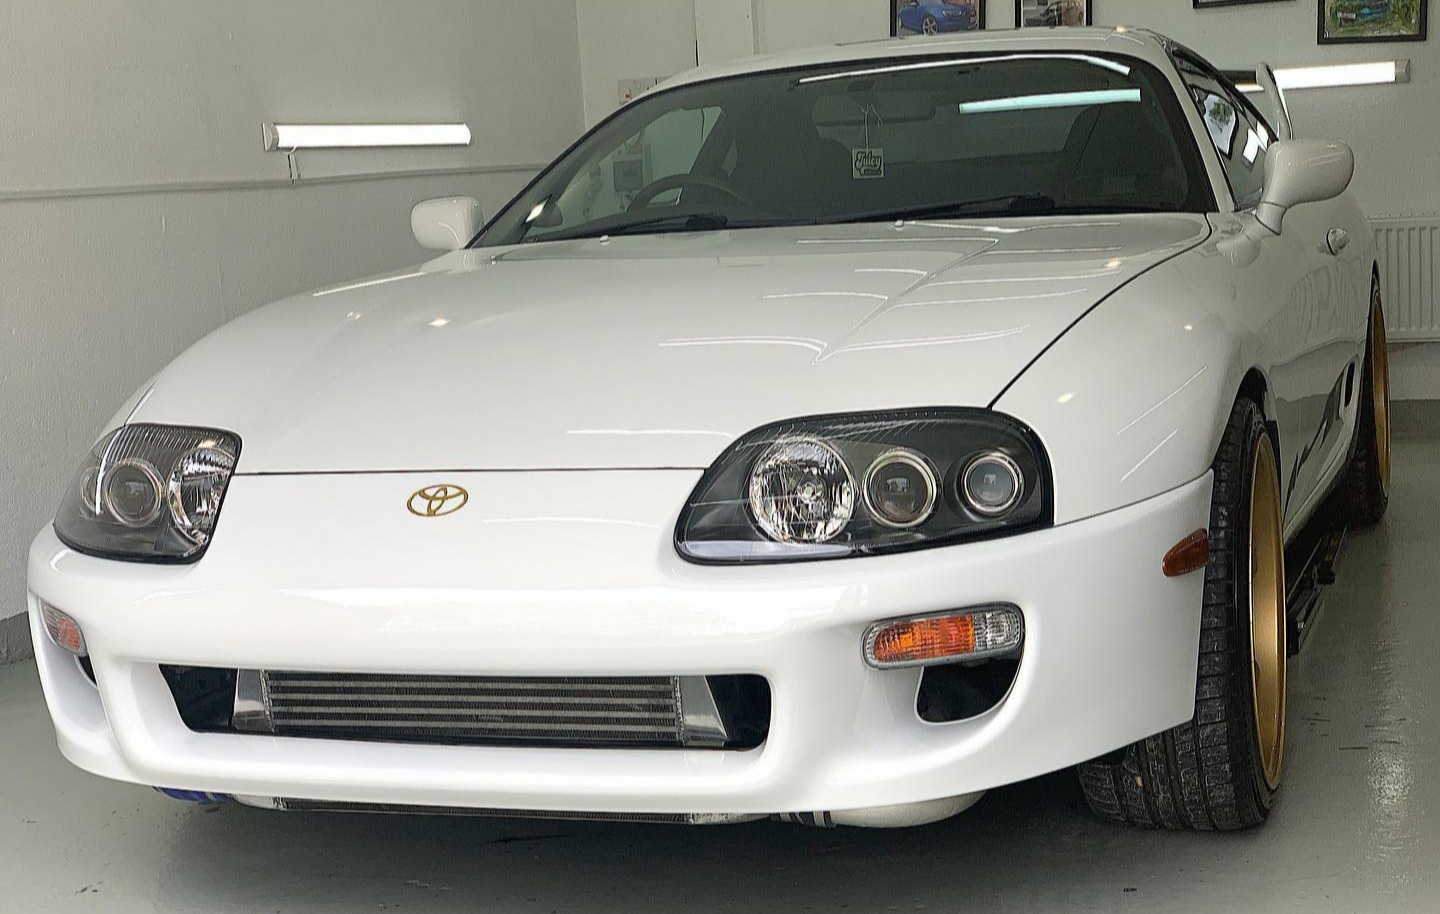
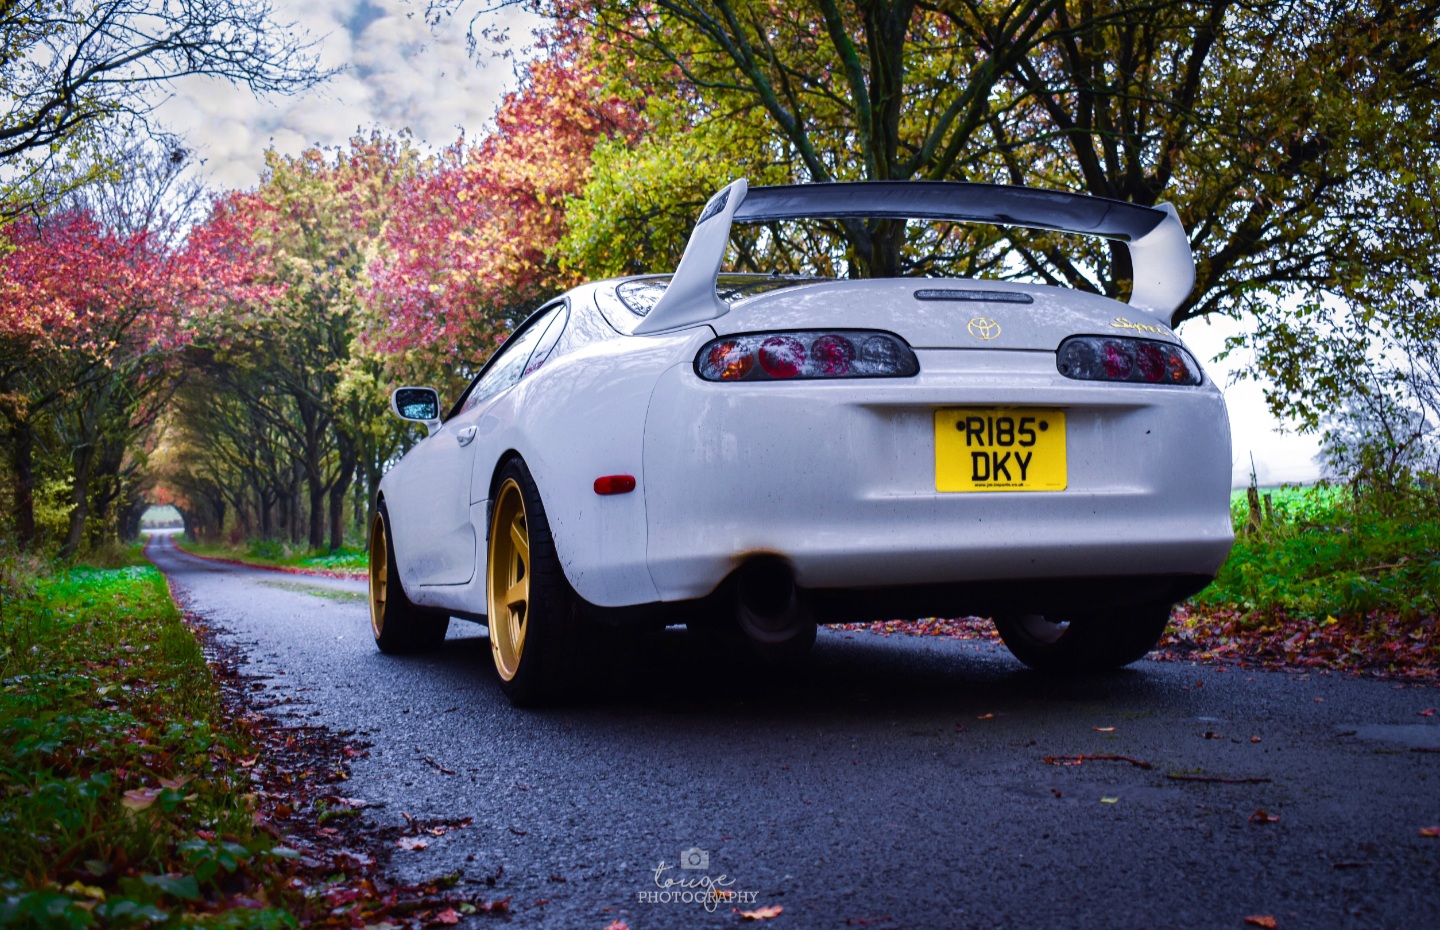
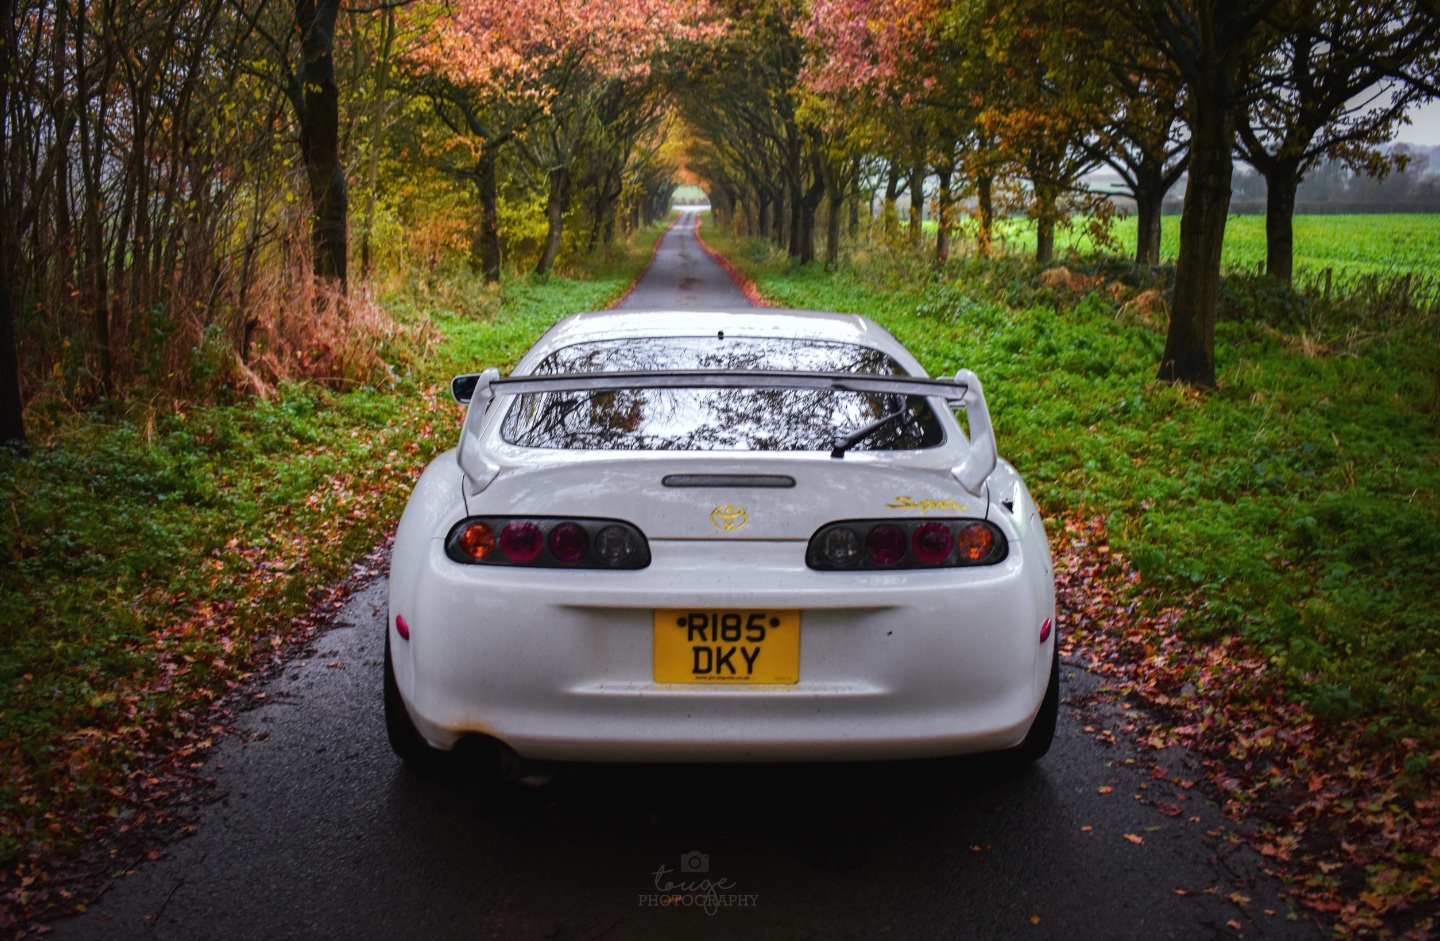
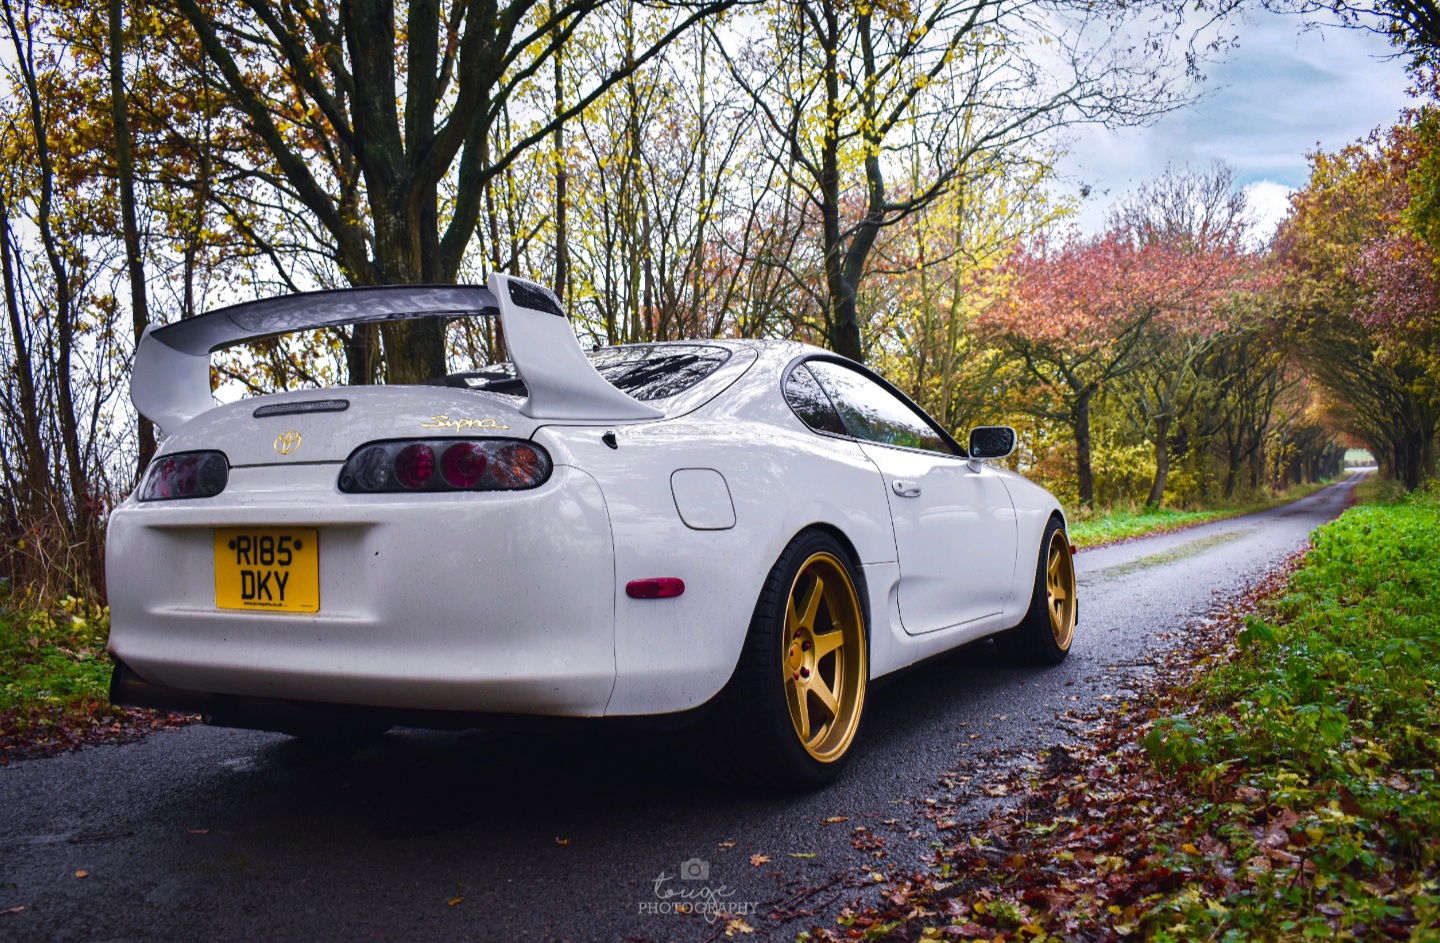
Few pictures from over the last few weeks showing how effective the coating is, can't even get snowfoam to stick to it most of the time unless its properly coated in road grime! The Ceramic coating on the alloys, Exhaust and windows are doing the job as well! Beading on all surfaces are brilliant, and the gloss on the bodywork is crazy, especially for a white car Some more updates coming up with small changes, and then all caught up! Hopefully some big progress with it by the end of August as well!
-
A guy called Jegan. Really nice bloke, shame it happened to that as it was really clean. Was for sale too if I remember rightly as he had just picked up another one. He is known for owning the Carbon GTR that attends most Jap Shows. https://instagram.com/jegan7000?igshid=vykhecilm1jm
-
I'm keeping the coating itself topped up with a spray on sealant, and wax as you would without it, should help the longevity. It will go back once every year to check on the coating, its supposed to be a 5 year sealant but that's minimum with good maintenance so I'm hoping to be getting at least that out of it. I'm managing most weekends to just snow foam and dry it off without contact washing as I don't use it some weeks. Every other week I seem to be doing a proper contact maintenance wash. The cost of the work and the coating was £800, that was at a fair discount though as he barely had to prepare the bodywork due to my work on polishing prior. Tempted at PPF for the front bumper and splitter once the Carbon splitter arrives as well
-
Bump
-
Thank you mate onto the subframe and engine next!
-
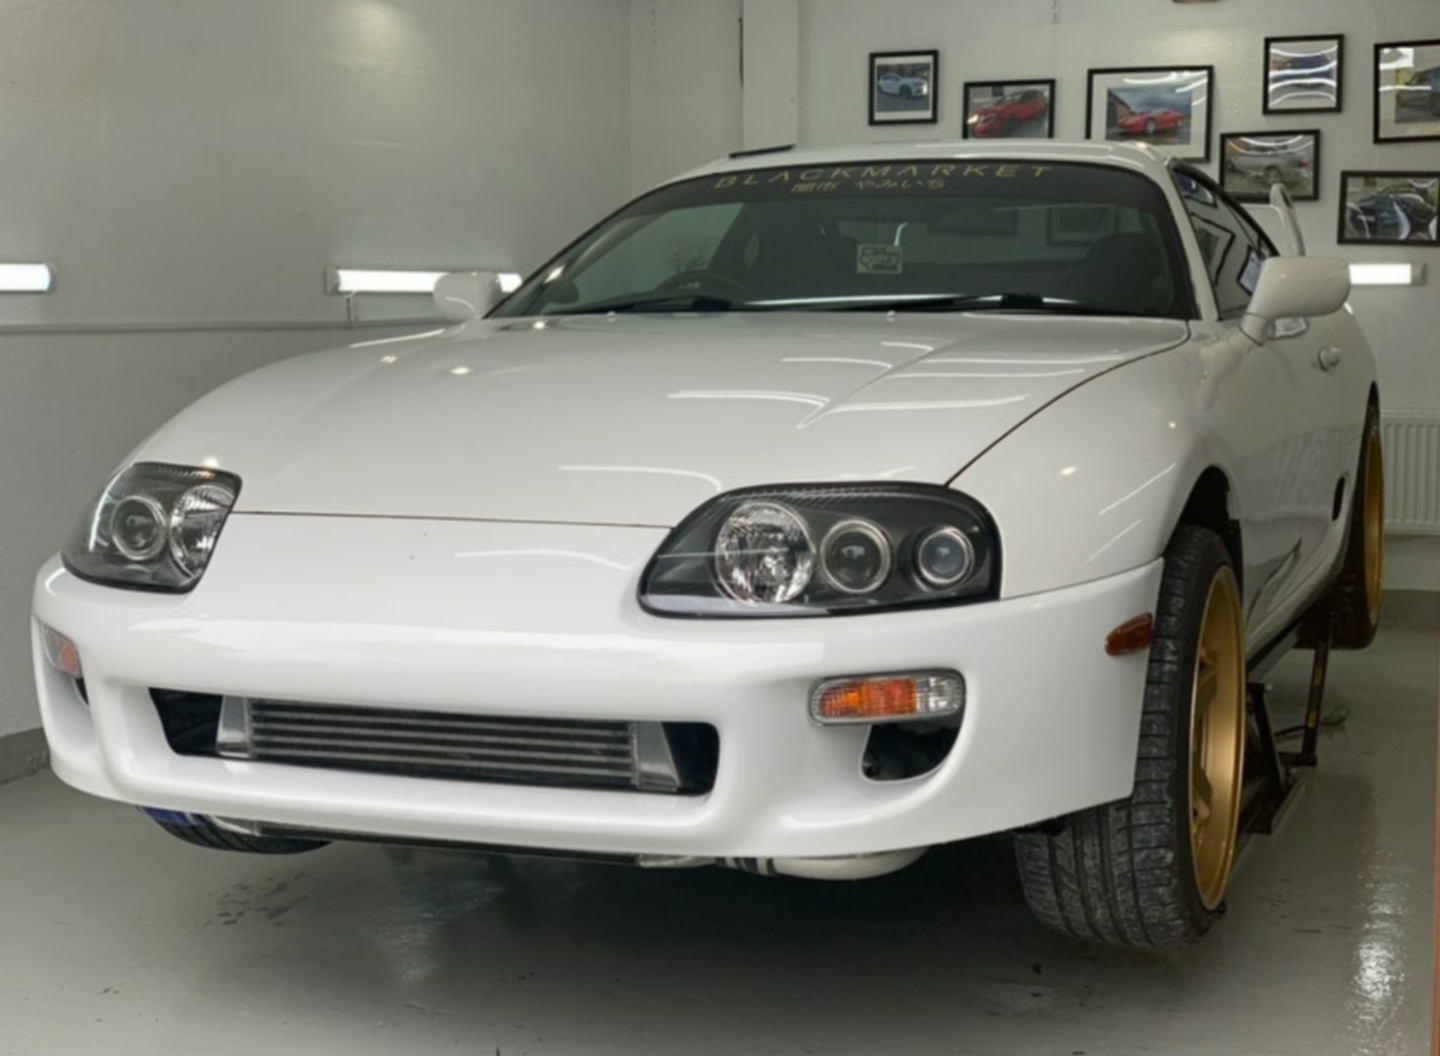
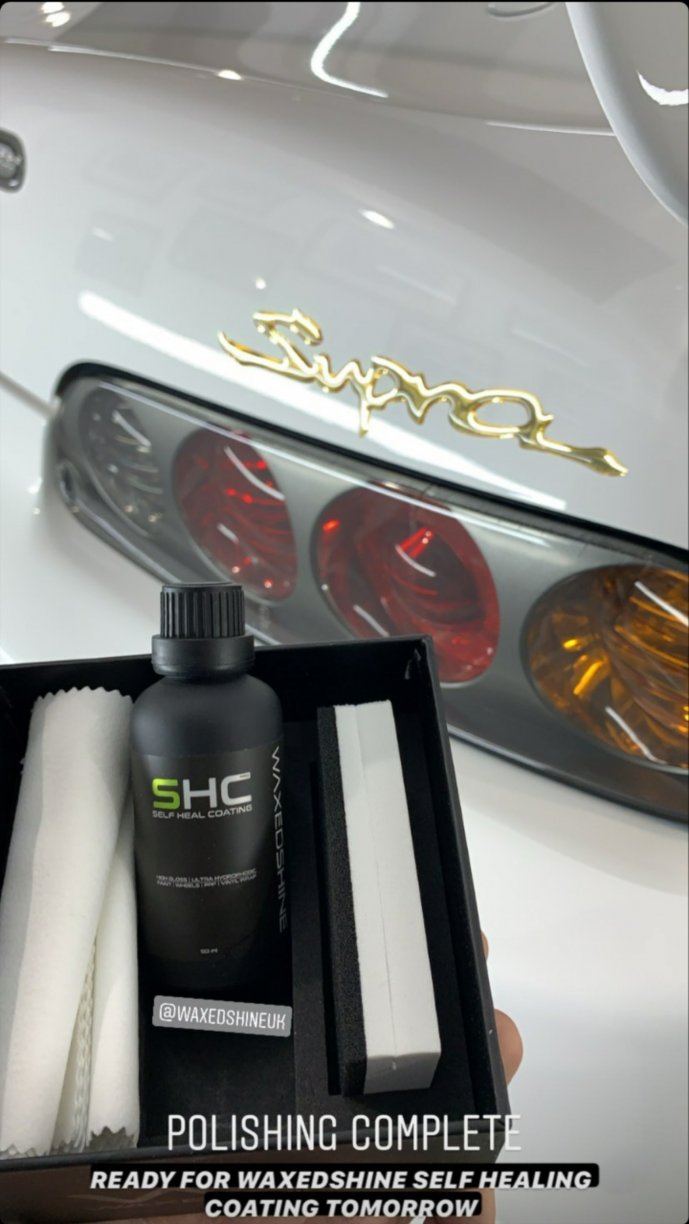
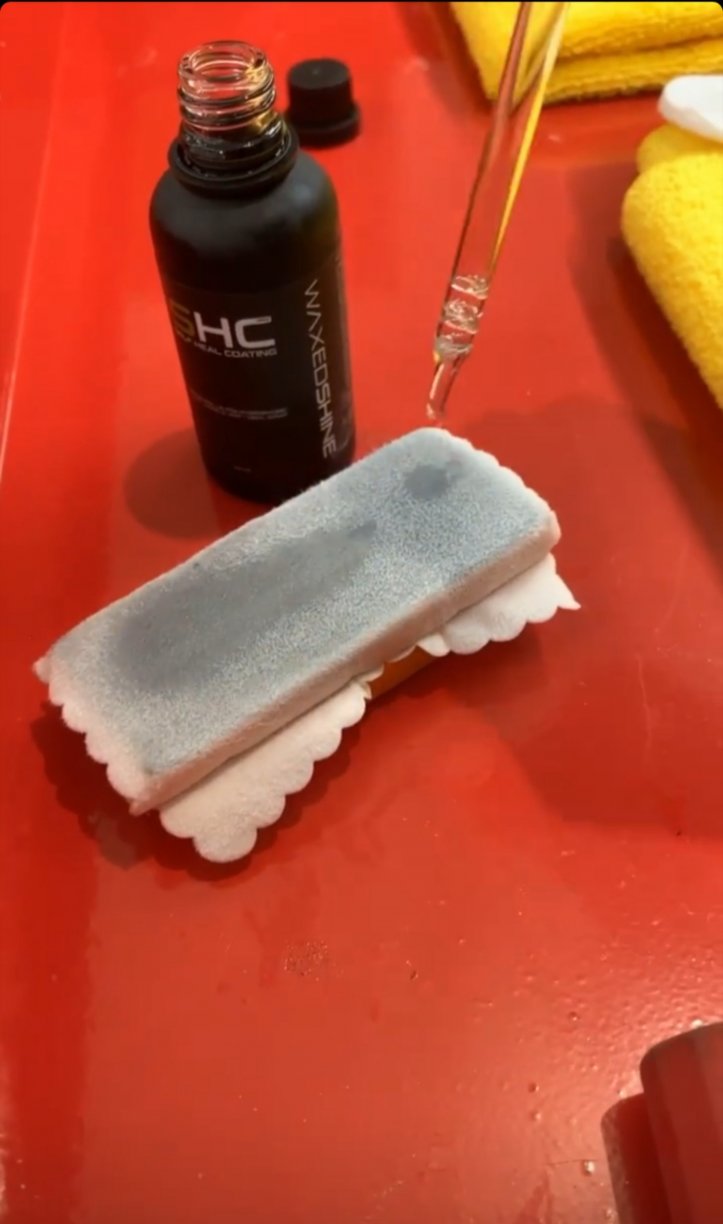
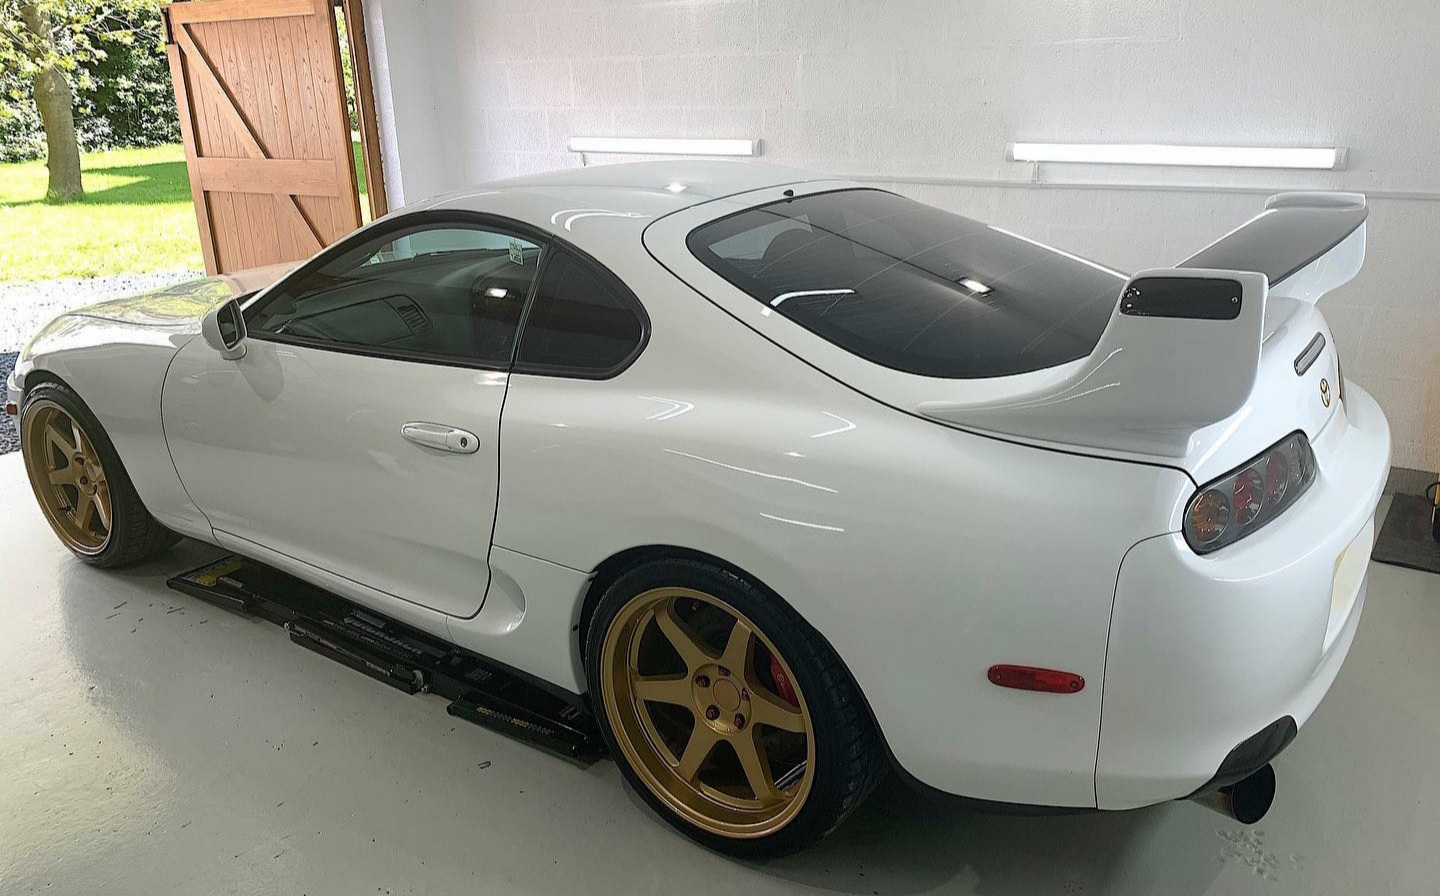
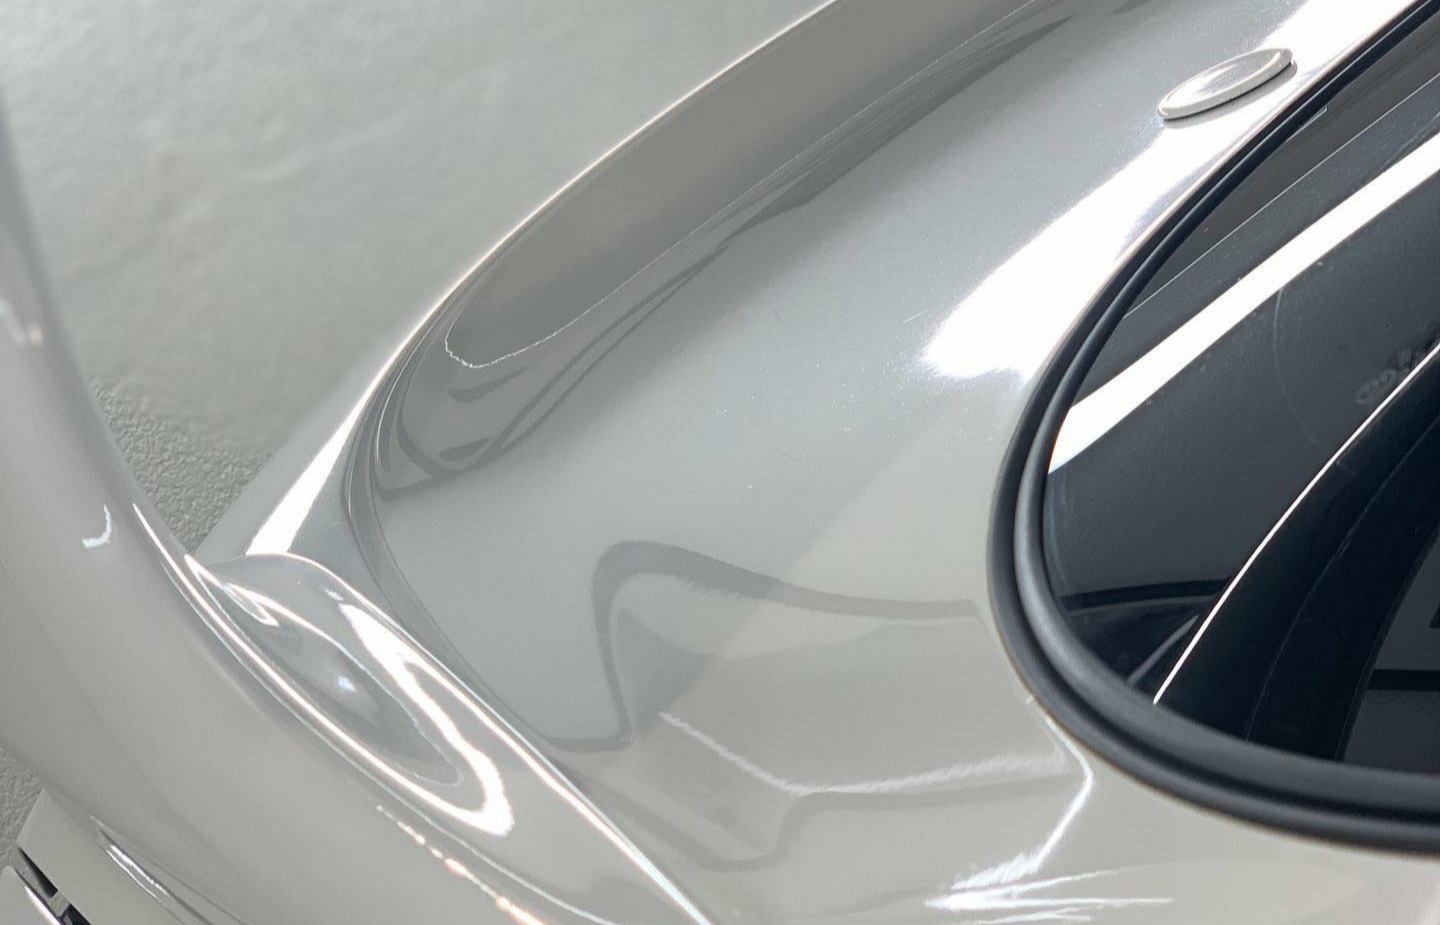
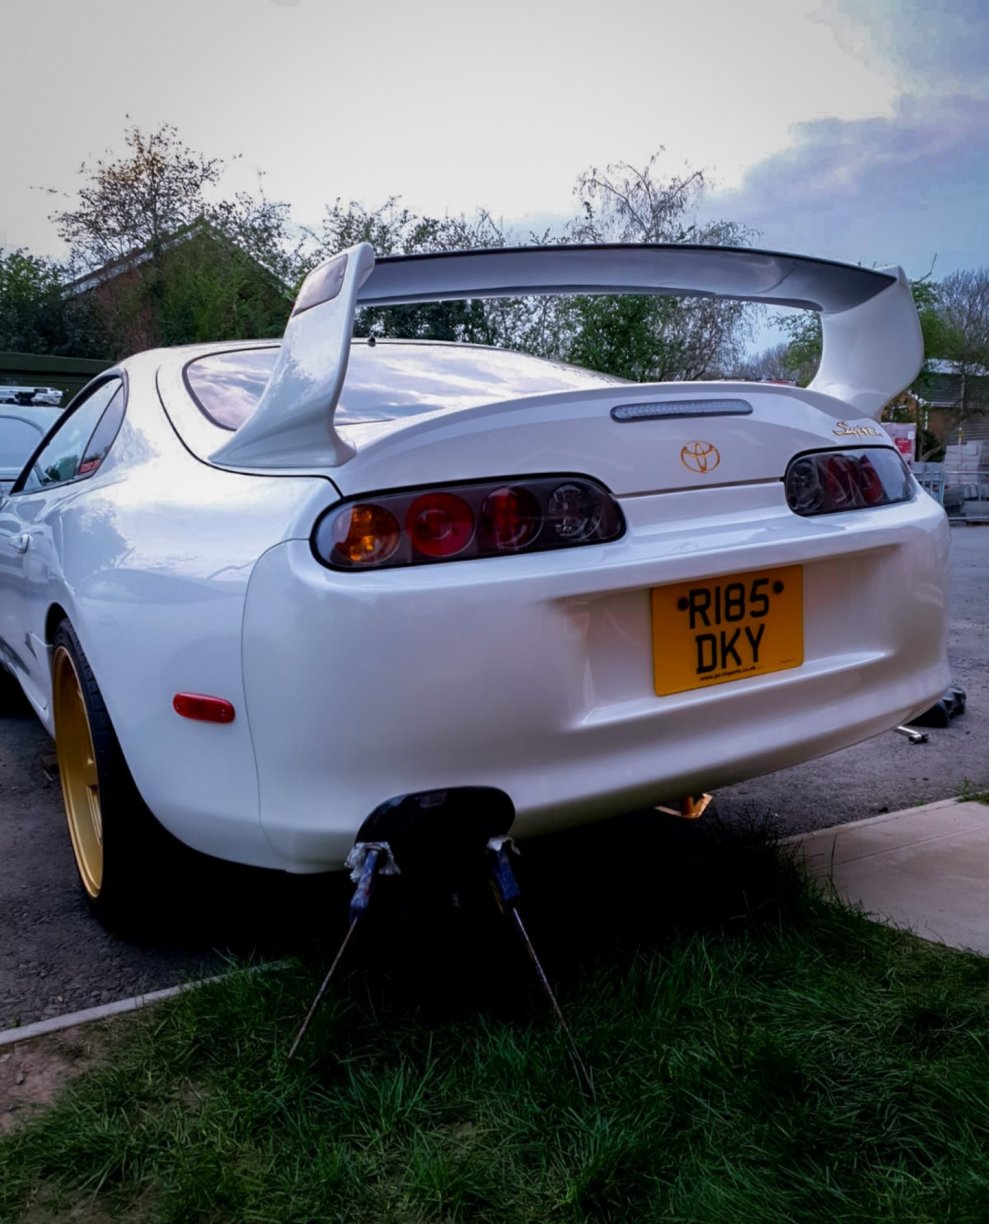
With all of the bodywork done and the car pretty much spotless I decided it would be good timing to get the bodywork protected for the long term. After a few discussions with various people across the world with different coatings and backgrounds that I knew had good and reliable info, and then to my local prifessional detailer, I settled on a Self Healing Graphene Coating. The videos I have of this coating are mad. I also watched in person on a BMW owned by the detailer rhe coating get worked with a metal brush to scour the coating; you could see all of the markings in the topcoat which would usually be in the lacquer, or for us with the paint system Toyota used, the paint. They heated the coating up with a heat gun on a low setting and the marking literally healed before my eyes. They did this numerous times in the same area, and even took a Rotary polisher to it with a course polish and it still healed out. The 5th time they actually covered the panel in petrol and lit it which was entertaining, it literally healed the coating due to the heat. I was literally sold on the Graphene Self Healing System there and then. I booked the car in for 6 weeks later and patiently waited for my slot! Over the 5 says he had my car he sent me various updates of what was going on, I actually got a good amount of money off because I had done the polishing the year before and had looked after it really well. All that was needed was work in a few localised areas where he did find a few swirls and then gloss enhancement polishing all over the car prior to the sealant being laid down. I also had the vinyl sunstrip removed and glass polished all over the car. Images below are of the car being cleaned and decontaminated; I'm a pretty proud person when it comes to my cars cleanliness so I had actually completely cleaned it beforehand as well. He actually stated that he was looking forward to the challenge of finding an area of the car I hadn't gotten around to cleaning yet before me jokingly reminding him that the rear bumper didn't need removing for the work he was doing haha The car was then taken inside his unit for a more localised cleaning of certain areas and jacked up for him to get to the arches, which he messaged me his love for the work I had done to them in the weeks prior, making his work a breeze in there. He took a few before shots of the car He managed to find somewhere to actually properly clean as well haha He stated it was probably the cleanest 22 year old car he had ever seen, and went as far as to say that it was cleaner the the majority of 2 year old cars he's had in some cases to work on. Once he had finished all of the polishing he laid down my new set of Gold LikwidArt Badges as they were due to be coated too. He then begun work on laying down the coatings. He laid down a ceramic glass sealant on the glass, and added a second coating of ceramic to the alloys and exhaust system as well for further protection. And finally, the finished article once all the coatings had cured over a 30 hour period! The gloss levels these provided under good lighting was crazy, especially in person!

-
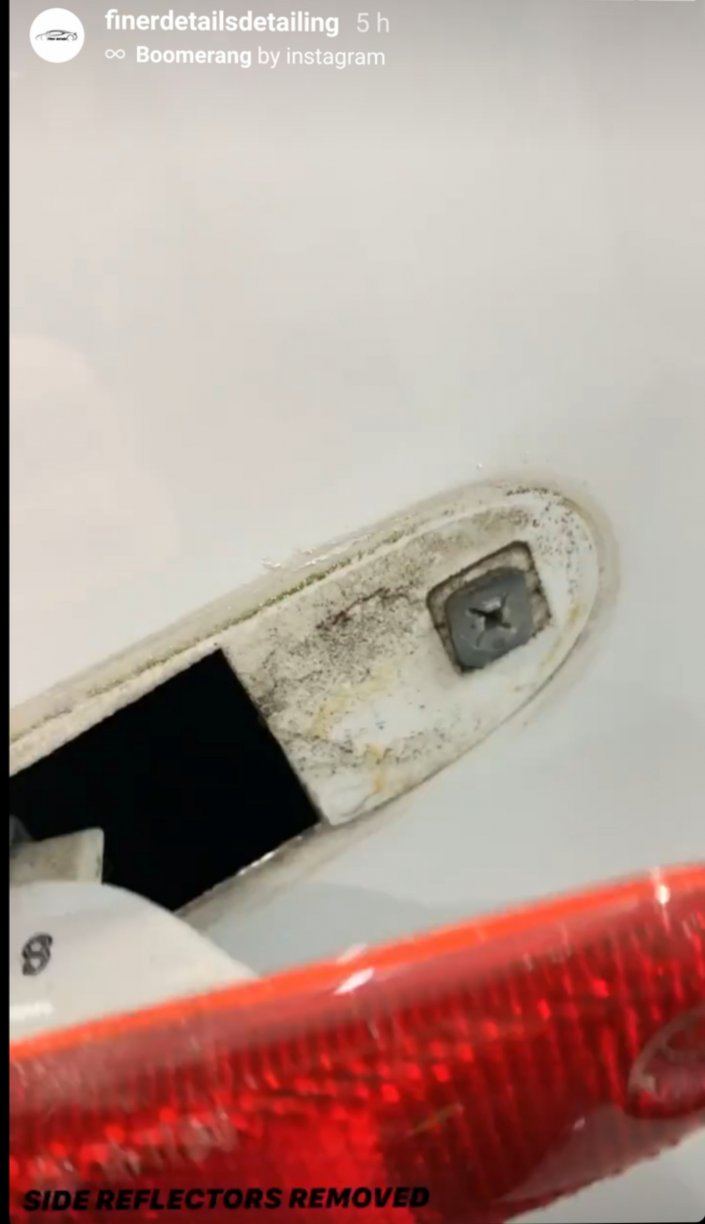
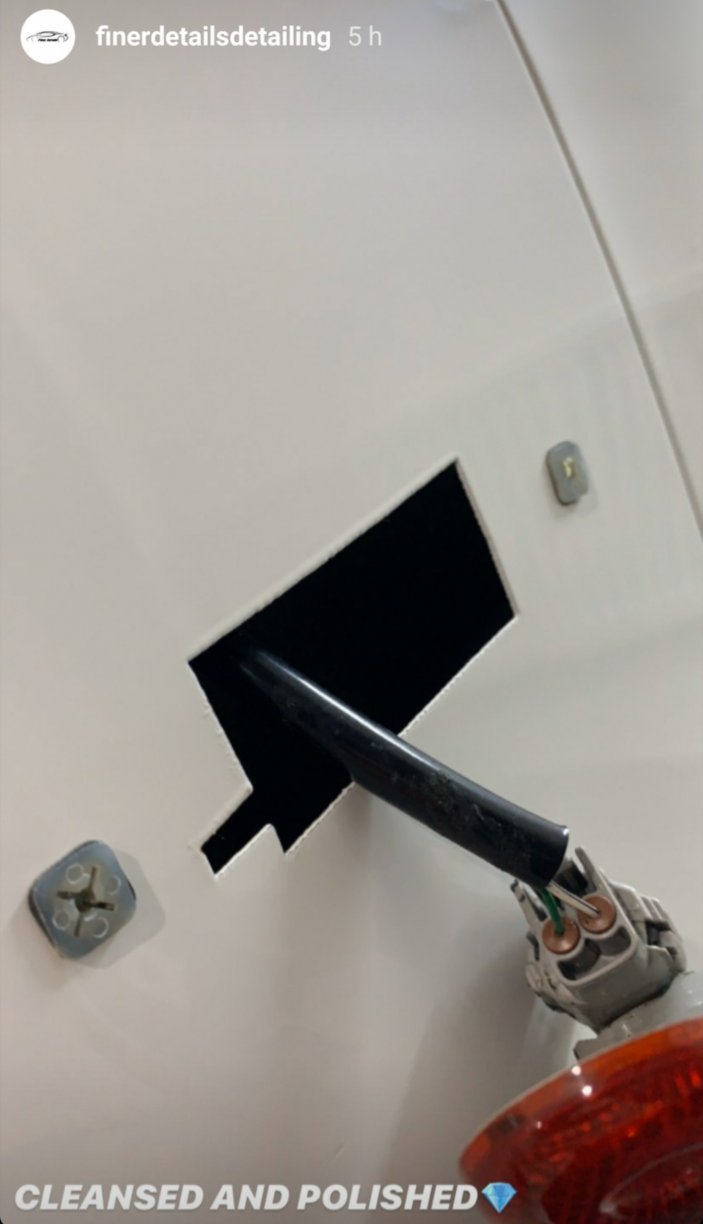
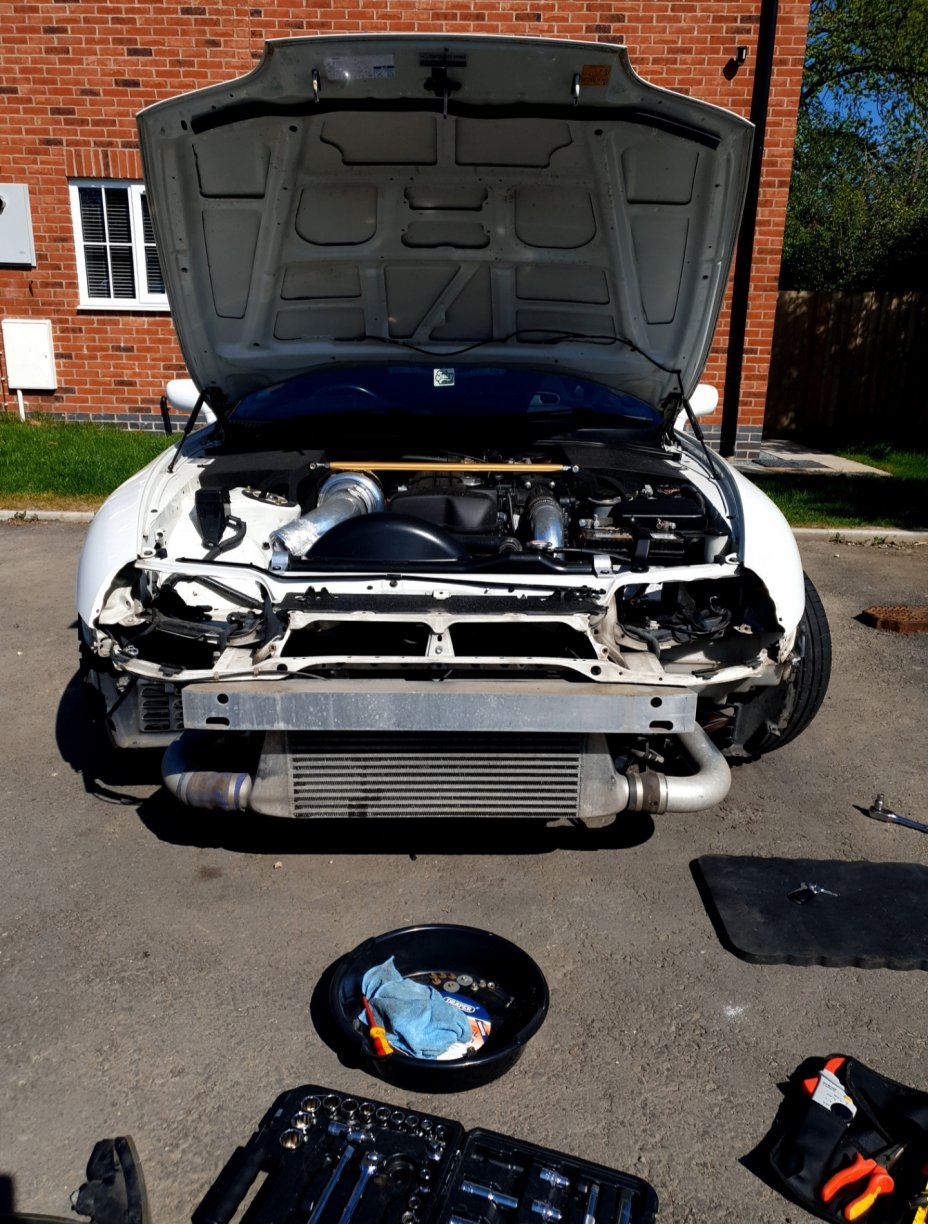
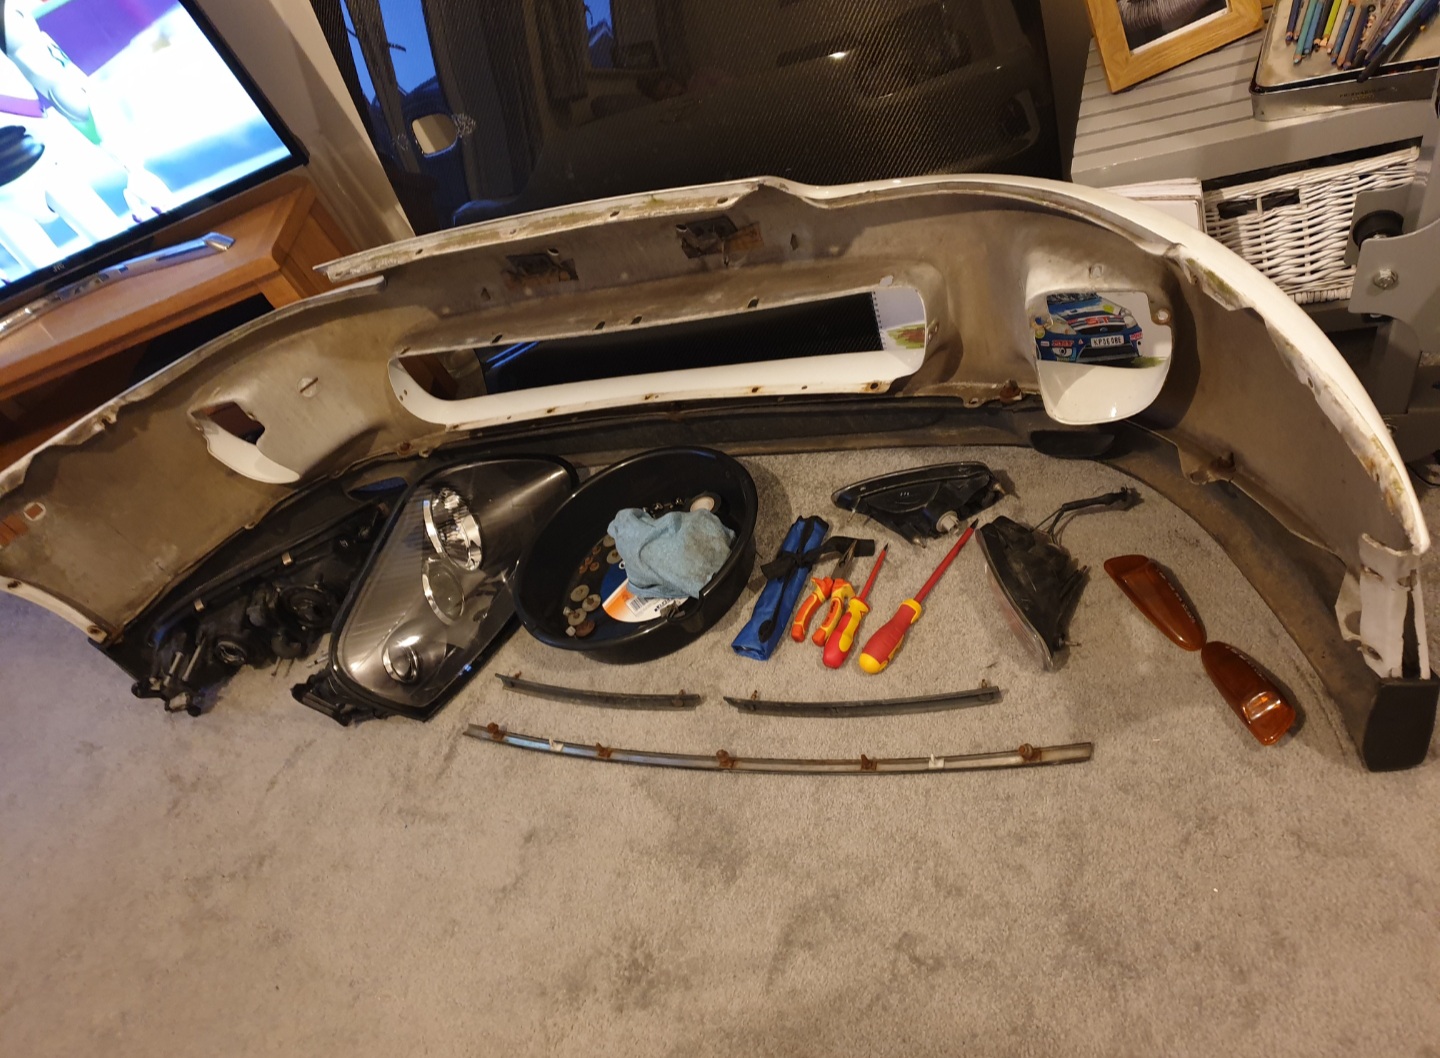
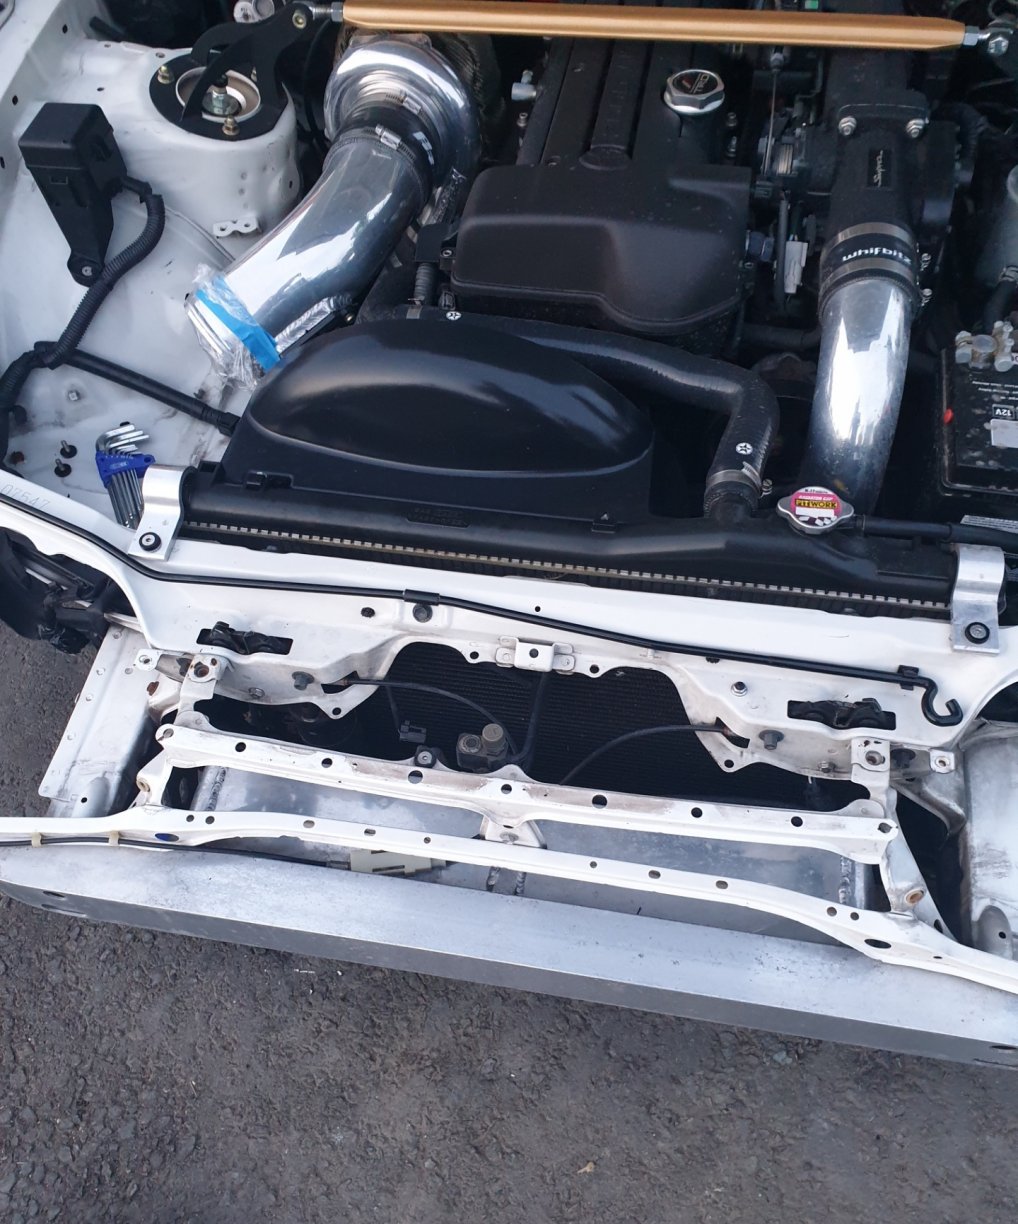
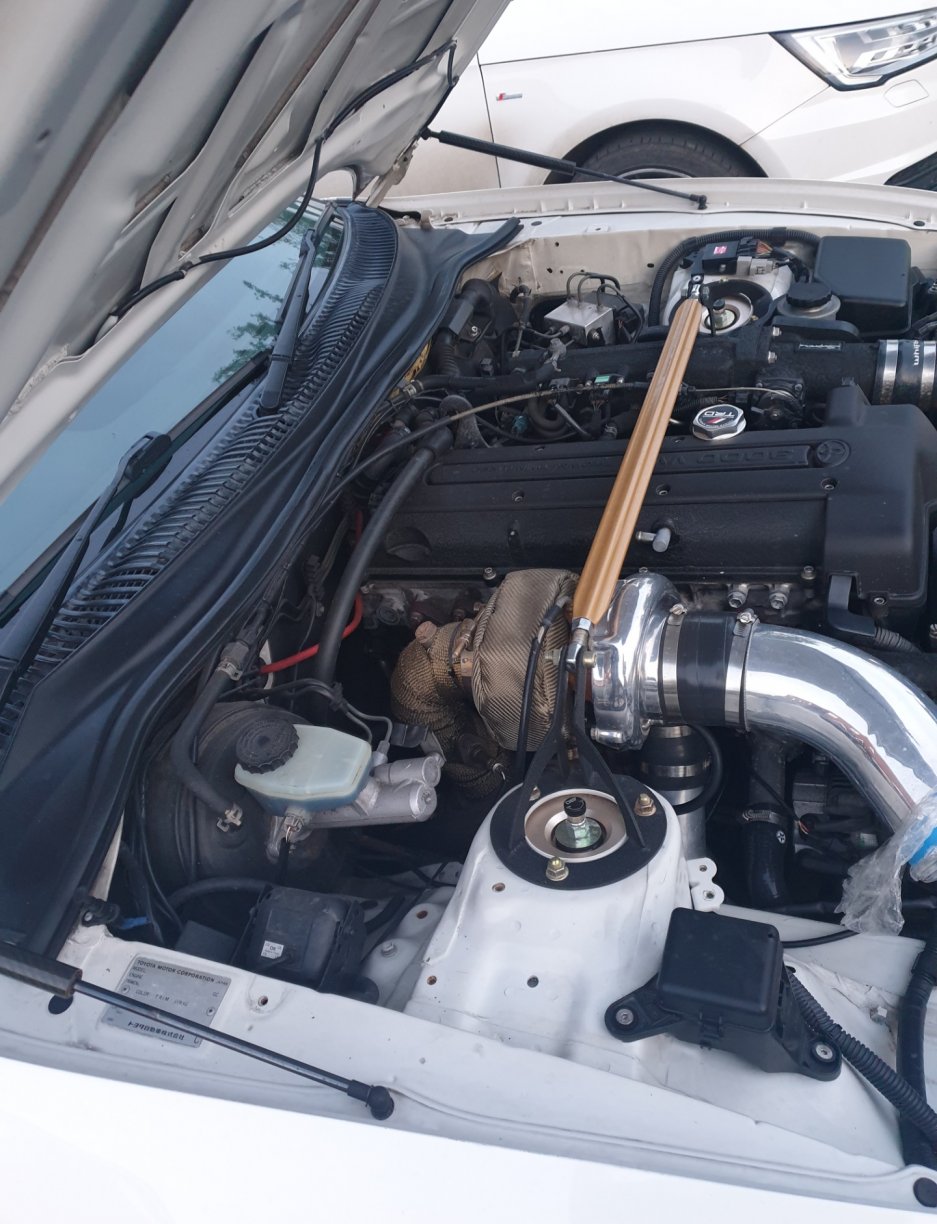
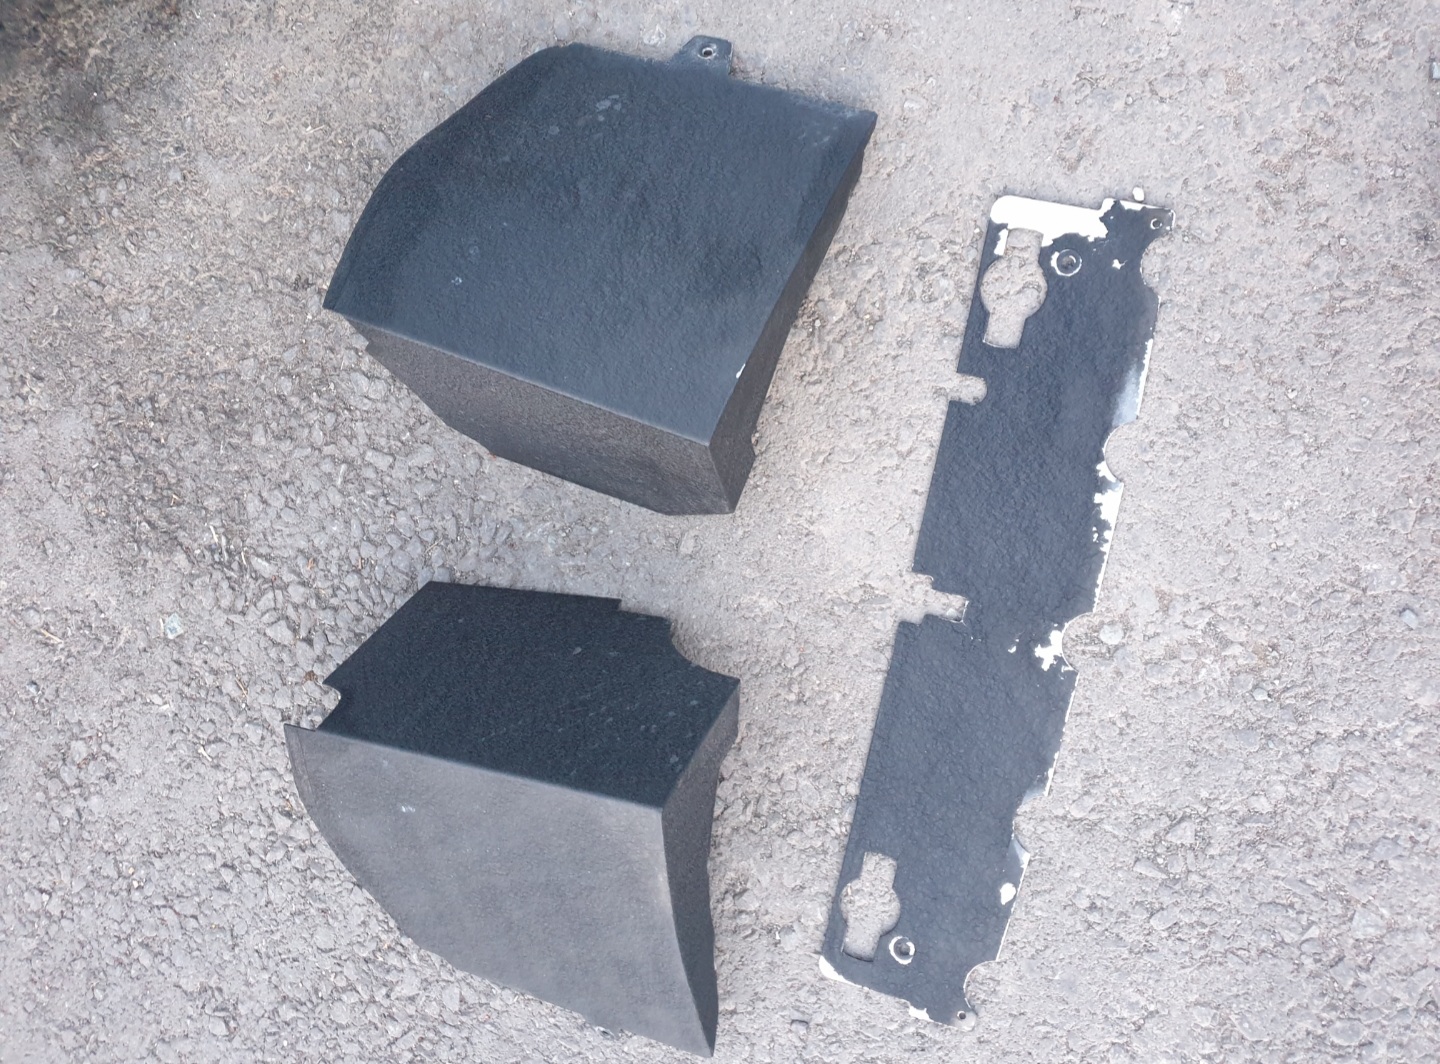
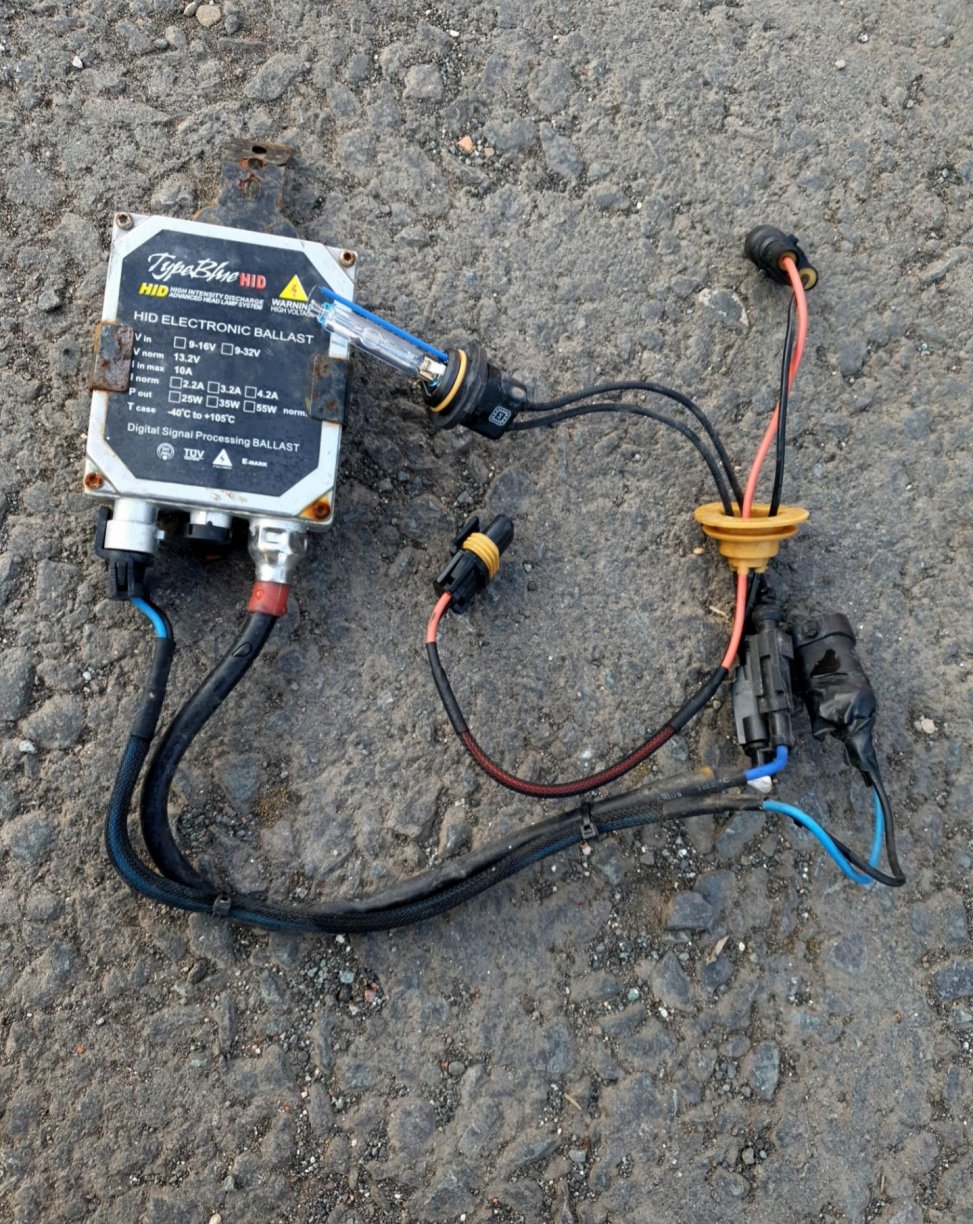
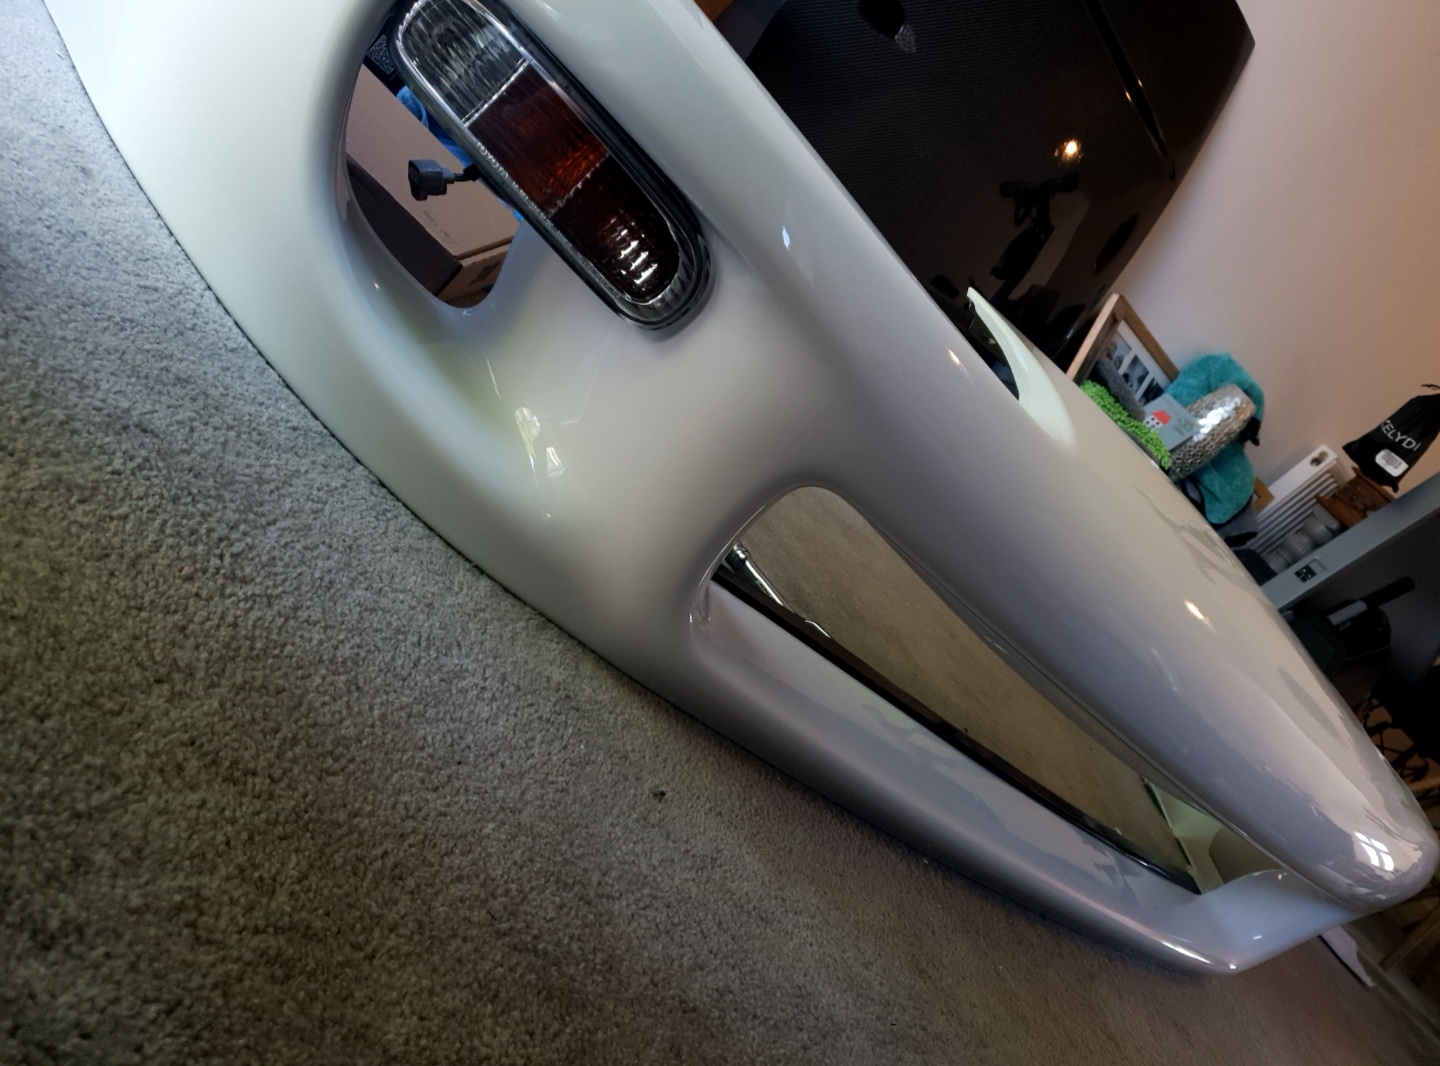
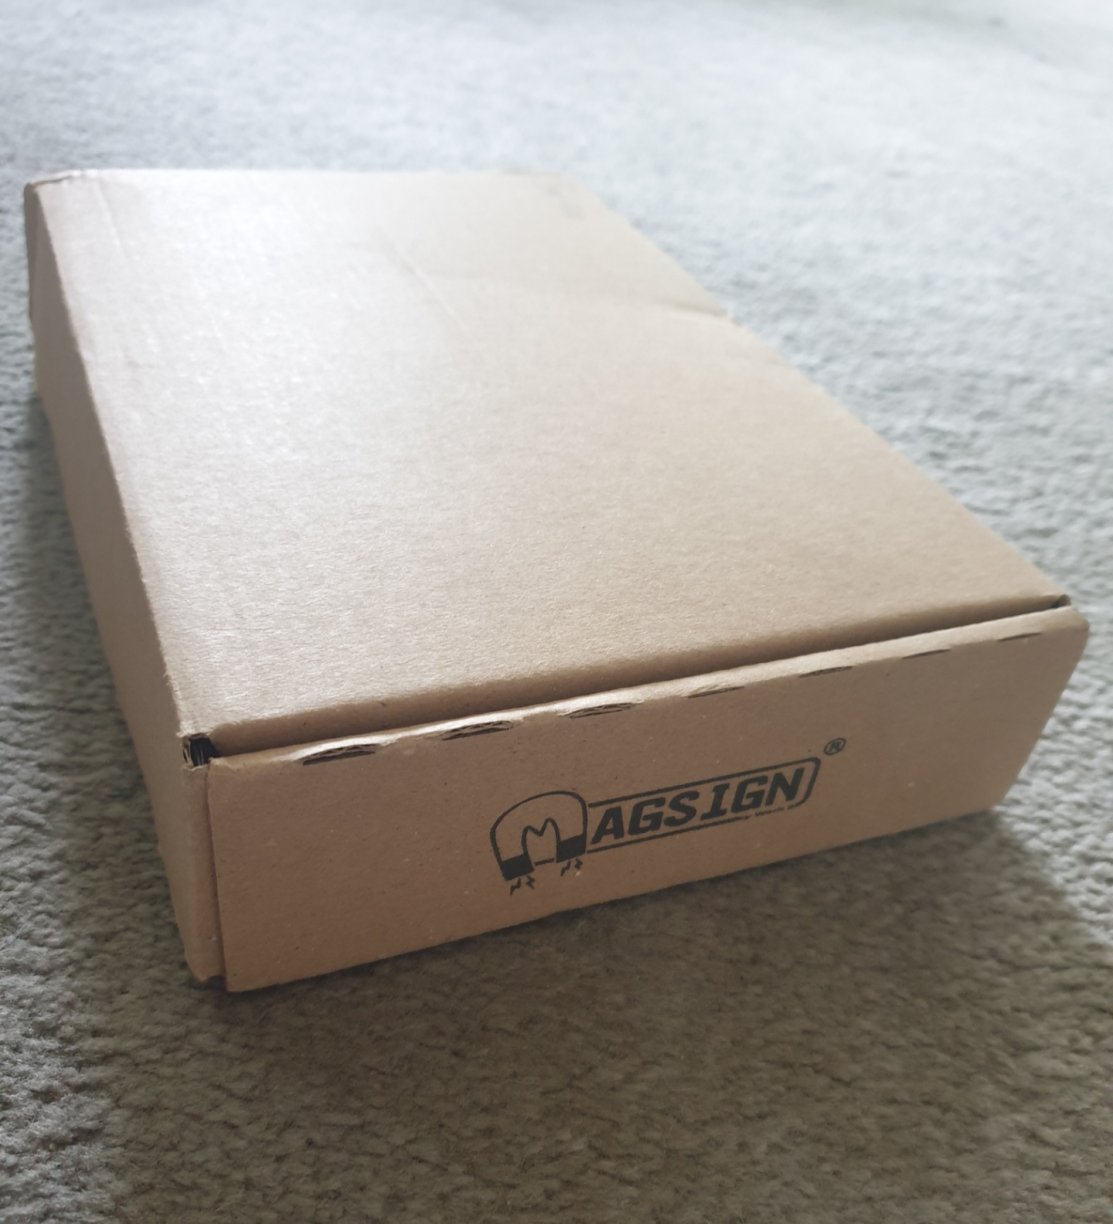
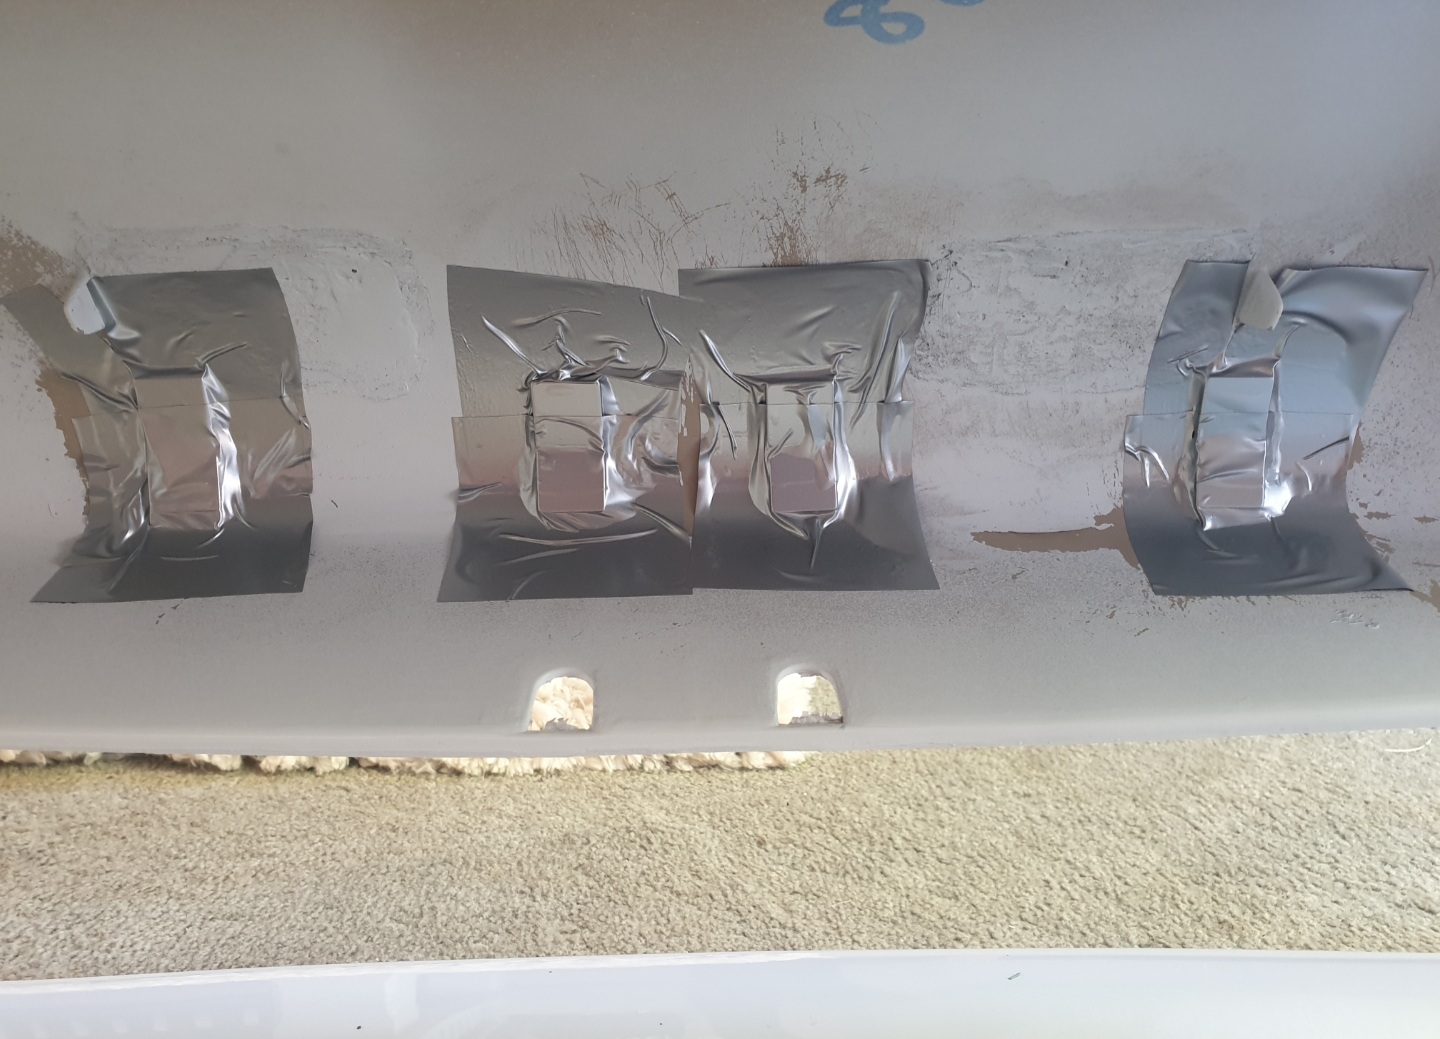
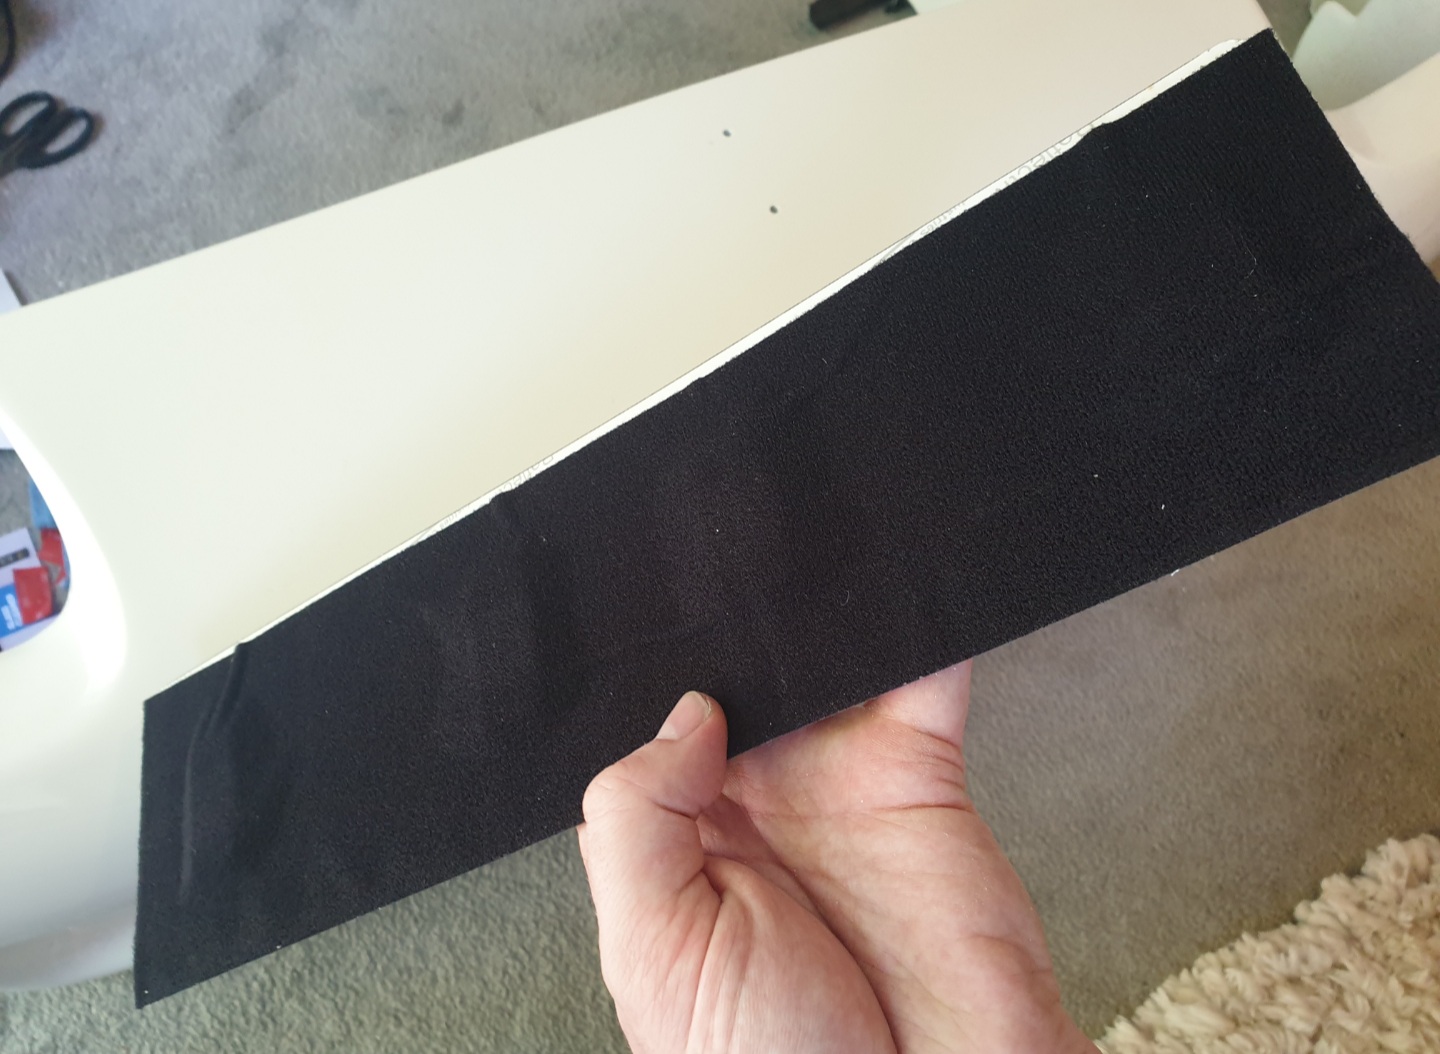
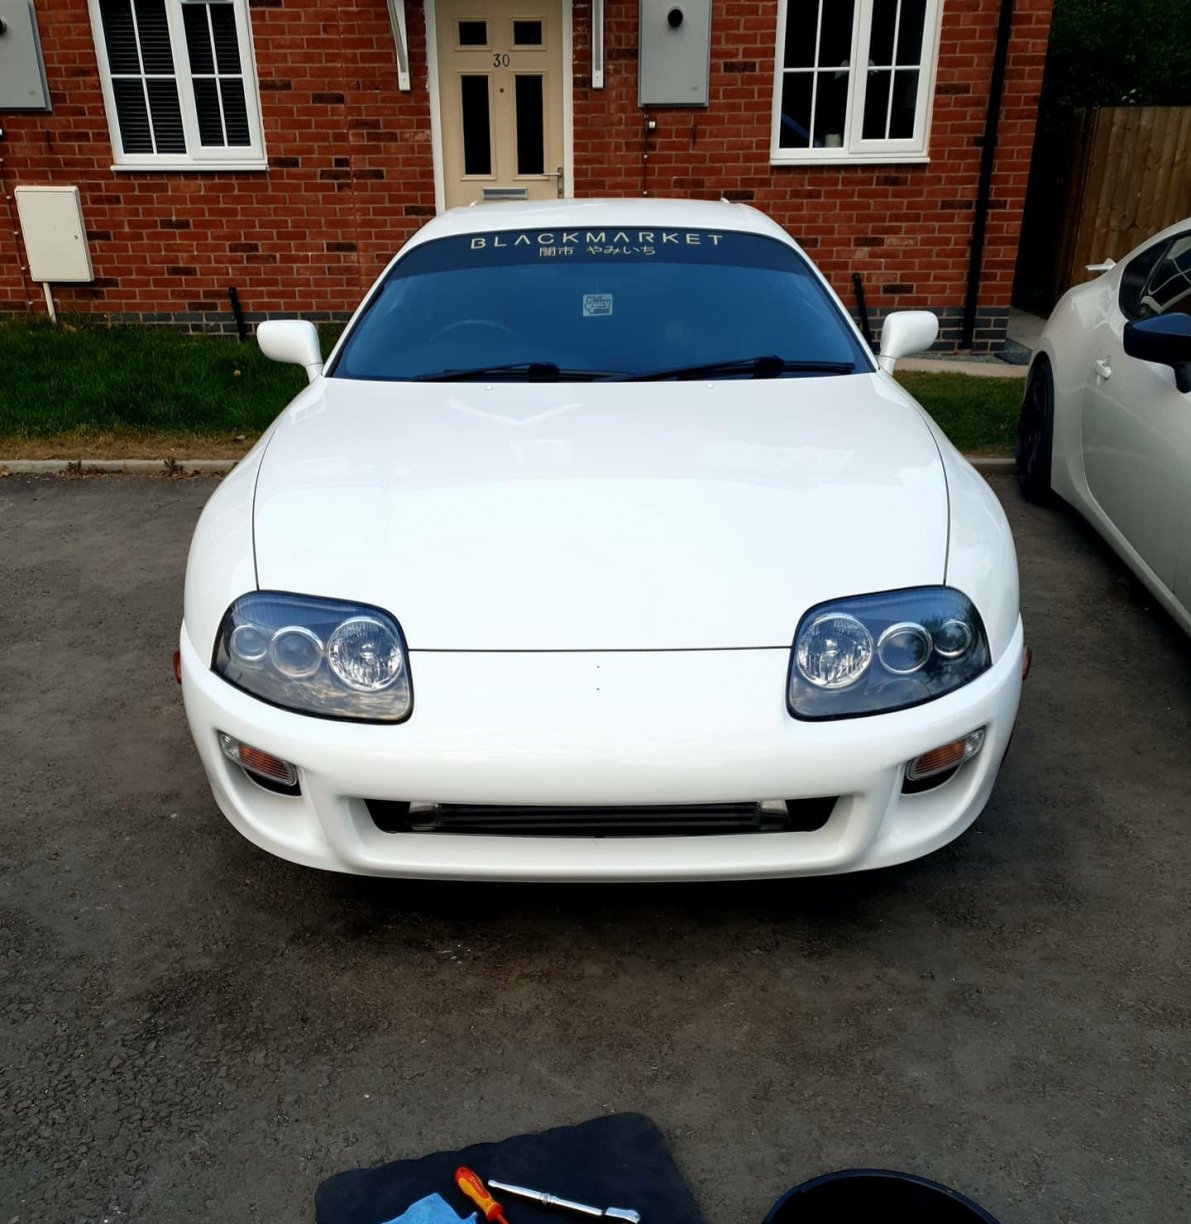
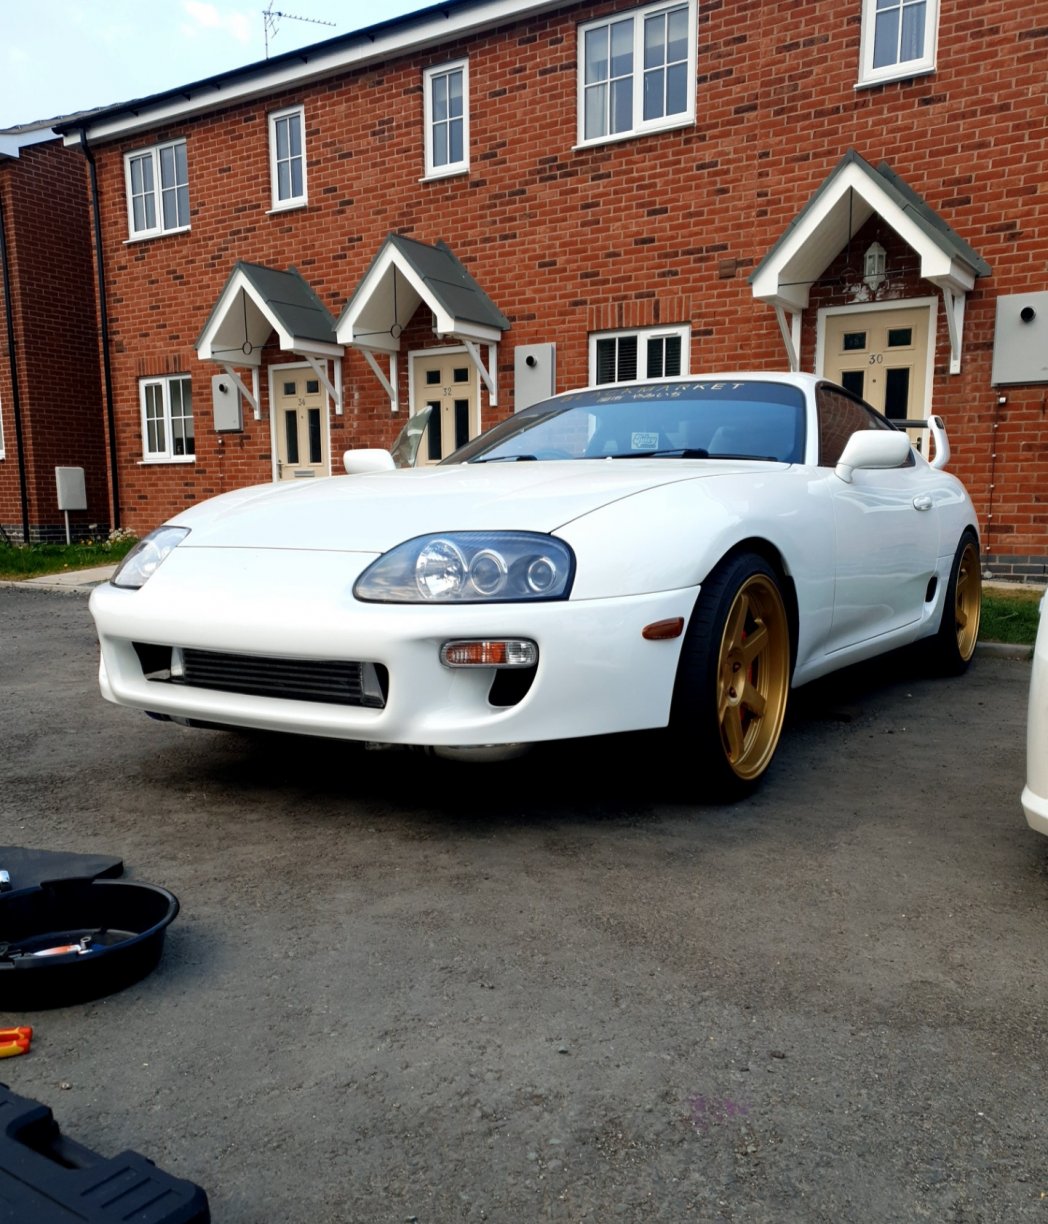
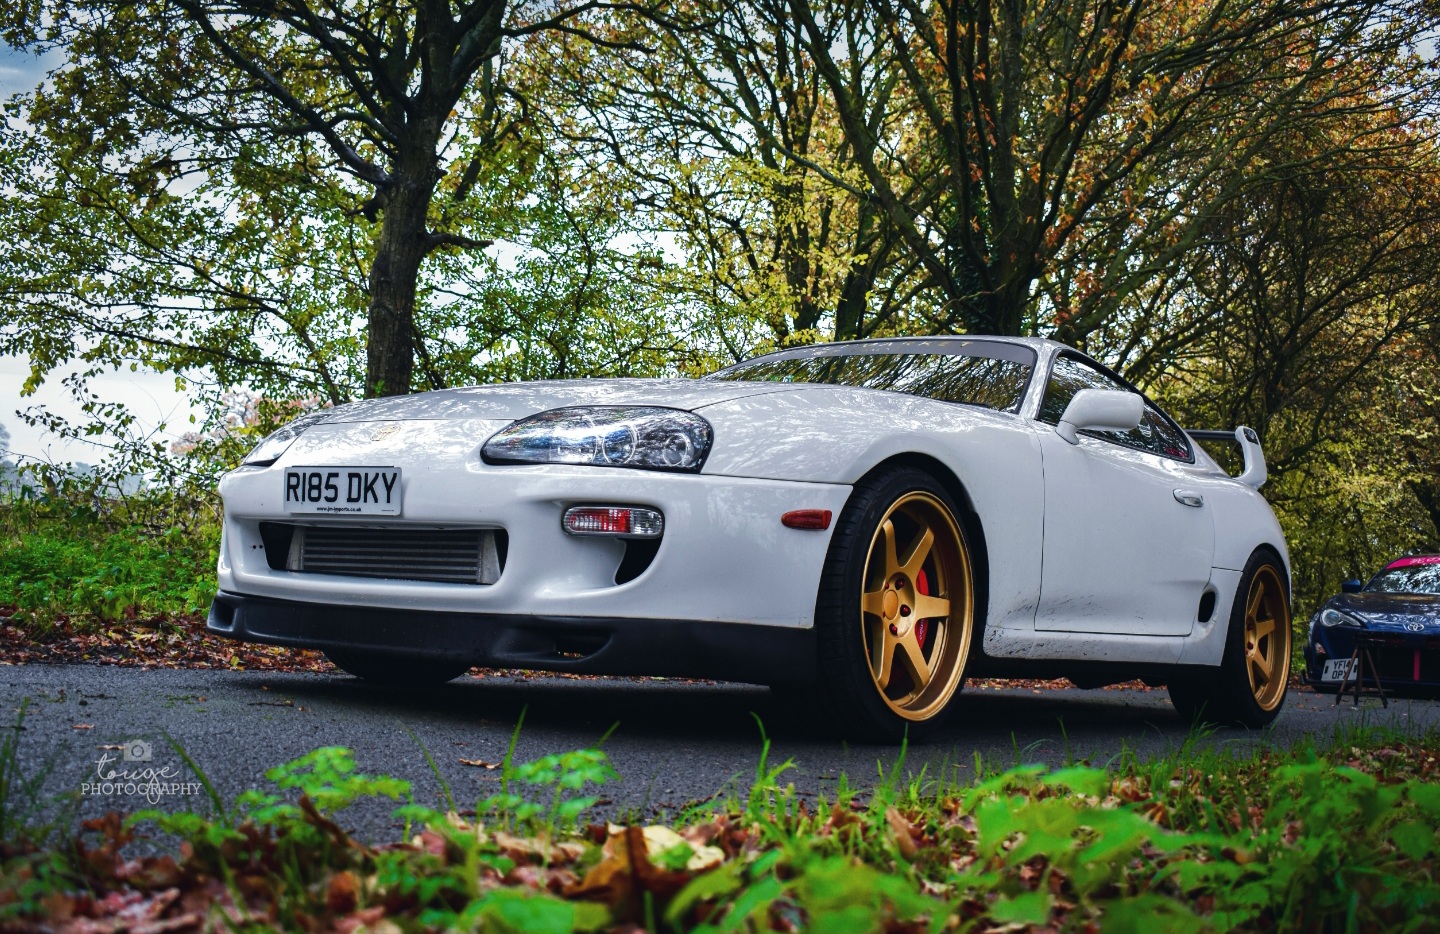
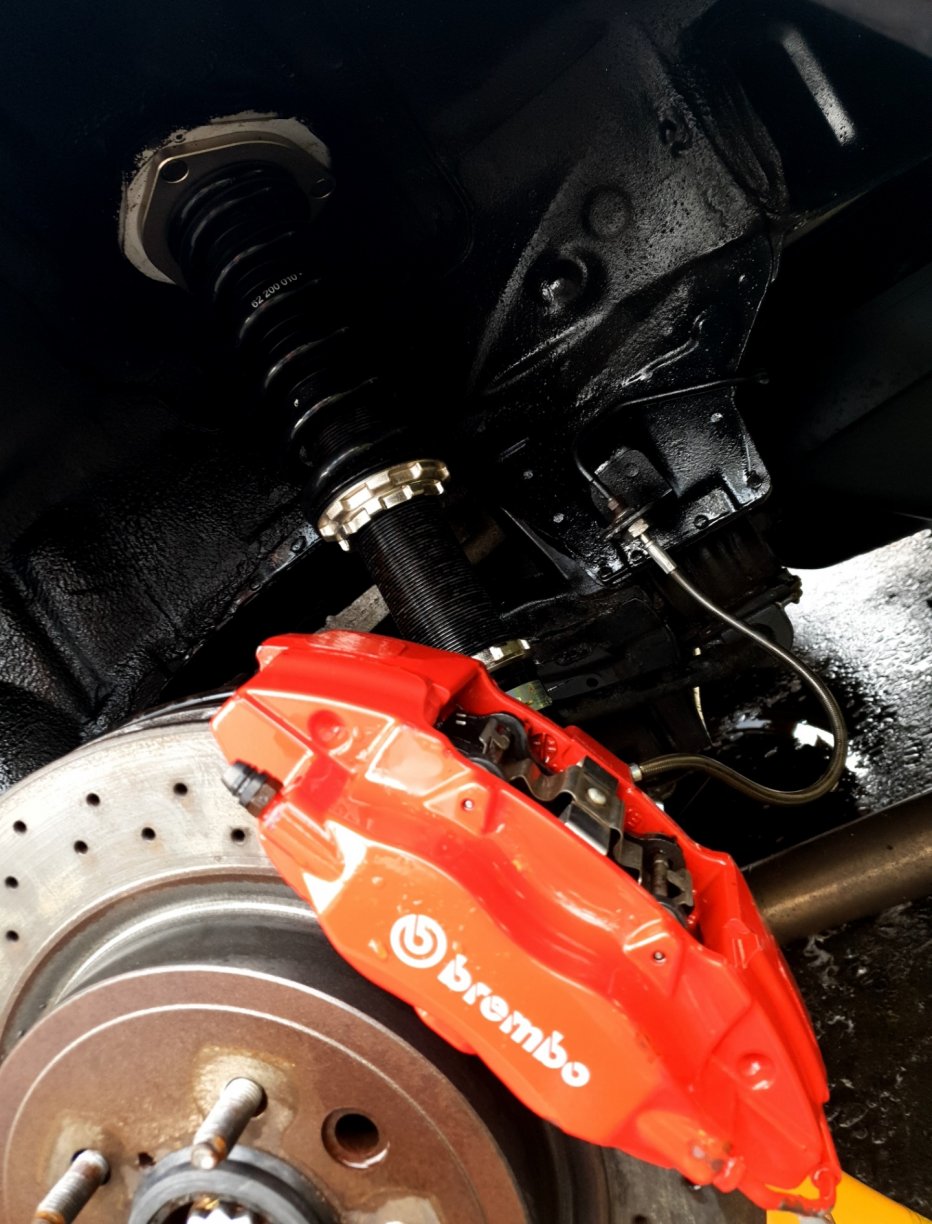
So last on the list of bodywork was to tackle the front bumper! So I got to work and whipped the old one off Actually amazing how much of a pain in the ass it was to get the 1 bolt from the passengers side inner arch. For some reason I just could not keep the socket on the head of the bolt. After shouting at it and threatening it with violence it came off after I took a small composure break took the bumper inside and lay it down ready to strip all of the lights and side repeaters off of it I then moved onto stripping out the SRD covers and the cooling panel, as these are looking a little tired and want refurbishing. I'll likely redo the SRD covers in Crackle Black, but I've purchased a carbon cooling panel so that's only back on for the meantime. Took the opportunity to clean inside these areas and check fluid levels, all seemed well. I'll only be back here in another couple of months when I intend to do a complete oil and fluids change for the car along with all other servicing parts. I also removed the crappy old HID kit ballasts and wiring to replace them with Night Breaker LEDS. God this made a huge difference; went from being able to see next to nothing to be able to seeing everything! Also replaced the full beam with the same bulbs and they really are a hell of an upgrade. Had to leave the progress as it was for a few hours as work ended up calling me out... Always the way when things are actually going well! 3 hours later I was back and immediately set to putting on the lights and side markers back onto the new front bumper As per usual I took the opportunity to give the area behind the bumper a clean out, and the intercooler and pipework a polish. A lot of the marking on the intercooler would need a harsher pad but I did what I could. Also cleaned the areas below the headlights, and the back of the headlights themselves. This probably leaves the only area of the car behind panelling to be uncleaned without a few coatings of a sealant as behind the rear bumper! I also picked up a Magsign kit for the front number plate; I had considered a flip out plate but was impressed by this kit on a mates Golf R and decided to go for it! Effectively, it just works off some very strong magnets. So to create a good adhesion to the back of the front bumper, I sanded away the remnants of over spray, gave it a good surface to adhere to and then cleaned the area. Lined up where I wanted the magnets to sit, sealed them in place, and covered them with a tape similar to heat shrink and heated them in place to ensure the magnets wouldn't rust as easily going forward The numberplate itself needed the same treatment, however the backing of the numberplate is covered with a really soft felt so that when it is placed to the surface of the bumper it doesn't mark it at all You honestly wouldn't believe how strong the numberplate sits on the car. Even tested it to various speeds to ensure it doesn't budge with spirited driving! Hadn't moved an inch! Link to a brief clip of how it works below: https://www.instagram.com/p/CCWmE_hng19/?igshid=1n8ngcjetdsz5 I then got about replacing the front bumper and lights. The only thing left was to fit a front Toyota emblem badge onto the bumper, but this was being left for the week ahead for a good reason The bumper went on surprisingly easy considering the agro it caused me taking it off. I guess it was largely down to keeping myself quite a bit calmer haha.


-
Was actually my other half that took the pictures, she had been using my DSLR to build a little Instagram page called "Touge_Photography" and has had quite a bit of local interest for shoots to be fair to her! I've actually had the whole car coated recently but I'll go into that in a post after I've put up the front bumper post should protect it all nicely! Yeah I actually prefer the look of carbon on darker coloured cars, should look great on yours! People are always welcome over, I've had a few people with other cars over prior to the Covid restrictions, always nice to meet people, get a couple of jobs done on the car and have a few beers!
-
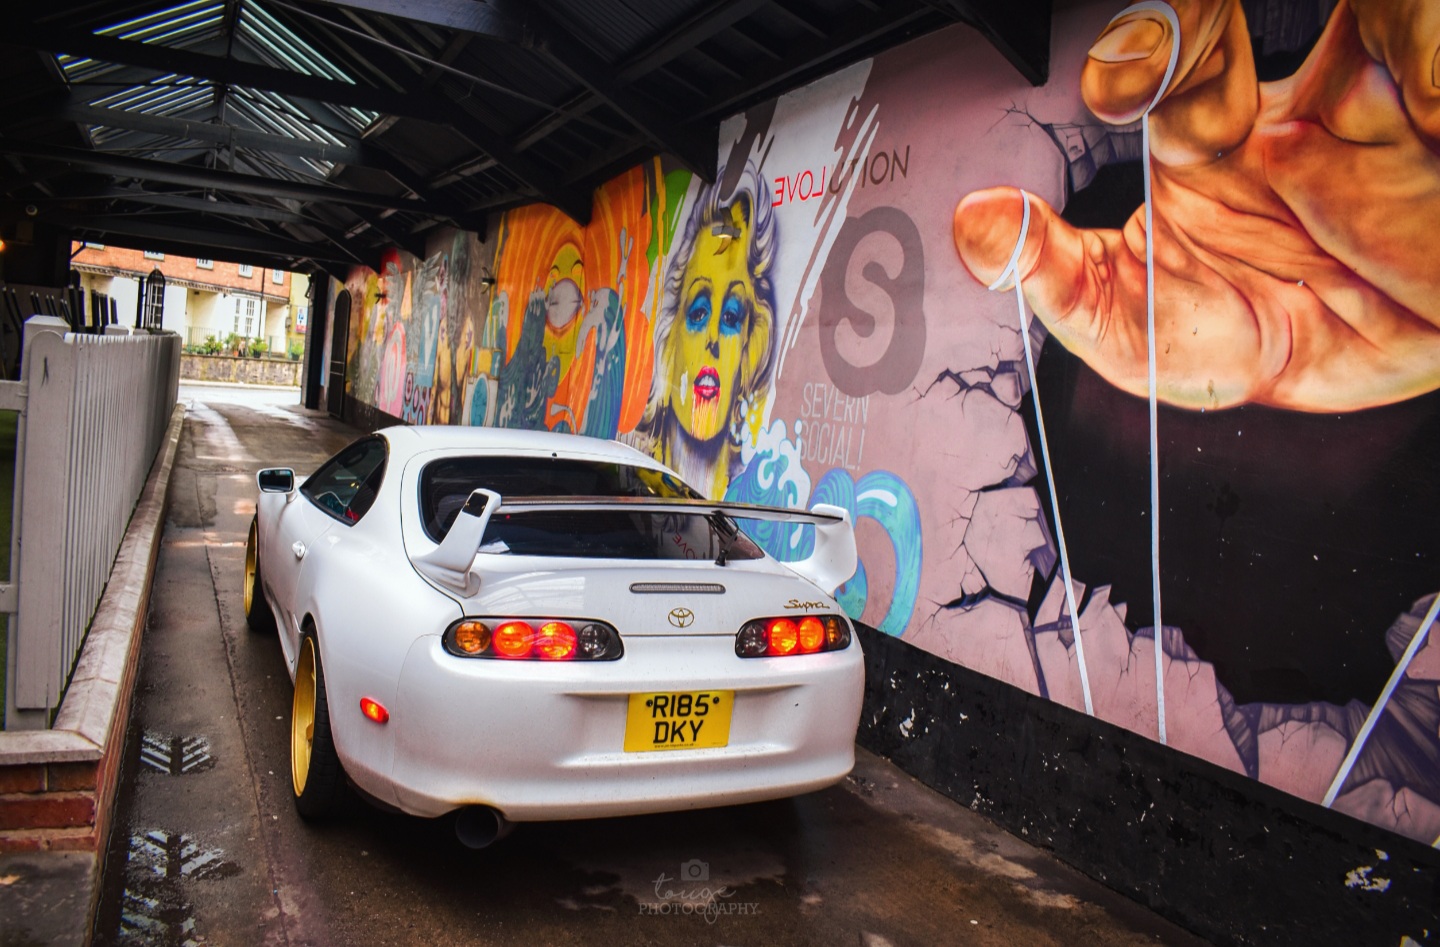
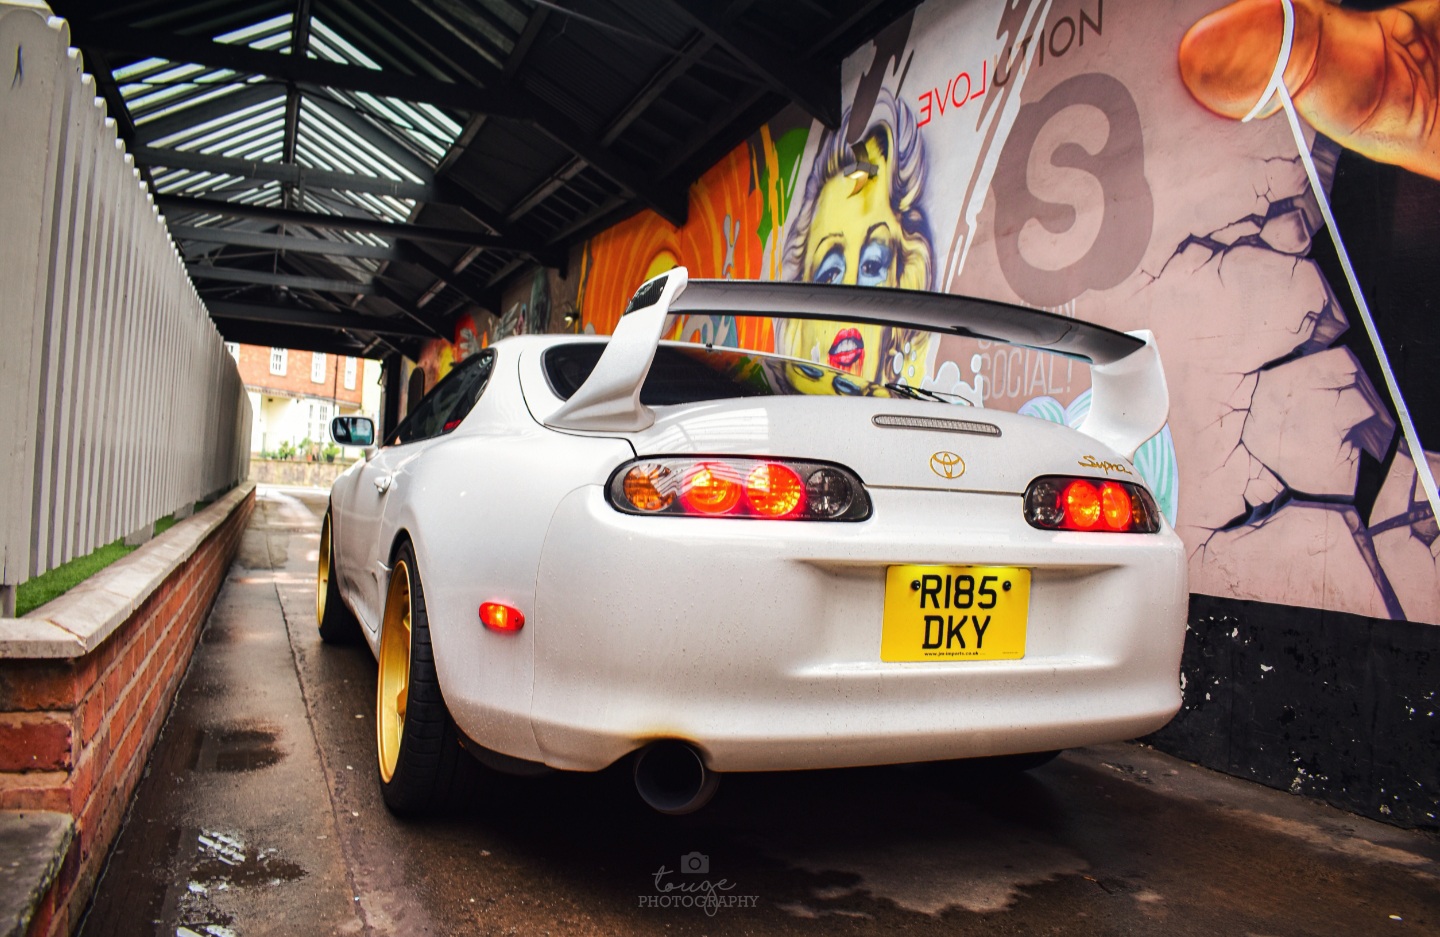
Found a few images from a shoot here in my hometown Shrewsbury, these would have been about a month prior to beginning all of the bodywork. 2 very different locations, have loads of images from it but these are just about my favourite few! Lucky around here to have loads of really good locations to shoot in if you know where to look.

-
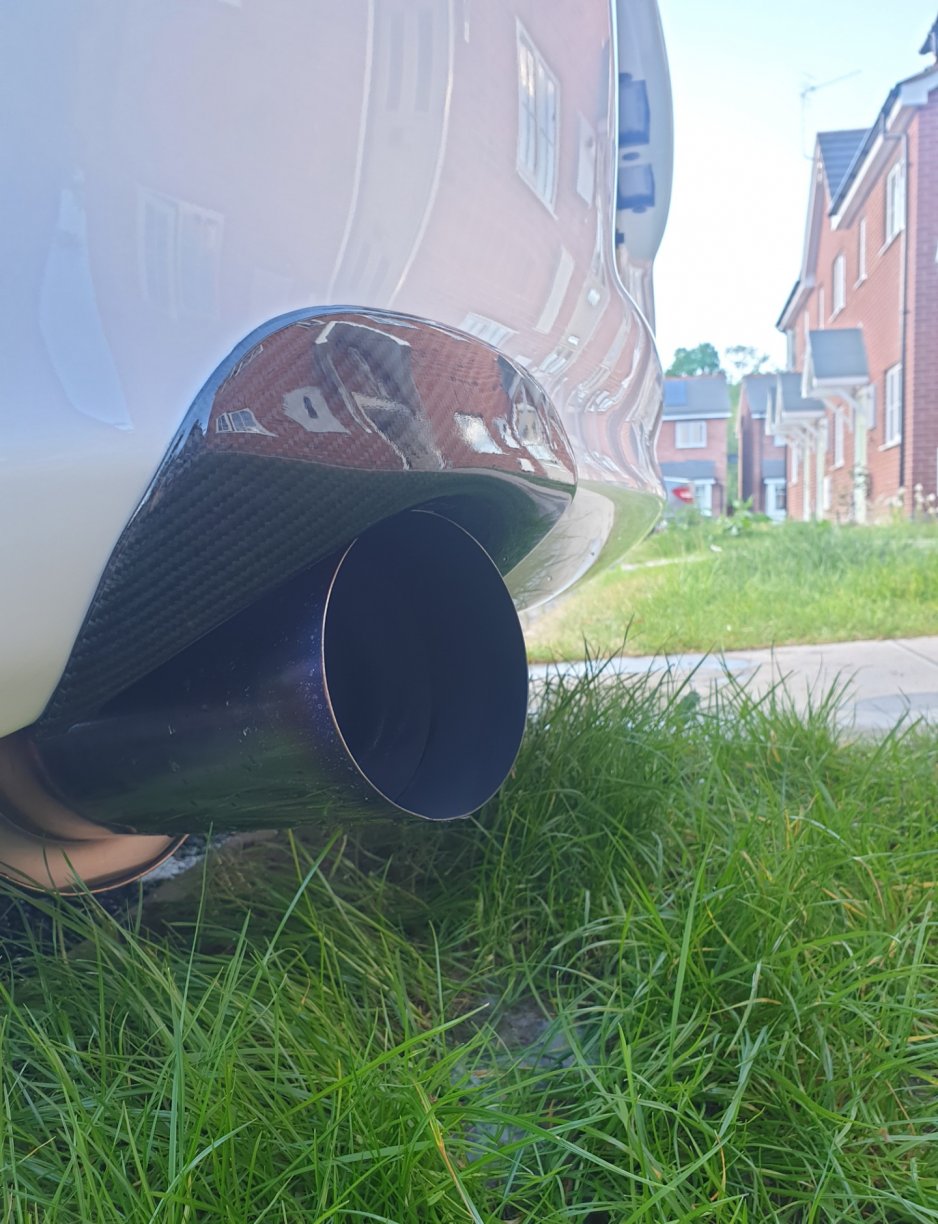
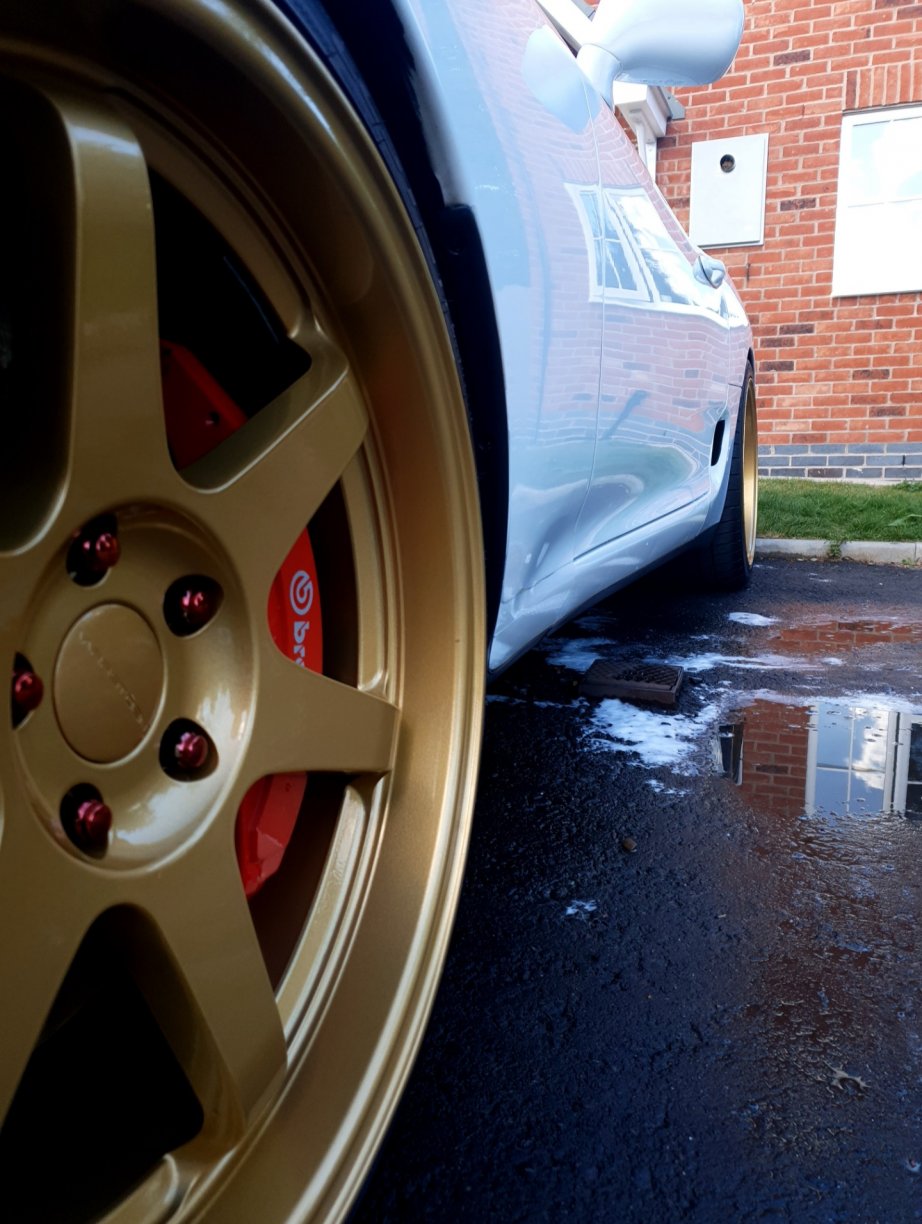
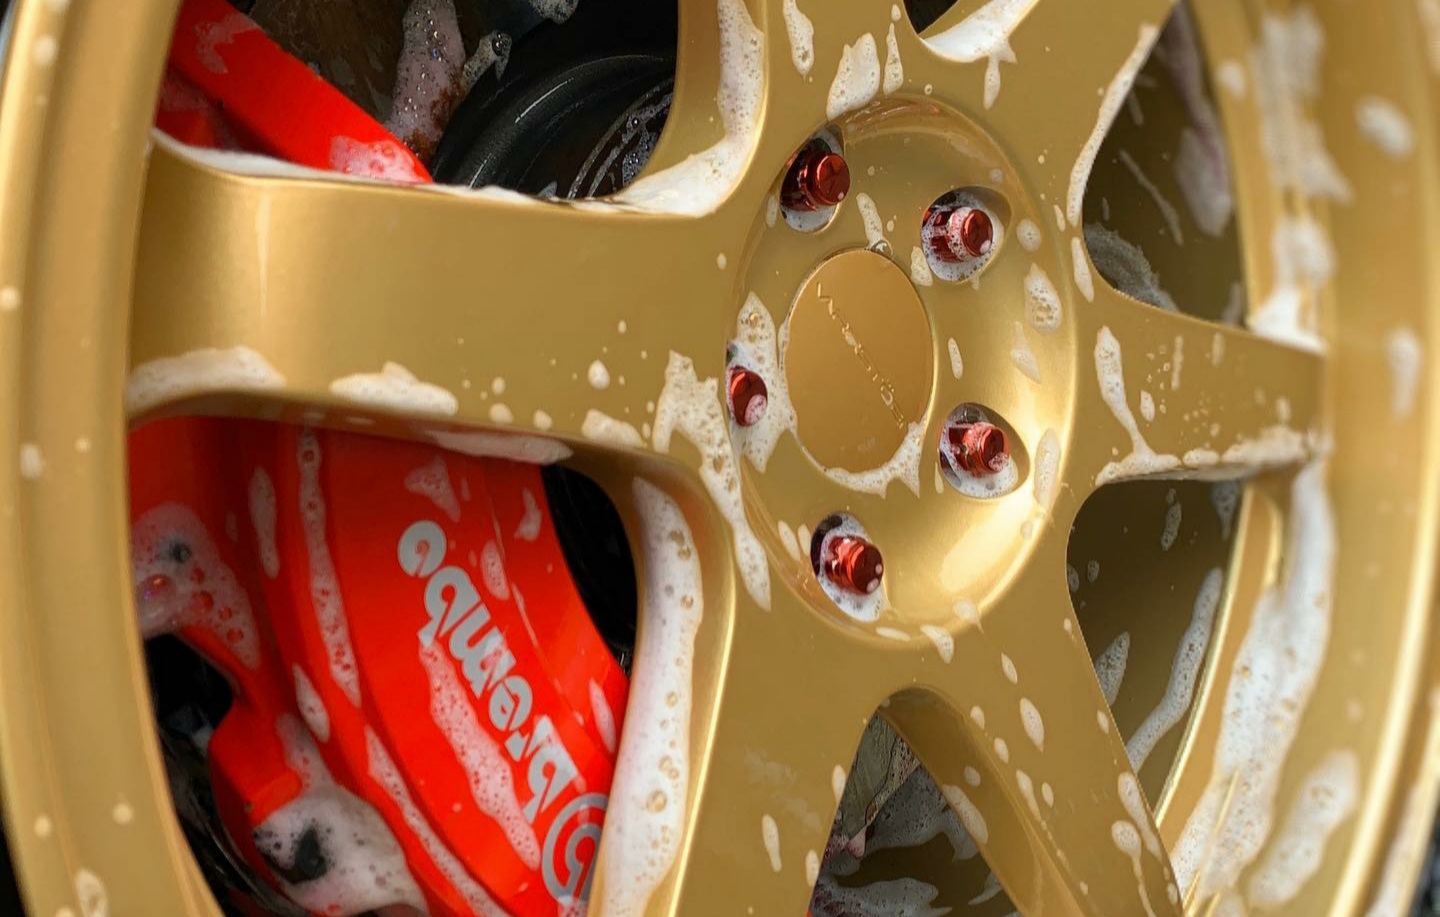
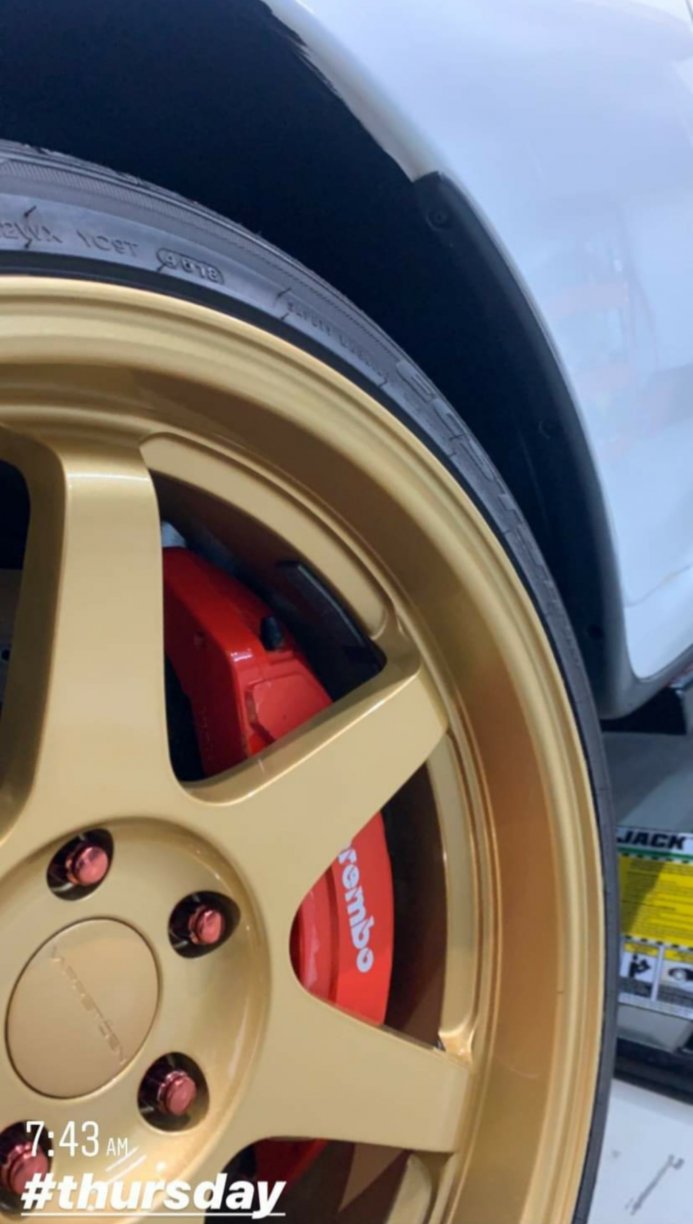
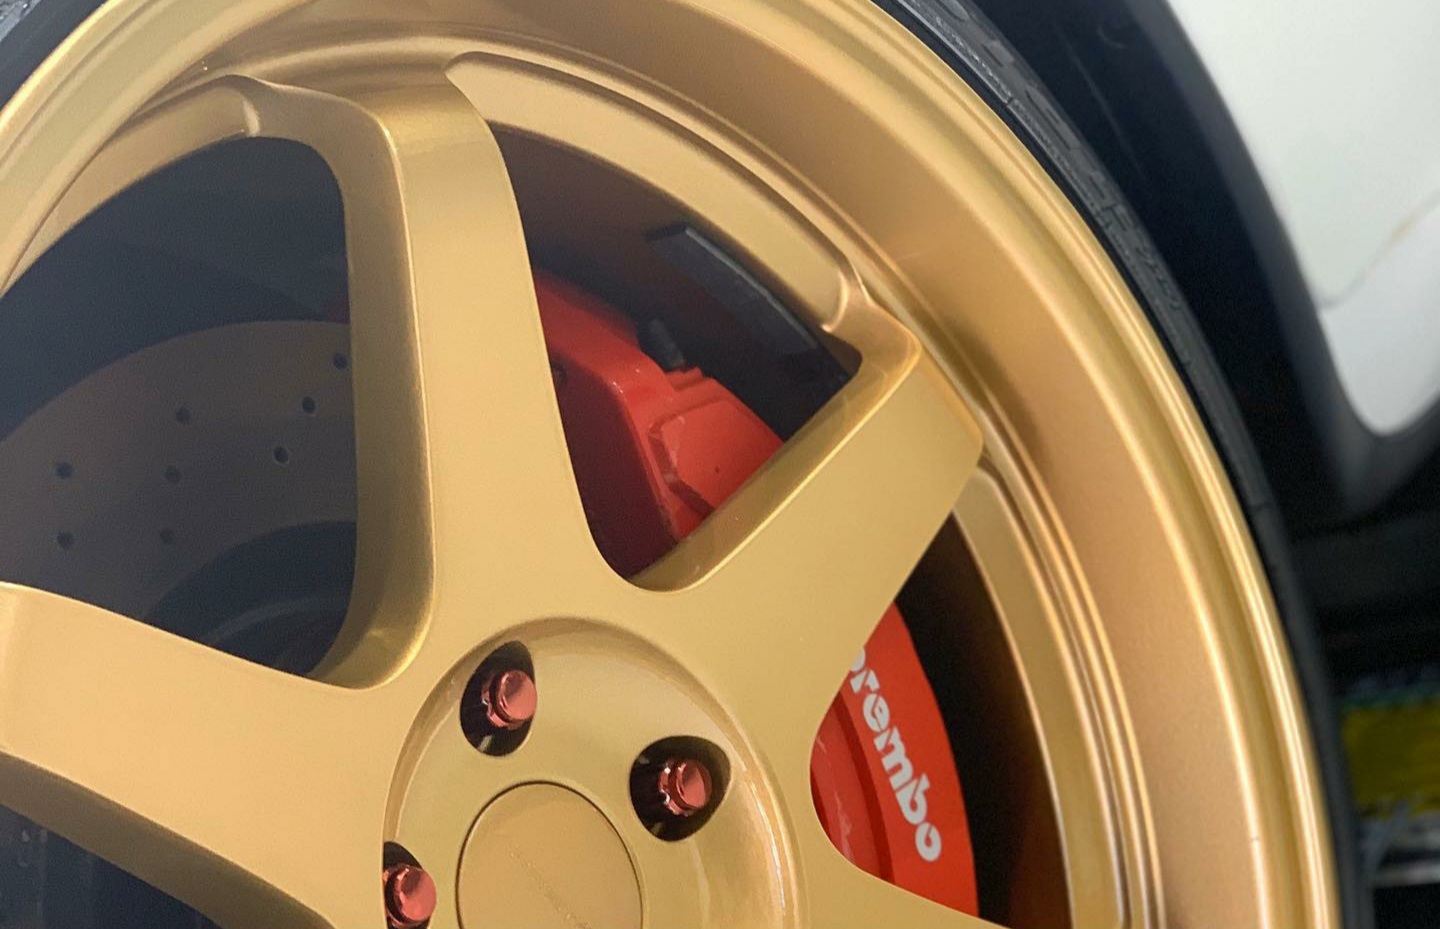
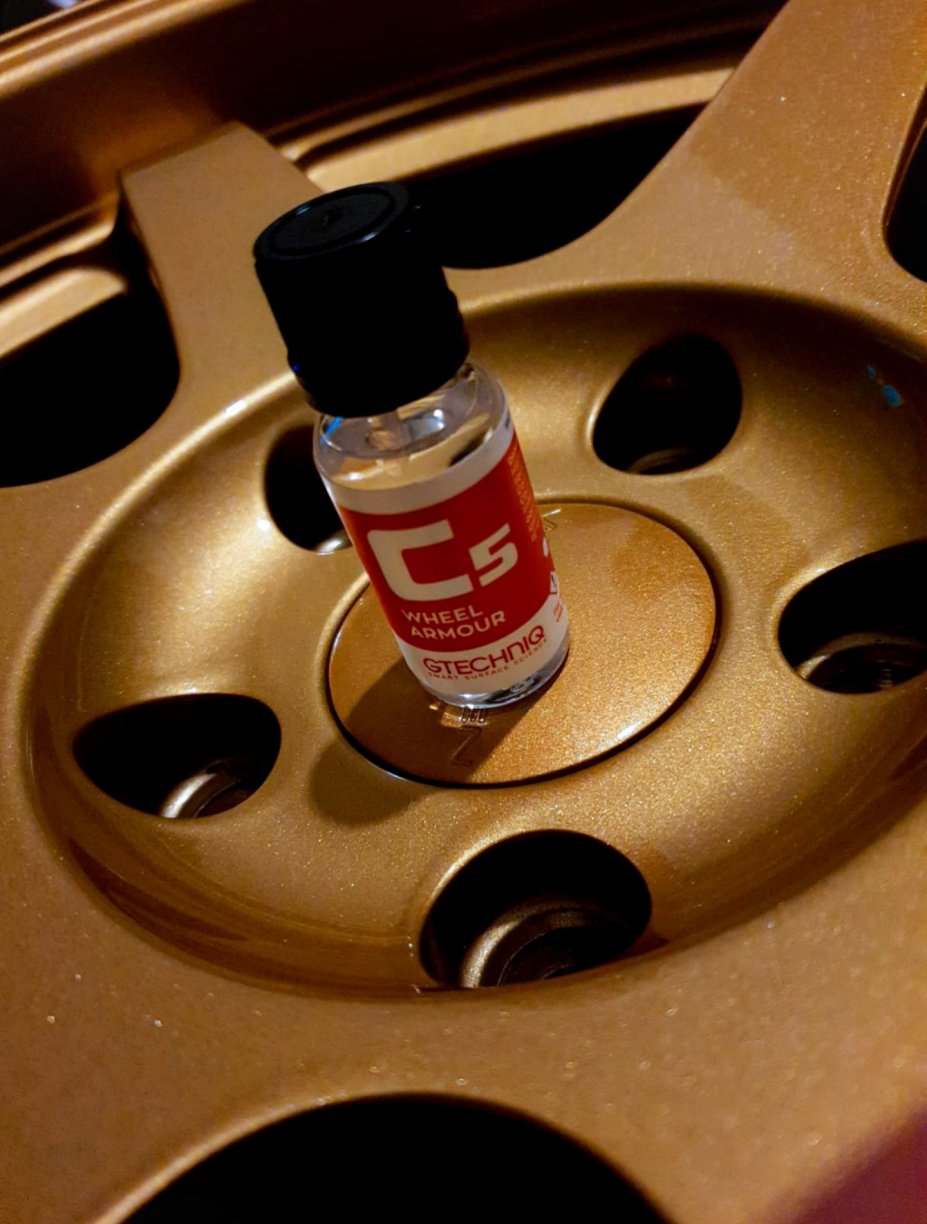
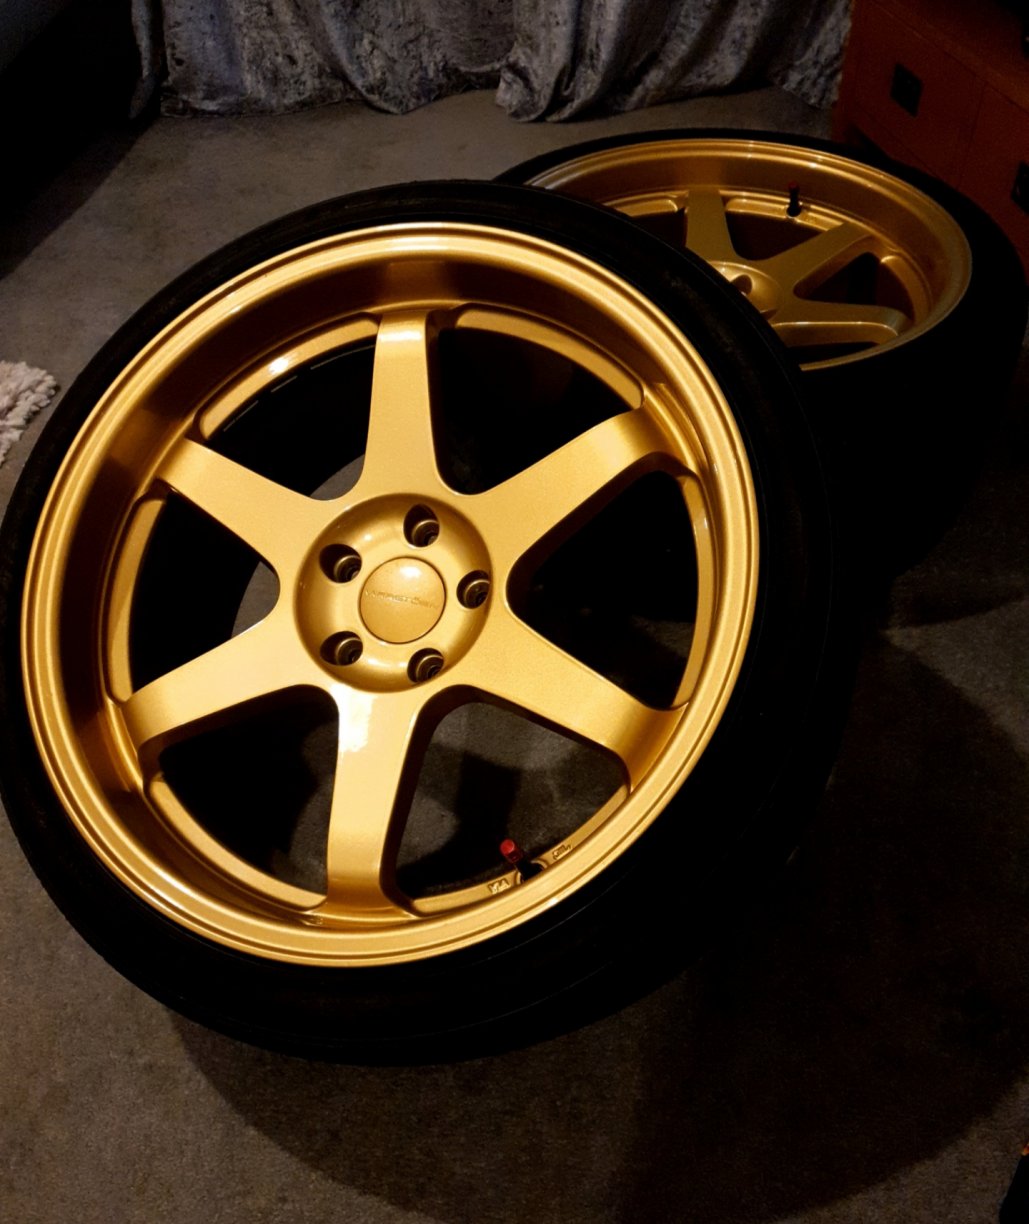
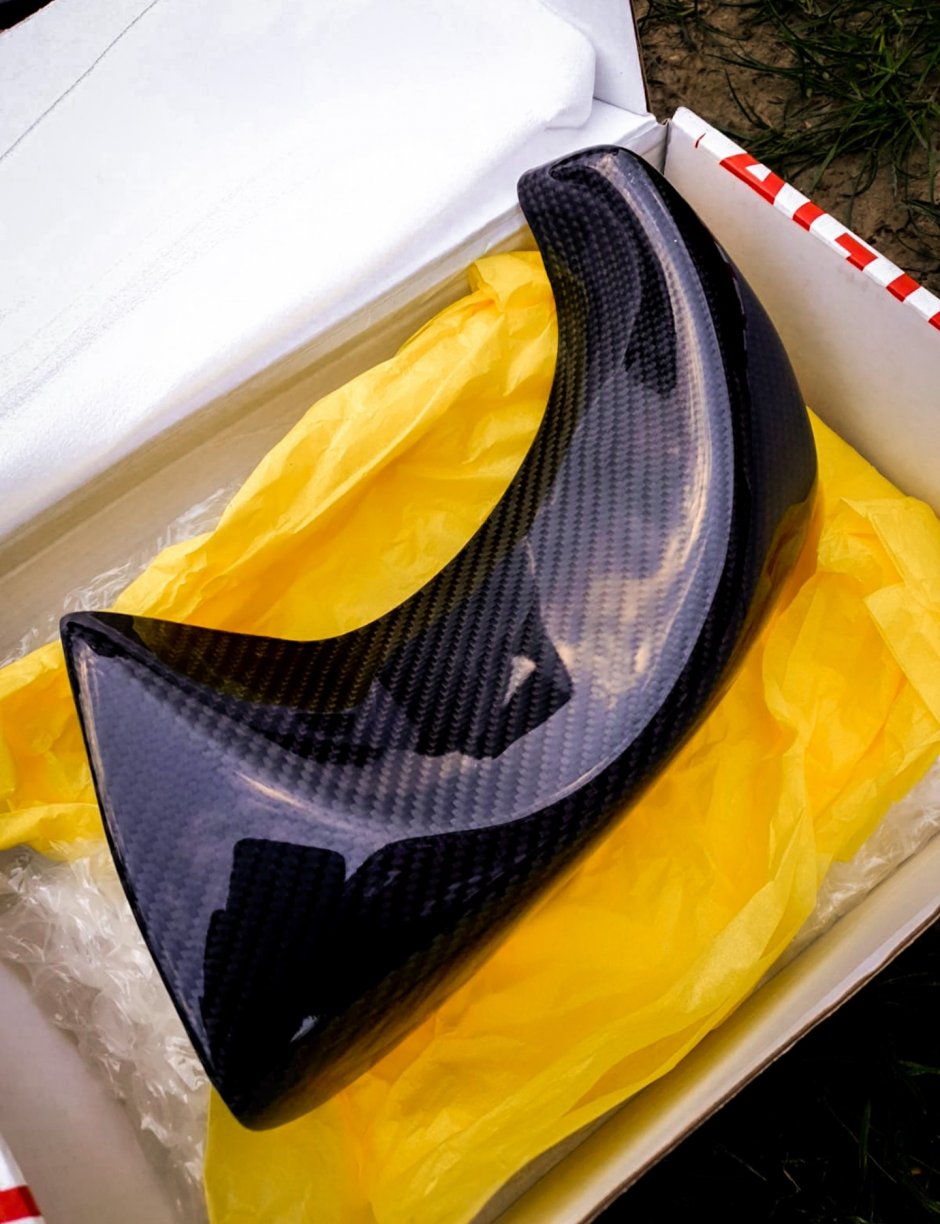
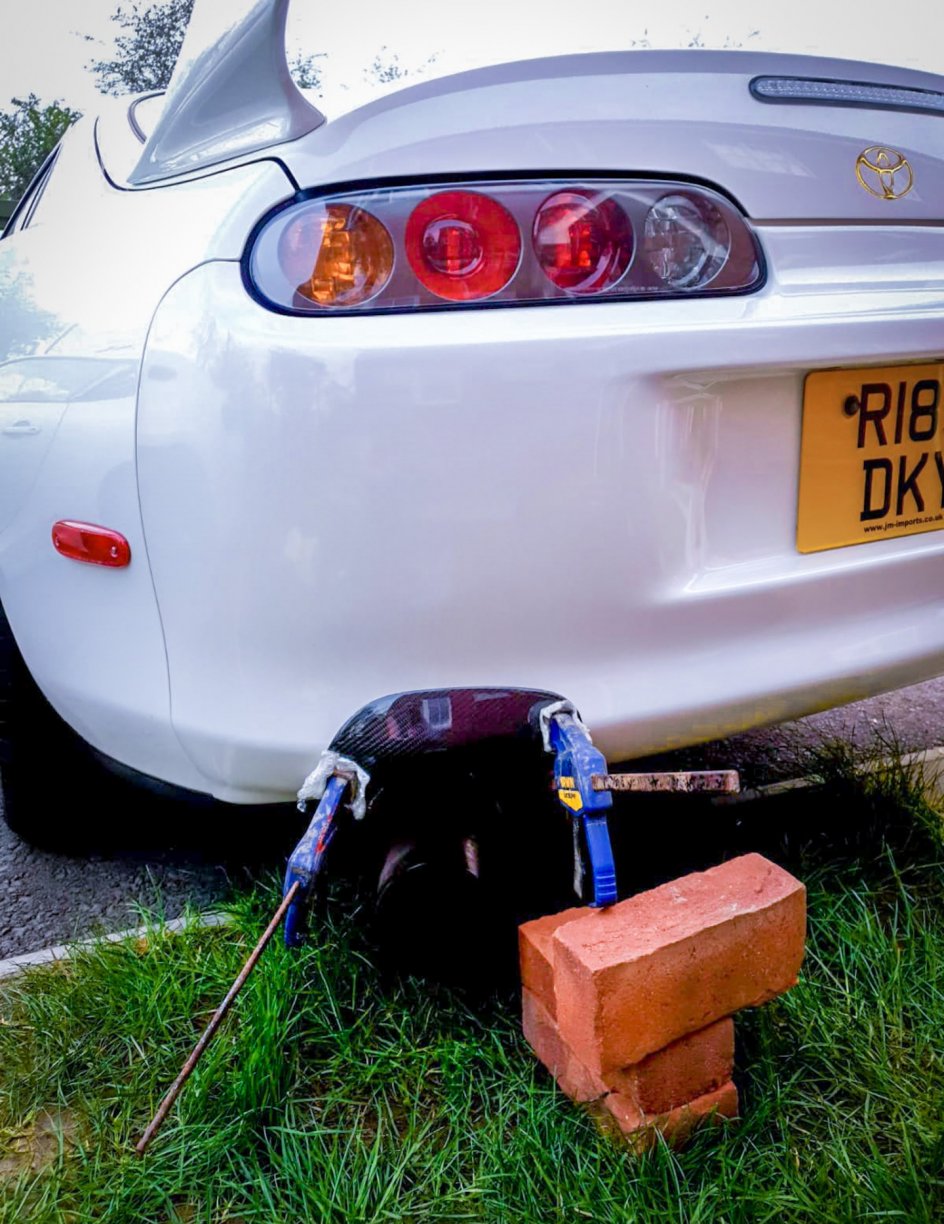
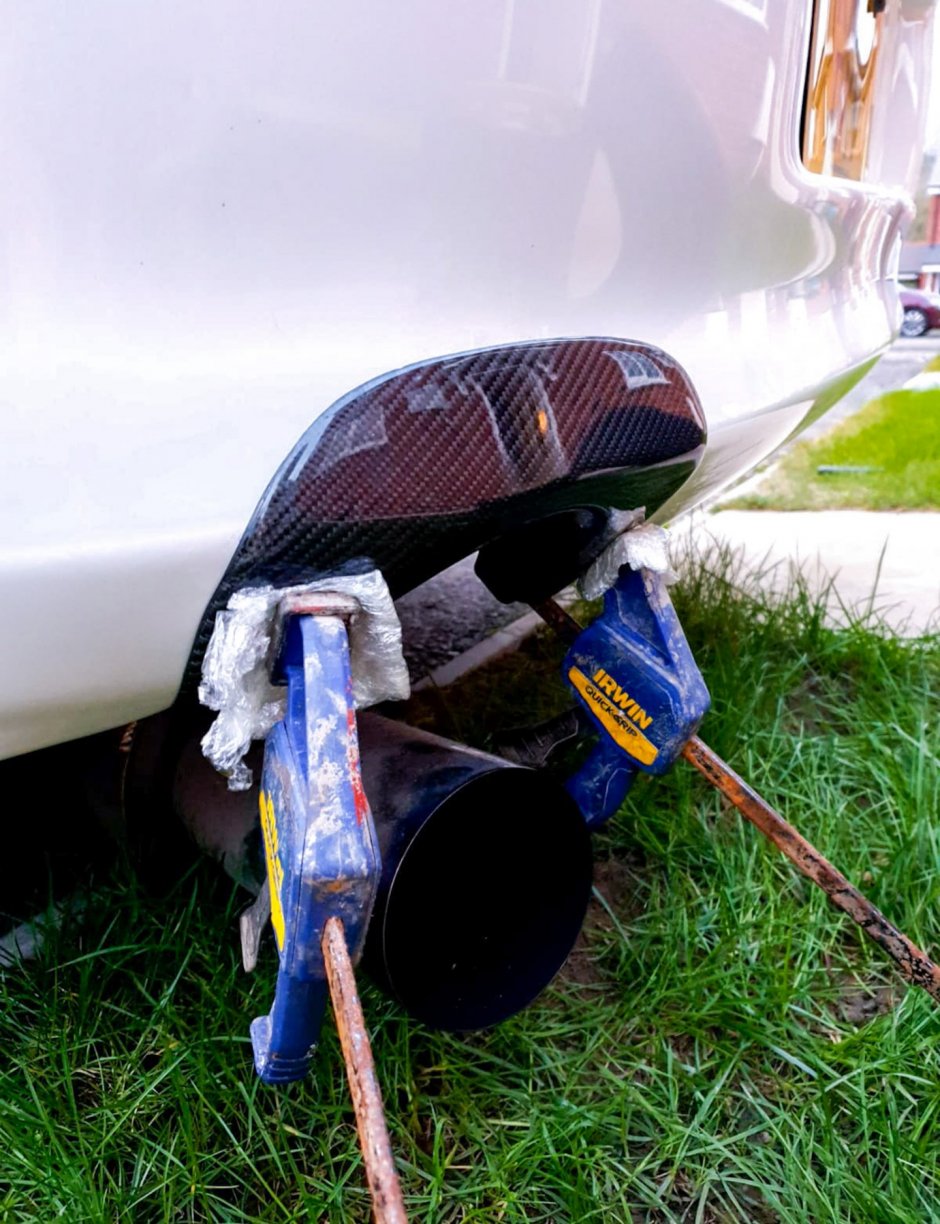
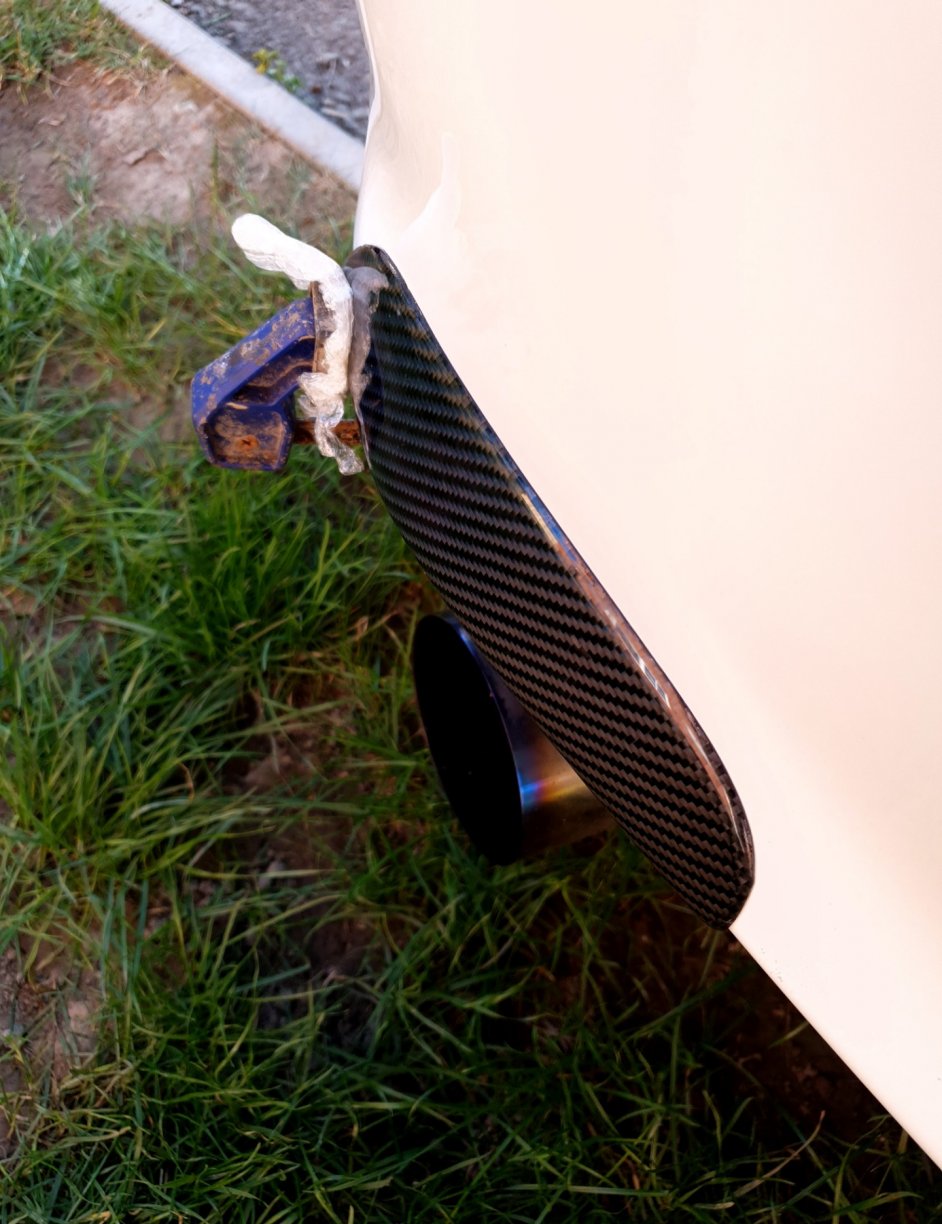
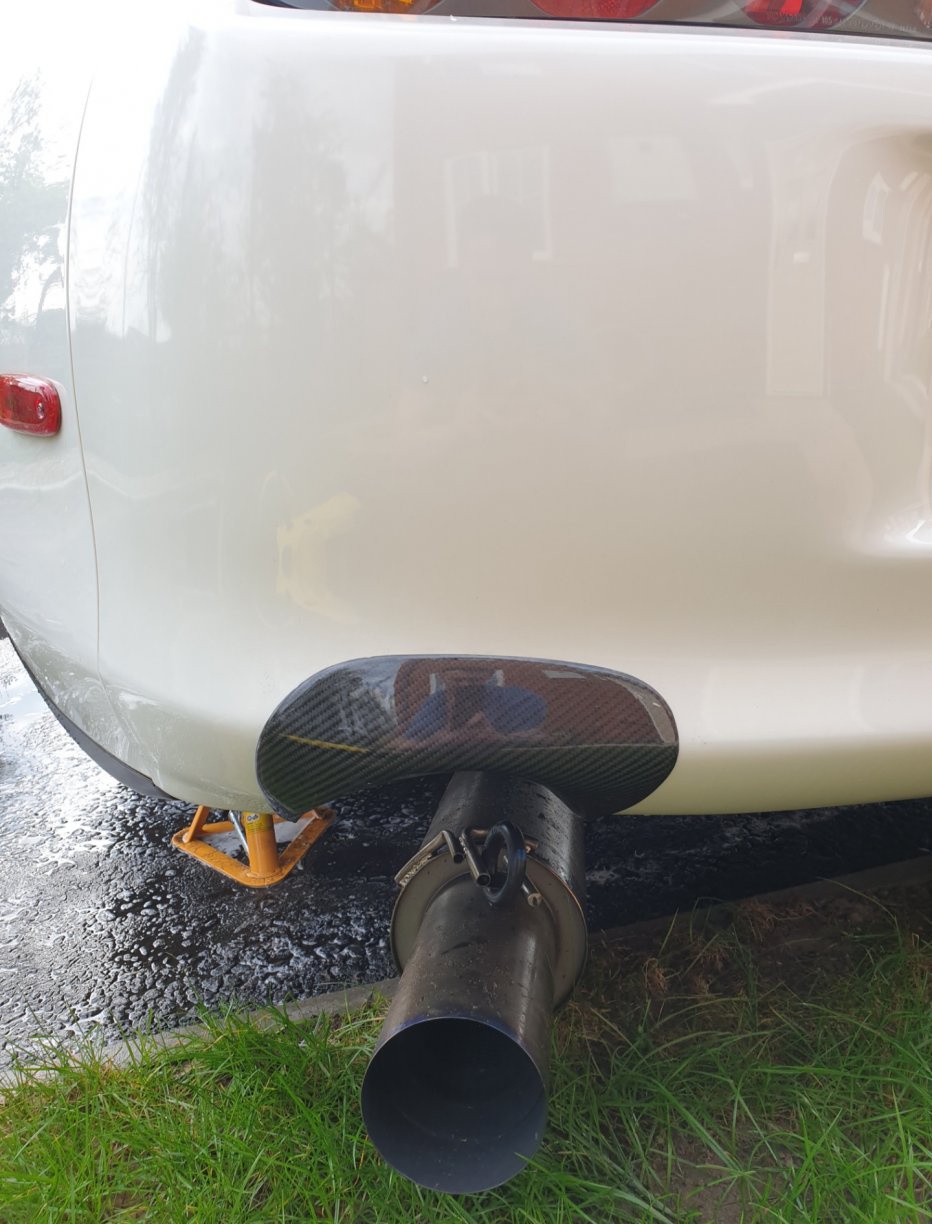
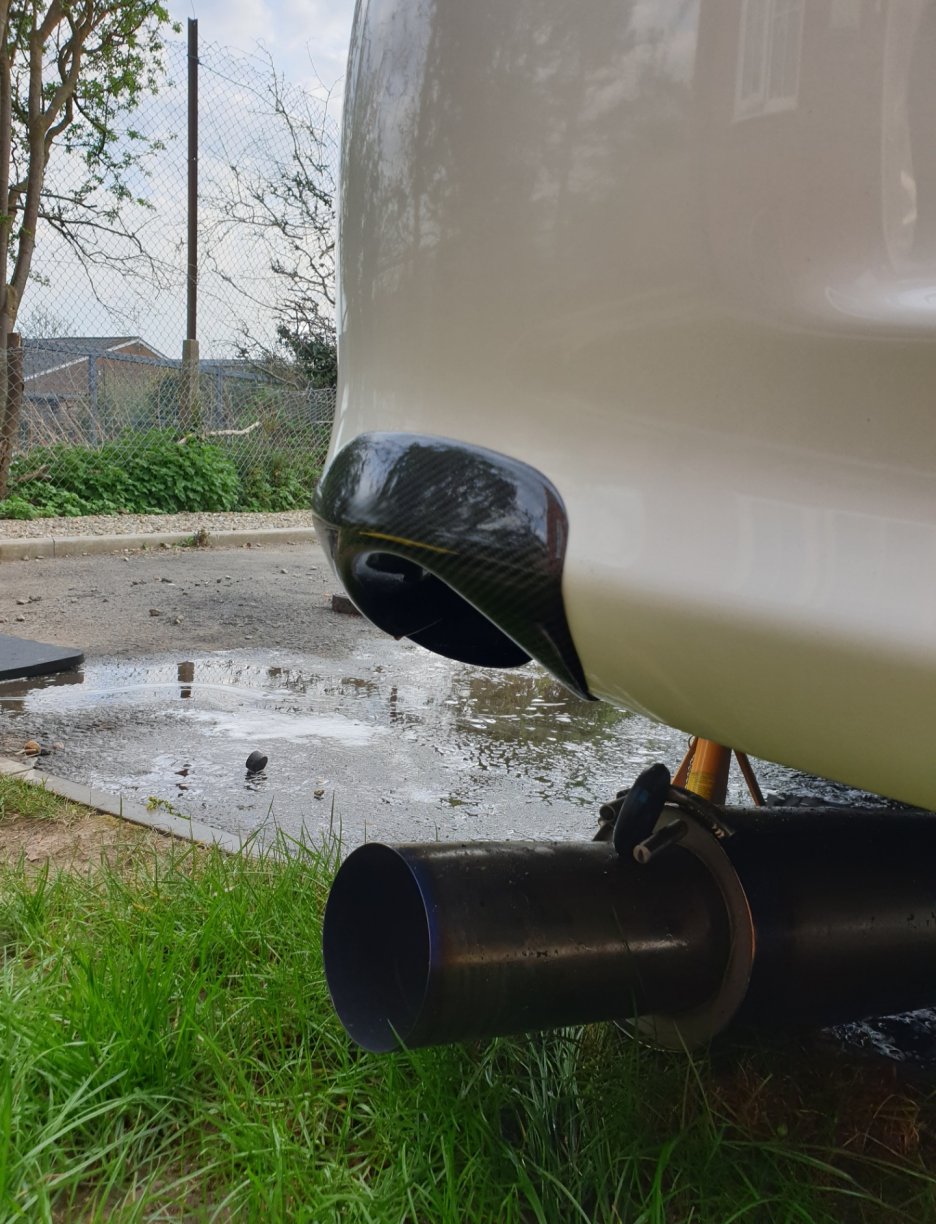
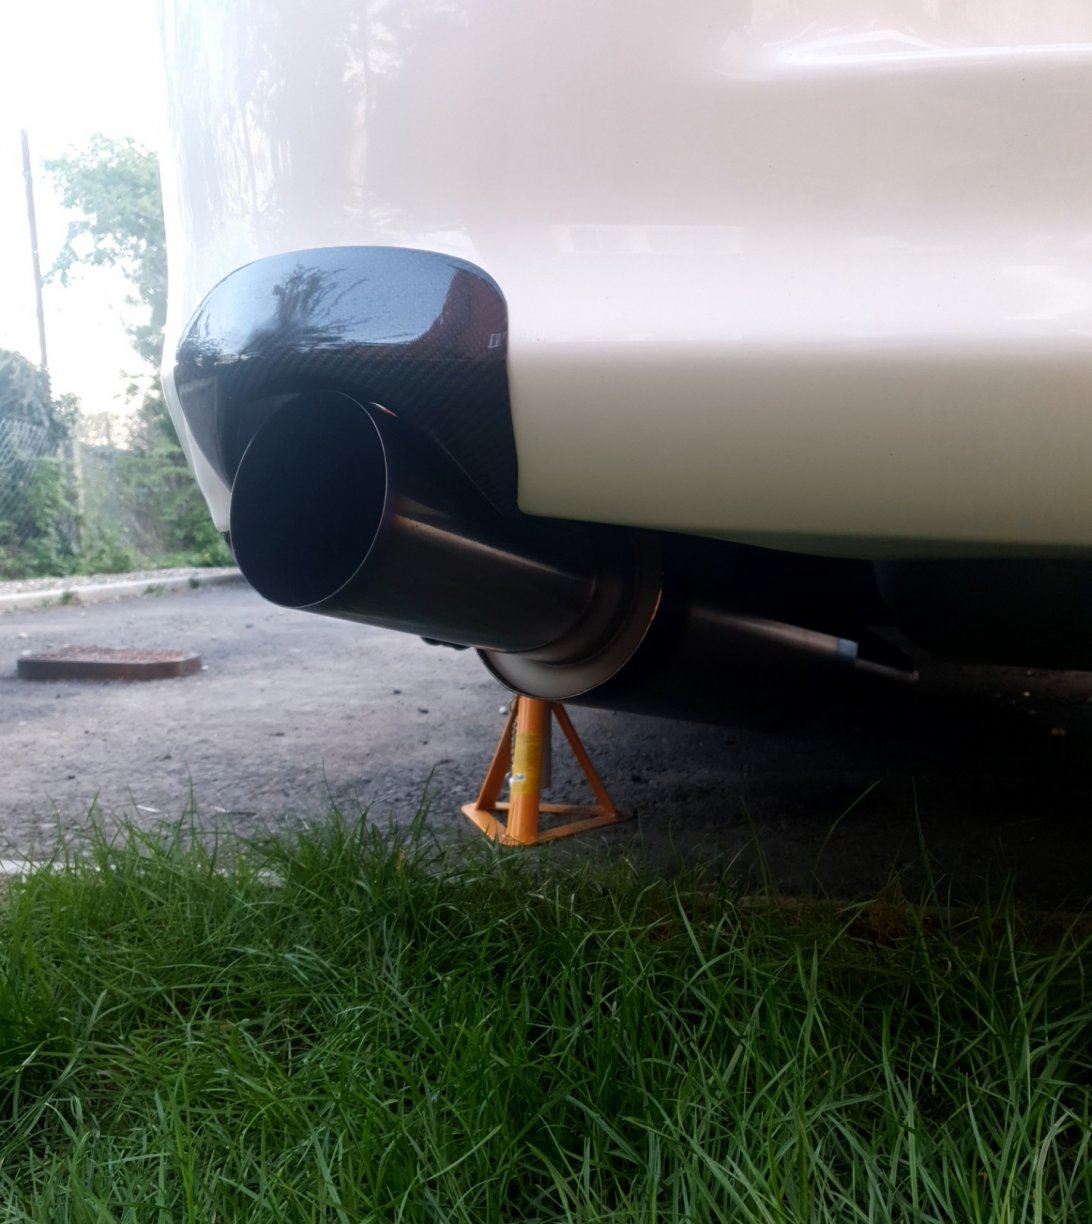
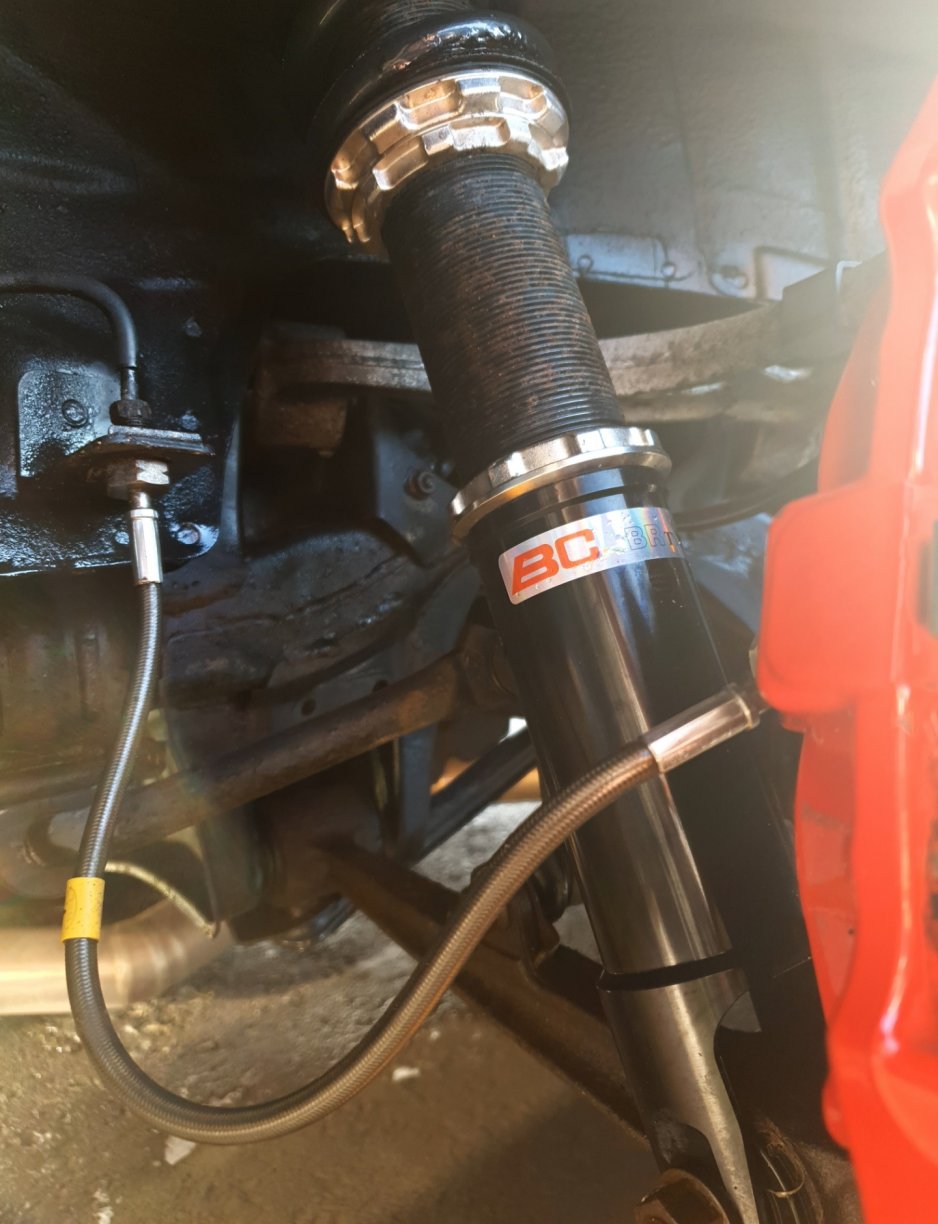
While I was doing the work on the arches, I had 2 alloys off per day so decided to use the opportunity to put a ceramic coating on the alloys which would cure overnight. The coating I used was GTechniq C5 Wheel Armour It was surprisingly easy to put on; to start with the alloys were given a proper decontamination clean, followed by 2 passes with a clay bar to remove all hidden imperfections. I then put the coating on the alloys and let them cure overnight and the next day. The coating itself made the alloys super slick and glossy, they almost looked like they'd been freshly powder coated. This will make the alloys easier to clean in future, and ensure none of the brake dust etc will be as harsh on the powdercoat. While the car was up for the arch work on the drivers side, having done the passenger side first, I decided it was about time I fitted the Carbon Shroud I got from Whifbitz. I got under the car and dropped the exhaust system off the rubber holders to create some working space, got a couple of clamps and covered the ends with a generous layer of cling film so that it wouldn't mark the bodywork. I then placed the shroud in place and ensured I could get the clamps into a workable position as a test fit Once I knew what I was aiming for position wise with the clamps I took the photo for later reference and removed the bricks to see if the clamps would hold at these angles in place, luckily they did, and the pressure was enough to hold the shroud tightly in place but not to crack or affect the bumper or shroud itself. I then removed the clamps and shroud and cleaned the area around the exhaust to remove contamination on the paintwork, this is usually where I would be polishing the paint but that would make the paintwork slick and gave the opposite effect I needed to bond the shroud to the paint. So at this point I gave the area where it would be placed a very careful sanding with a fine sandpaper and cleaned the area of dust. I did the same on the inside of the shroud. This was so that the sealant I would use between the bumper and shroud would have a better chance of bonding longterm. I then carefully placed a bead of Sikaflex 221 (best sealant I felt for the job after research) around the edges, with a small amount through the centre and placed it onto the bodywork and fitted the clamps with the ends covered in clingfilm again I allowed this around 30 hours to seal and then removed the clamps. I was please with how it sat, but there was 1 edge that didn't appear to have the same seal as the rest of the shroud, so I placed a very fine bead of sealant inside this edge and clamped it again for 24 hours Once I was content that this had held as I wanted I sat back and checked all edges of the seal over the next 24 hours to check for any flexing of the carbon to see if any cracks in the bonding would become obvious, however it held perfectly and looked really tidy Took the opportunity of the exhaust system being accessible to clean it up and polish it before placing it back in place. I actually applied a small amount of the GTechniq C5 Wheel Armour on the Exhaust System as well, as it was recommended that you can use it on metal that reach high temperature as well. This will hopefully mean all of these areas are protected and cleaned much easier going forward!

-
Not tried it, you're right though they are comfy! Miss my MR2s, only car I've actually missed owning 1 of. I do actually have an MR2 I'm breaking at the moment mind with a set of original Rev1 cloth seats in good condition if anyone wants to give them a go in their Supra haha
-
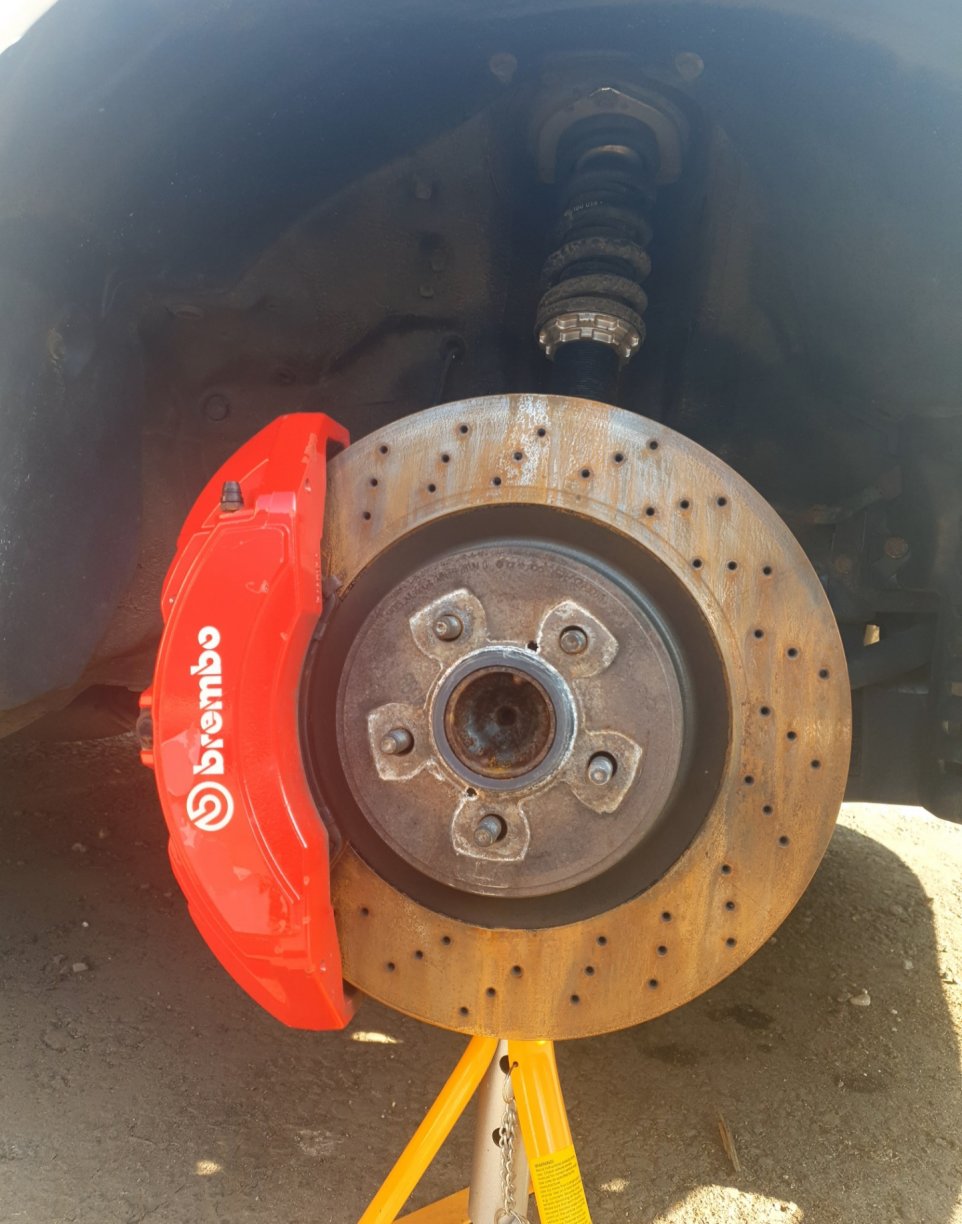
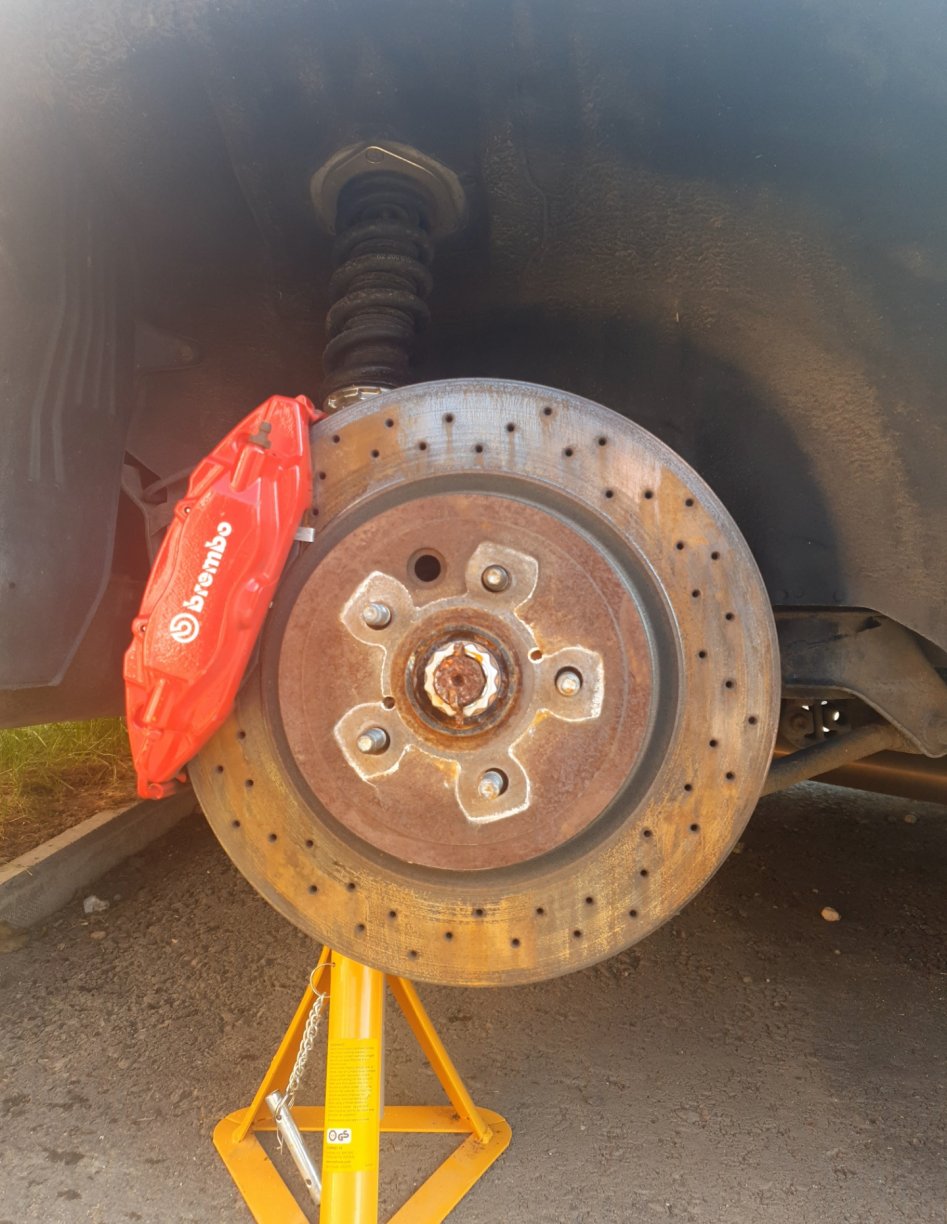
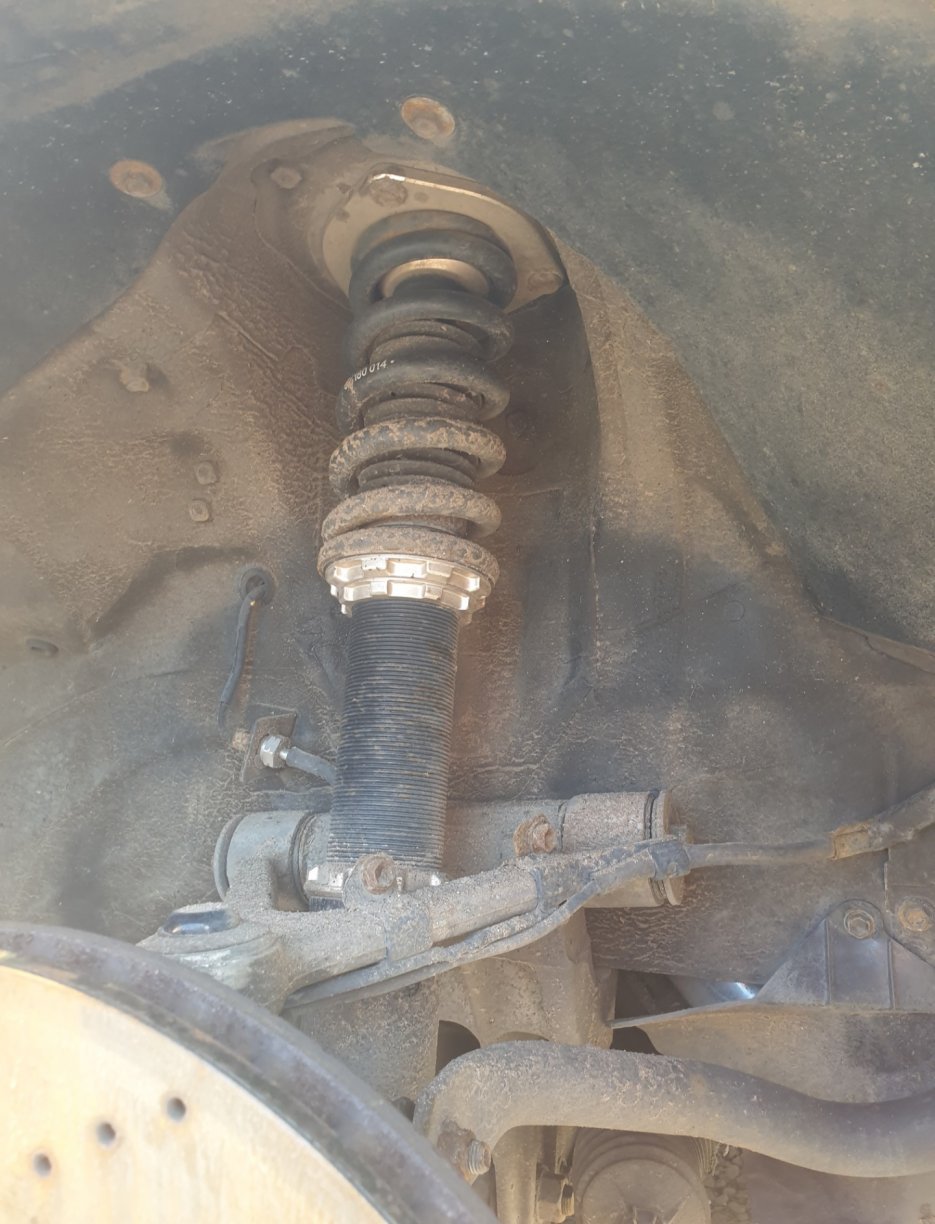
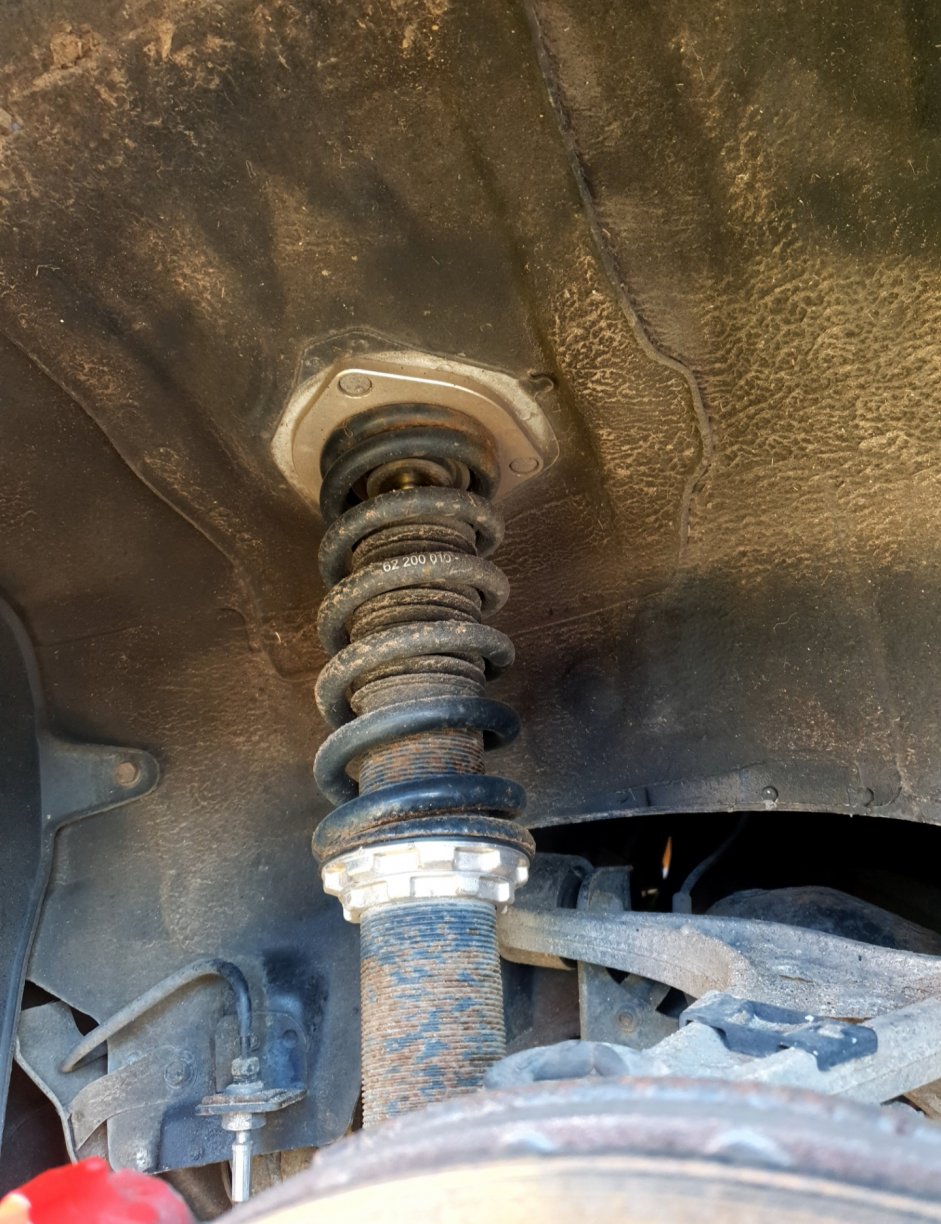
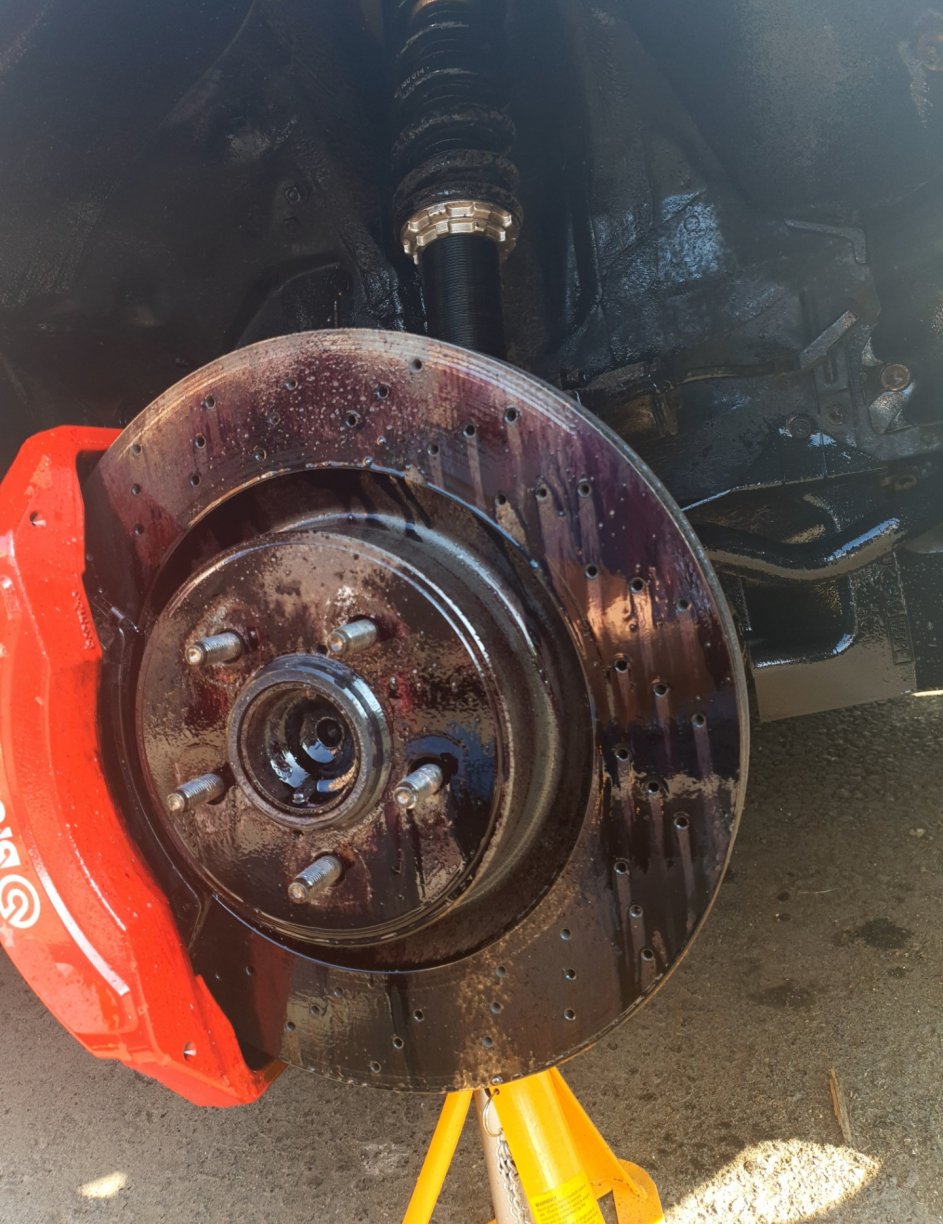
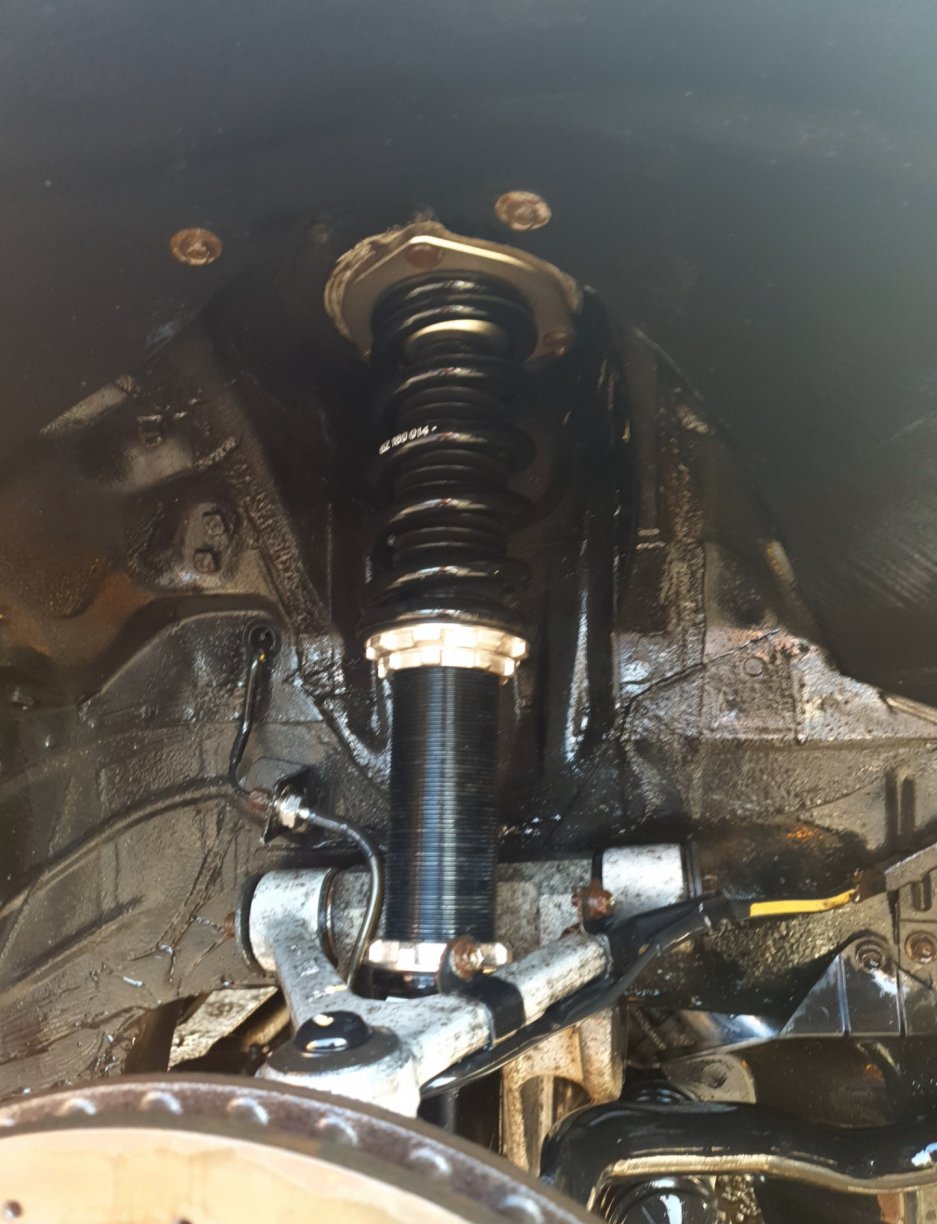
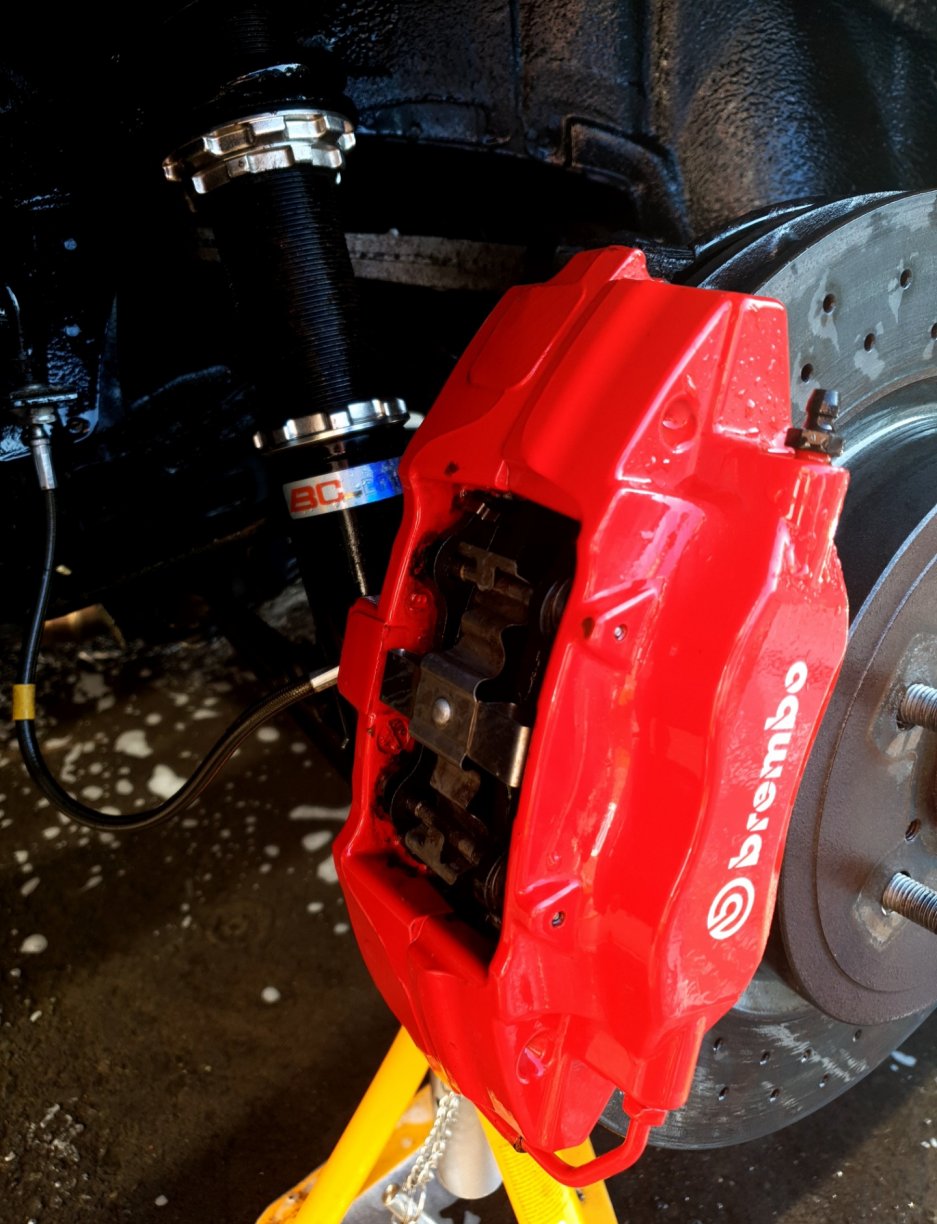
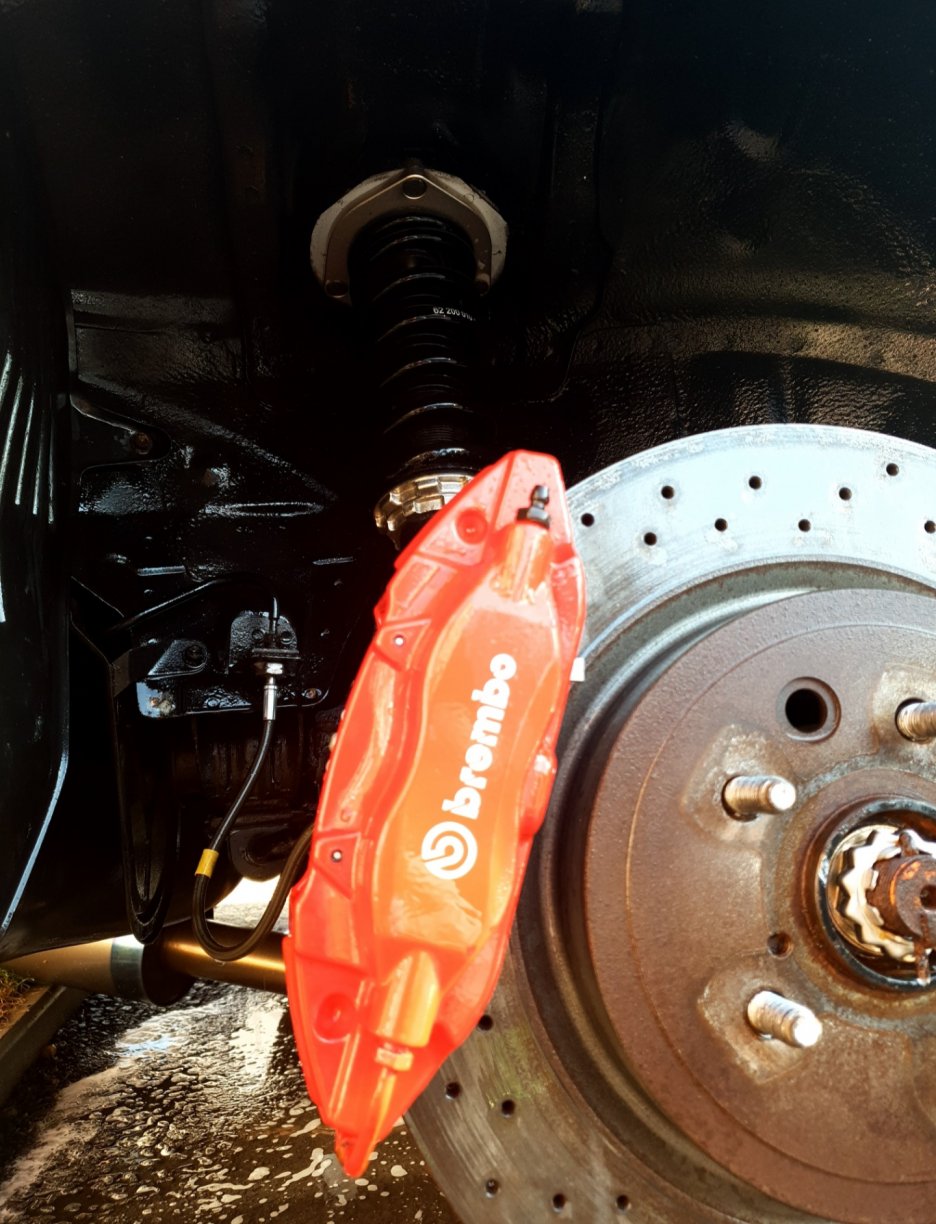
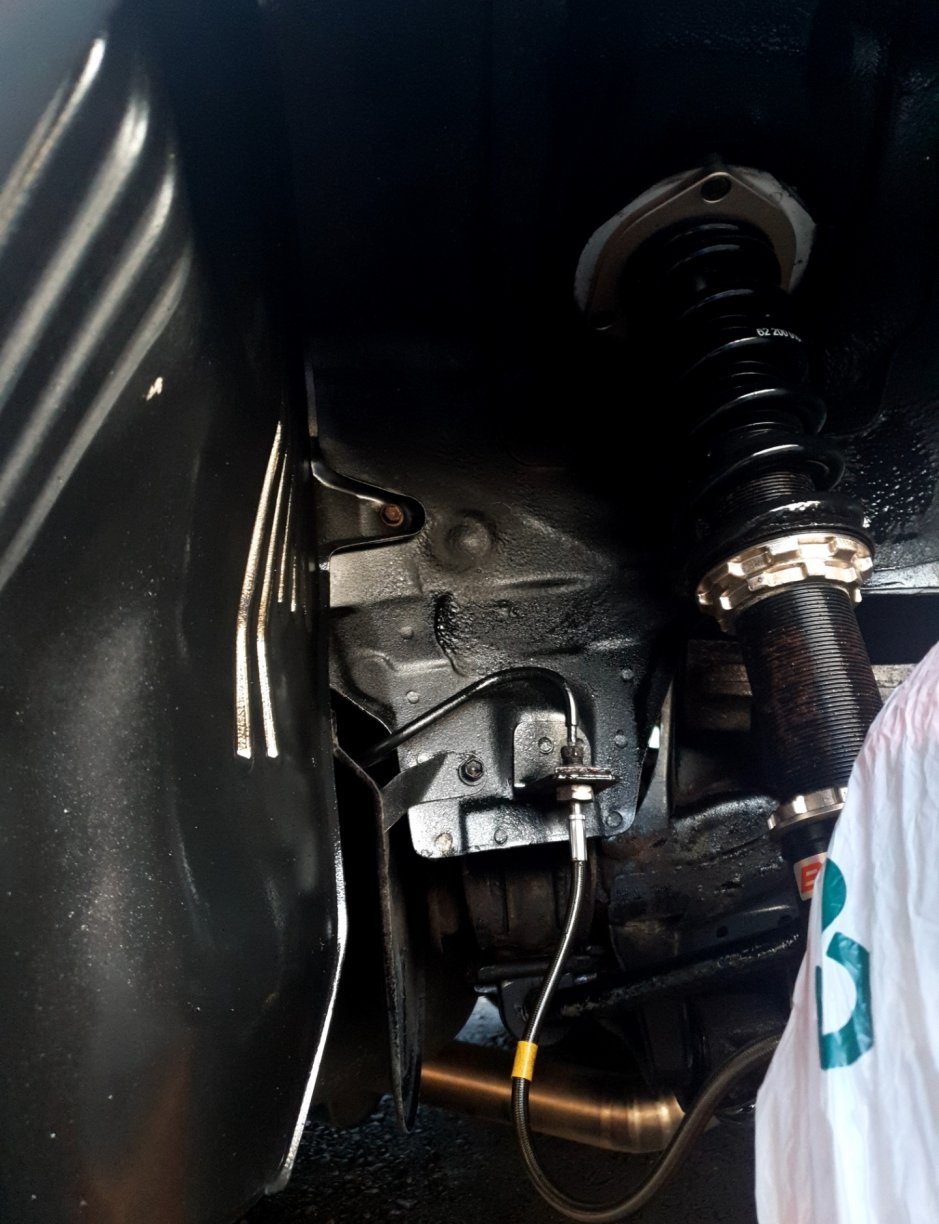
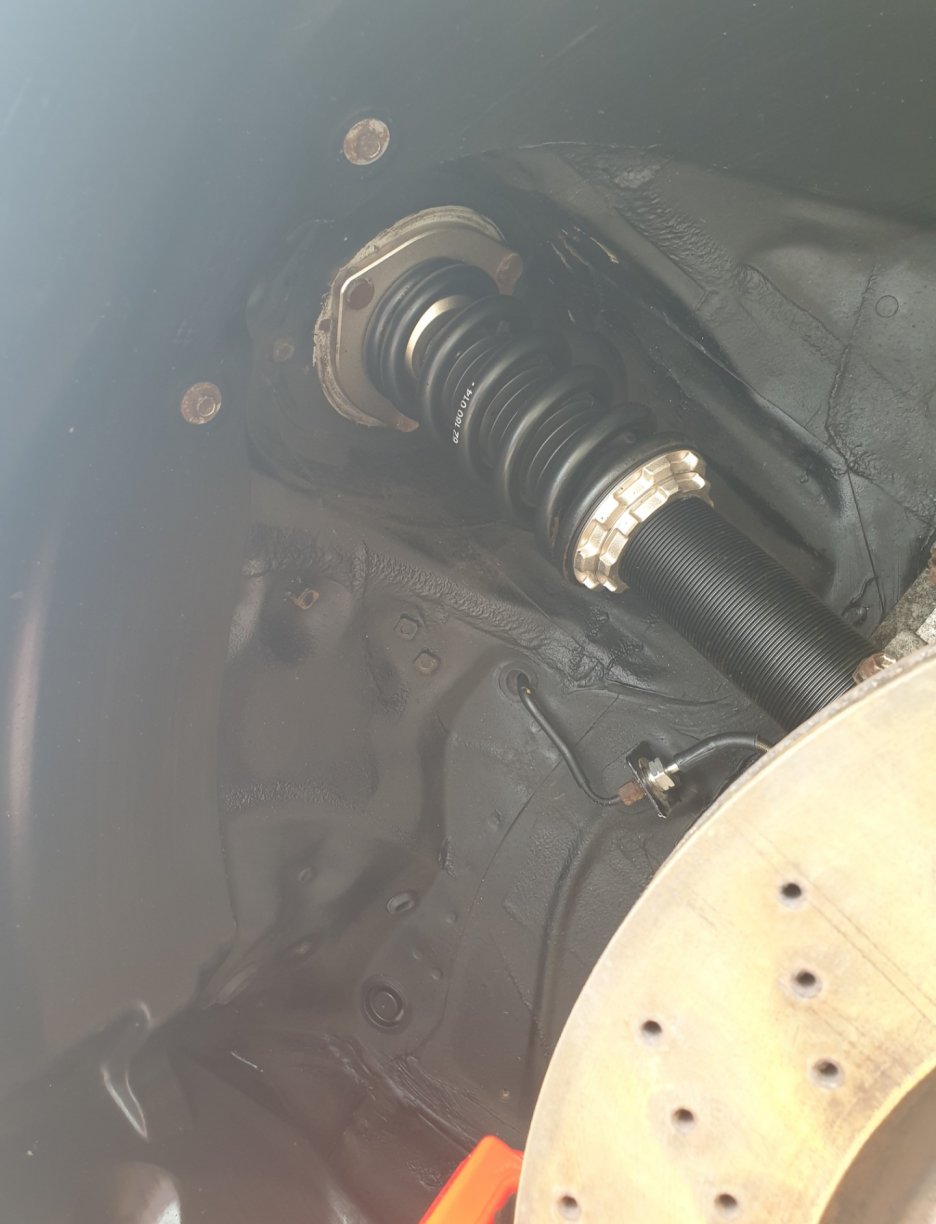
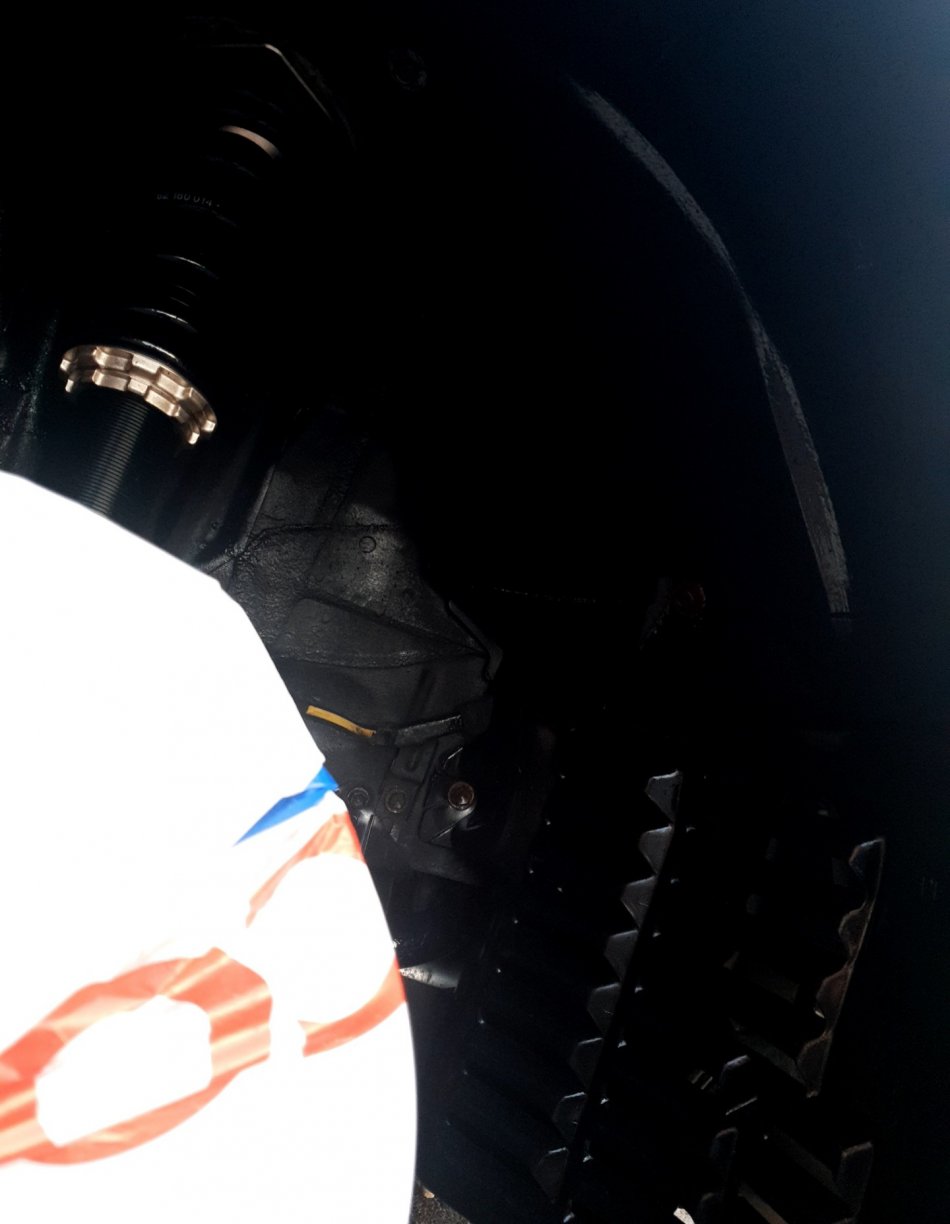
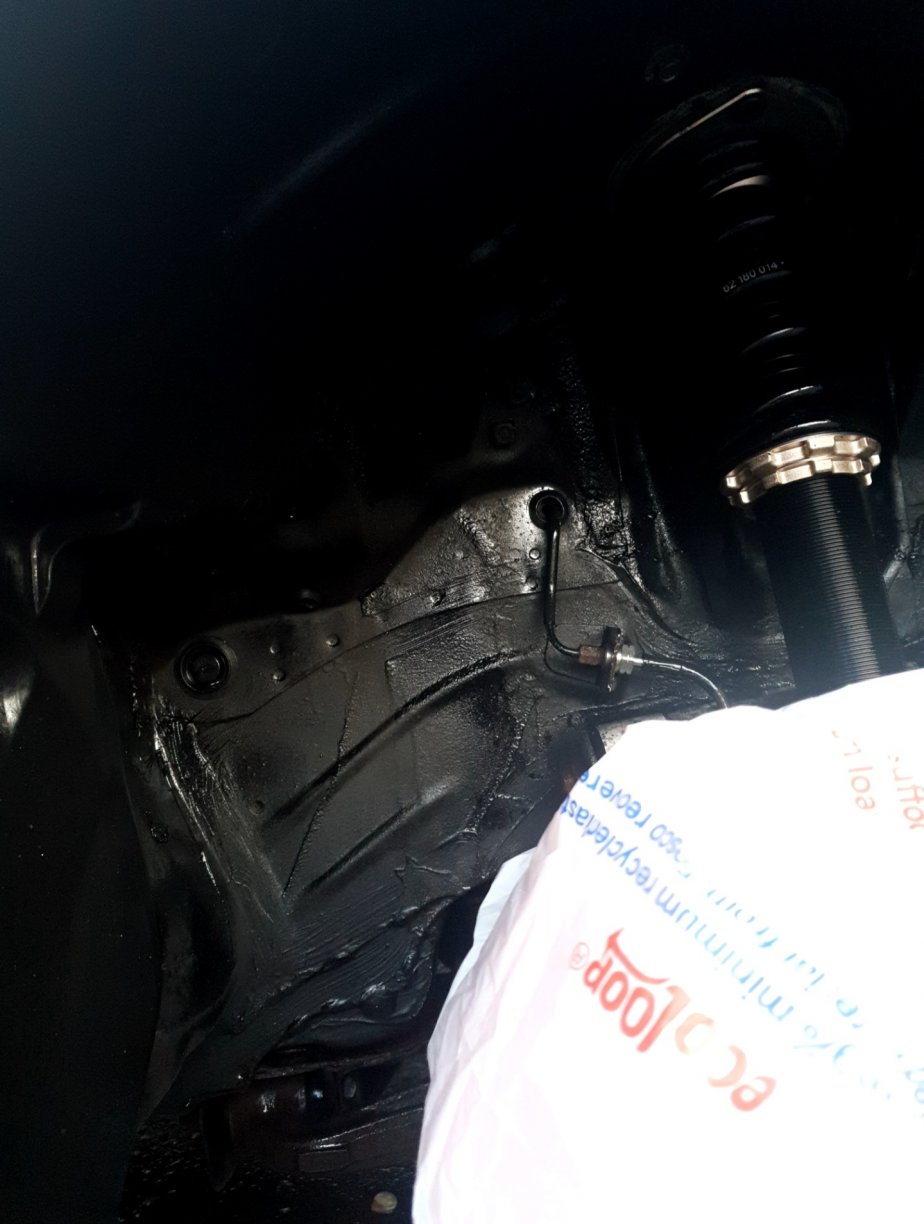
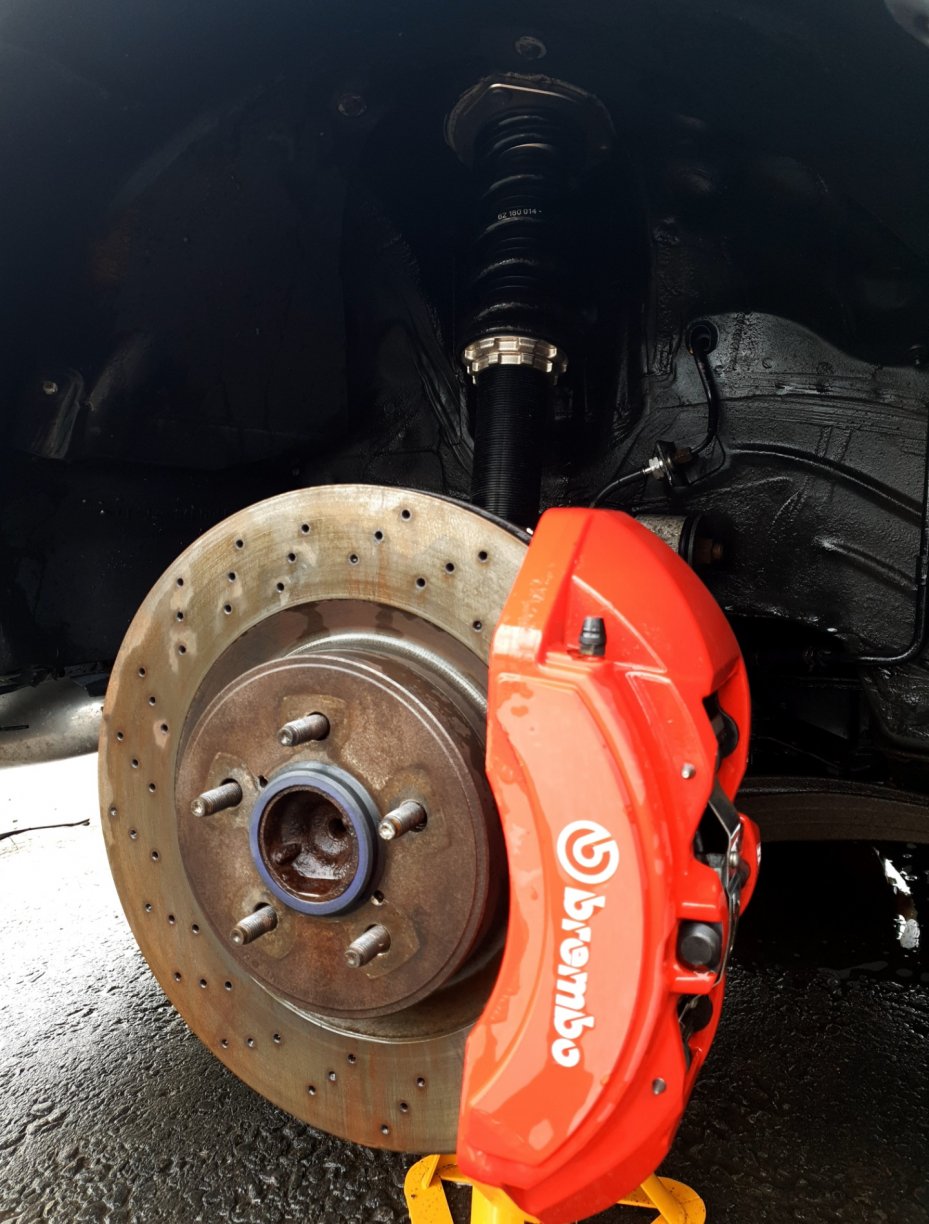
Decided to put off changing the front bumper for another day and thought it was about time I cleaned and renewed the coatings under the arches knowing that it was years since it was last done. This was with cleaning and inspecting the actual underside of the car. The car had a professionally done underseal when it was imported and still looked ridiculously clean after a wash and a soft brush, however I wanted to lay down some underseal on the arches as I know these areas can take a beating from road grime and dirt off the tyres. I still intend to redo the underseal before Winter 2020, but I'm likely going to get this removed and redone professionally. Few before pictures after I had removed the alloys, I did this work over a 2 day period one side at a time. I gave the arches a good pressure wash to get rid of the worst of the dirt and grime and laid down a good layer of degreaser and citrus pre wash and worked it in all over with a course detailers brush. Once the area was clean I hit all of the mechanical parts with a spray of Fallout Remover and let it work its magic, working it again into the areas where it was harder to reach and power washed it all off. Once I could see every part clean without the obstruction of dirt, I targeted a few areas that I felt needed further cleaning and reworked those areas to ensure it was all as clean as possible prior to laying down a sealant I then left the area to dry for a couple of hours, and went out to dry any areas that needed the help, and then left it for another hour just to ensure it was all properly dry. I placed a bag over the calipers and discs and went to work with the sealant. I chose the Dinitrol 1000 as I loved the idea it is clear, so doesn't have the issue that you can't see what is hidden going forward as you get with some coatings such as the black waxoyl. I gave each arch 3 seperate coatings with time between drying. The outcome looked great, pictures were at various different times.

-
Yeah no problem at all, always welcome to quiz me on the detailing side of things!
-

My Supra - Progress so far, next steps and build thread
Crossy replied to Peter P's topic in mkiv Supra Projects
Doing a really good job with this mate, looks really clean and OEM+ How much were the leather rear seats from Kieron? I put up a wanted post not long back asking for the same as I'm not keen on the blue cloth rear seats in mine! Bonnet is looking good as well, as said they're usually a pain in the ass to fit well without a large gap somewhere. Loads of subtle bits going on as well then! I was going to get a flipper plate and ended up going with a magnetic kit instead so I can take it off as and when I wanted. Do like the flipper plates though, they seem to go down well whenever people start messing with them haha -
I honestly dont mind it, just people having their moment of fun. A lot of the time I try and have some fun back with it and make a comment on whatever they're driving in a humourous or humourless way, depending on whether they're being a laugh, or being a knob haha My favourite so far was coming out of Morrisons to find a group of young lads around it, 1 of them said the line as I unlocked it and they realised I was the owner. 1 of them was propped up against his Civic sat 2 spots down and says "christ it's only a car" too which I replied "Is that a laaaawwwnmower". Took it pretty well to be fair while most of his mates were pissing themselves at his expense. Actually spoken to a few of them since and they seem harmless enough
-
No problem at all mate, always happy to talk people through anything to do with detailing! I actually enjoy a lot of the work involved haha. I went with a company called TBT Carbonfactory as someone I knew in America vouched for their work, they actually did a couple of bits that I wanted that I couldnt get from Whifbitz, so I ended up ordering the lot from them to ensure the weave pattern stayed the same throughout etc. It's been a bit of a wait, but what's another month when I'm already 4 months into waiting eh! Just unfortunate timing that they were sending the parts the week Covid lockdown begun over there and they had to cancel all of their shipping out. I dont think anything I've ever ordered has gone smoothly for any car, sort of used to it now! Well firstly I'm glad Harry is ok! I know it hasn't really affected most people but I have a close friend that passed away from it this week, just as though it was looking like no one from my general area had been hit by it. Completely out of the blue as well and so unexpected. I just hope people continue to try and stay vigilant and safe with it as he was a pretty healthy guy as well. It really puts the whole concept of things we find difficult and problematic, such as waiting on car parts for instance, into concept when you think these families just wont get these people back eh. Yeah that's it, it's hard to sit and wait knowing the work is there to be done but its actually out of your hands for the foreseeable! I'm sure it will definitely be worth the wait! Looking forward to seeing some updates and pictures of it! I'll keep slowly updating this thread every few days, only about 4 months out now from the present day time wise I think!
-
Sold for Asking Price


