gavin.starr
-
Posts
1565 -
Joined
-
Days Won
7
Content Type
Profiles
Forums
Store
Blogs
Events
Downloads
Supra Articles
Gallery
Everything posted by gavin.starr
-

My project to return the supra back to the road begins
gavin.starr replied to gavin.starr's topic in Supra Chat
I have also stripped the original fuel tank straps and re painted them. replacements are pretty expensive for a couple of strips of metal. Miner only had surface rust so scrubbed up pretty well. I then received a mesage from the powdercoaters telling me my parts are ready so i have been to collect those. So now these are back i can start poly bushing everything. thats as far as ive got at the min but progress is progress.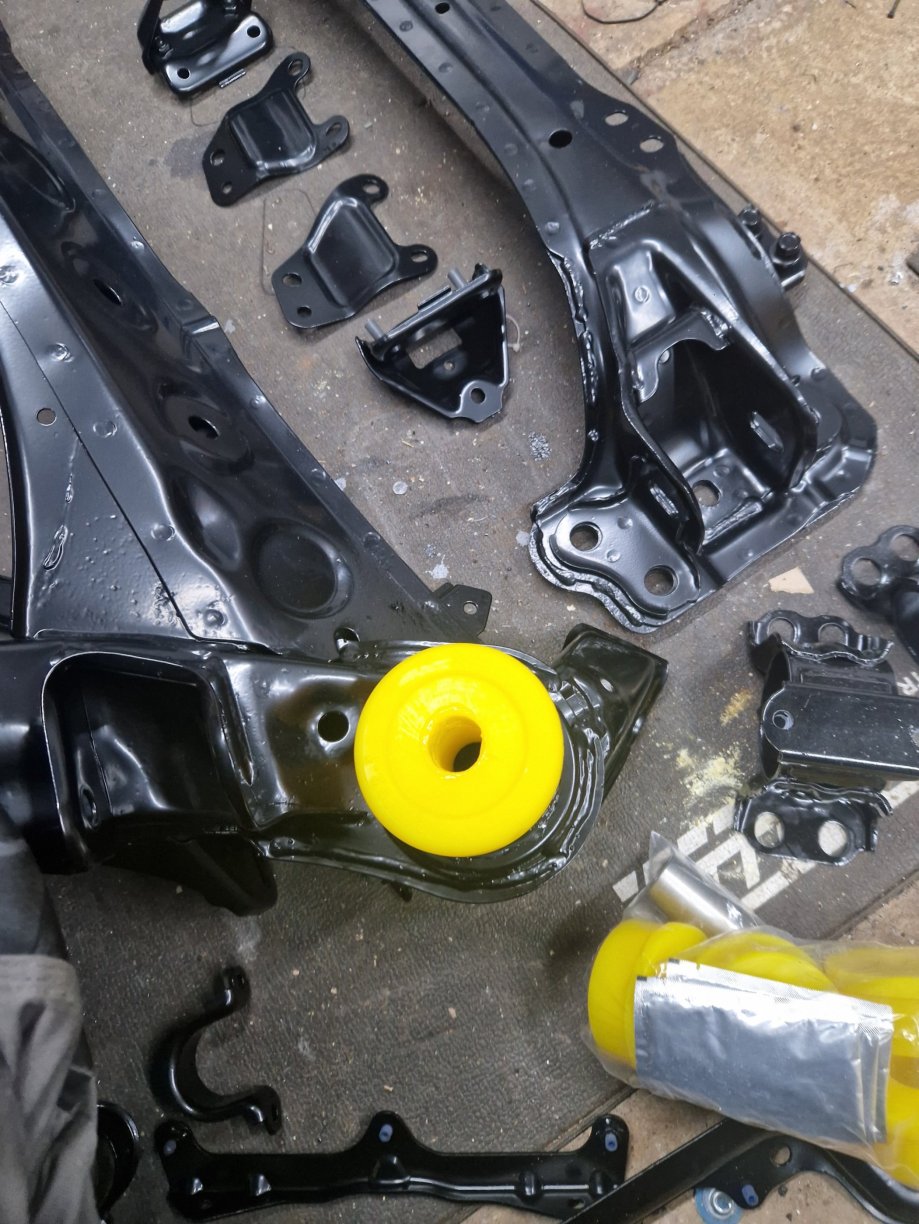
-
My project to return the supra back to the road begins
gavin.starr replied to gavin.starr's topic in Supra Chat
So I've started by putting the original filter mount through the blast cabinet and have painted it up. I have stretched out the clamp to accommodate the new size fuel filter from sytec which now fits like the factory filter under the car.
-
Cheers dude. I'll take a look. Is on my very long list of things to do so hopefully I'll get round to it soon.
-
Im currently in the process of overhauling everything on my Supra. Brake and fuel lines have already been replaced on the car. It is also undergoing a single conversion, so therefore it is getting a larger pump in the tank, a GST400K (400lph). Now i have seen a few posts regarding running 12v and a relay. The page below Is this still the best way to do things or have other ways been established since this was posted in 2012. Also with regards to the pump hanger I belive the the electrical conector in the lid of the hanger is also a weak spot for overheating, if so what are peoples fixes for this, a beefier type of connector or a new bulkhead to run wires through? My next question is regarding the wiring what gauge wiring is required so that i can get some ordered. Thanks Gavin
-
My project to return the supra back to the road begins
gavin.starr replied to gavin.starr's topic in Supra Chat
While the car is in this position I'm going to refresh all of the brake lines and fuel lines. Hopefully once the car is built I'm going to be running around 650 to 700hp so I need to future proof all of this in advance. So with regards to the fuel lines what size should I look at running. Would standard size lines be sufficient or should I upgrade them to run a -8an feed and a -6return? -
My project to return the supra back to the road begins
gavin.starr replied to gavin.starr's topic in Supra Chat
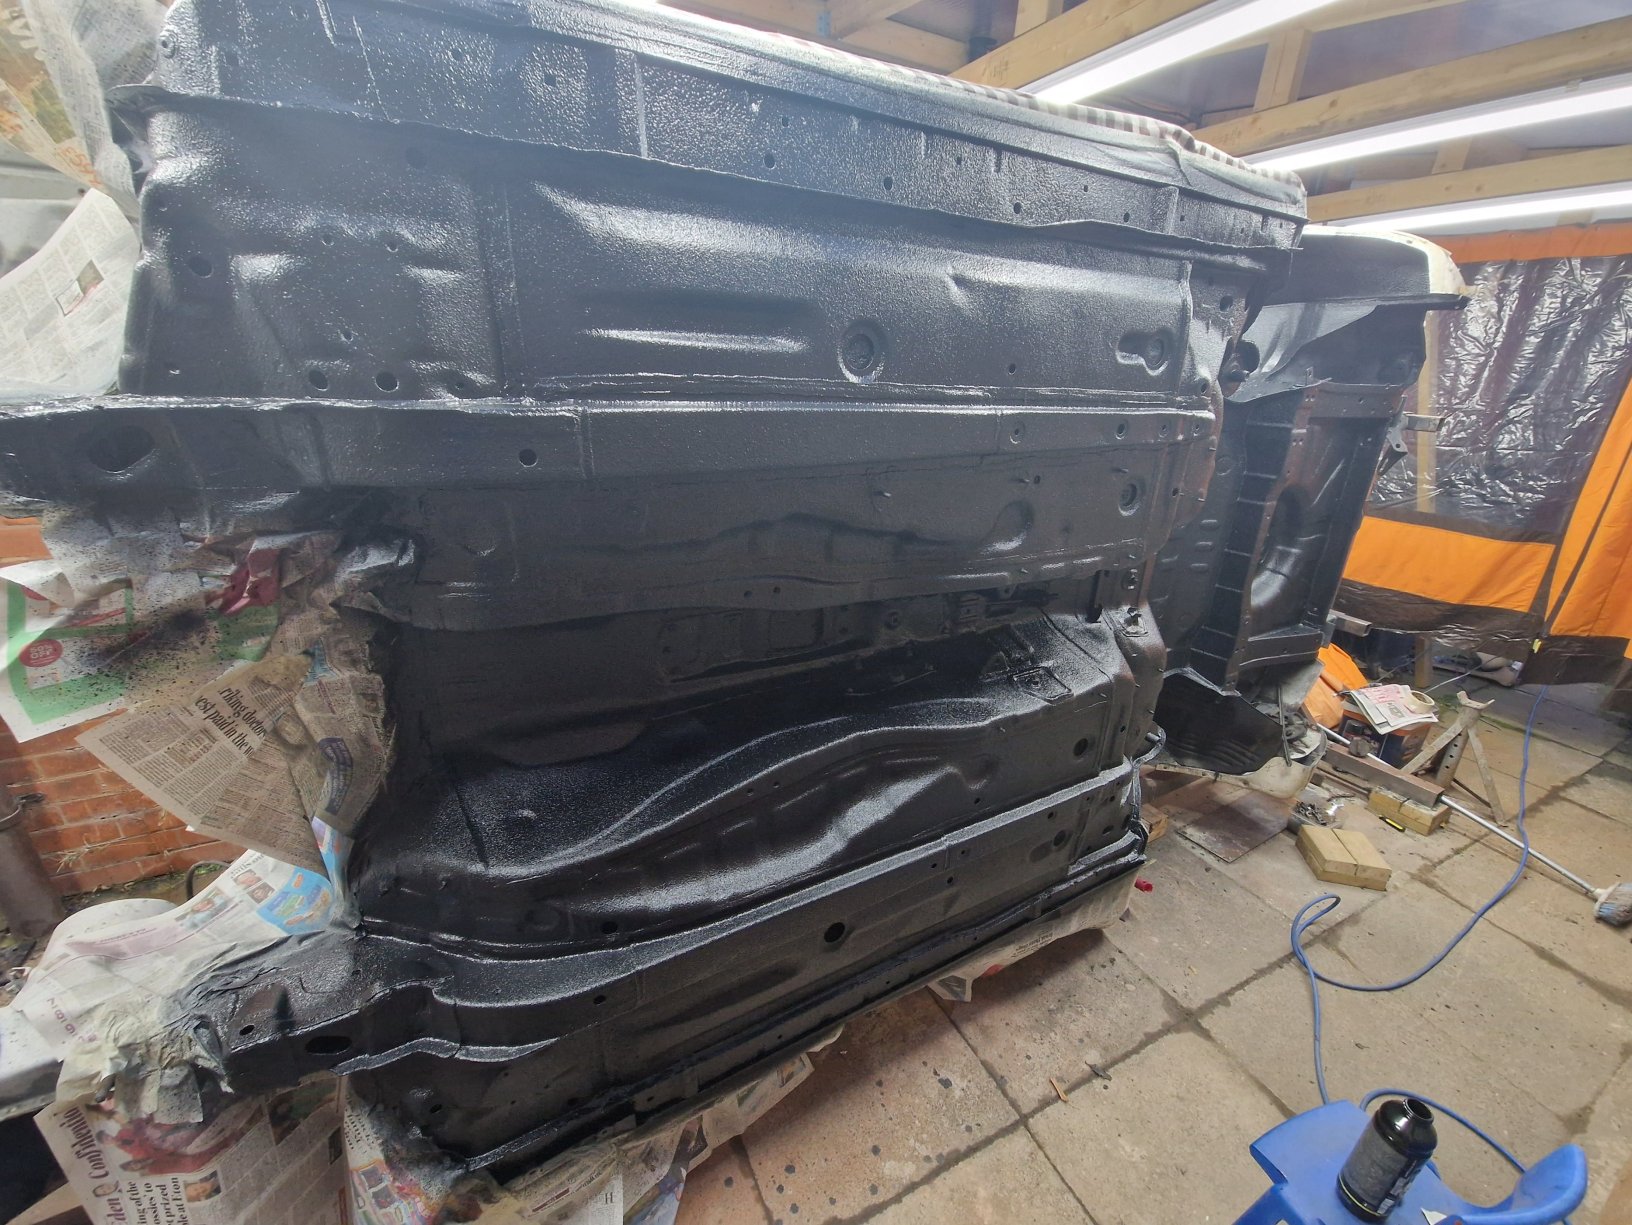
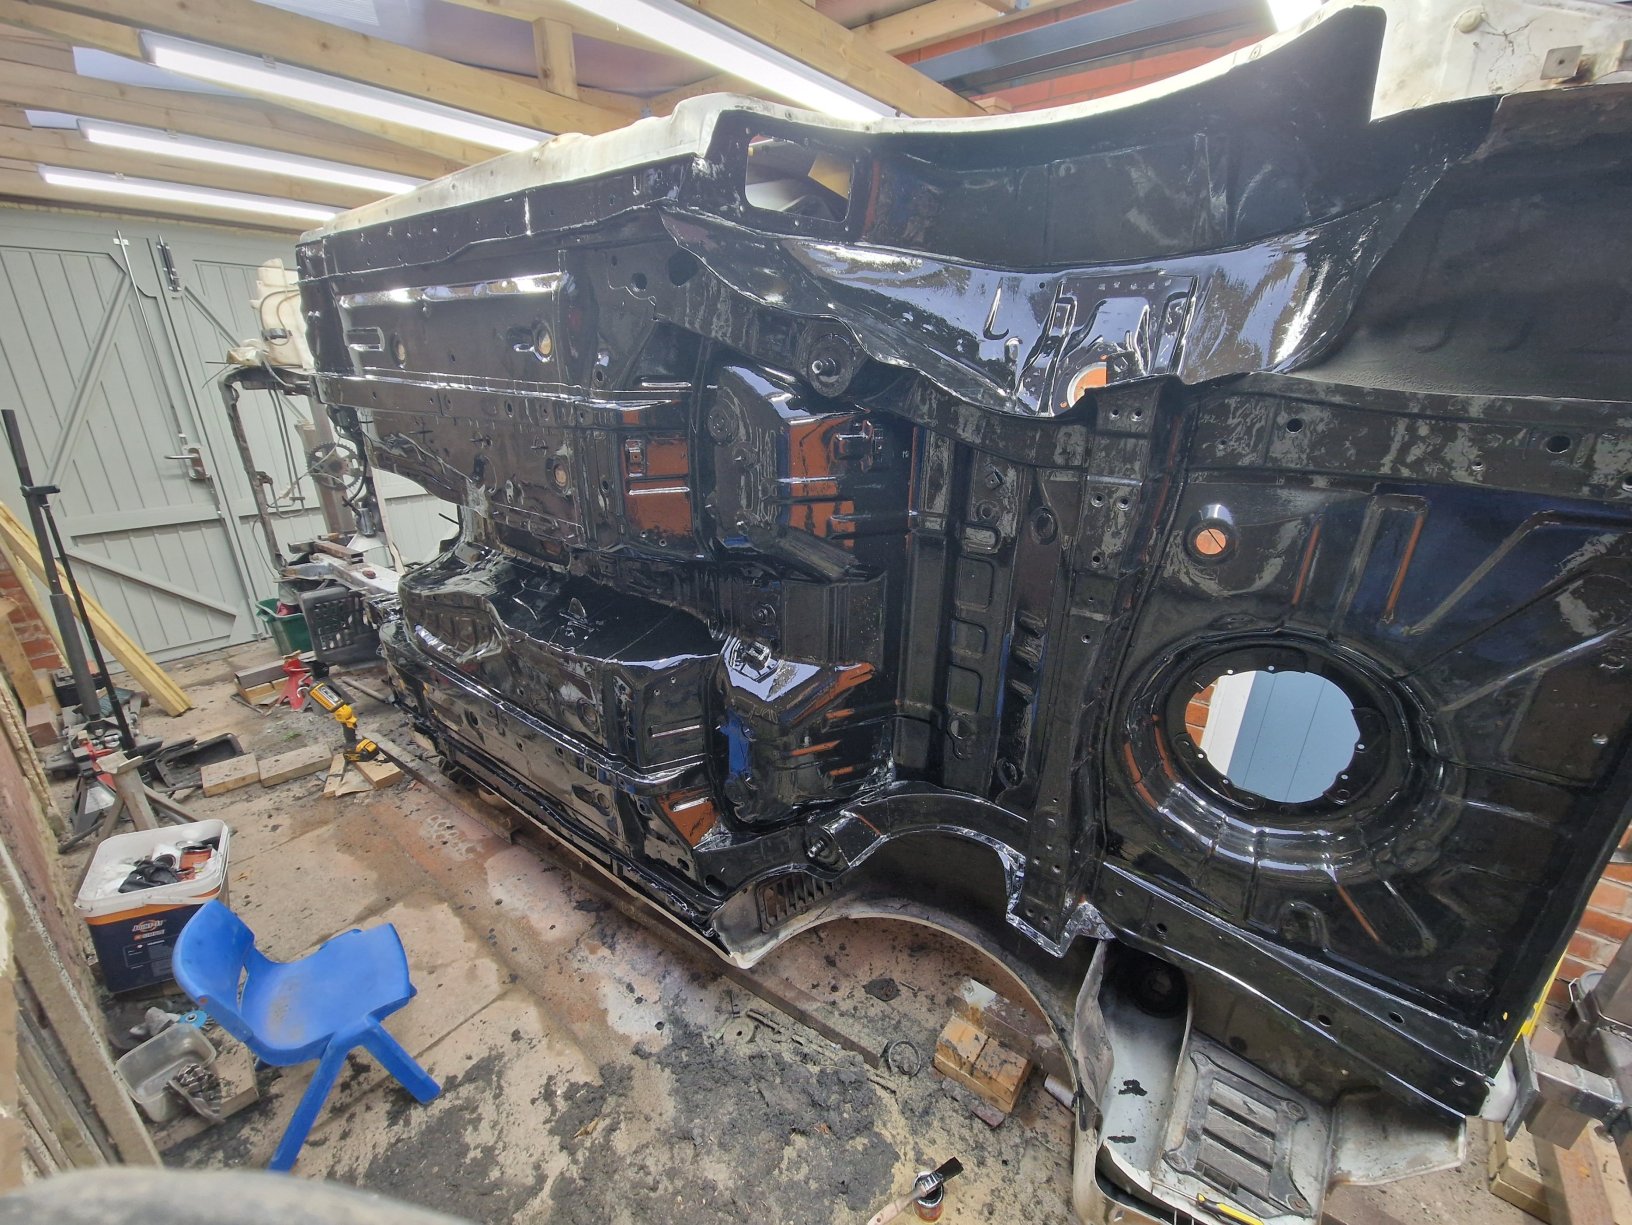
Final layer of protection is now on. Raptor paint is complete.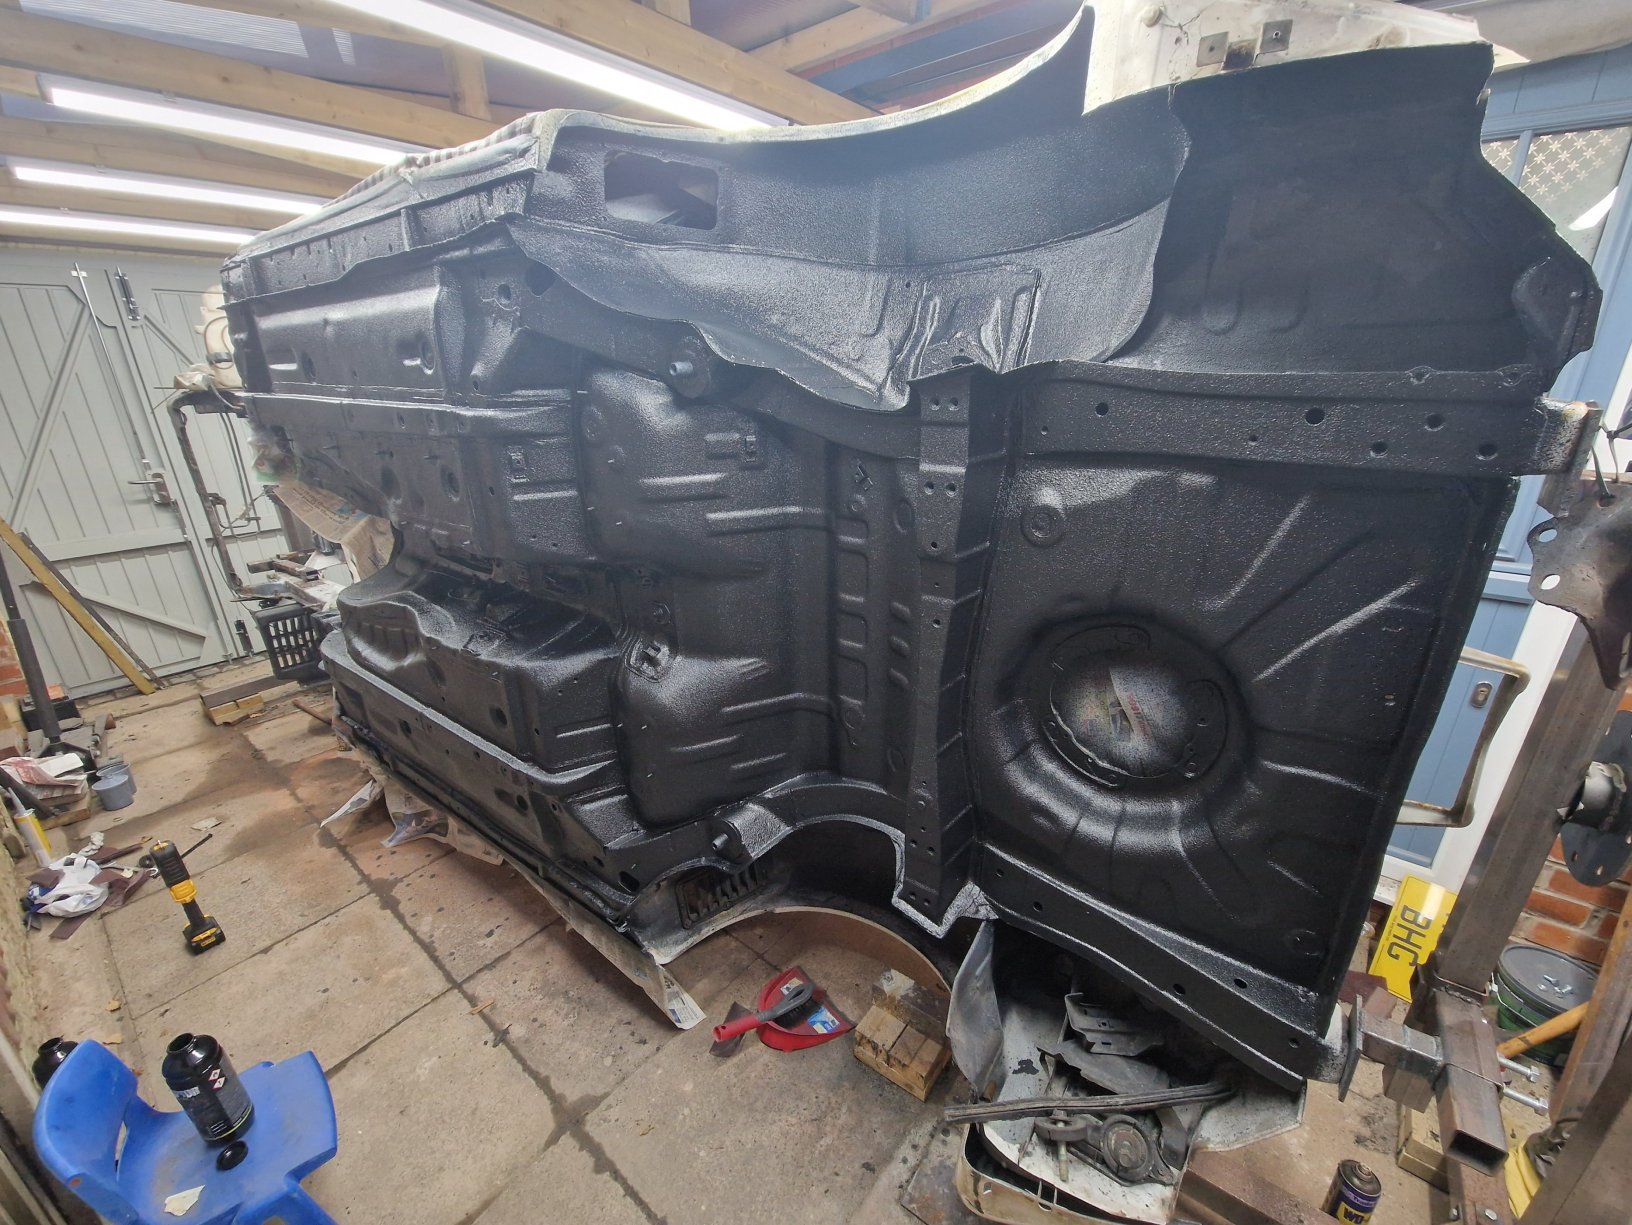
-
My project to return the supra back to the road begins
gavin.starr replied to gavin.starr's topic in Supra Chat
Last layer of primer before the Raptor paint goes on.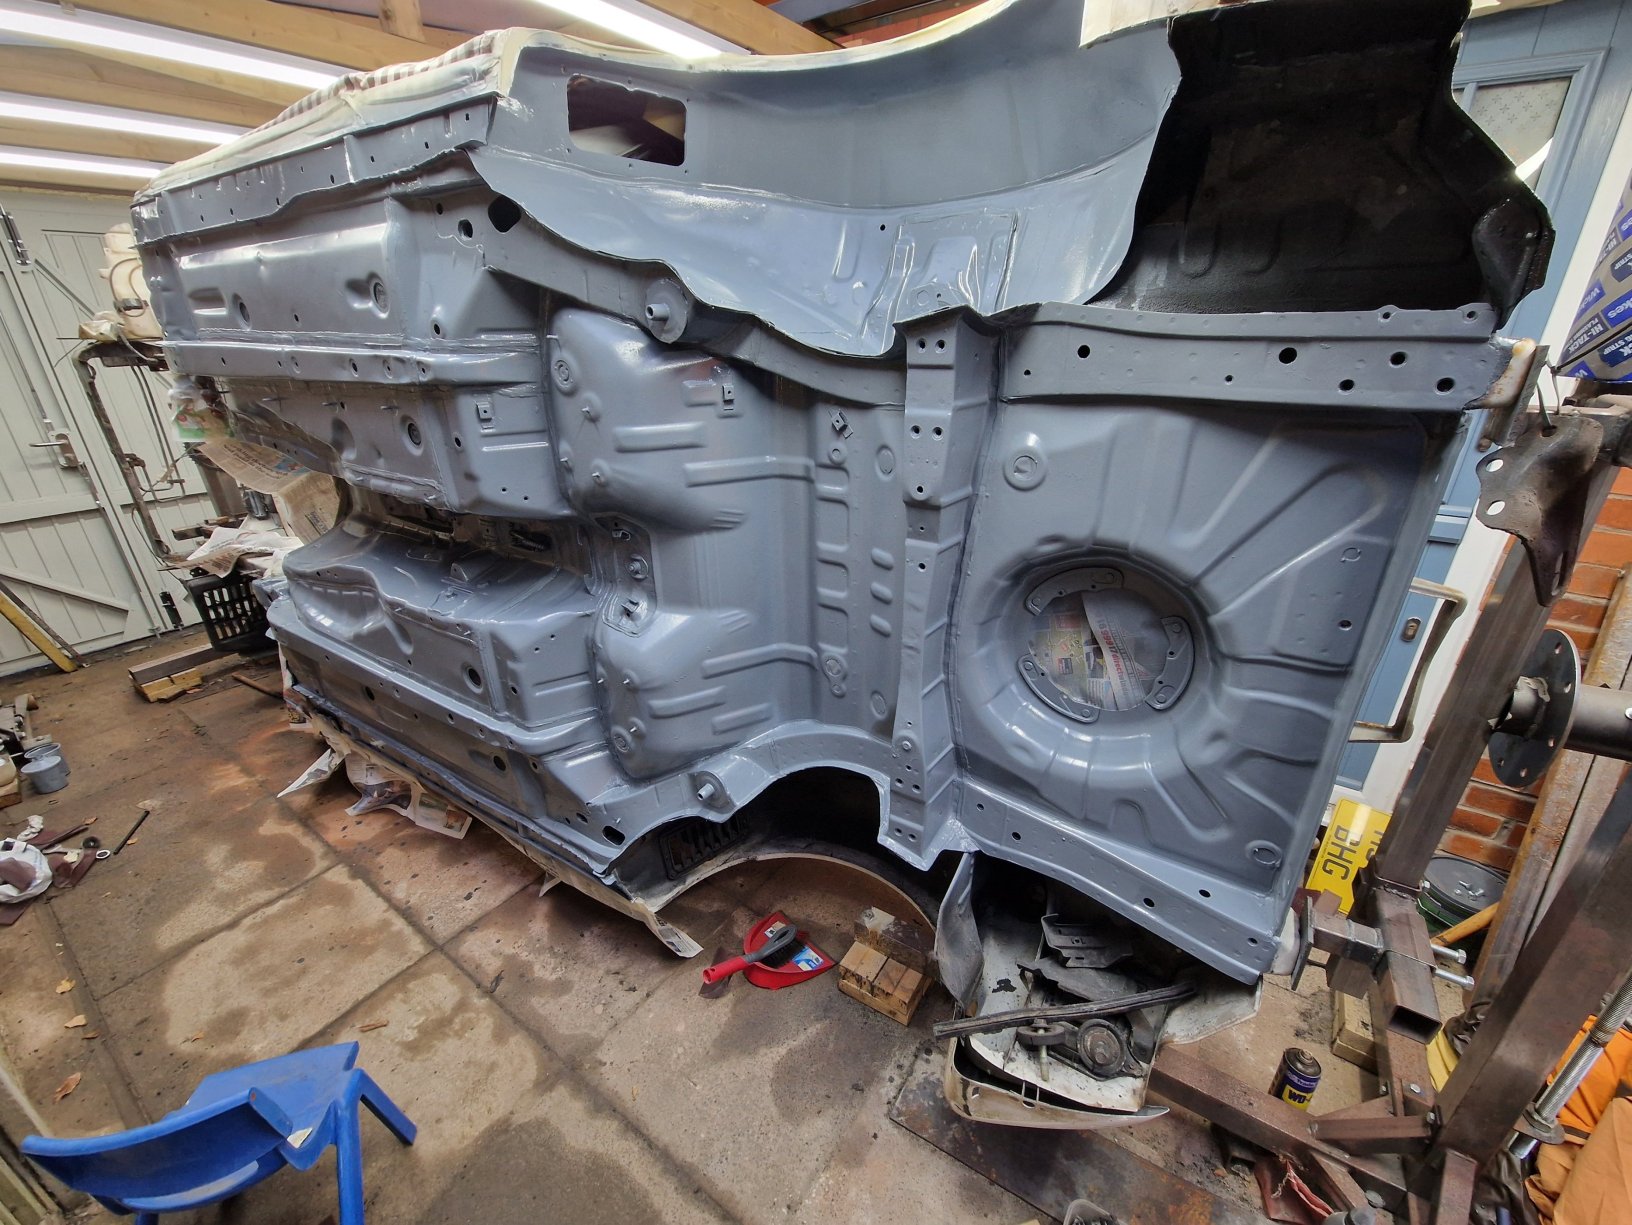
-
My project to return the supra back to the road begins
gavin.starr replied to gavin.starr's topic in Supra Chat
Thats all of the seam sealing work complete. Now justvfor a new layer of primer and on with the Raptor Paint.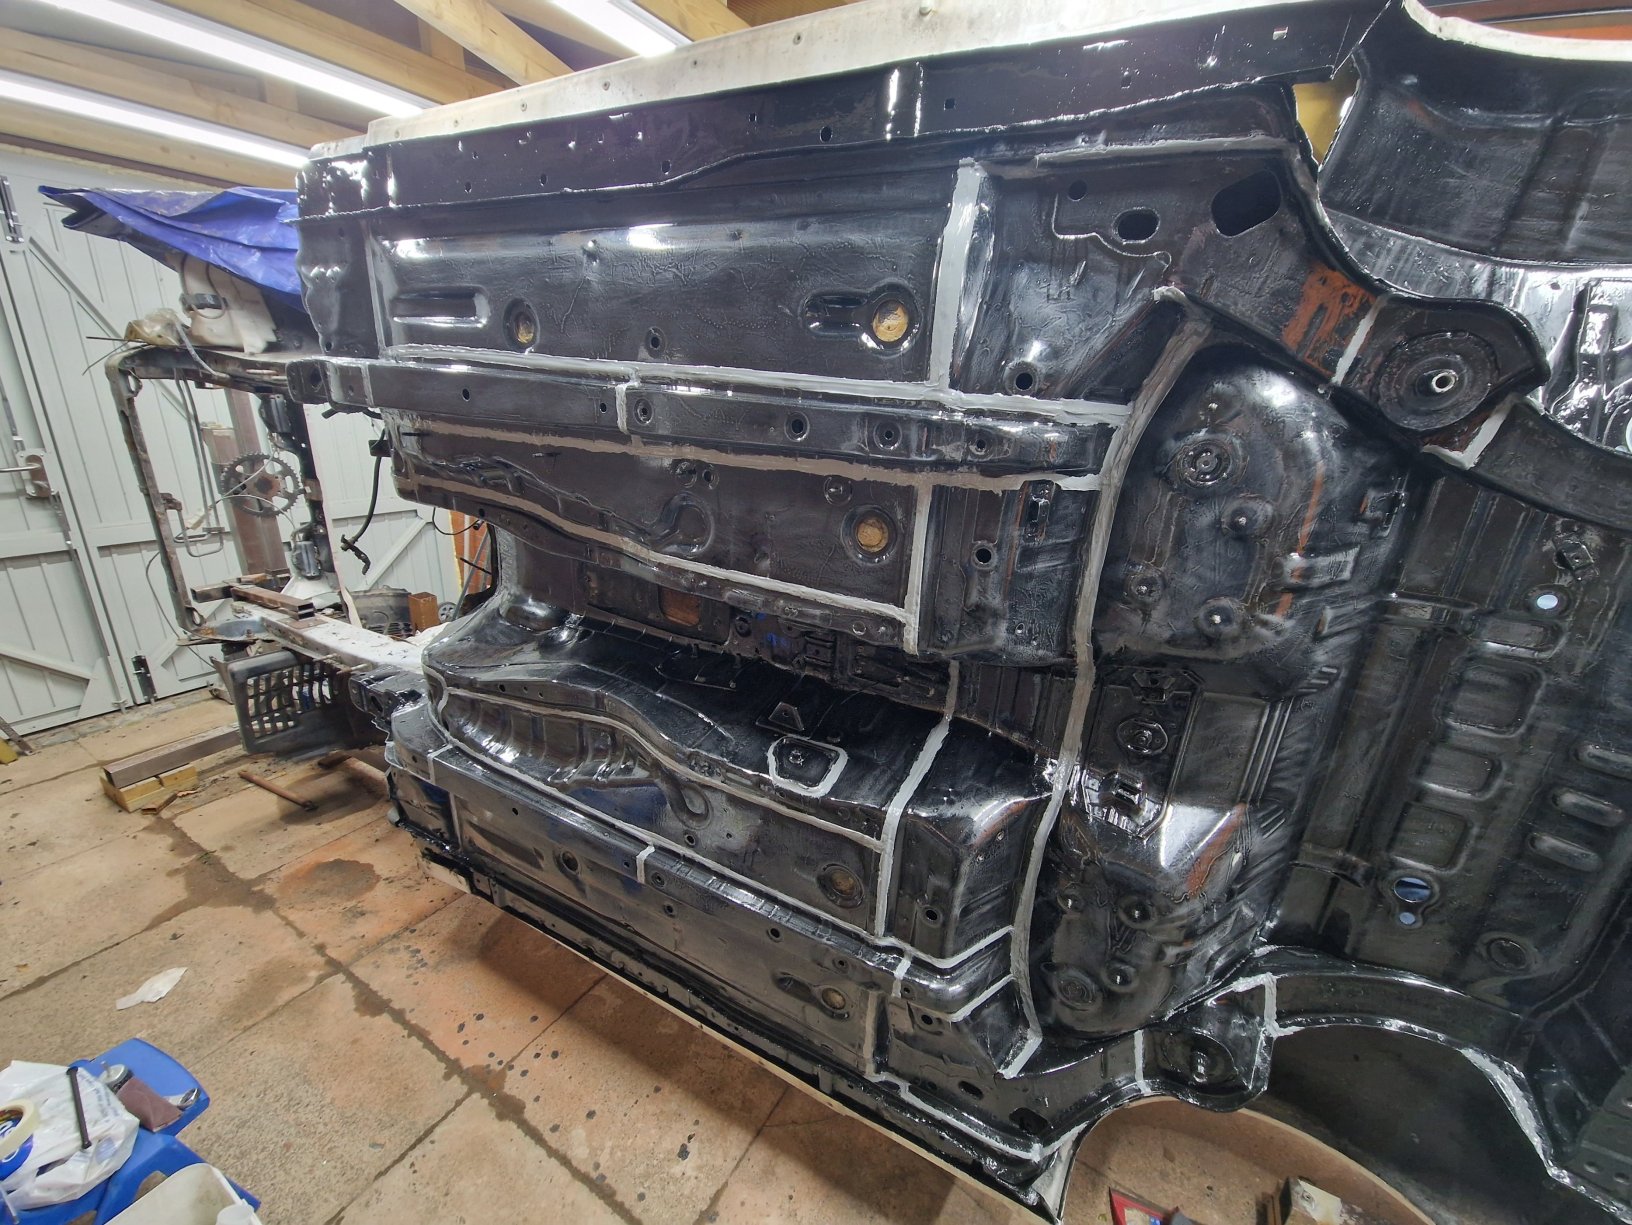
-
My project to return the supra back to the road begins
gavin.starr replied to gavin.starr's topic in Supra Chat
I've actually just bought some. I have been recommended it by a few people now. I ordered the one with the cavity nozzle so I can spray it inside hard to get at places. I haven't got much done this week as my little lad has Chickenpox so I've been looking after him. But hopefully I'll have some updates soon. -
My project to return the supra back to the road begins
gavin.starr replied to gavin.starr's topic in Supra Chat
I'm going to be going over all this with Raptor paint to act as a stone guard. So hopefully I'll be able to start that this weekend. I bought the roll over jig off Ebay. Although it works its not the best design, as I had to modify it to suit. -
My project to return the supra back to the road begins
gavin.starr replied to gavin.starr's topic in Supra Chat
Thanks. It's definitely a tedious task but hopefully worth it in the end. Not sure of your on tiktok or not but that's where the videos go (@suprarestore). I only put pictures up on instagram. -
My project to return the supra back to the road begins
gavin.starr replied to gavin.starr's topic in Supra Chat
So that's 90% of the underside now complete.
-
My project to return the supra back to the road begins
gavin.starr replied to gavin.starr's topic in Supra Chat
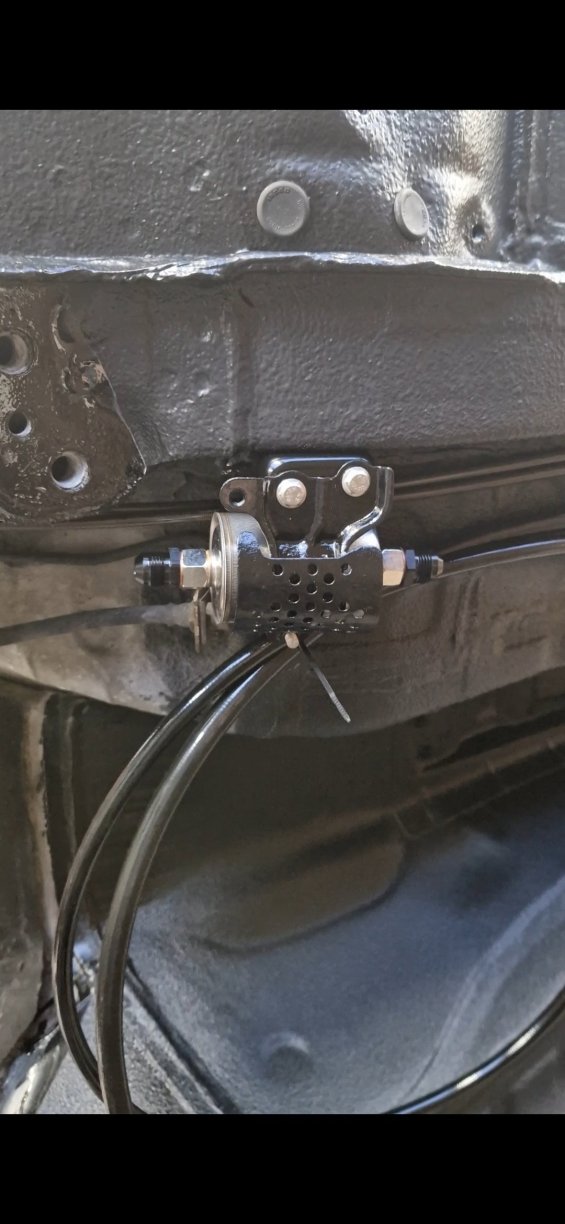
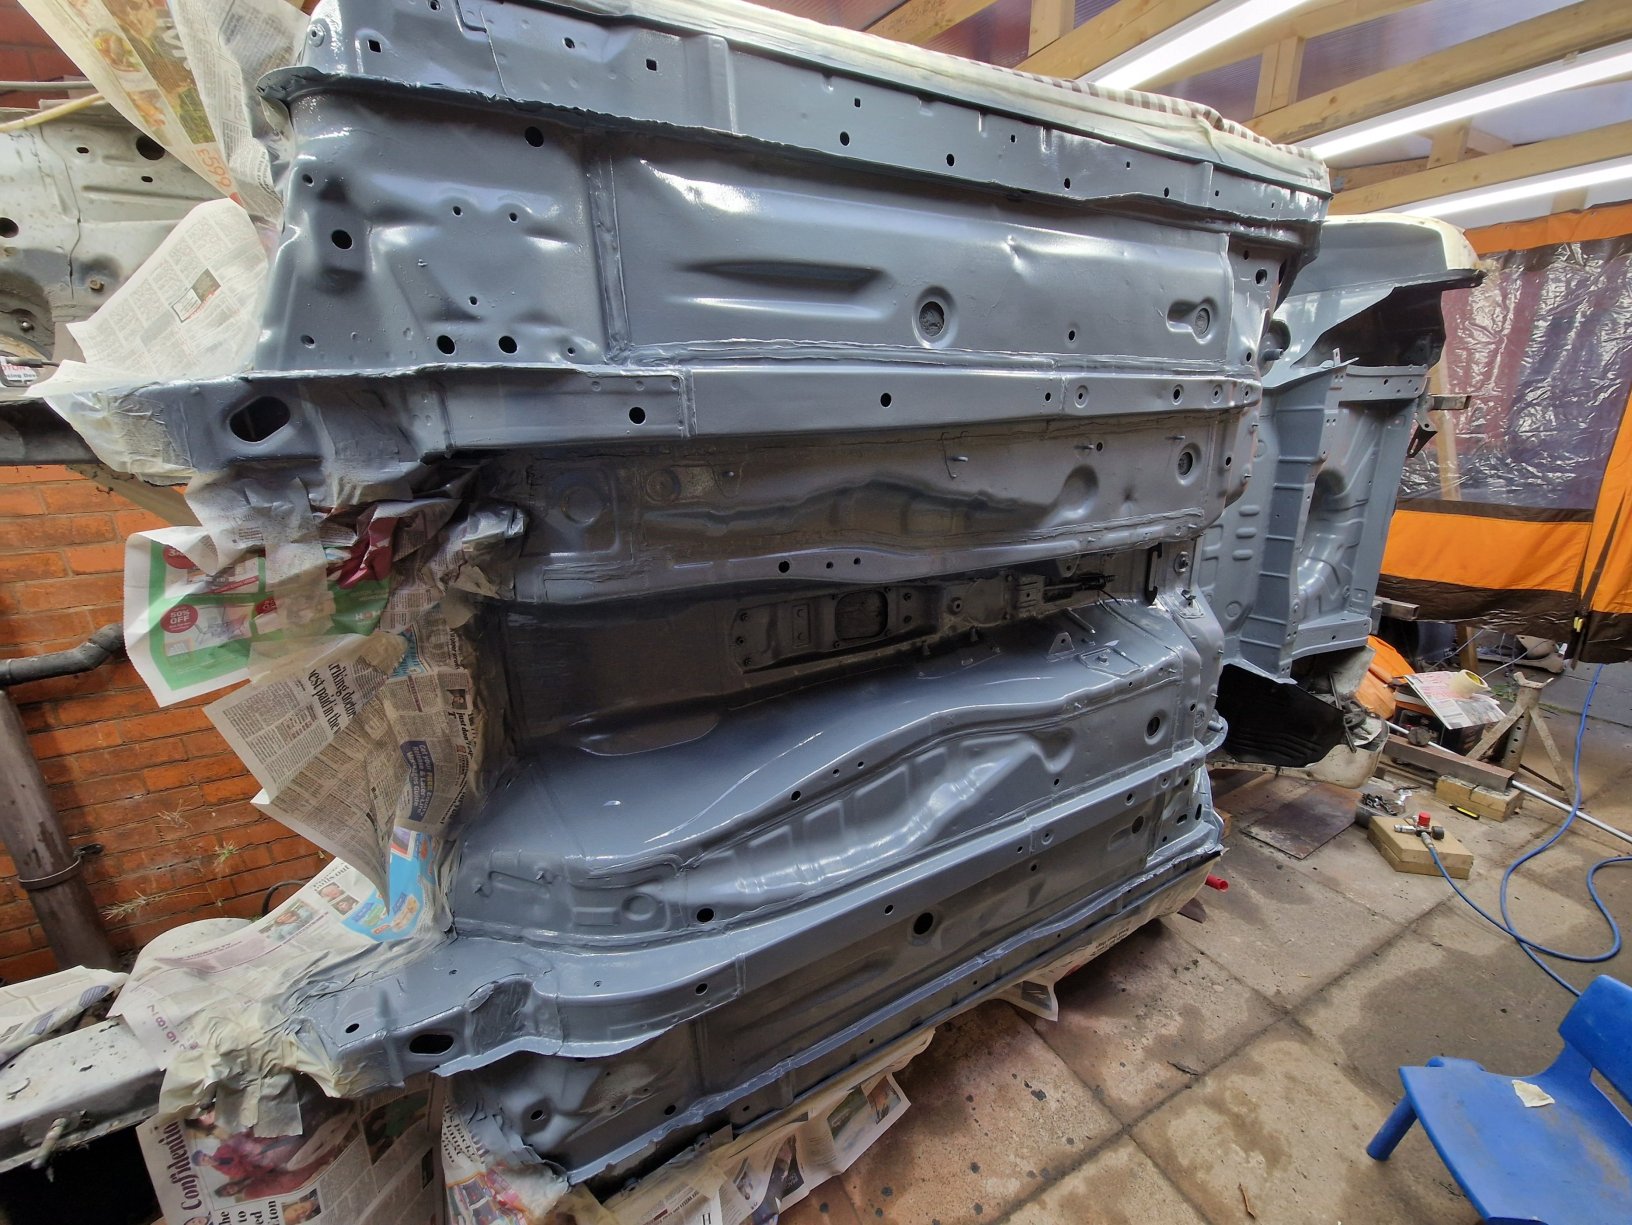
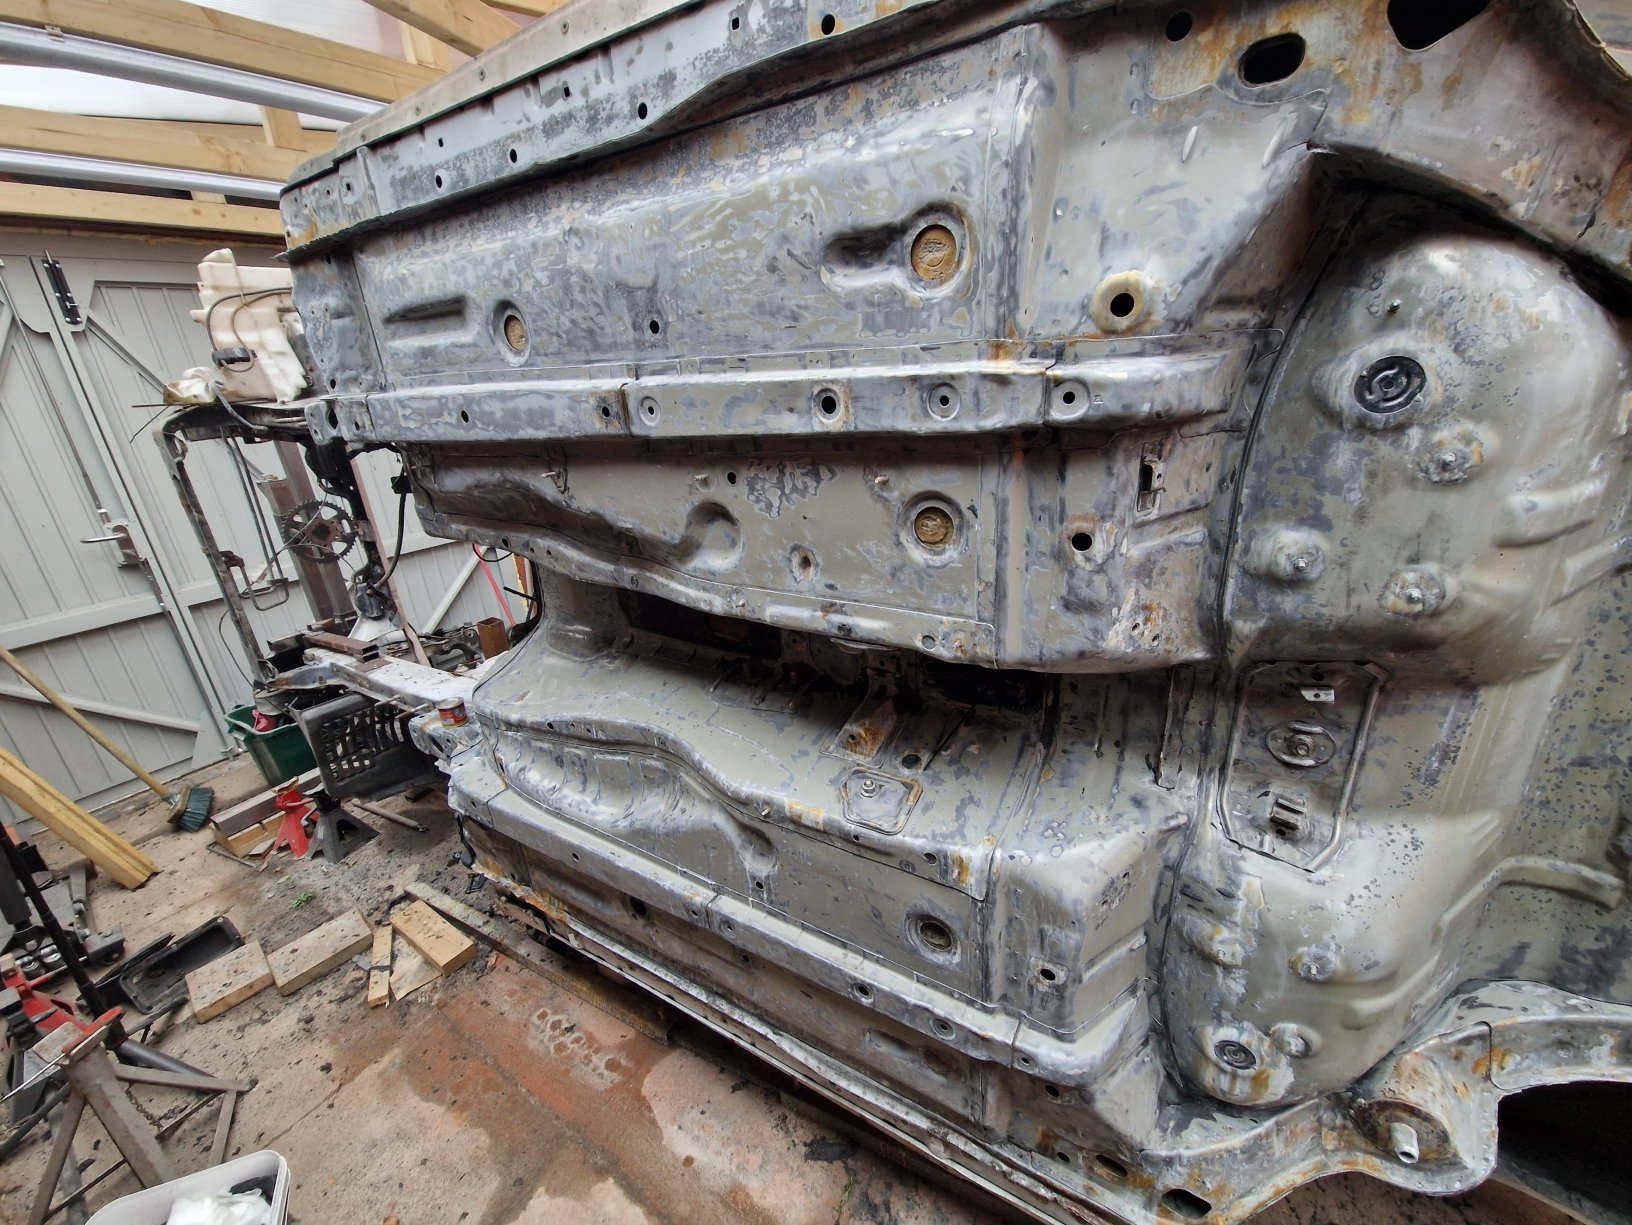
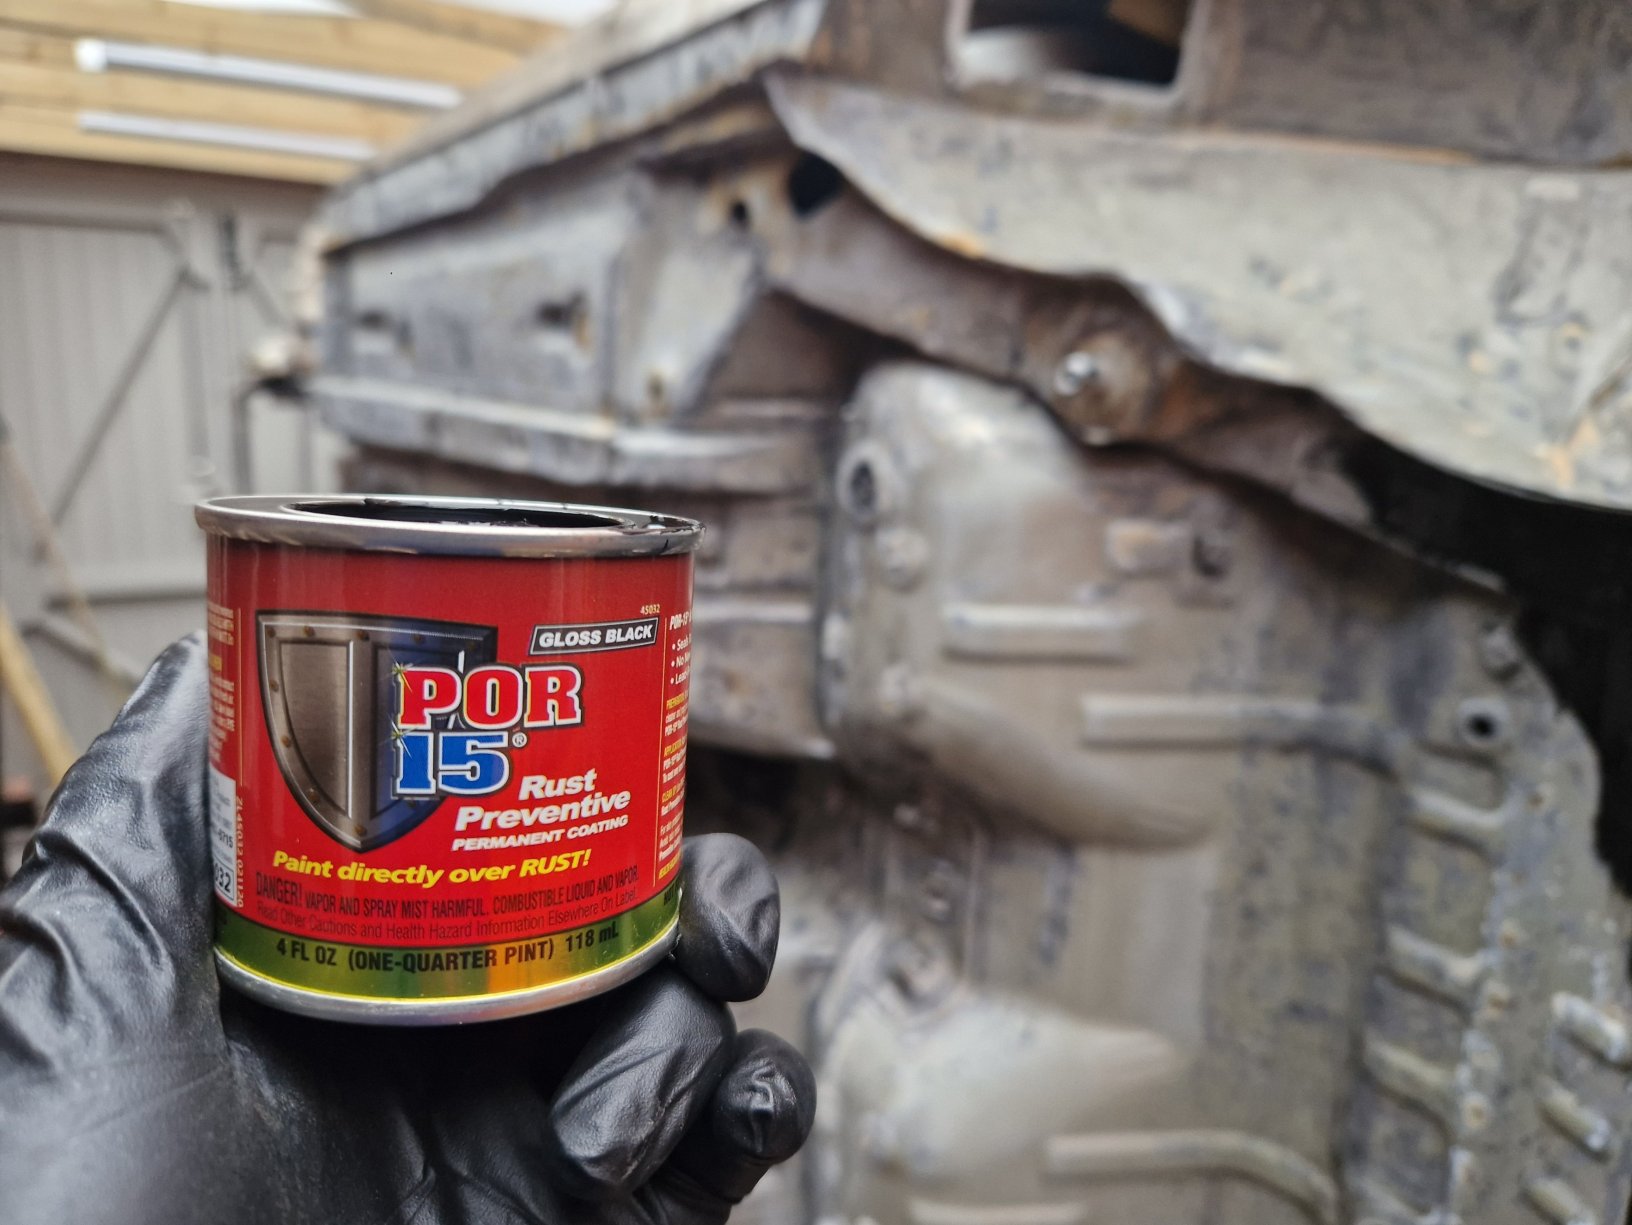
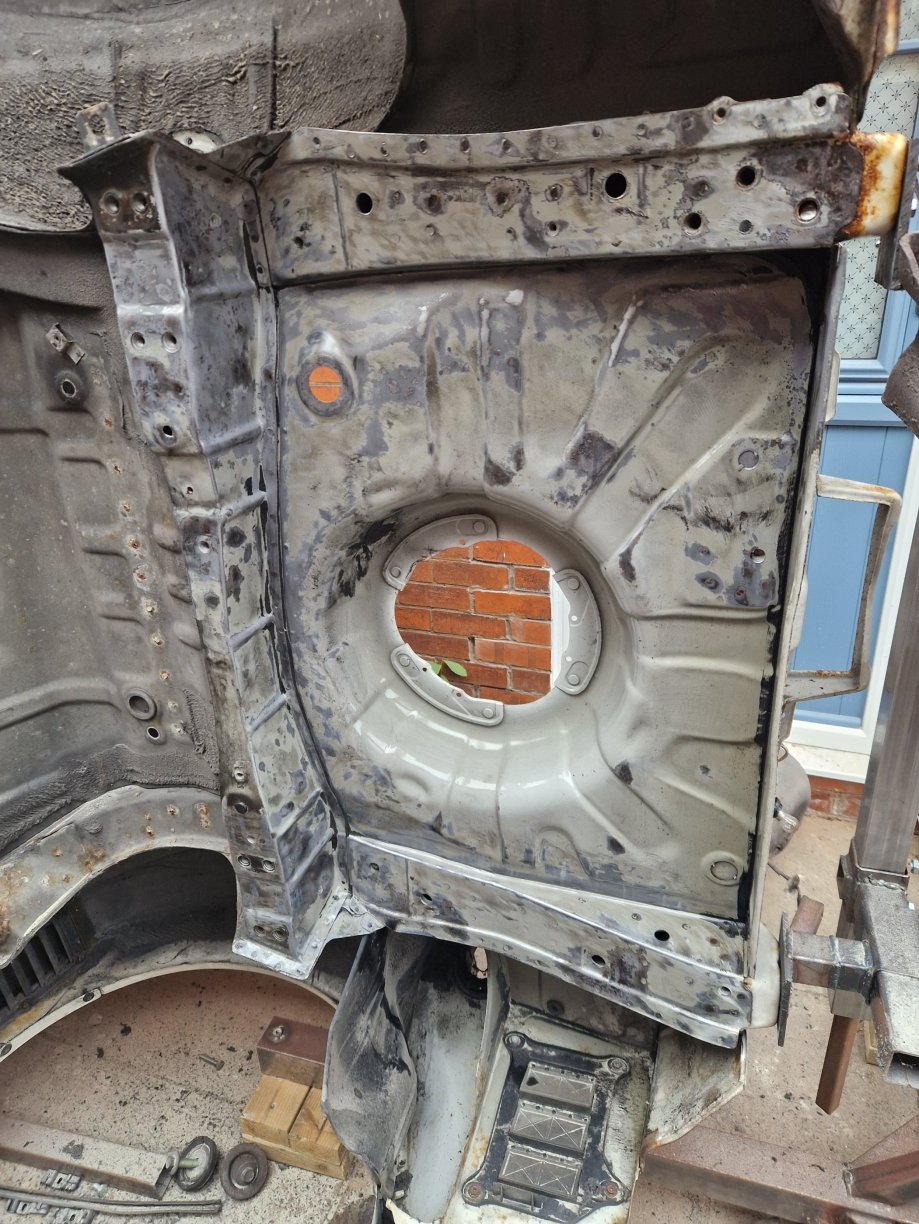
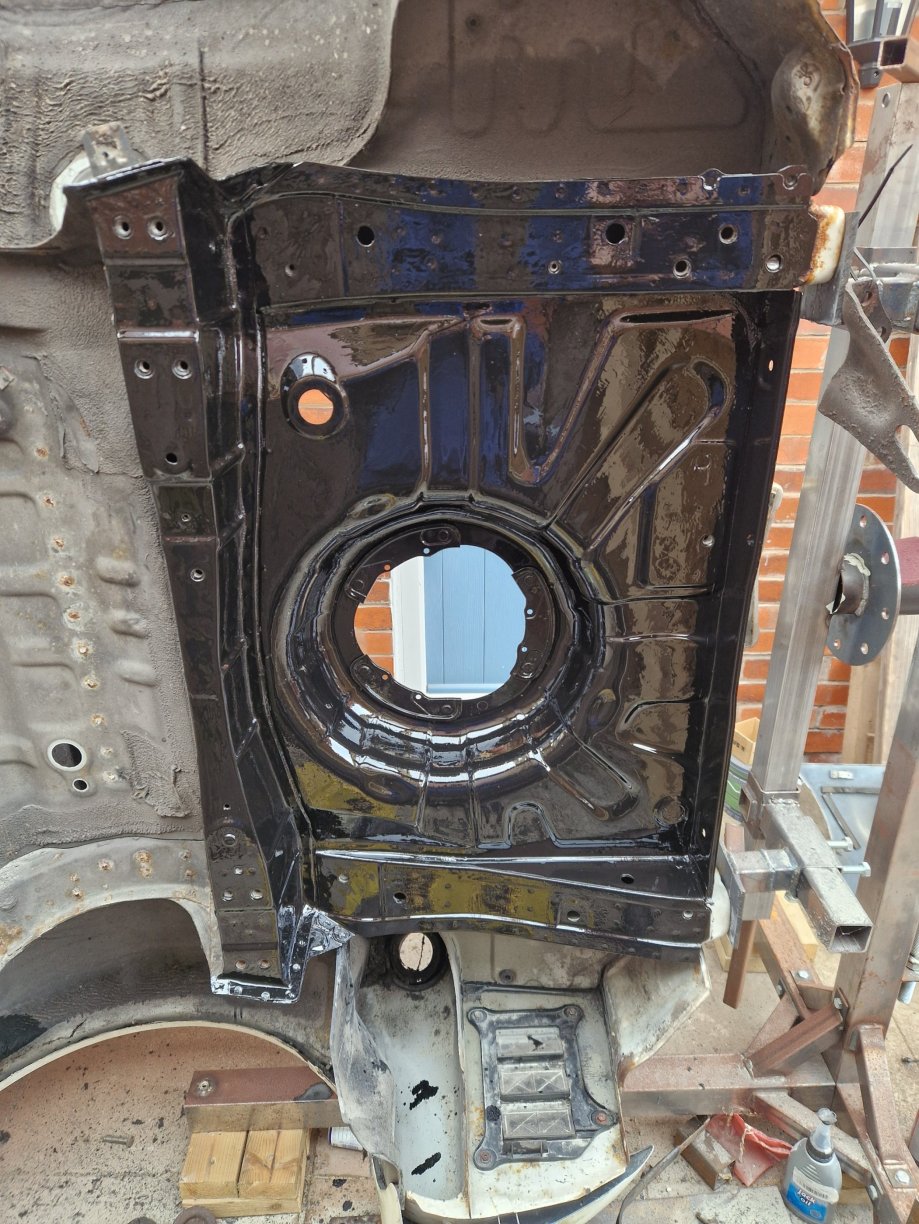
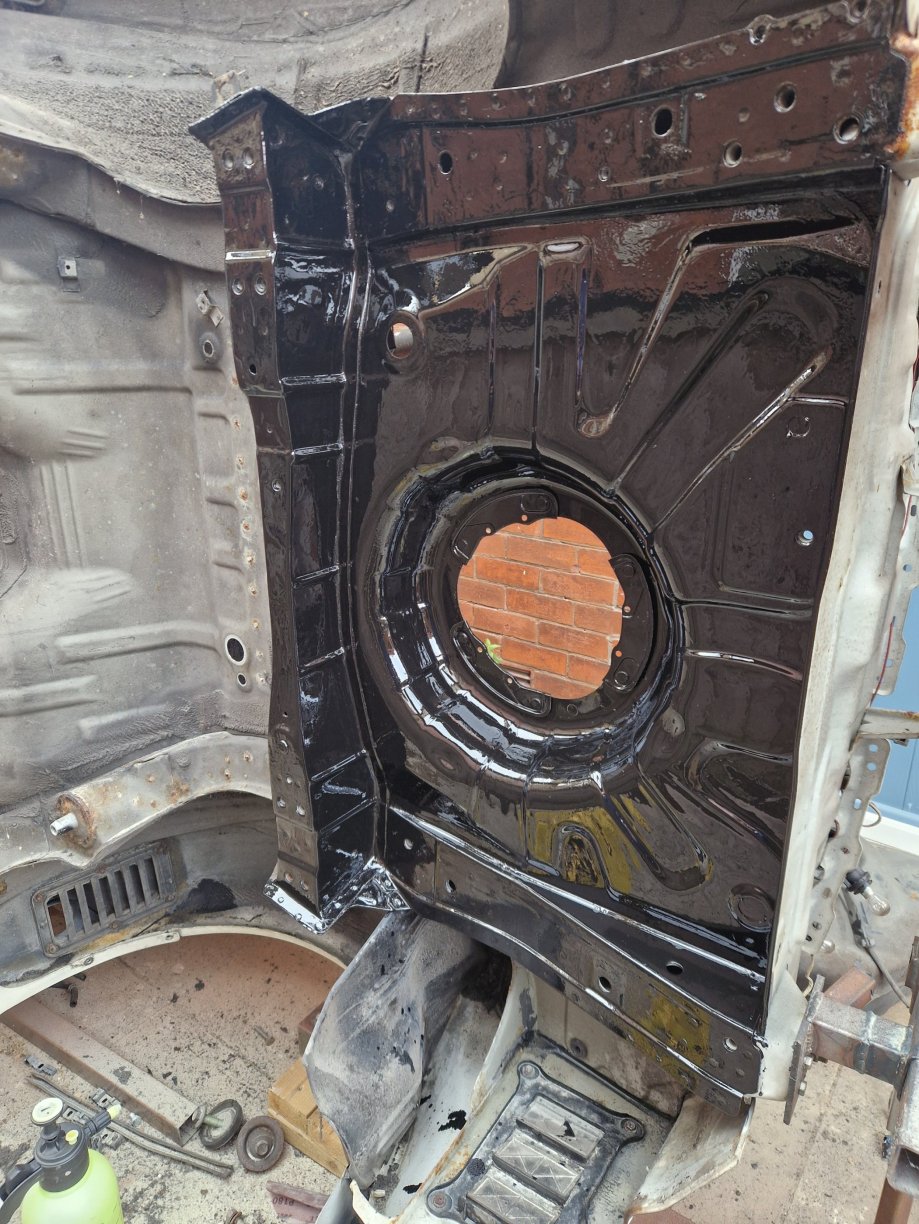
Stripped all of the underside and have made a start removing the underseal to re do it all. some of the old fuel pipes and brake lines were starting to look a bit crusty. So they have all been removed and will be replaced. under the fuel tank has been stripped of underseal and the small rust patches that were starting to creep in have been sanded back to bare metal. POR15 metal prep was then used to prepare the base metal for paint. POR15 Black paint has then been applied. Once I have completed the car panel by panel I will then re seam seal it. Followed with Raptor paint over the top of everything which will then act as the stone guard to protect it all underneath. Up to now that's as far as I've got as it's a lengthy process.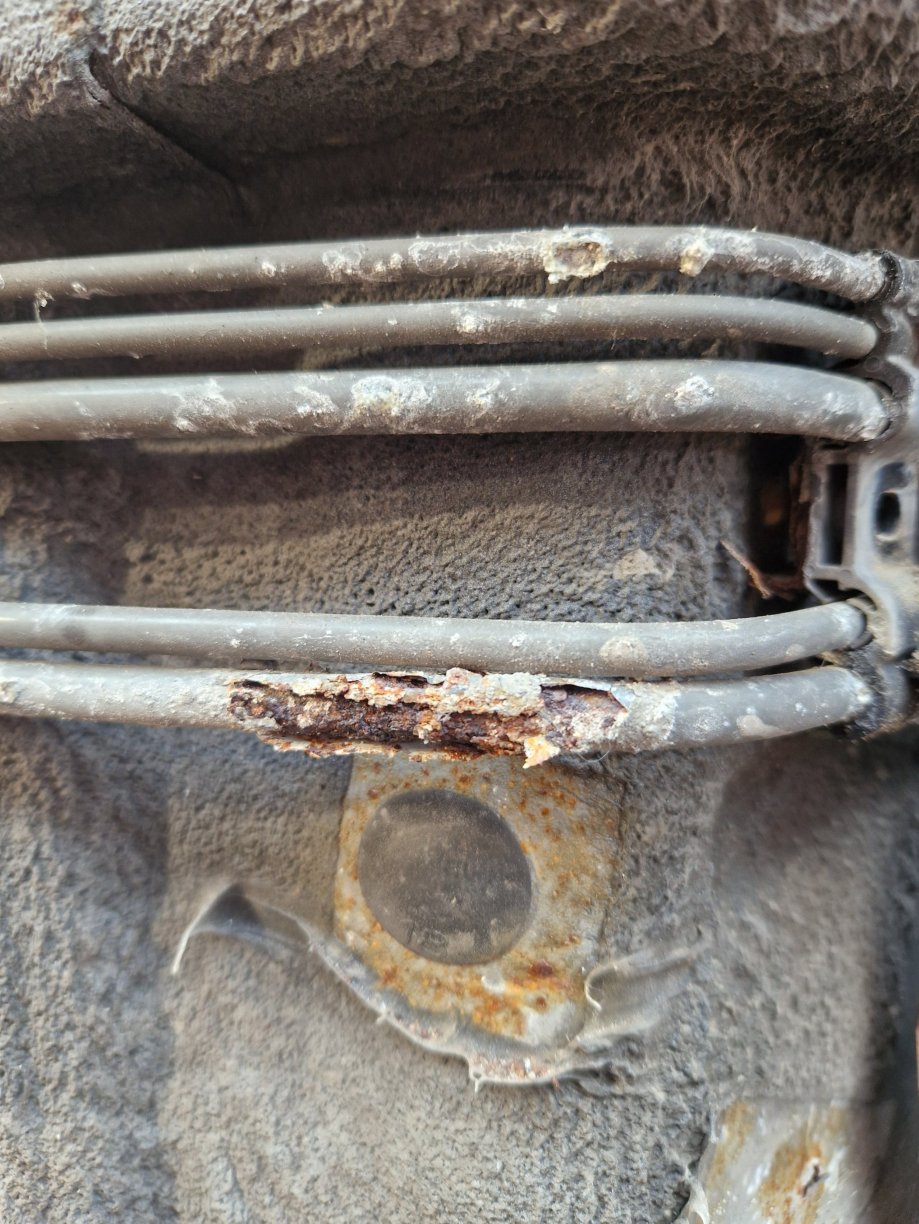
-
My project to return the supra back to the road begins
gavin.starr replied to gavin.starr's topic in Supra Chat
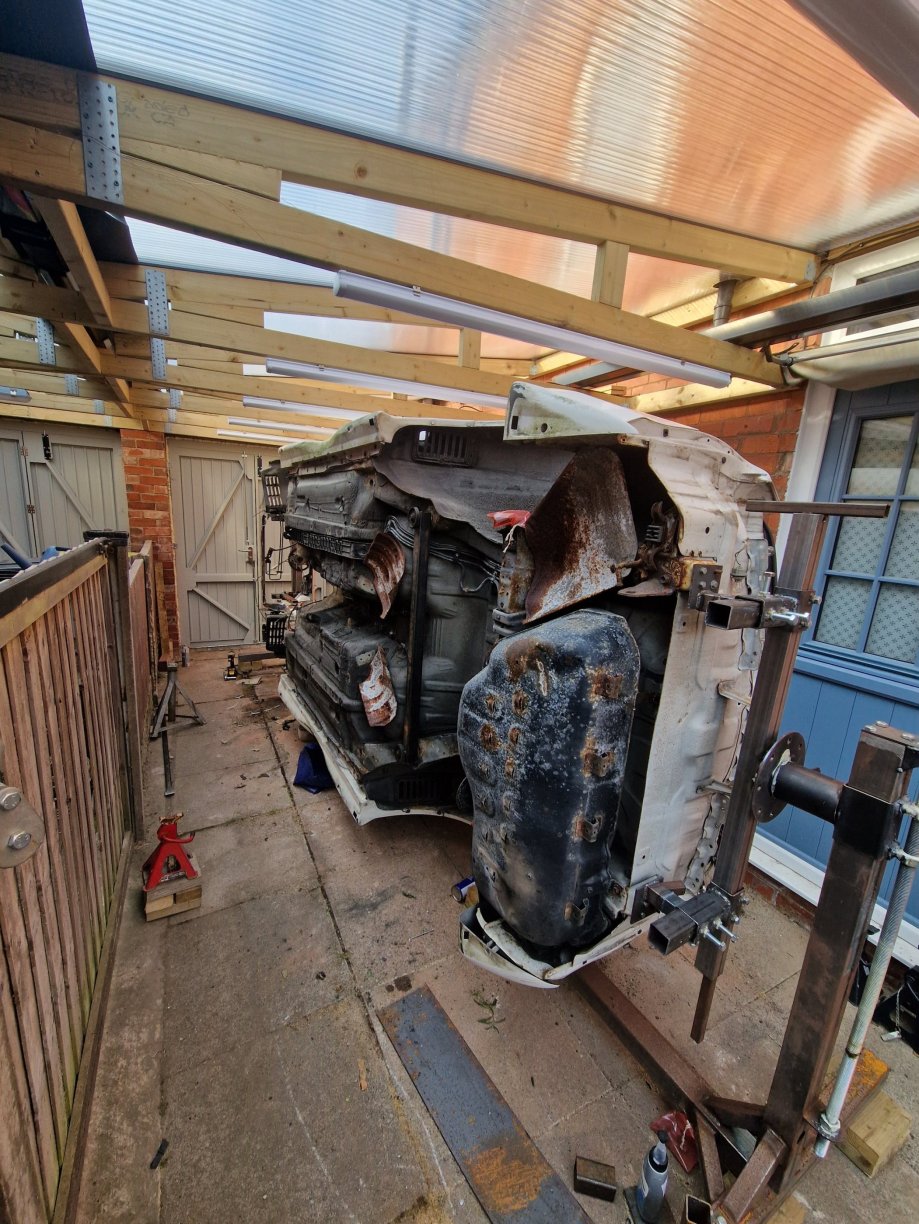
I have finaly got the balance right on my rotisserie. So the supra is up in the air and on its side ready for it's underside restoration to take place.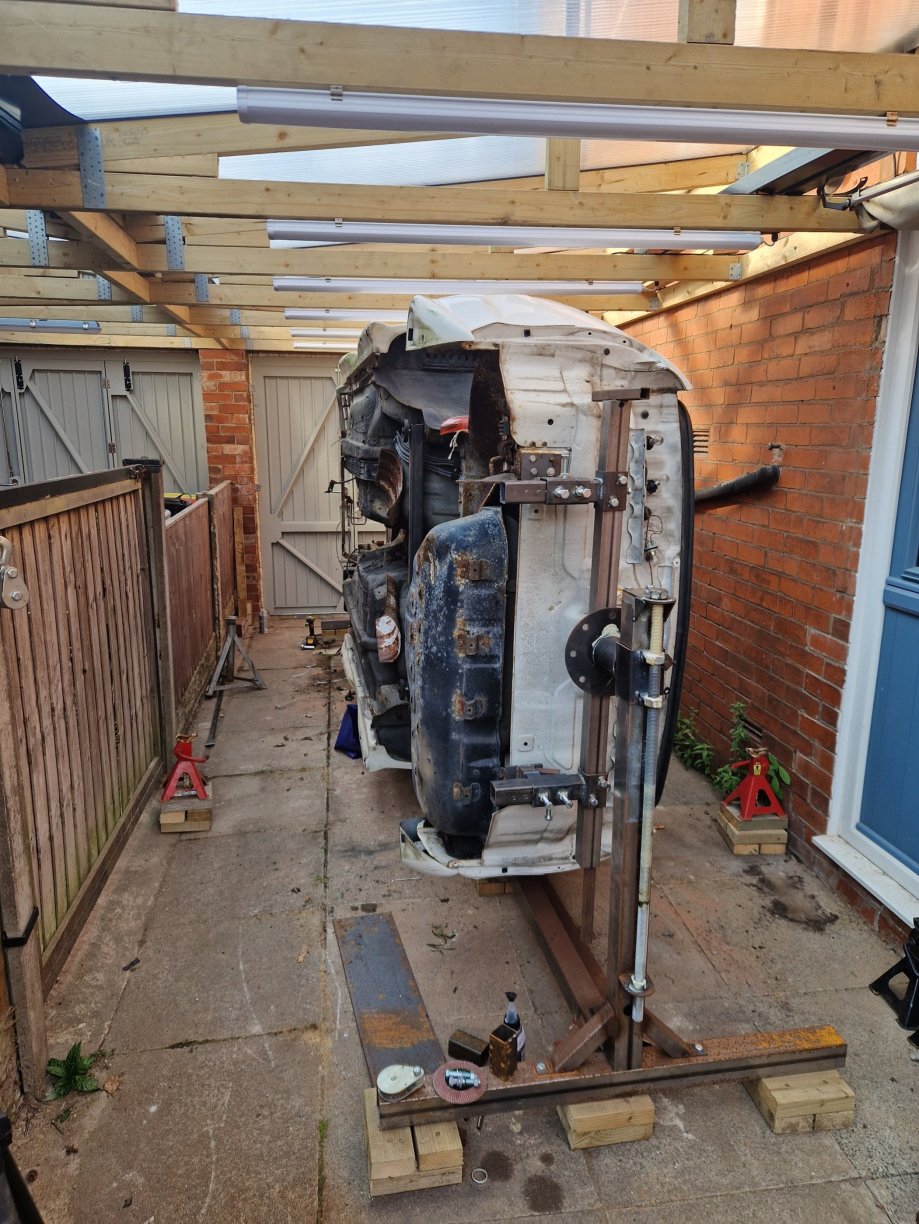
-
My project to return the supra back to the road begins
gavin.starr replied to gavin.starr's topic in Supra Chat
Thanks Rob. I managed it in the end was a struggle but I got there. I ended up pressing out the hubs which inevitably pulled the bearing apart which I expected would be the case. To remove the race I performed the engineers gastric band by running a beas of weld around the inside face of the race. Once I had done that and they had cooled they popped out with about 2 ton worth of pressure. If any of you lot are on tiktok I document most of my stuff on there. @supra.restore -
Sweet. I thought they might be as they share the same part number but I just thought I would check
-
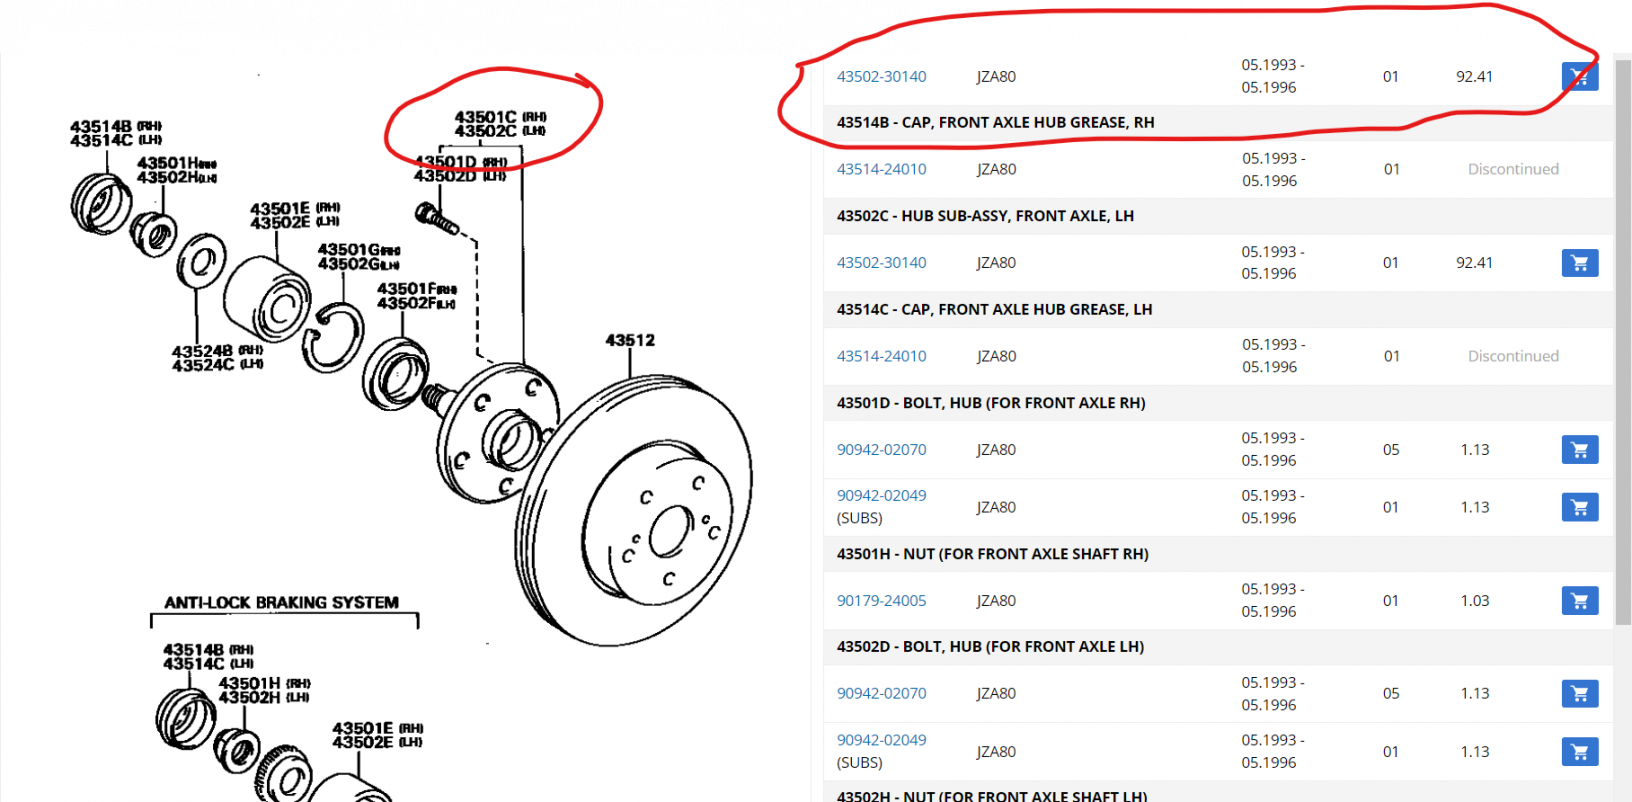
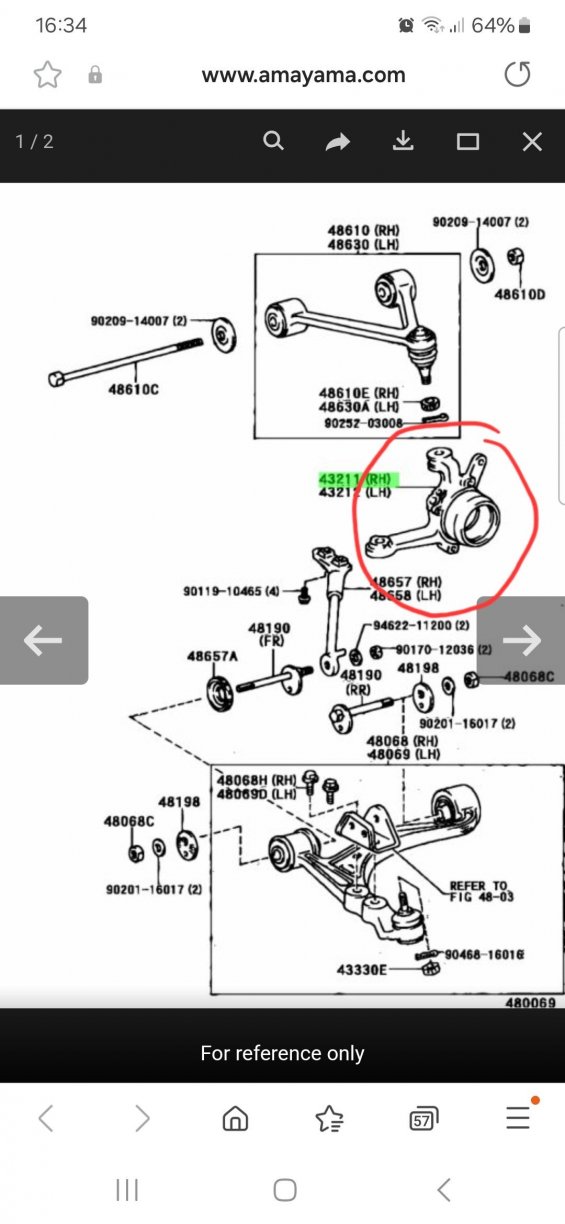
I am in the process of overhauling the whole underside of the supra including the subframes, suspension, wheel bearings etc... Im looking to replace the front hubs (the 5 bolt flange that the wheel bolts to) the part number states 43502-30140 with 43501c being r/h and 43502c being l/h. is there any differences in the hubs ie an oposite thread for the nut or are they completely the same? thanks Gav
-
My project to return the supra back to the road begins
gavin.starr replied to gavin.starr's topic in Supra Chat
Don't mind me I'm a dumbass. I need the wheel hub puller first. I'm tired -
My project to return the supra back to the road begins
gavin.starr replied to gavin.starr's topic in Supra Chat
Hey up folks. I'm in the process of giving the supra a major overhaul complete rebuild. I have currently got all the suspension parts stripped down to bare components front and rear subframes are off and away for powdercoat. Whilst doing that I'm replacing the wheel bearings and hubs. Now my question is, does anyone have a picture of how they have mounted the hub in a press to press them out in particular the rears? The only way I seem to be able to mount it is on the inner dustseal (the stronger one that the handbrake components attach to not the flimsy tin one) I'm not too fussed so long as that dust seal is still available as I will no doubt damage it using it to press the hub out.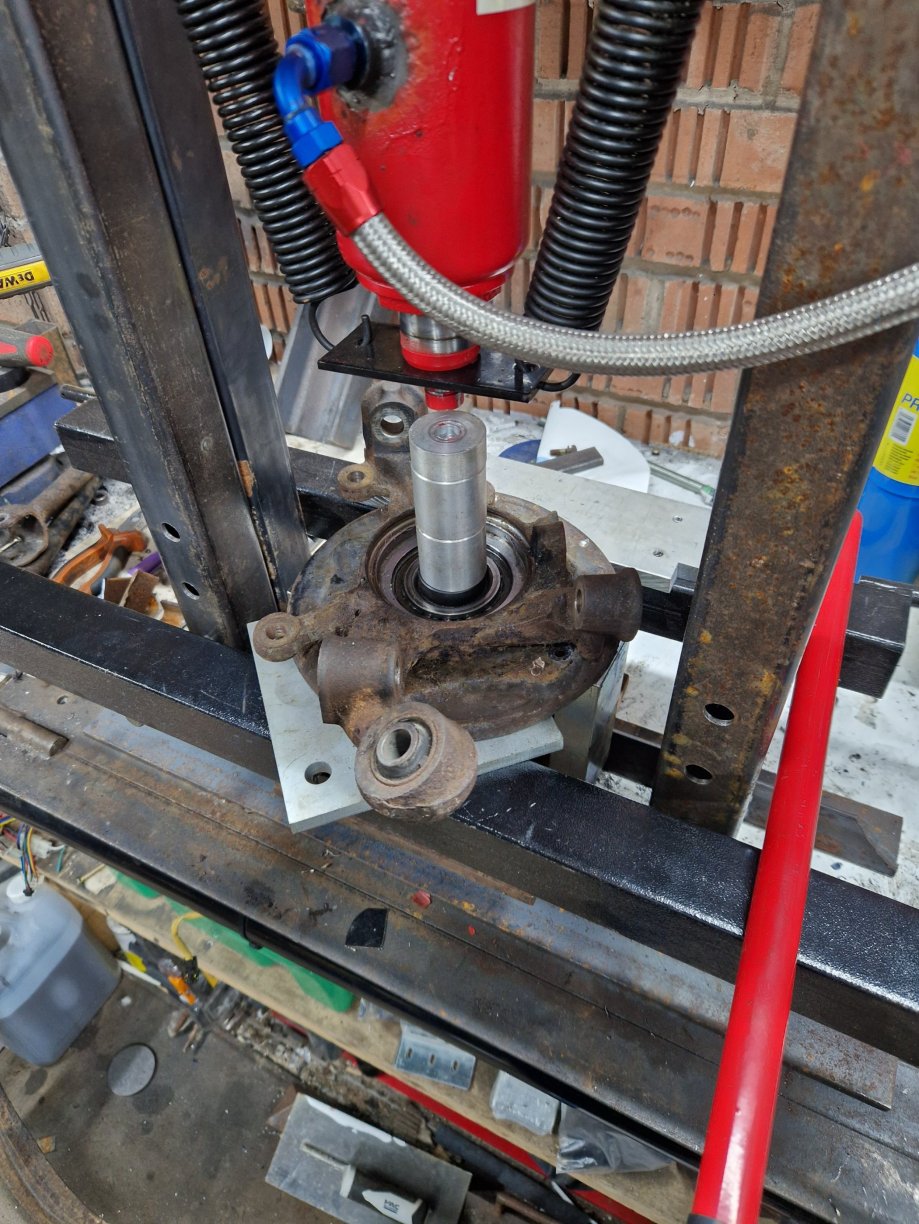
-
Imin the middle of restoring my supra so it at the suspension stage at the minute. So im looking for a set of front hubs to get powdercoated and built up with new bearings etc. It's the part circled in red I'm after. L/H and R/H.
-
Would you consider selling the lower bracket?
-
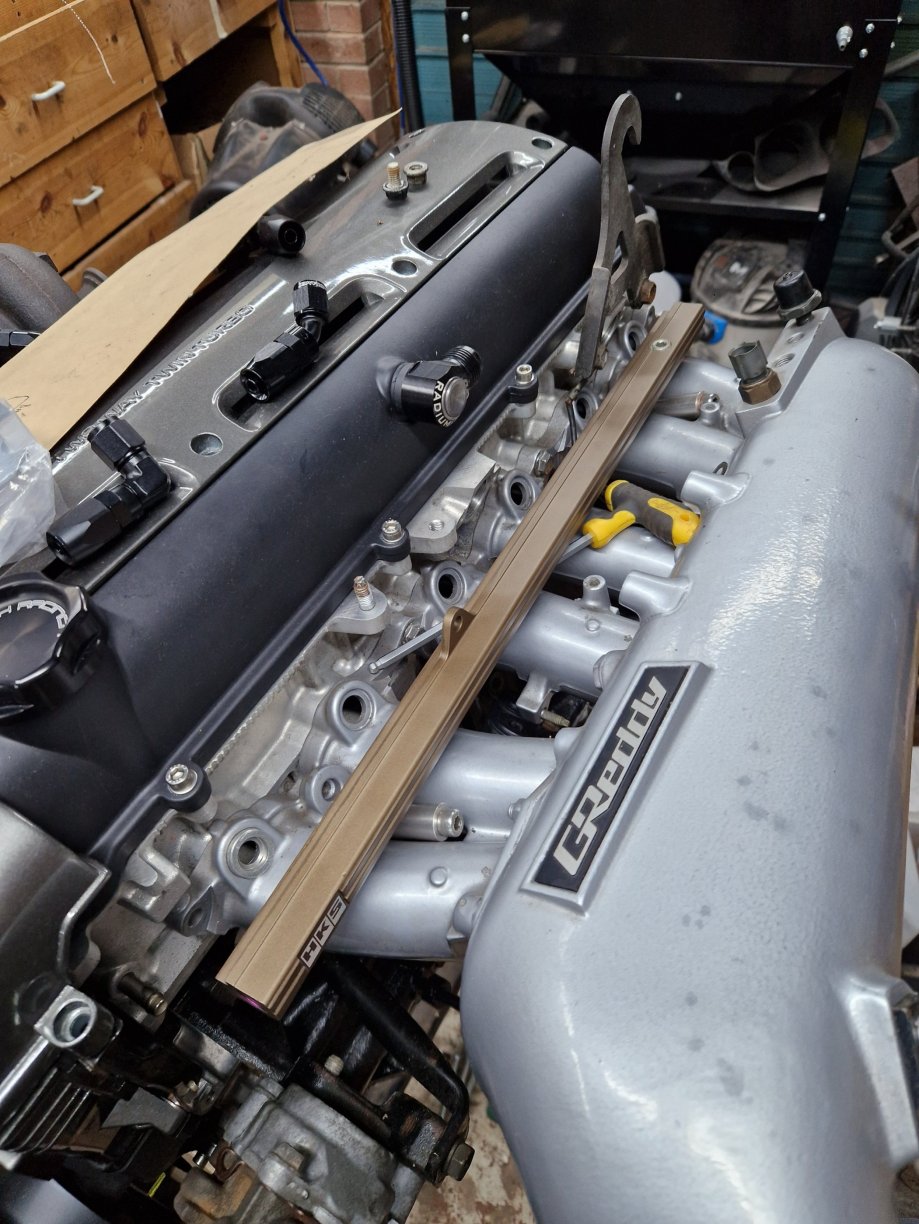
Cheers guys. I think I'm just gonna buy a new rail on this occasion.
-
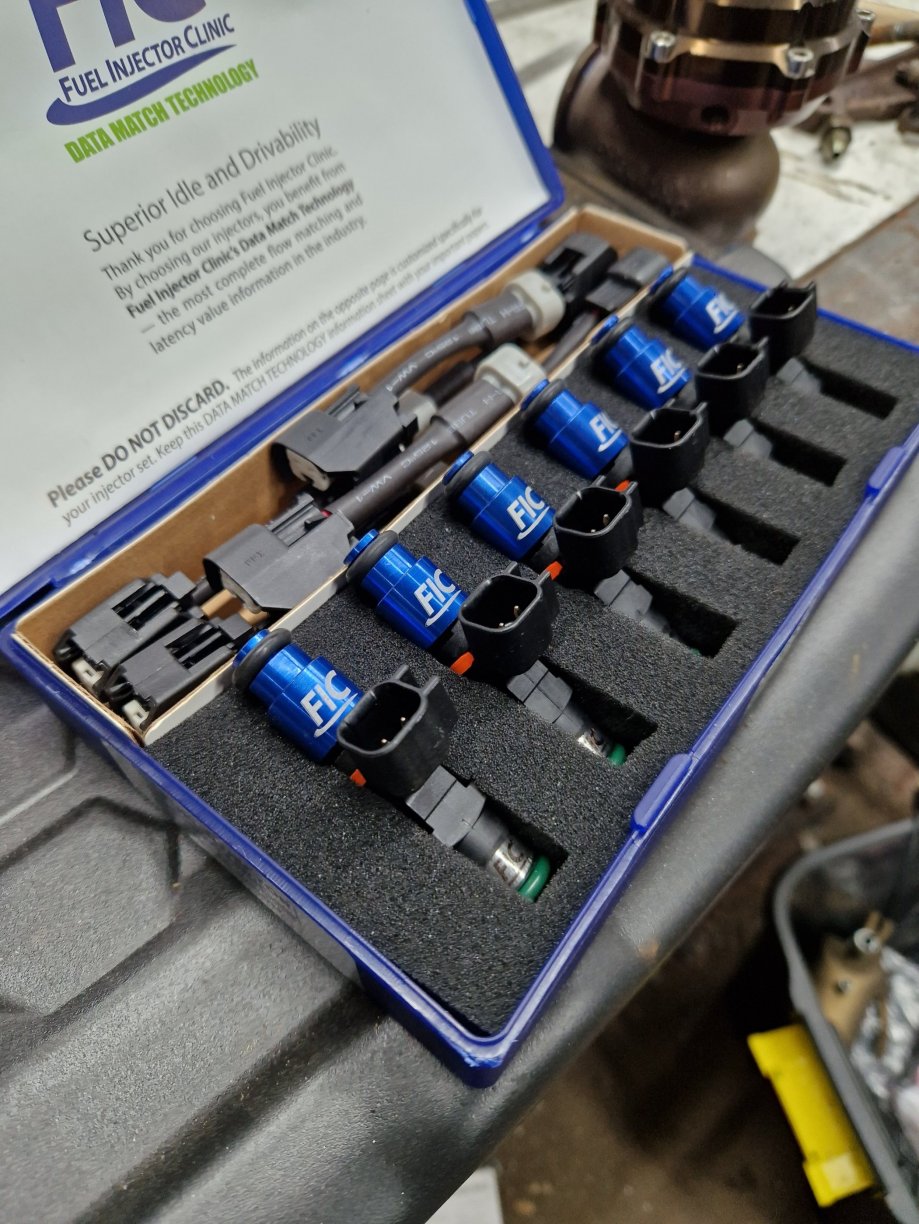
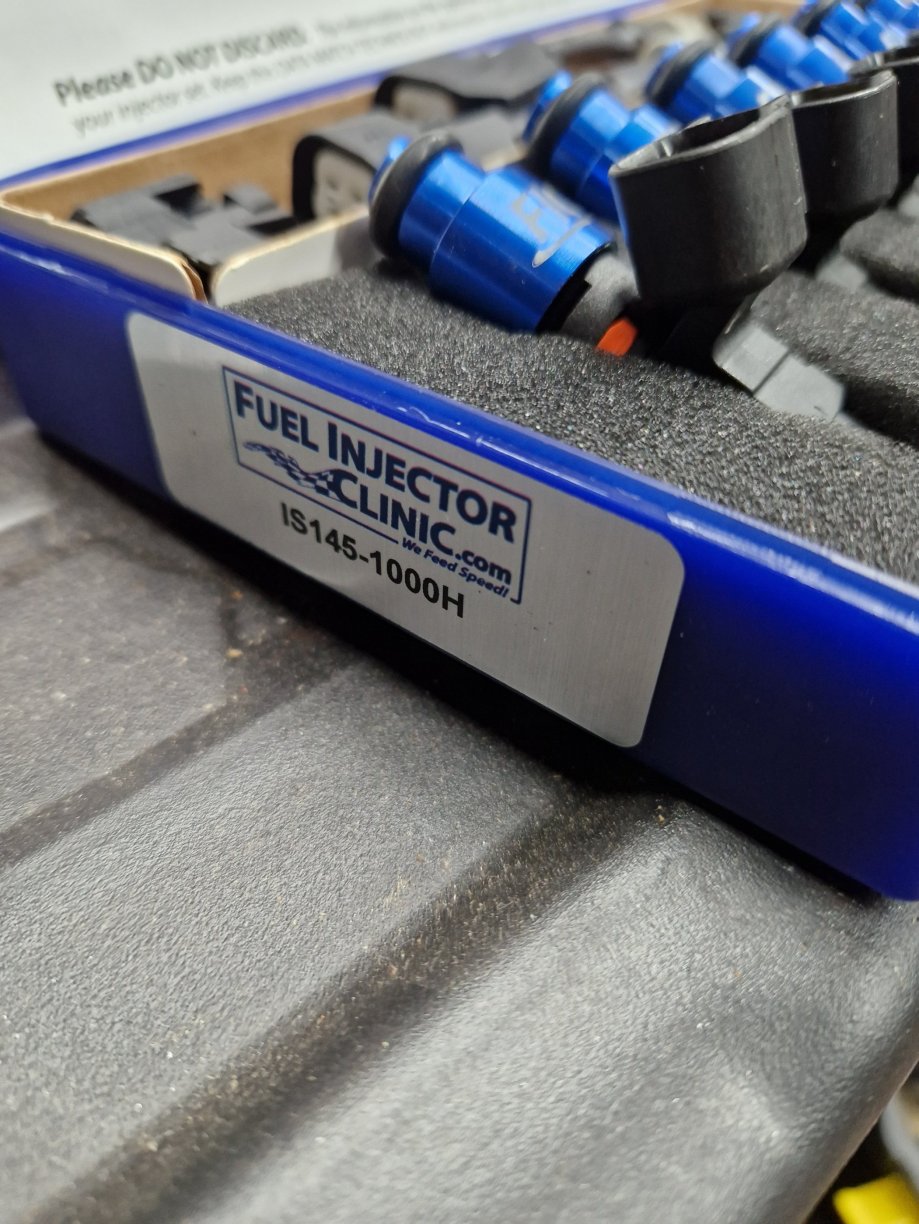
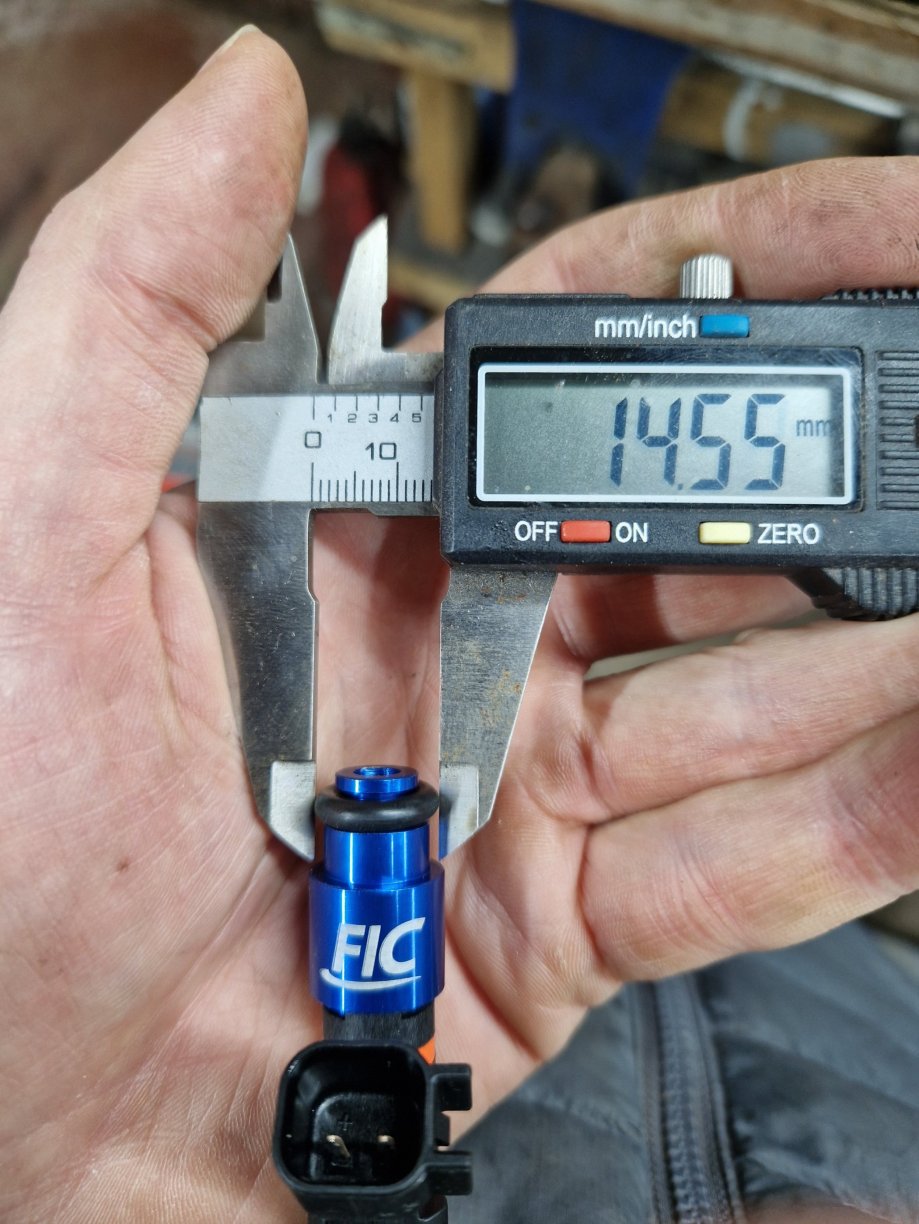
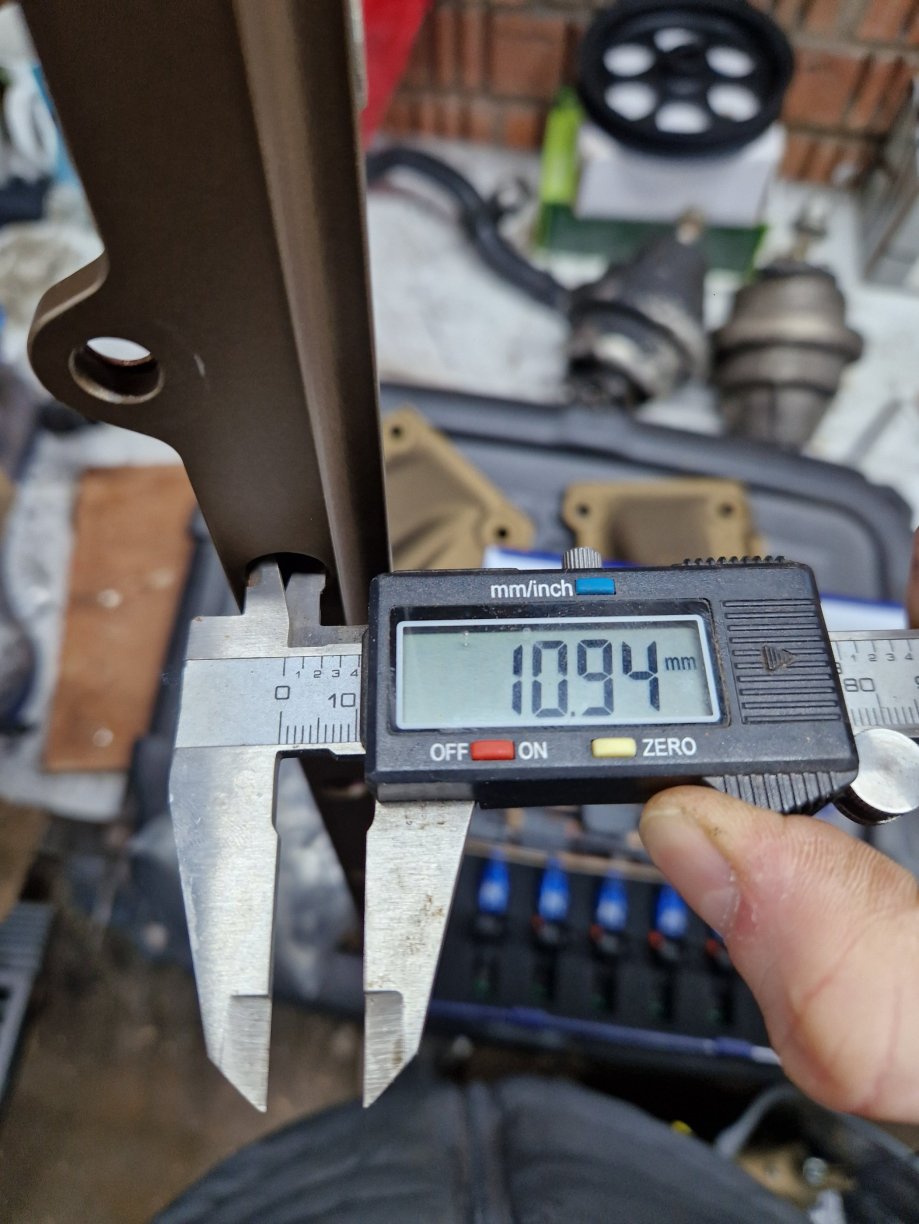
I'm on the process of digging out parts I purchased years ago so no chance of getting them exchanged. I have opened up my FIC injectors to see what they look like withvthe newly cerakote'd fuelrail and they are different diamaters. Can I just open up the hole diamaters in the fuel rail to accommodate them or is it going to be a case of replacement injectors?
-
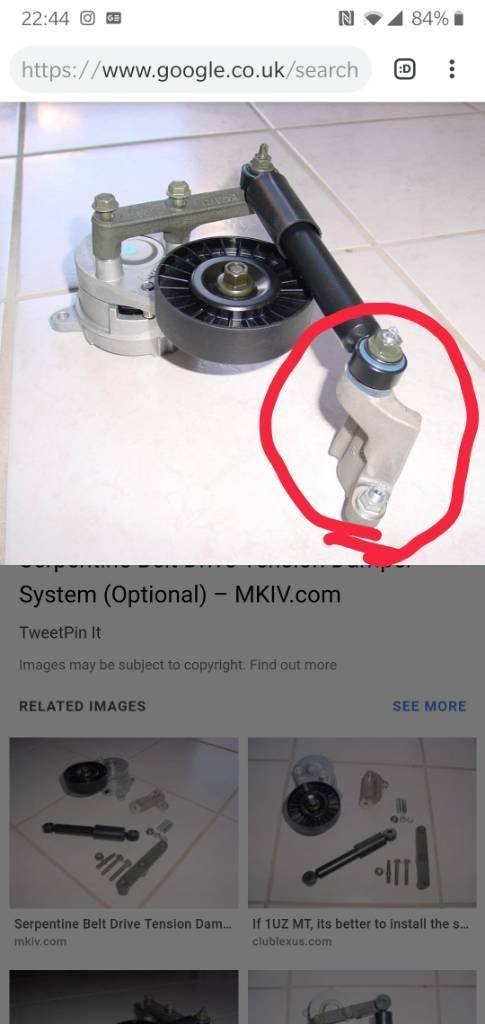
Its the bracket that attaches the damper to the base of where the AC pump is. Picture below borrowed from another post.
-
My project to return the supra back to the road begins
gavin.starr replied to gavin.starr's topic in Supra Chat
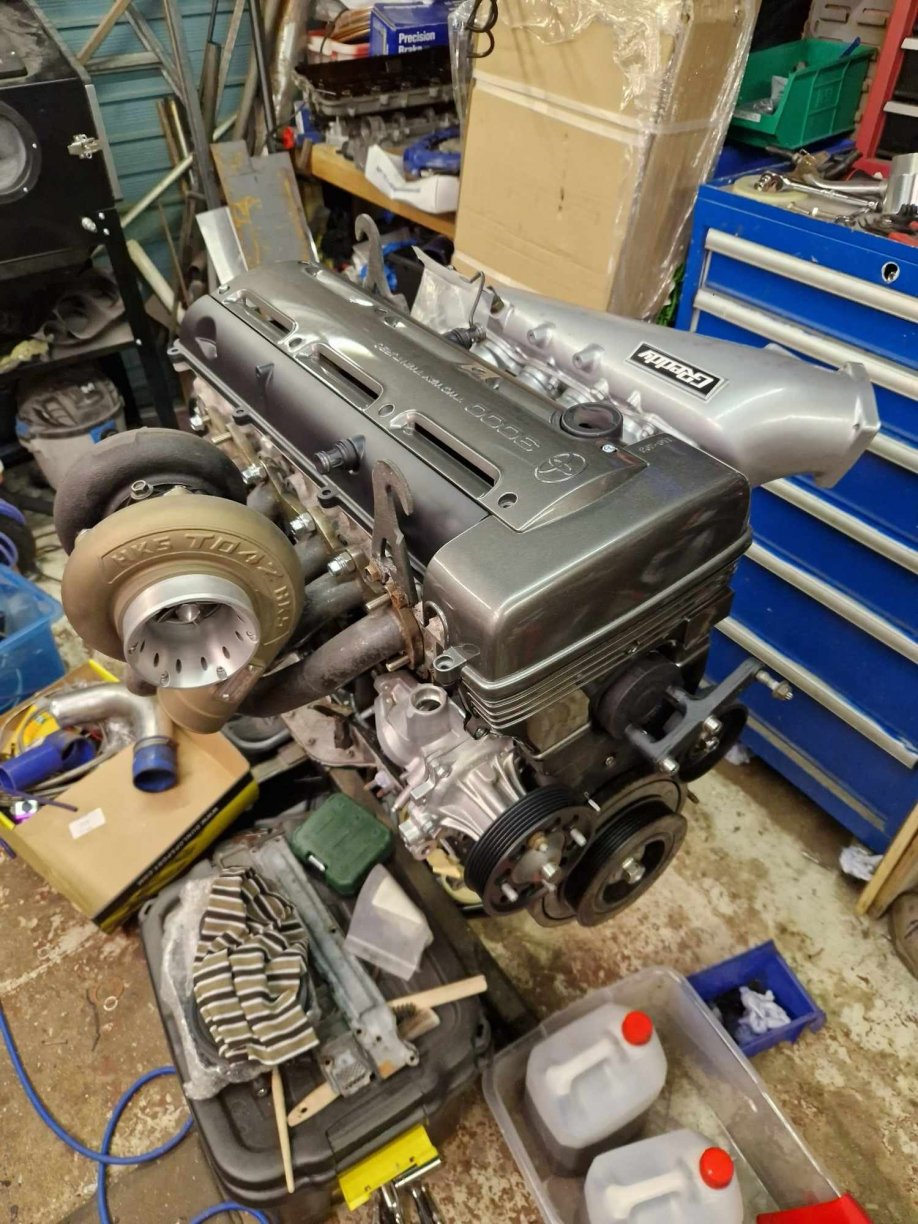
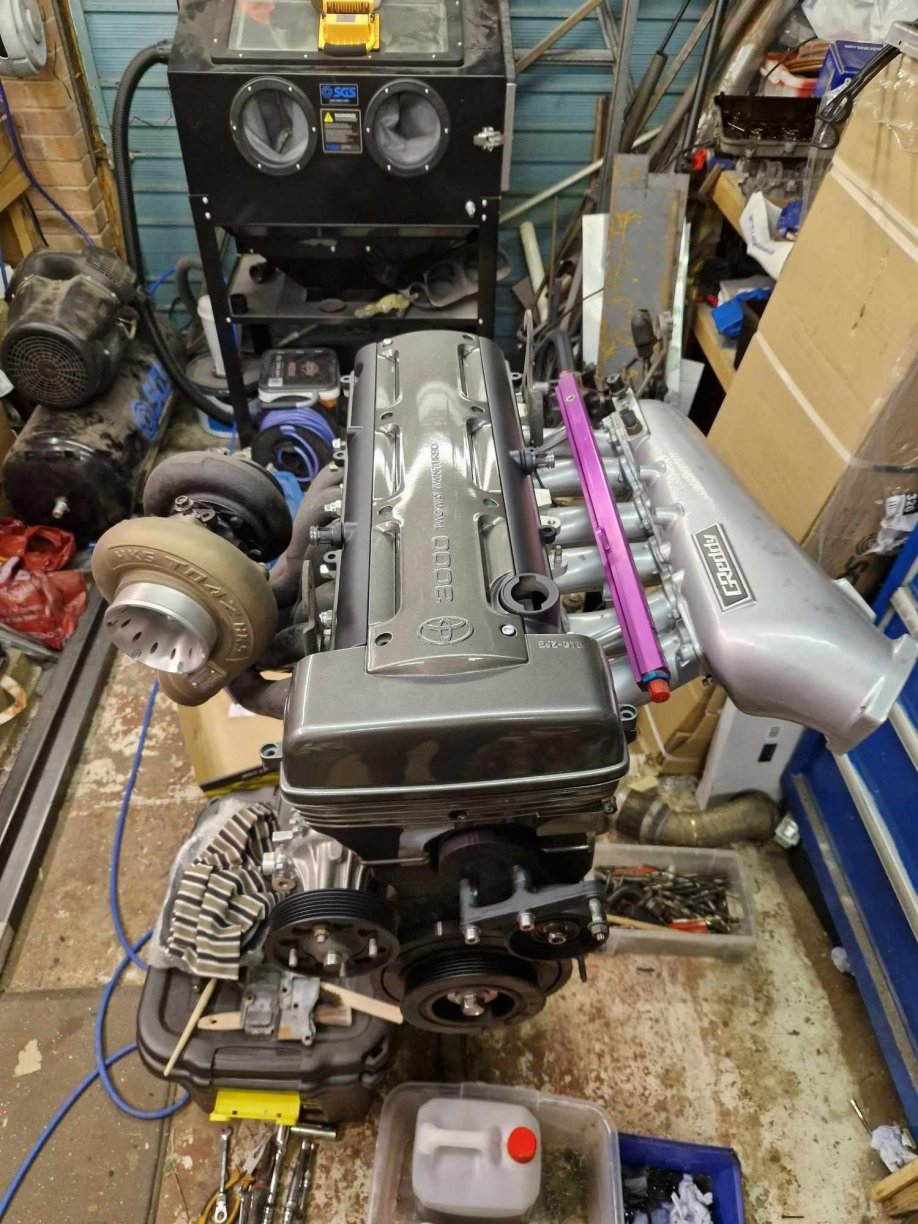
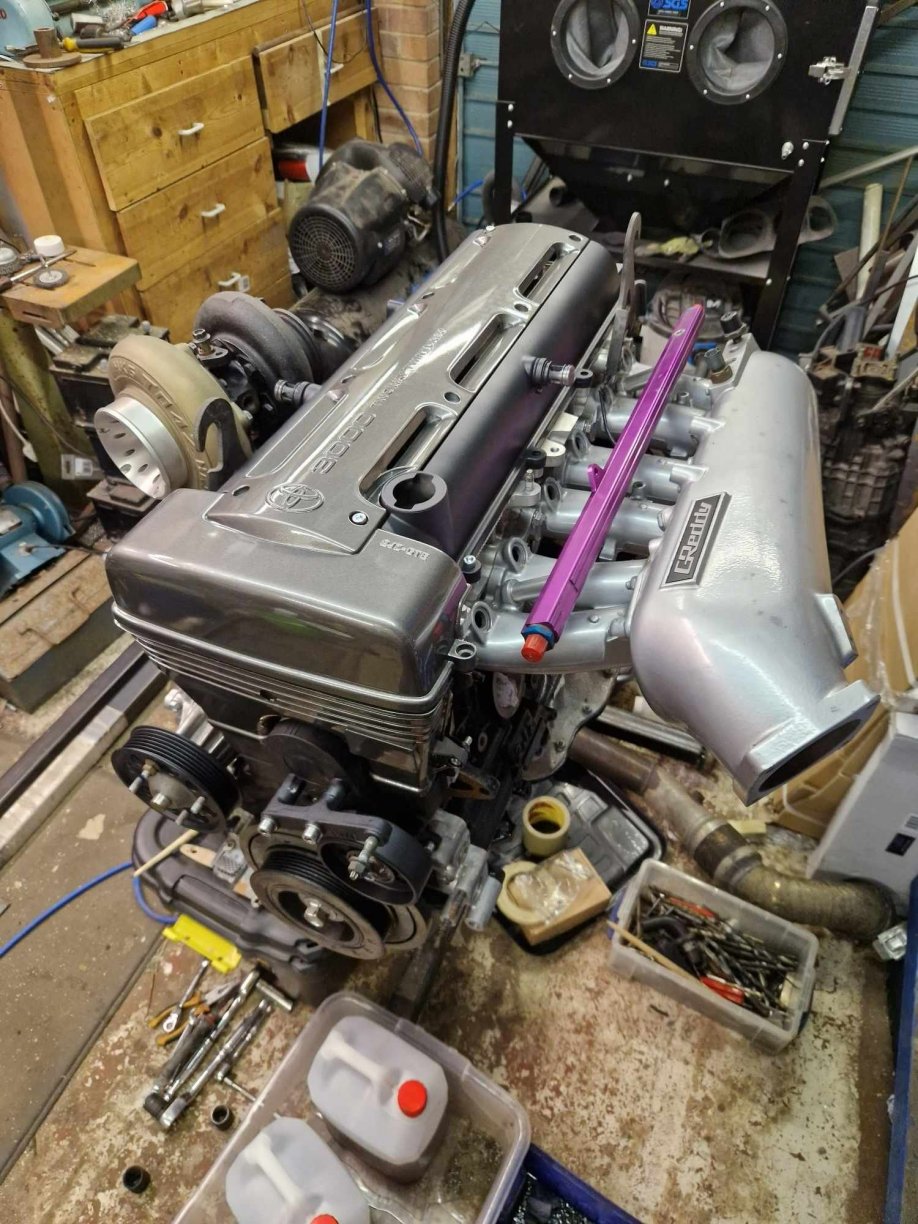
Right then folks, it been a long time since i posted any updates and that is mainly because of a House move then a house extension and then covid ant then kids so the supra has been put well and truly on the back burner. This summer I have had some time and a little free cash so i cracked on with getting the engine completed. The hardest part has been finding all the parts that I put away in hiding nearly 10 years ago, but progress is progress.